
Half-rectangle triangles may seem just like half-square triangles, but they’re not quite the same. Half-rectangle triangles require a little more planning, but once you get the hang of it, you can use these shapes to bring a whole new design element to your quilting.
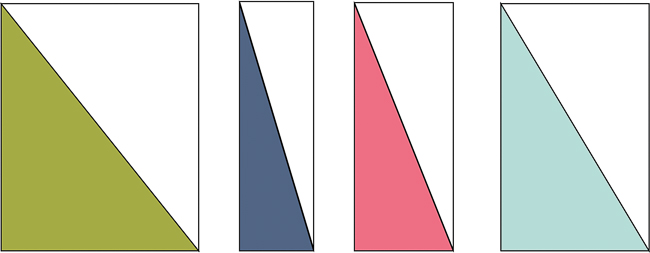
What is a half-rectangle triangle?
A half-triangle rectangle is just that: an elongated triangle that forms half a rectangle. This shape can be used to make diamonds, zig zags and other interesting quilt designs.
How to construct half-rectangle triangle units
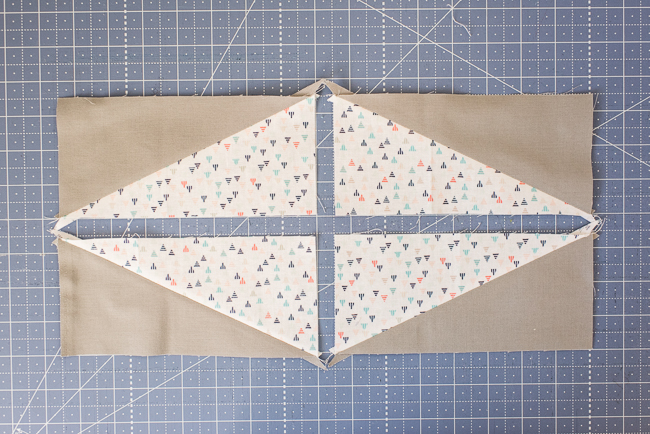
Most quilters’ first instinct is to make a half-triangle rectangle the same way they make half-square triangles.
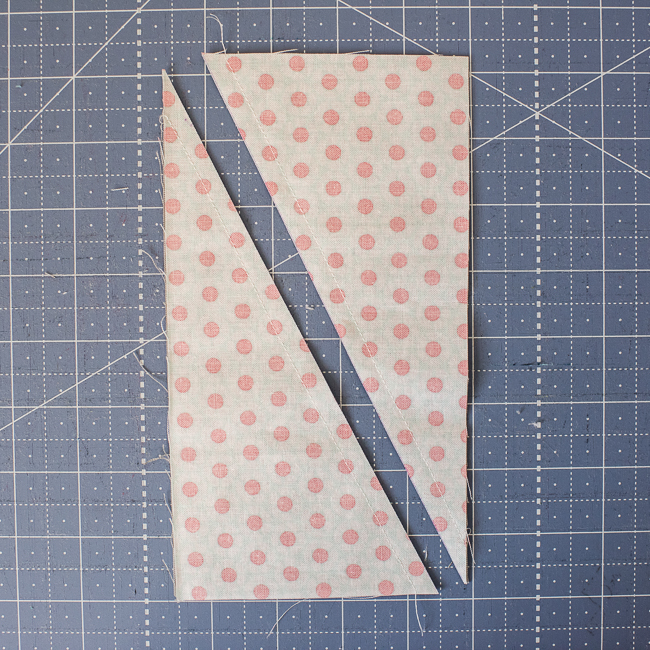
But I’ll let you in on a secret: This doesn’t work! You can see below that you end up with an odd kite shape.
A little more planning goes into sewing a half-triangle rectangle.
Guidelines for sewing half-rectangle triangles
There isn’t a hard and fast formula to make half-rectangle triangles, but there are guidelines you can follow.
Start with the same size rectangle you want to finish with, and then add ¼” to the width and ½” to the length.
So, if you want the resulting half-rectangle triangle to be 3½” x 7½”, start with two 3¾” x 8″ rectangles. These half-triangle rectangles would finish at 3½” x 7½”.
Easy half-rectangle triangles tutorial
Start with two rectangle fabric pieces.
I recommend using rectangles that have a 1:2 ratio for the length and width. A 1:2 ratio will result in a wider half-triangle rectangle rather than a long skinny shape. As the rectangle gets skinnier, it gets more difficult to work with.
This tutorial doesn’t require you to trim your half-triangle rectangles. If your units are coming out too small, increase the size a bit and then trim back down to the proper size.
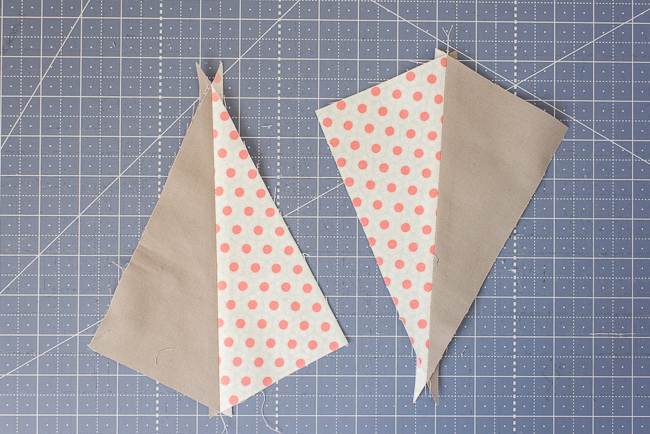
Step 1:

Stack the two contrasting rectangles with all fabrics right side up.
Step 2:
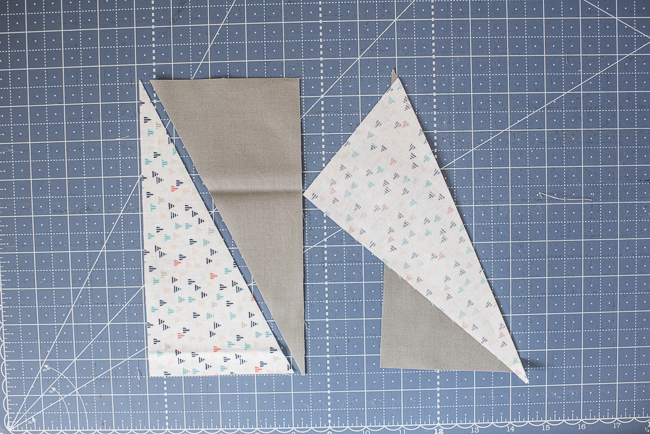
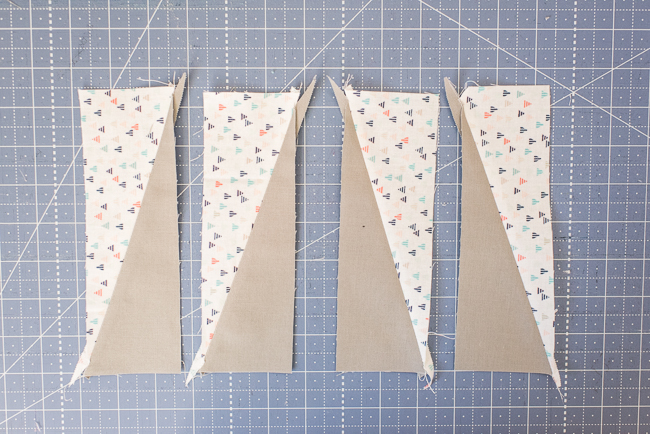
Cut each rectangle on the diagonal. Keep in mind that each diagonal will make a half-rectangle triangle that goes in one direction. In this case, I’m cutting each pair of rectangles in the opposite directions.
Step 3:
Sew the cut triangles back together, using two different fabrics and leaving a ¼” overlap on each side. Use a ¼”seam allowance.
Tip: Use starch to prevent the bias edges from stretching.
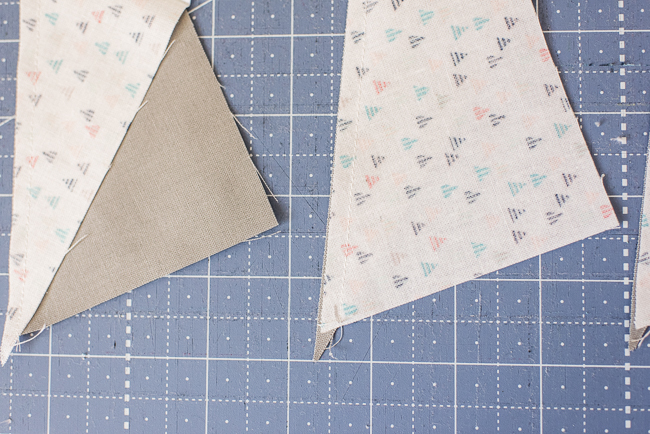
Step 4:
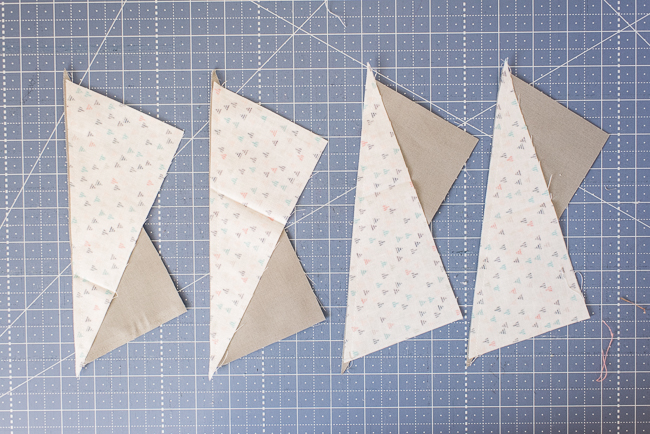
Press the half-rectangle triangles open. Each pair of half-rectangle triangles is going in the opposite direction.
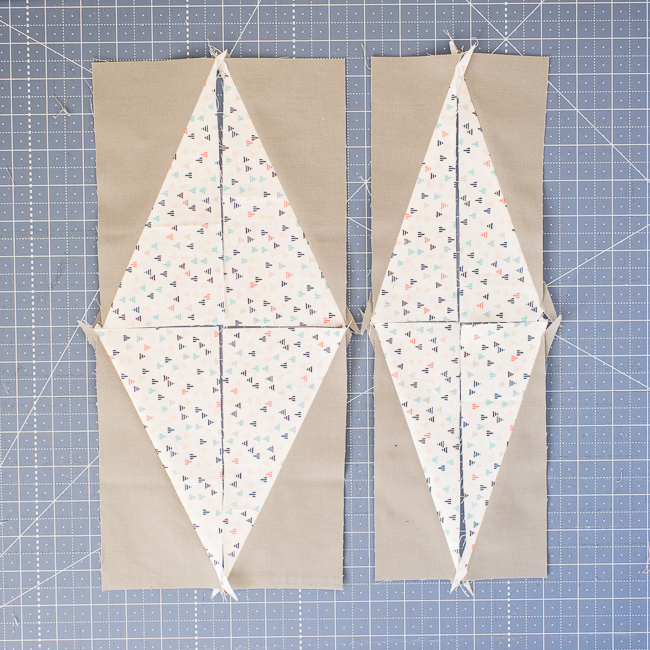
Four of these half-rectangle triangles make an elongated diamond. You can easily repeat these steps to make multiple diamonds or other shapes.
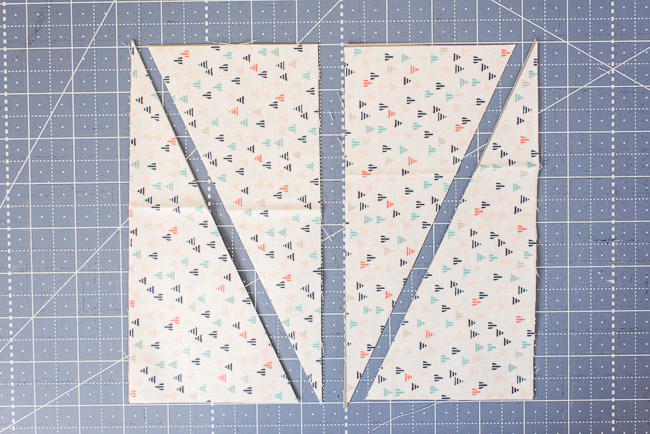
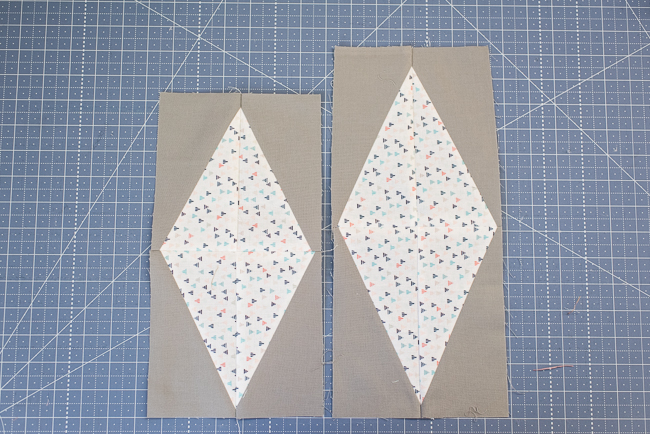
Make any size half-triangle rectangle
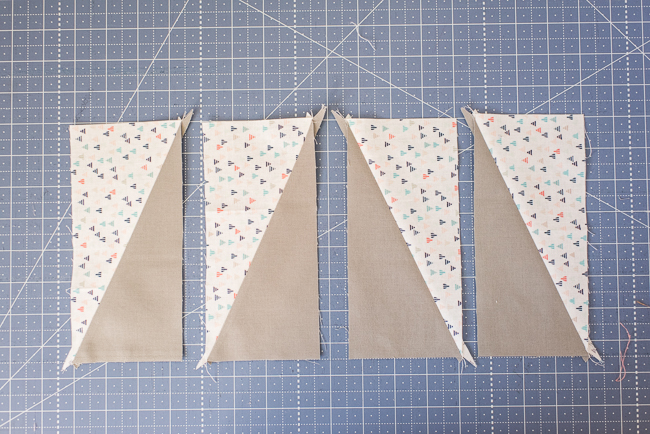
This same method works to make just about any size half-rectangle triangle. Below is a skinnier rectangle. These starting rectangles are 2¾” x 8″. The resulting half-triangle rectangles are 2½” x 8″.

Now we have two diamond shapes the same height but different widths. Experiment with different size starting rectangles to get various half-rectangle triangles.
A common problem for diamond units
My first instinct was to sew the half-rectangle triangles together below to make diamond blocks. The side seam allowances kept coming up short, as you can see below.
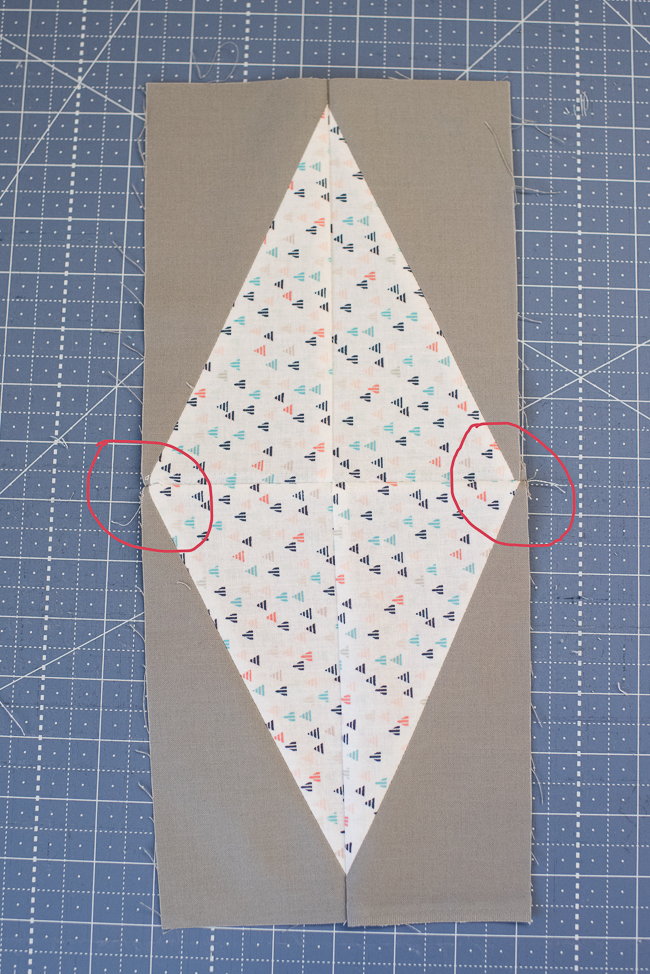
A simple solution to this seam allowance problem is to use a bigger seam allowance. To create a diamond shape, first sew the top two half-triangle rectangles together. Then sew the bottom two half-triangle rectangles together.
Now comes the step where the seam allowance will change. Use a 3/8″ or ½” seam allowance when sewing the top and bottom units together.
Now that you know how to sew half-rectangle triangles, you can start dreaming up new quilt designs using this shape!
Share tips, start a discussion or ask one of our experts or other students a question.
No Responses to “How to Sew a Half-Rectangle Triangle in Any Size”