
 Photo via Rosie Wednesday.
Prepare the seam
First, we’ll do a few steps to get the seam ready to be sewn.Step 1:
Finish your seams as you normally would. Here, I’ve serged the edges. You’ll also notice that I’ve done everything else needed to prepare the back, including stay stitching and sewing the darts.
Step 2:
Stabilize the seam. Here I’m using a 1/4″ fusible web bonding, but a regular interfacing will also work. If you’ve ever finished a zipper, only to discover that you’ve got one end longer than the other, then this step will become your best friend. It helps to reinforce the seam and prevent stretching that happens when you’re installing the zipper.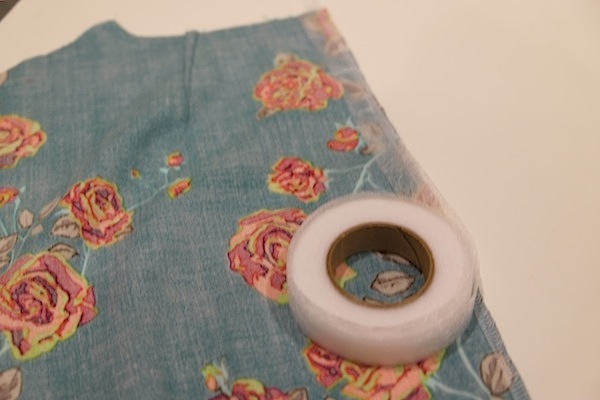
Step 3:
Sew the seam up to the end of where the zipper will be. Make sure to back stitch at the edges.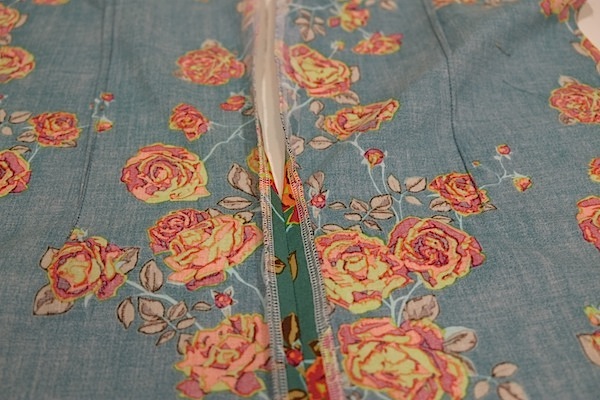
Create the lap
Step 4:
Next, we’ll be pressing the overlap and underlap. The overlap is the flap that will cover the zipper. The underlap goes right up against the zipper teeth. In a center back application, as I’m doing here, the overlap is typically on the left side, although it doesn’t really matter. If you’re inserting your zipper on a side seam, you’ll want to make sure that the overlap goes from front to back, so your topstitched/handpicked side is on your front and you don’t see a peek of the zipper from your front. For the underlap side, press under 1/2″. You can stitch this on the machine as you normally would a zipper. It won’t be visible (see step 5 below). For the overlap side, which is the side that will cover the zipper, press at 5/8″.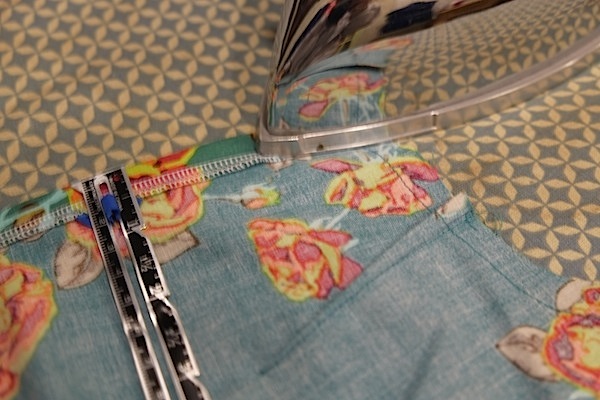
Stitch the underlap
Step 5:
For the underlap, position the folded edge directly next to the zipper teeth. You can stitch this by position, or by using the prick stitch we’ll review in a minute. You won’t be able to see this from the outsidePrick stitch the overlap
Step 6:
For the overlap, which is the part you’ll be able to see on the outside of the garment, we’ll be using the prick stitch. You might have also heard this referred to as a “pick stitch.” It’s essentially a variation on a back stitch that creates tiny stitches on the outside, and longer ones on the inside of your garment. Position the zipper so it’s completely covered by the overlap. This stitch will secure the zipper in place, so make sure you’re catching your fabric and the zipper tape as you go. Start by pulling your thread to the outside of the garment. Your stitches should be 1/2″ away from the fold. Then place your needle behind that spot, taking a small bite of fabric. Push the needle through, positioning it for the next stitch about 1/4″ away. Then repeat! Once you get to the end of the zipper, pivot to form a “L” at the bottom of the zipper.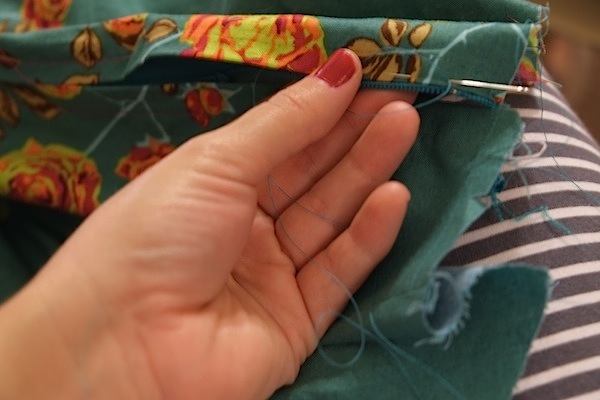 That’s all there is to it! Here’s the back of the dress, with the handpicked lapped zipper installed.
 You can hardly even see that it’s there! It’s marvelous!
This is just one of the many ways you could choose to install a zipper into a garment, and it’s one of my favorites.
You can hardly even see that it’s there! It’s marvelous!
This is just one of the many ways you could choose to install a zipper into a garment, and it’s one of my favorites.
Share tips, start a discussion or ask one of our experts or other students a question.
No Responses to “Discover How to Finish Garments Like a Pro When You Handpick a Lapped Zipper”