
The reality in sewing is that even if you have fancy sewing machines and sergers, there are still many moments when hand sewing is the best option. Especially if you would like to take a more couture approach to your garment making, it relies entirely on hand stitching. In this series, I will guide you through the main hand sewing stitches that you might encounter while sewing garments.
In today’s segment, we will learn how to do the hemming stitch by hand. This stitch does exactly what the name implies, it is used to create a hem. There are many hand stitches that can hem, but they all have their own names. The hemming stitch is the most utilitarian of the hem stitches, as it is not meant to be invisible on the inside of the garment. But it can be done relatively quickly for a hand-sewn stitch, and sometimes that is exactly what you need.
Follow along to learn how to do a hemming stitch by hand!
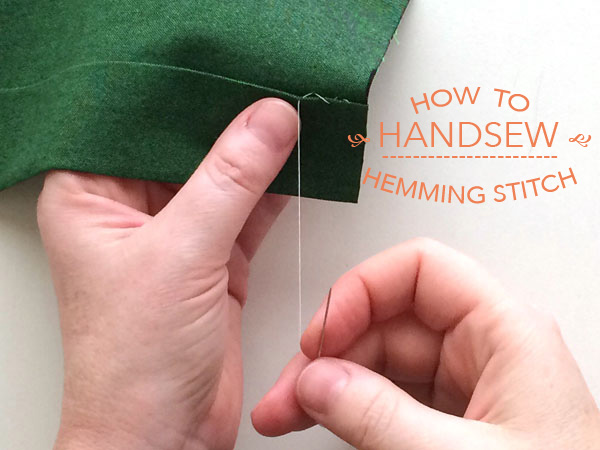
Step 1:
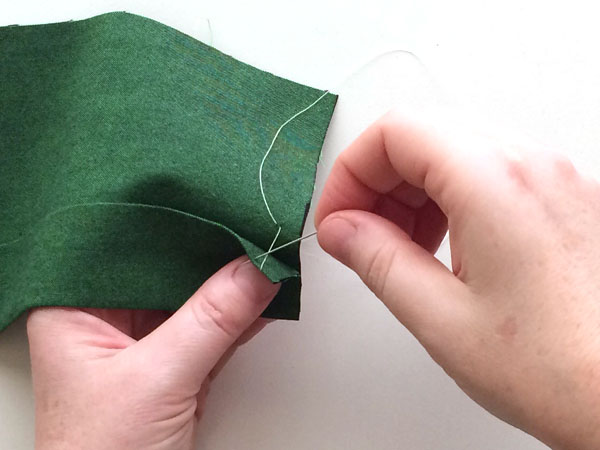
Press your hem following the instructions of the pattern you are making. In this example, I pressed the hem .1/2″ to the wrong side, then another 1 1/2″. Knot the end of the thread and thread a hand sewing needle appropriate for the type of fabric you are sewing with. Insert the needle in between the layers of the first and second fold of the hem, then poke the needle through the top fold and exit the fabric so the thread is coming directly out of the fold and the knot is hidden inside the hem itself.
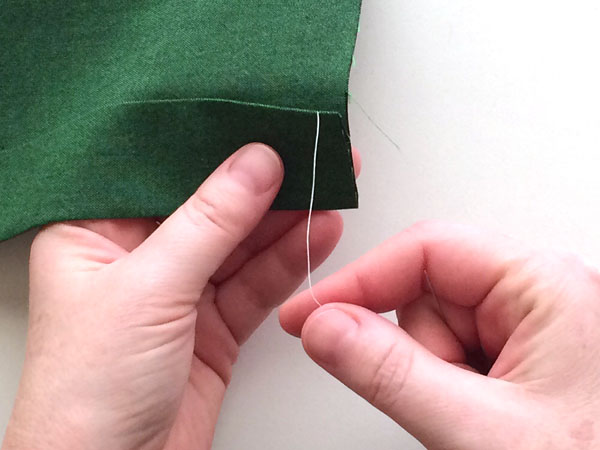
Step 2:
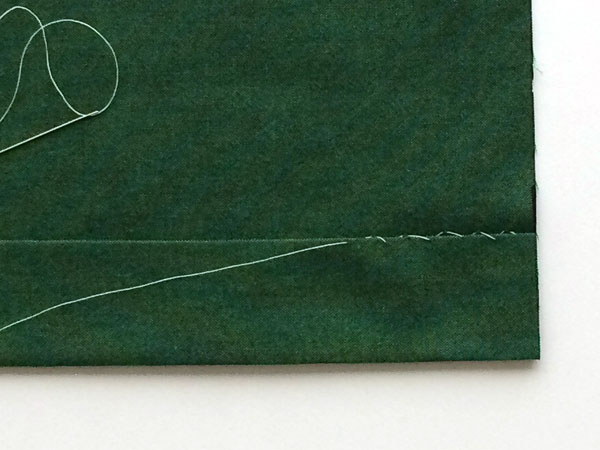
Insert the needle just above the fold and catch a tiny section of the main fabric, creating a very tiny dot on the right side of the garment. Ideally your thread would match the fabric and this dot would appear invisible. For my example, I am using a contrast thread so you can see the stitches.
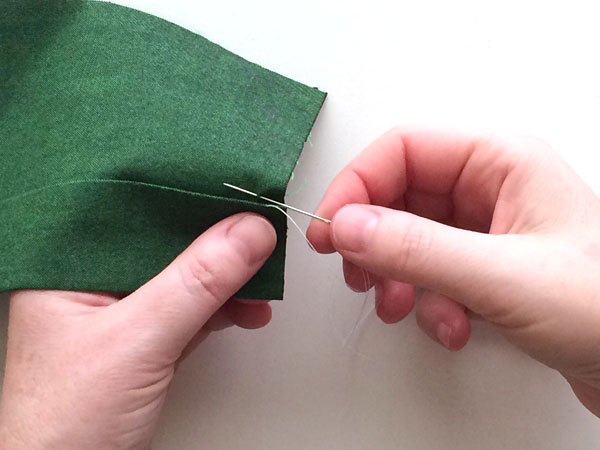
Step 3:
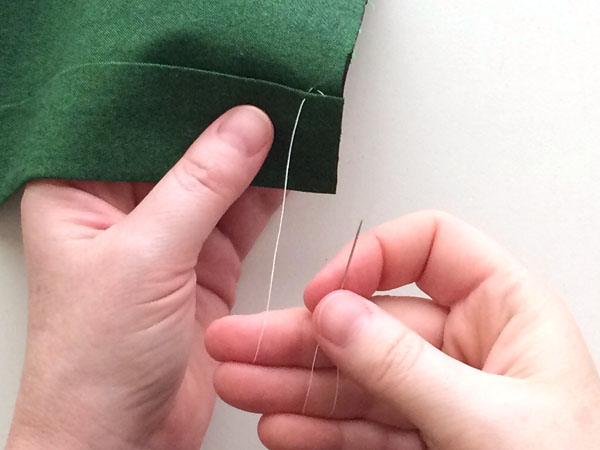
Pull the thread through the fabric, forming the dot that you started in step 2. Pull the threads firmly, but not too tight as to make the fabric pucker.
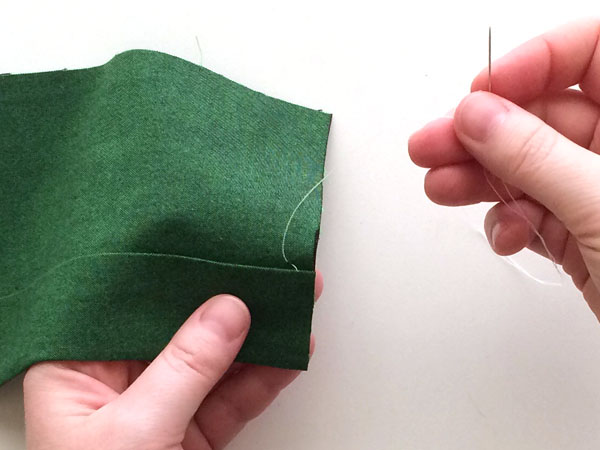
Step 4:
Insert the needle into the underside of the hem so that the dot made in step three is centered between the stitches on the fold. In this example, I’m flipping the fold forward so you can see it clearly, but ideally yours is flat and taut against the garment.
Step 5:
Pull the thread through the fold, creating one full stitch. Again, pull it taut but not so tight as to make the fabric gather up.
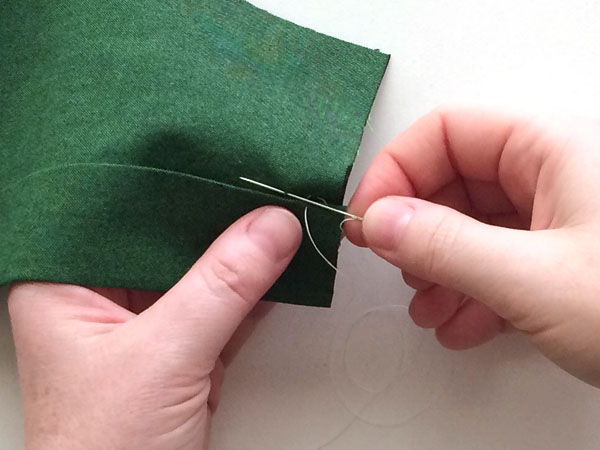
Step 6:
Repeat the process by inserting the needle into the garment fabric just above the fold, creating a small tiny dot. The distance between each dot should be even and consistent around the hem.
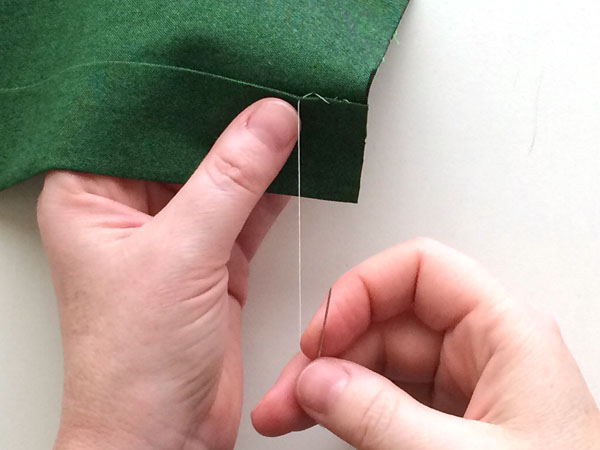
Step 7:
Complete the second stitch by again passing the needle from the underside of the hem fold to the front of the hem and pull firm.
Step 8:
Repeat the process over and over until you have gone all the way around the hem of the garment. These stitches should be evenly spaced and the dots should all be level with each other, so if seen from the right side of the garment the hemming stitches look even.
There you have it! You’ve learned to make a hemming stitch by hand. Follow along to see the other entries in this series of hand stitches to further expand your skills!
Conquer common pant-fitting issues! Learn to alter pant patterns with secrets from the pros for a flattering fit you’ll model proudly in Craftsy’s Pant Fitting Techniques class.
Share tips, start a discussion or ask one of our experts or other students a question.
No Responses to “How to Handsew: The Hemming Stitch”