
Whether you want to say “happy birthday,” “congratulations,” or “I miss you” (or something else), a homemade greeting card is the perfect way to send a personalized message. Sure, you could run out to the store and buy a pre-made card, but where’s the fun in that? A personalized greeting card guarantees warm reception and a one-of-a-kind message.
If you’re not an experienced card maker, learning the ropes can be a little intimidating. That’s why we’re talking card-making basics today. In this tutorial, I’ll show you how to make homemade greeting cards that look complex but are easy to make!
What you’ll need
Before we get started, you’ll need a few basic card making supplies. In this tutorial, I used:
- A paper trimming and scoring board (with a bone folder)
- Cardstock
- Patterned paper
- Acrylic paint and a foam brush
- Circle punches
- Paint markers
- An adhesive runner
- A flower die cut
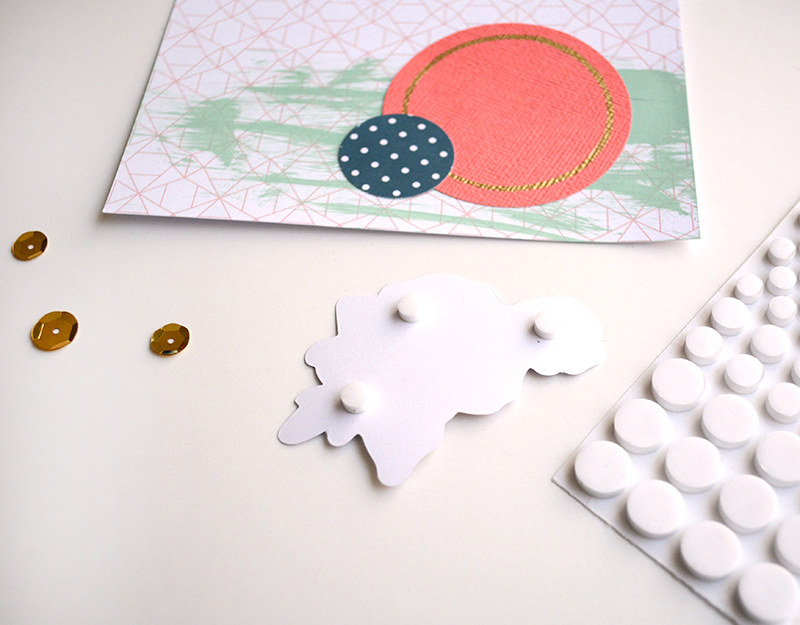
- Foam circle adhesives
- Sequins for embellishments
- Liquid glue
These are the supplies I used, but if you don’t have all of these materials, don’t worry. We’ll talk about substitutions later on.
Simple card making tutorial
Step 1:
Use your paper trimmer to cut an 8.5″ x 11″ piece of white cardstock in half so that each piece measures 8.5″ x 5.5″.
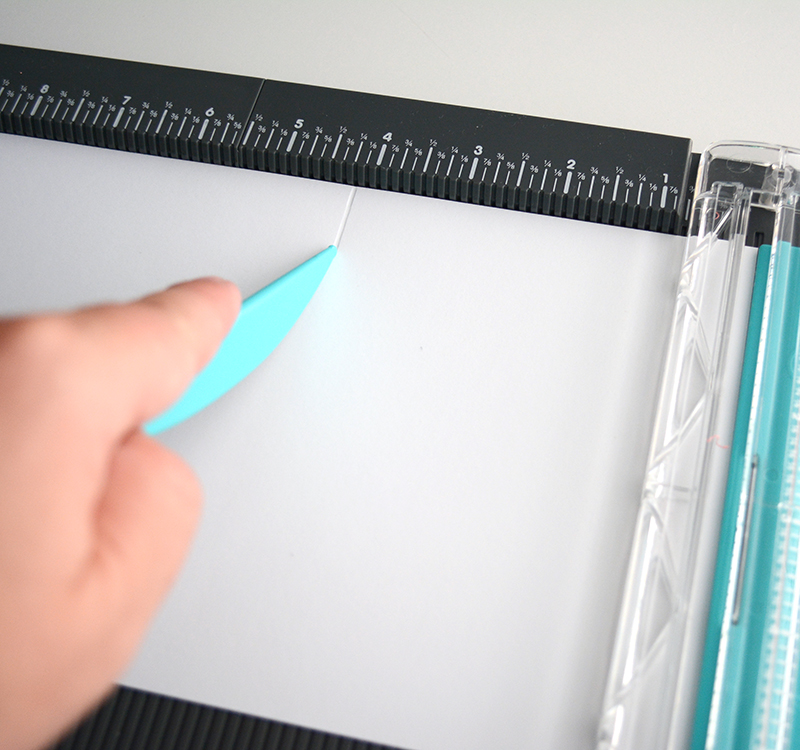 Step 2:
Place one piece of paper on your scoring board with the longer side running along the ruler. At the halfway mark (4.25″), score your paper for the fold. Scoring your cards prevents cracking along the fold, giving the card a clean, professional look.
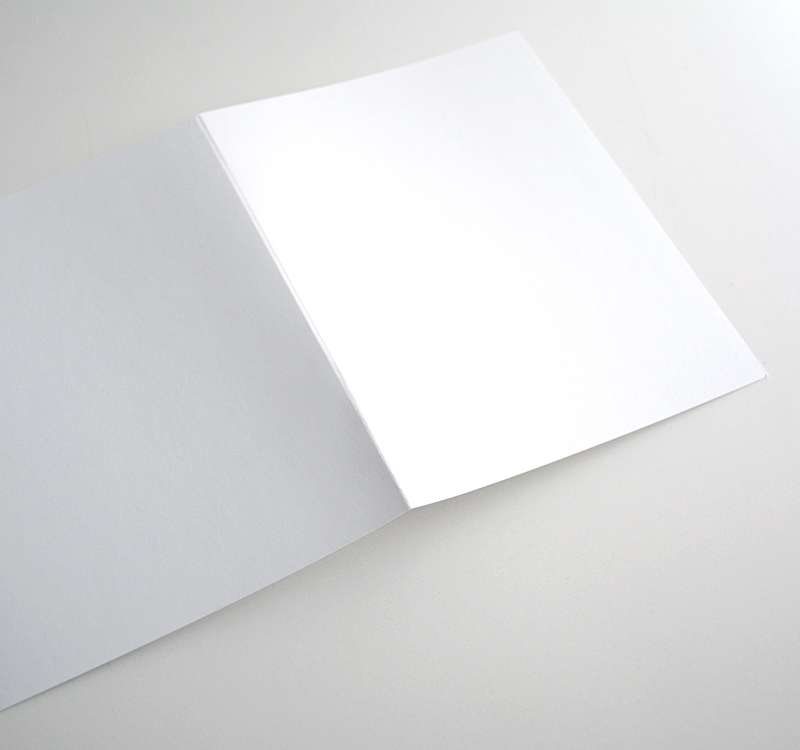
Step 3:
Fold the paper in half along the score line. The side of the paper you scored will be the outside of your card. It may seem backward, but don’t bend the card inward following the groove of the score. The inward groove is actually the outside of the fold. Once you fold your card in half, you can smooth out the crease.
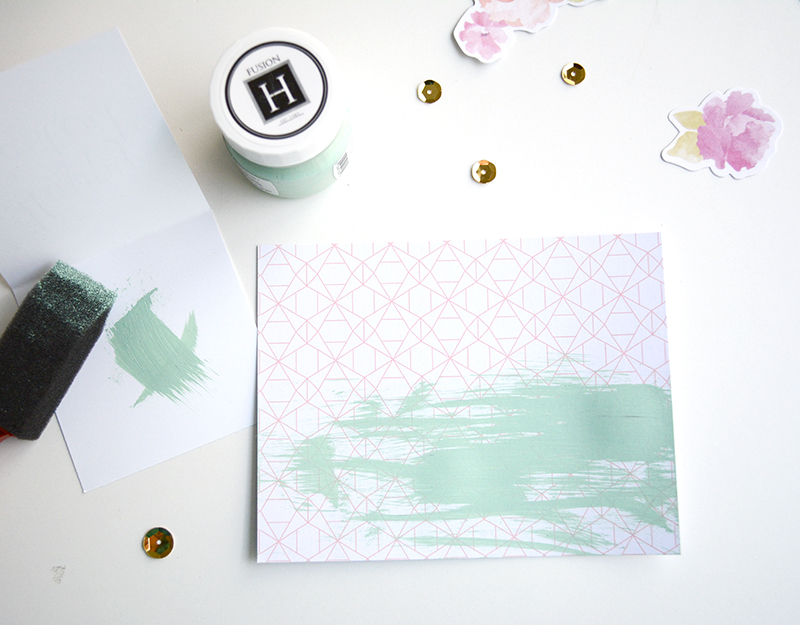
Step 4:
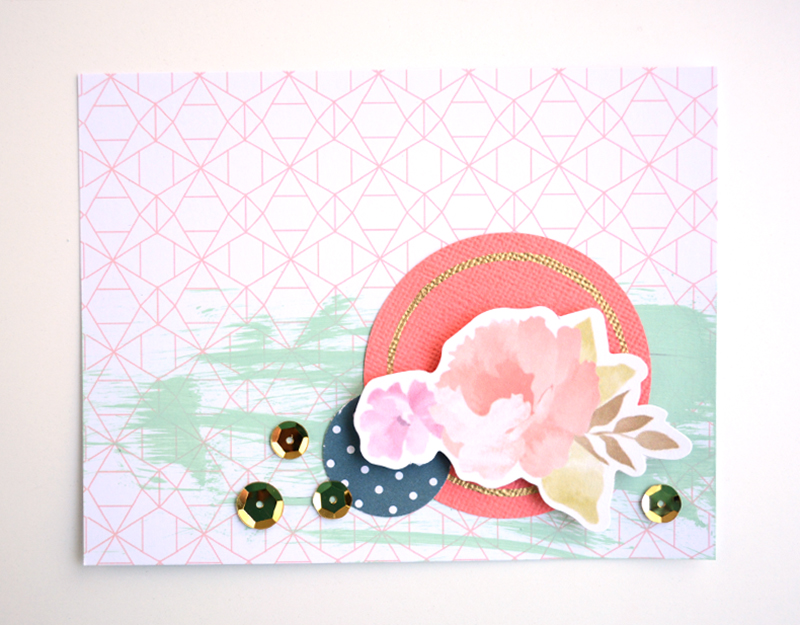
Create the background layer. Cut a piece of patterned paper to 4.25″ x 5.5″, which should fit on the front of your card perfectly.
Then, using a foam brush, I roughly applied some acrylic paint to the bottom right area and let it fade to the left. You could also use watercolor paints or get creative with stamps. The goal is here is to add a little color and texture to the card; how you achieve the look is up to you.
Once the paint or ink dries, glue the paper to the front of your card using an adhesive runner.
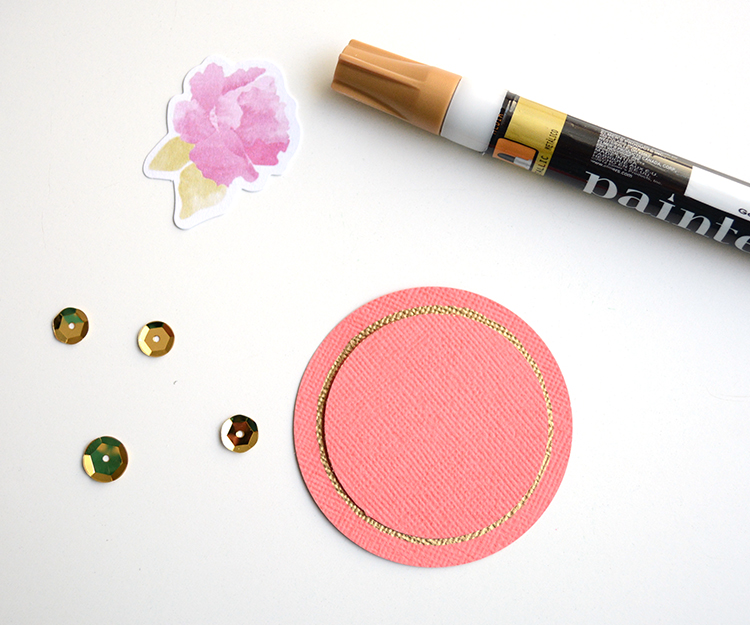
Step 5:
Use circle punches to create some embellishments. If you don’t have circle punches, you can trace and cut circles or use a different shape. For my card, I nested a smaller circle inside another circle and traced the smaller circle using a gold paint marker. Glue the embellishments to the card using the adhesive runner.
Step 6:
Add your focal point. If you own die cutters, this is where they’ll shine. Here, I used a flower die cut and used a few foam circles to adhere it to the card on top of the circles. Of course, another die cut shape would look great, too.
Another great embellishment you could add on top of the circles? A word for the occasion, such as “congratulations,” “thank you,” “thinking of you,” or whatever message you want to send.
Step 7:
Add finishing touches, like these fun, gold sequins. I adhered them with some Tombow Mono liquid glue. You can stretch your creative muscles here, too. Consider embellishments like glitter, beads or whatever other extras you have in your stash.
You can see how this card could be easily adapted. Try new tools, techniques and materials to figure out your style.
Share tips, start a discussion or ask one of our experts or other students a question.
No Responses to “Better Than Store-Bought: Easy Homemade Greeting Cards”