
Wrap dresses are as popular as ever and justifiably so. A wrap dress is a great way to use a fun knit fabric. You can be both on trend and timeless yet be comfortable and sew something quickly. However there can be a few trouble spots with fitting a wrap dress or top.
Here are a tips for getting a good fit on your wrap style neckline.
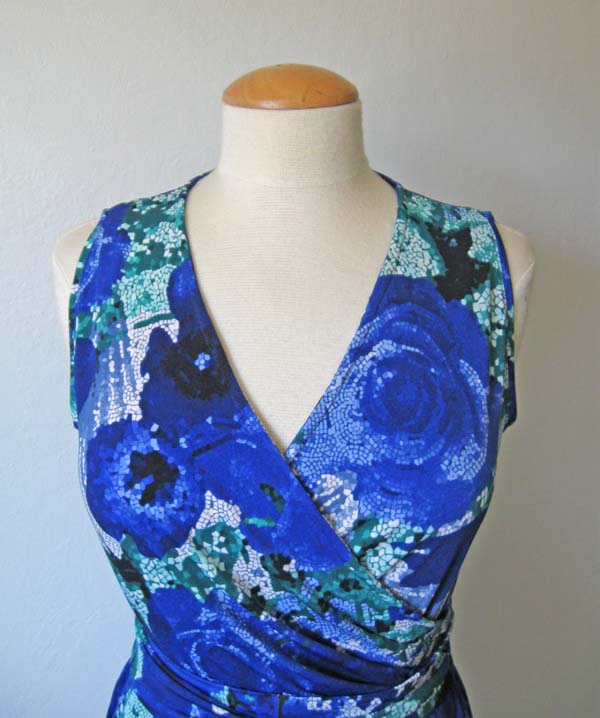
A wrap front neckline is a very pretty and feminine look, but sometimes we can end up with a finished garment that is more low-cut than we had planned. While wearing a cami underneath is one solution to making your garment safe for work, doing some pattern alteration before cutting out your fabric will help your dress or top fit nicely with no extra layers required!
Step 1: Evaluate the neckline fit.
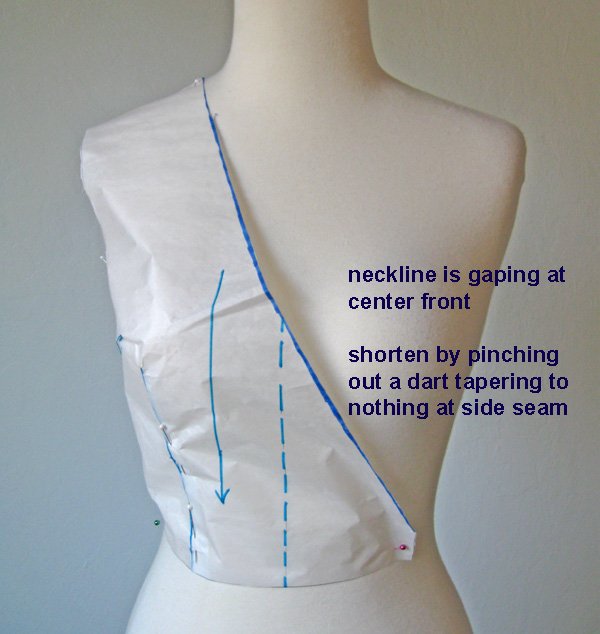
Here is the front bodice pattern piece for a wrap dress pinned on the dress form. You can see that it shows two common problems of the wrap neckline. The first is that it might be too loose and the second is that it might be too low-cut.
Step 2: Create a neckline dart.
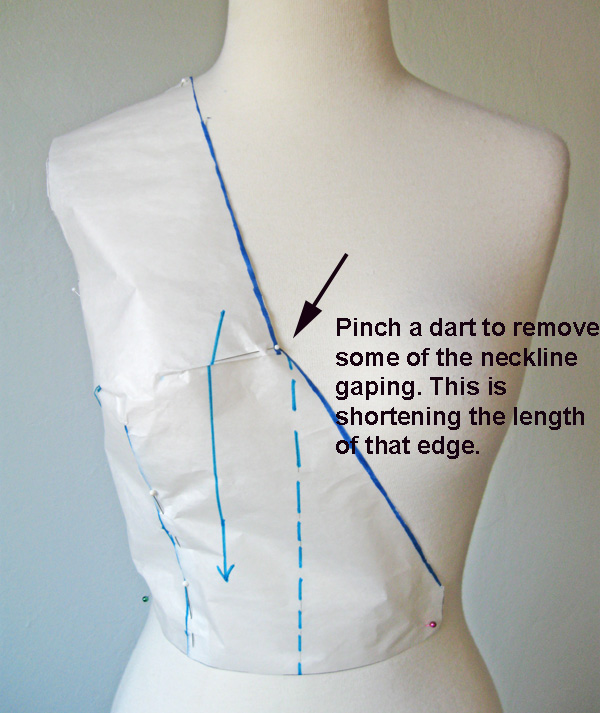
To solve the issue of the neckline being too loose and gaping across the chest, pin out a dart in the fabric. If you are adjusting your test garment you can pin out the near the center where the two sides cross over the bust.
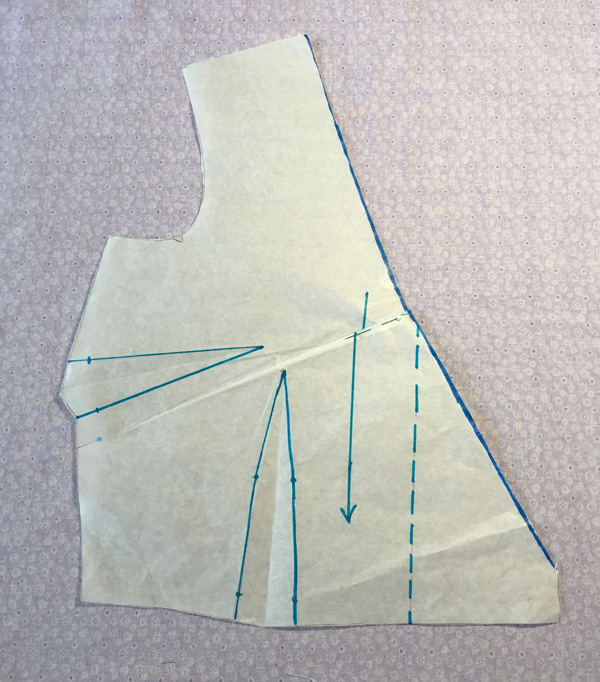
On the pattern piece, pin out the dart to remove that excess fabric. One important thing to note on wrap style patterns, be sure to mark the center front line on your test garments, and match those centers when testing the wrap. If your fronts won’t meet at the center front line, before you do any other changes, do any necessary FBA’s (full bust adjustment) so that the fit is correct across the bust. Here the pleat is in the center of the long neckline edge, and tapers to nothing at the side seam. The grain line is maintained parallel to the center front line.
Step 3: adjust the new neckline edge.
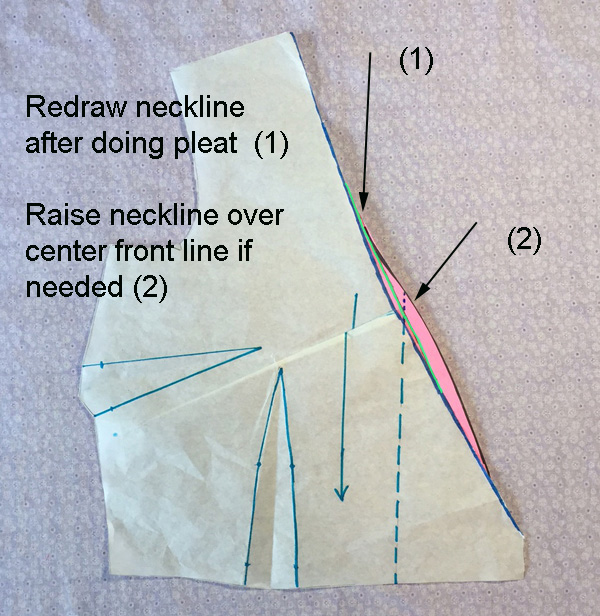
Once the pleat is created, the neckline edge needs to be redrawn, as shown with the green line. If the center front of the wrap is too low, you can raise that center front by reshaping the long edge a bit using your french curve ruler. The most important thing is to add height at that center front line (2) and then you can taper back to the original neckline. It may look odd on the pattern piece, but on the curves of the body it works quite well. Some wrap style patterns pieces have this type of curve built in instead of a straighter edge so you can make this change to just about any wrap front pattern.
Sometimes neckline issues only become apparent after the garment is cut out and you start sewing. There are still a few tricks to adjusting the neckline. Other opportunities for adjusting a gaping neckline can be found at the shoulder seam.
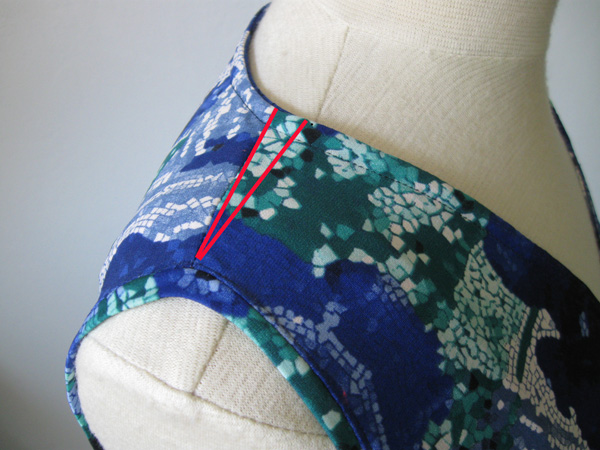
If the neckline is a bit big you can still create that dart by changing the shoulder seam. The red lines show how you can pull up the front bodice at the shoulder seam, and change the angle of that pattern piece to shorten the neckline edge. You can also make a similar adjustment at the bottom edge if needed.
For a dress or top that is just a smidge too low, consider changing the neckline edge finish.
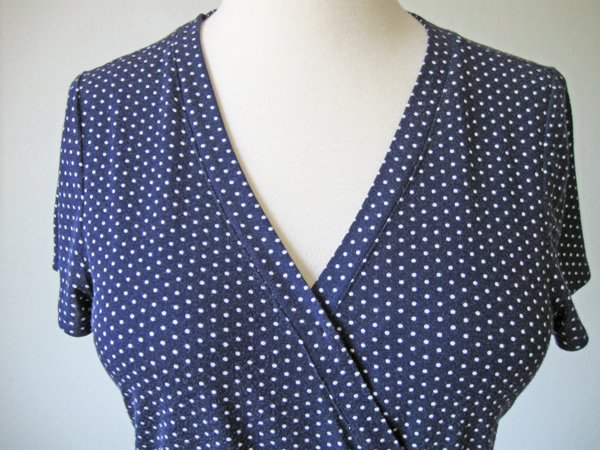
Many patterns call for a self-fabric binding that is sewn and then turned, pressed and folded. On this top the center V of the neckline is raised a good 1.25 inches by using a binding of about ¾ inches and not turning it under, but rather sewing it on and then edge stitching as you would on a knit t-shirt. One thing to note is this method also raises the back neckline so you may want to play around with the placement of the binding to end up with the original neckline shape in that area.
Thank you
Thank you for this tutorial, it provides the answer to a question that I have been searching for.
Great Tutorial!!!