
Vintage looks can be fun and flirty, with lovely details that you might not find on contemporary patterns. However actual vintage patterns can have their limitations. They can be costly or not available in your size, and you may already have a standard darted dress bodice that fits you to perfection.
Learn how to alter a bodice and create a vintage look that is just your size.
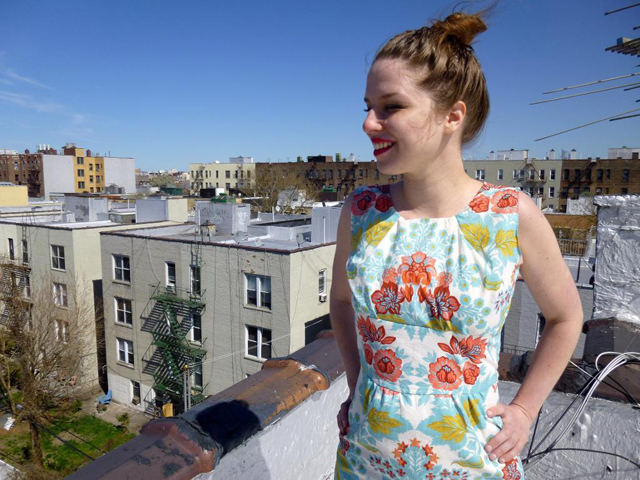
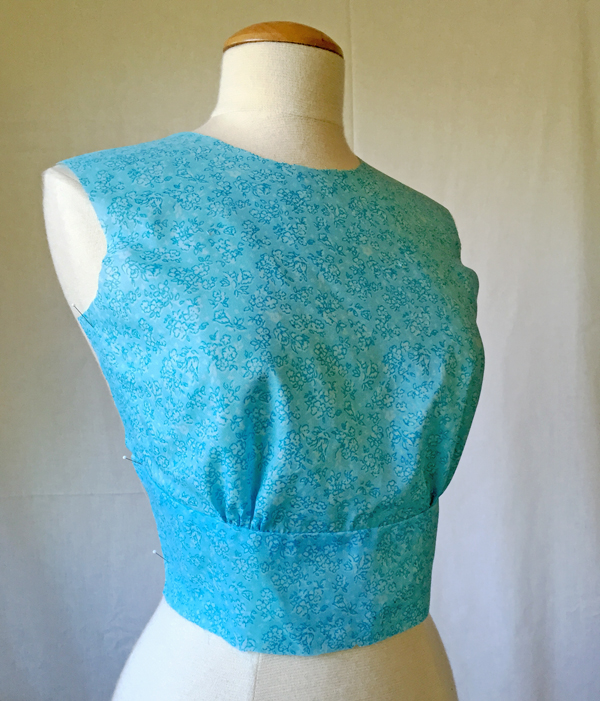
Vintage look dress sewn by Craftsy member Kristin Creates
With these steps, you can change a darted front bodice into one that has a waist yoke and gathers instead of darts.
Step 1: Start with a basic bodice.
For this style start with a basic bodice front where the horizontal bust dart has been rotated to the waist dart. You can buy current patterns with this style of bodice and even find versions with cup-sizing, which is a great feature and saves time on fit adjustments.
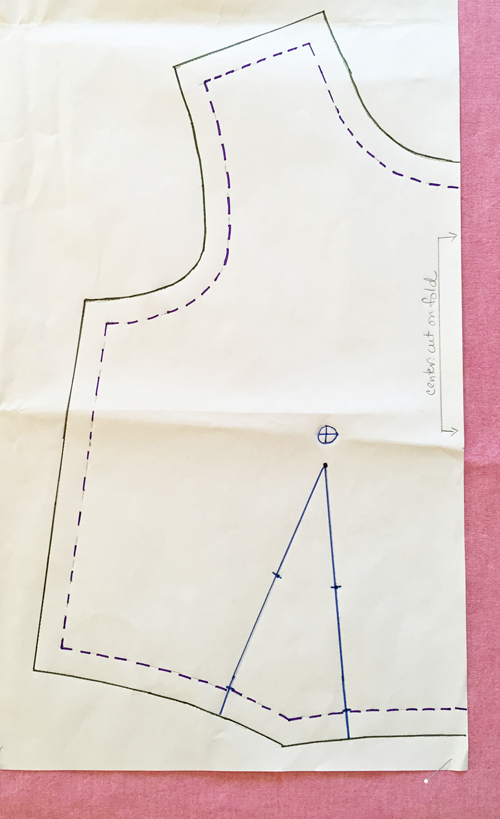
Step 2: Design your seam line.
Start with creating your waist yoke seam line on the basic bodice front pattern piece. Depending on your torso length it may be shorter or longer, here the seam line is 3 inches from the bottom stitch line. It is curved upwards at the side as this is a feature seen on a lot of retro looks and creates a flattering line on the body.
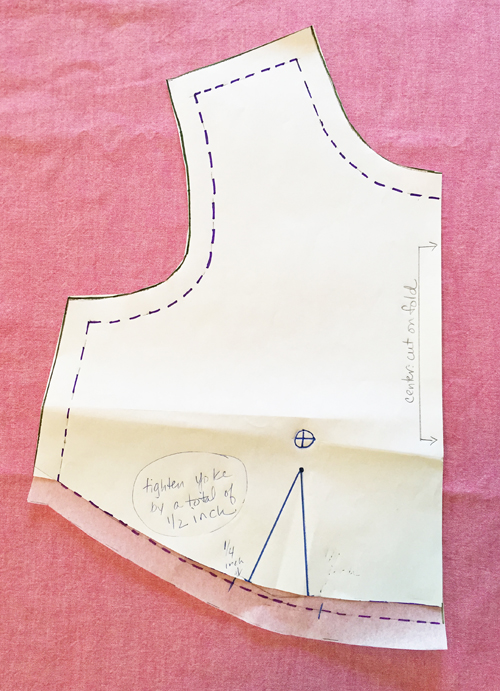
Step 3: Adjust the yoke.
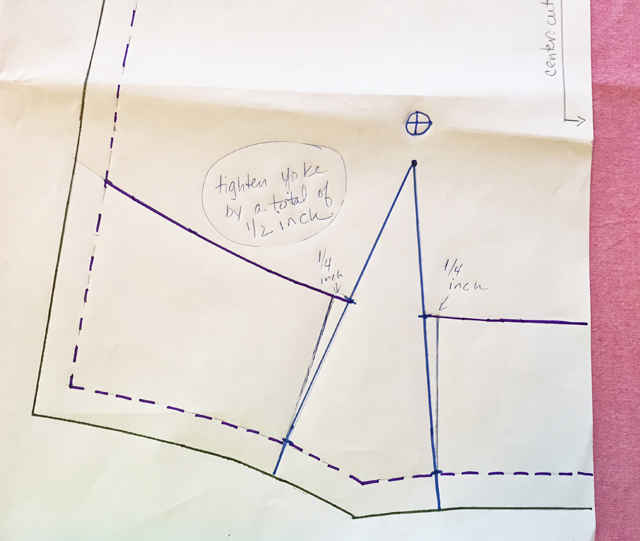
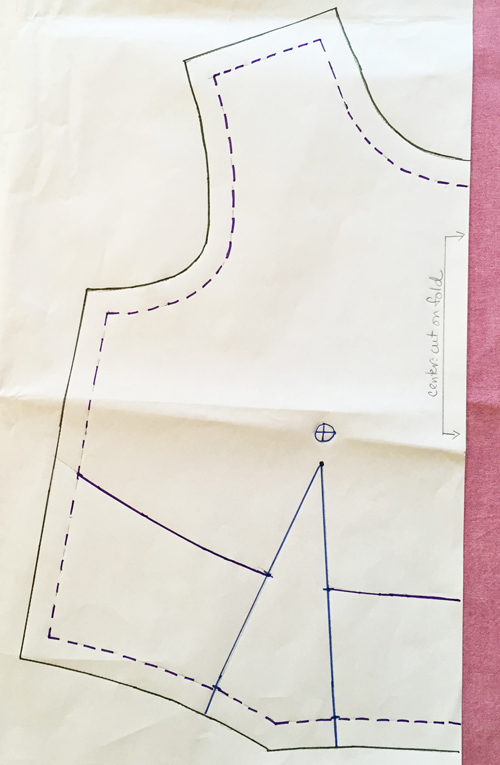
Adjust the portion of the dart that is in the waist yoke section which will be folded out. Before you do that, tighten the yoke by enlarging the dart section by 1/4 inch on either side as shown. A waist yoke will hug the midriff more closely than a dart that angles up from the waist so that is the reason this adjustment is needed.
Step 4: Create the yoke and add seam allowance.
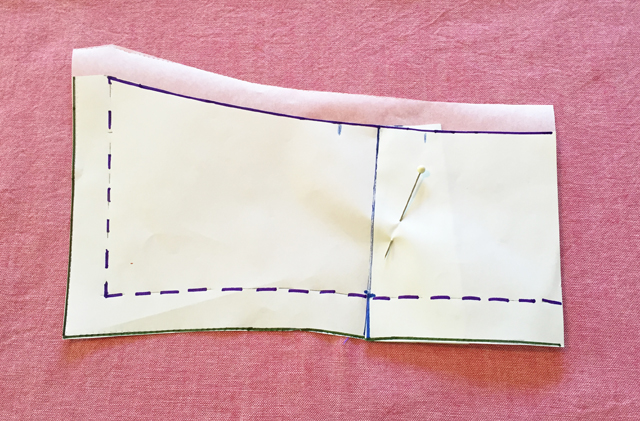
Time to cut on your newly designed seam line. Pin closed the dart portion at the new lines you have added which tightened up that dart. Add a seam allowance on the cut edge and that pattern piece is done. Be sure to cut this piece on the center fold.
Step 5: Adjust the upper bodice pattern piece.
Adjust the upper bodice piece by adding a small amount on the bottom edge. Perhaps 1/4 – 1/2 inch at the center front tapering to zero at the side seam. The reason for this addition is to allow for the now longer distance from the bust point to the waist, since the bodice with a flat waist yoke is a bit longer you want to have enough room in the bust area. If you have a small bust this may not be needed and a full bust will definitely want to add this, as you can always adjust and take away when sewing the garment.
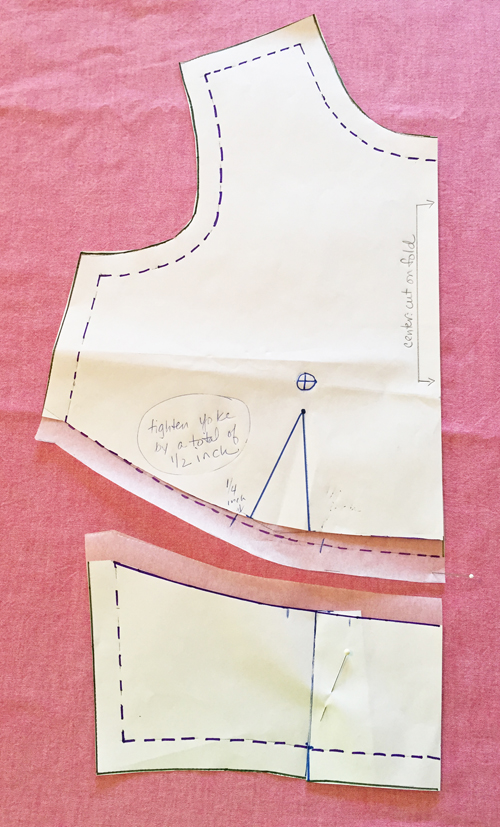
Here are the finished pattern pieces. Now the upper bodice is wider than the waist yoke, and that difference will be taken up with gathers at the location of the darts.
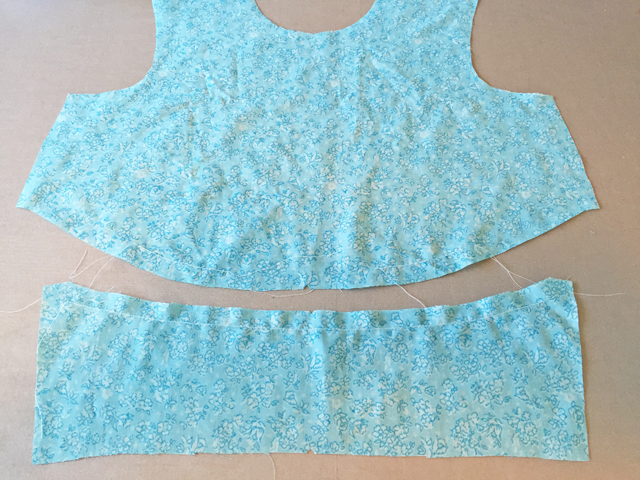
Finishing the bodice
To prepare for sewing the bodice front pieces together, stay stitch the upper edge of the waist yoke to prevent it from stretching out. Run some long stitches across the location of the darts on the upper bodice that you will use to gather those sections.
The bodice back can have a waist yoke as well, and the back pattern pieces are easier to adjust as the back is a flat piece unlike the bodice front. You won’t need to adjust the dart width, just draw the design line, separate the two sections, fold out the dart in the waist yoke and then add the seam allowances.
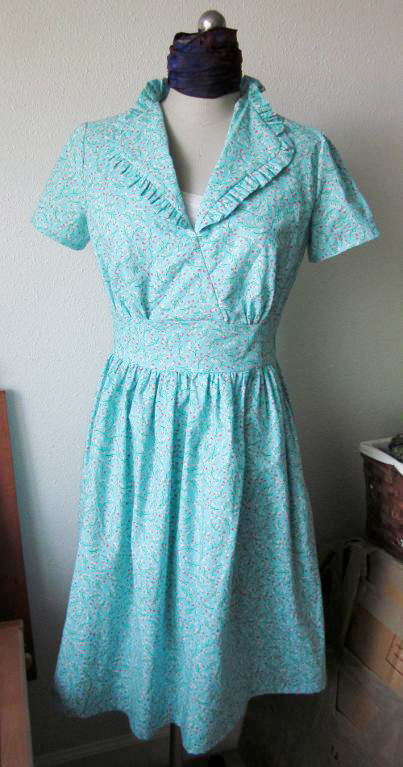
Vintage look dress made by Craftsy member Azalea820
Dart manipulation and pattern piecing are often seen in vintage looks. Now you don’t have to search for the perfect vintage pattern, you can create your own distinctive version!
Share tips, start a discussion or ask one of our experts or other students a question.
No Responses to “How to Alter a Bodice to Create a Vintage Look”