
Working with fine silver or bare copper wire to make intricate, woven, filigree, or free-form jewelry is extremely satisfying…until it tarnishes and you have to clean it. Oh man, do I hate cleaning my wire wraps!
Sometimes, it’s best to head the tarnish off at the pass and learn how to antique jewelry yourself. It only takes a few minutes, and depending on the materials you have nearby, might not even take elbow grease.

Antiquing jewelry is a fast and satisfying way to add sophistication to your copper and silver.
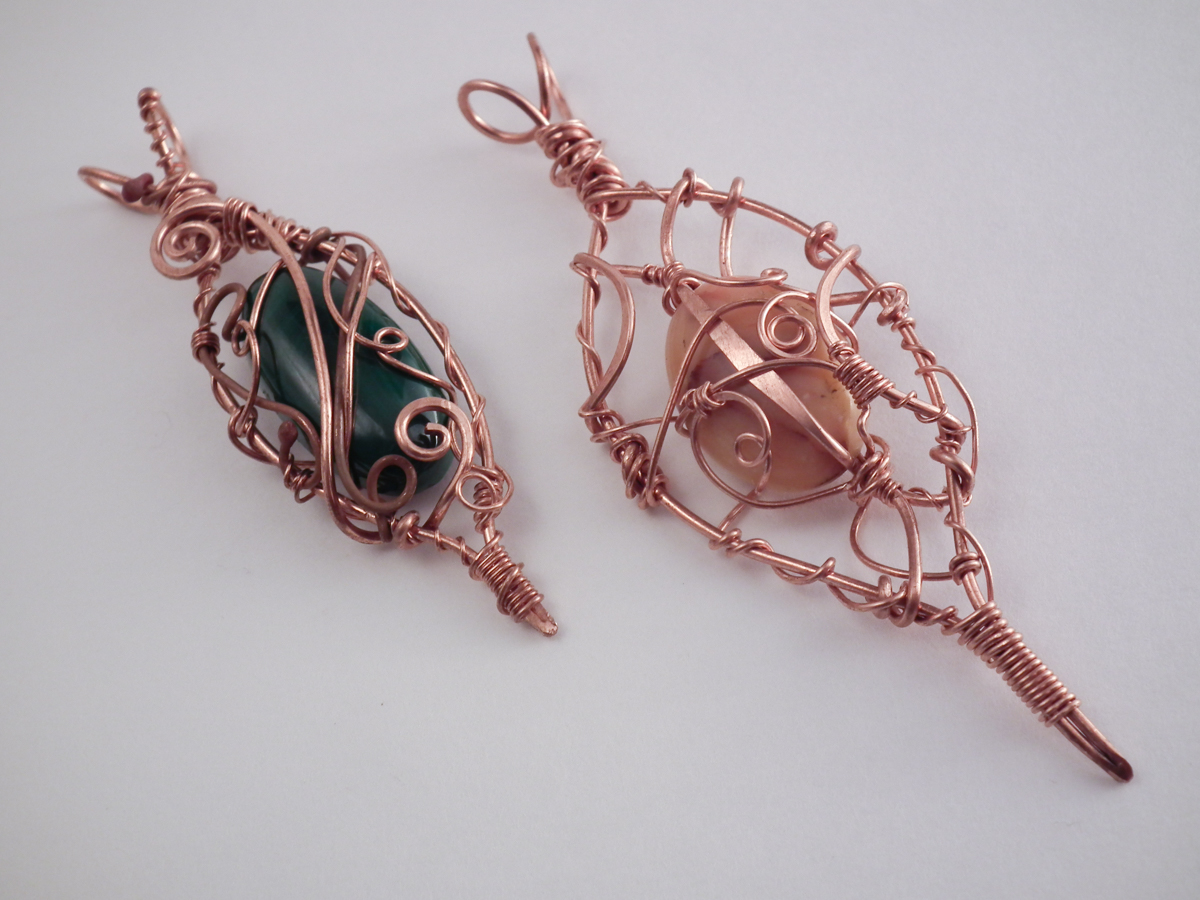
So in the next couple of minutes, I’m going to show you how to turn this:
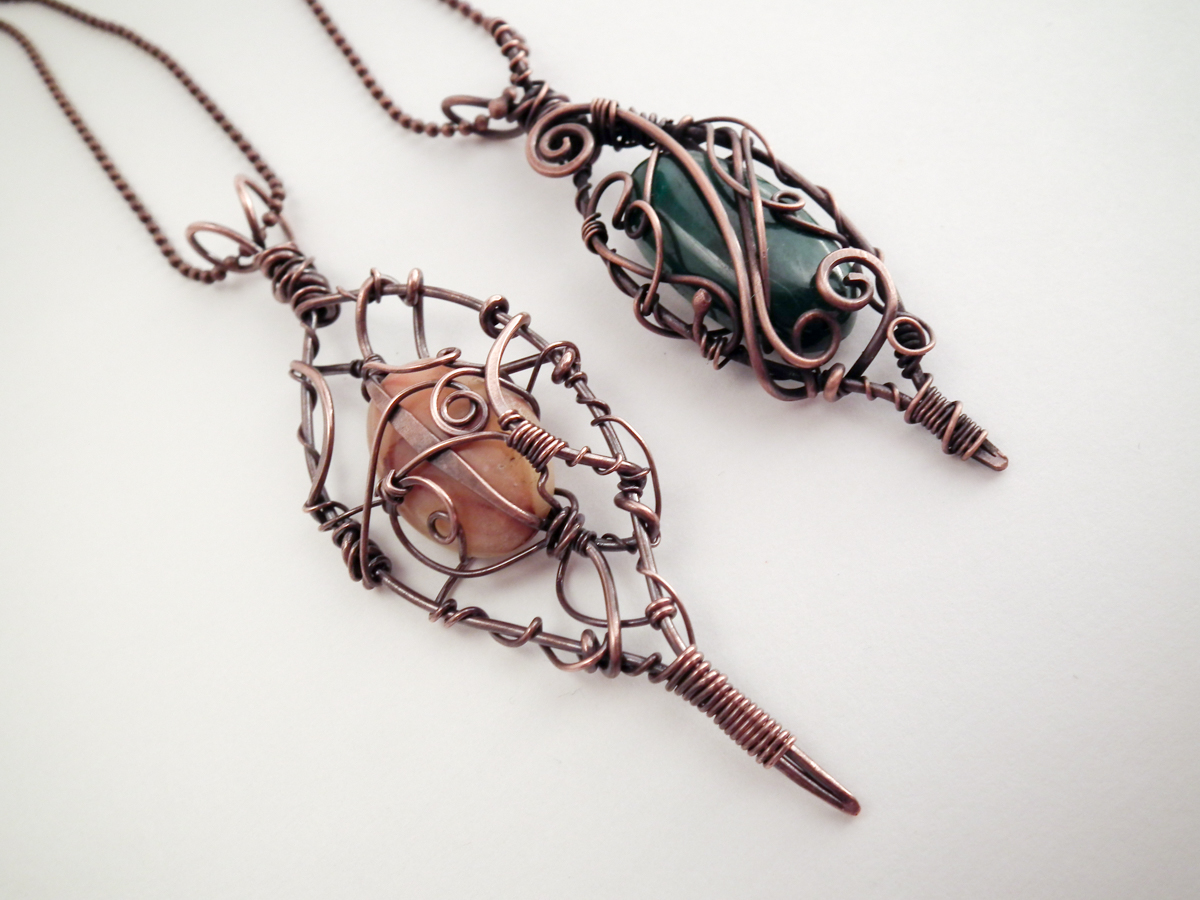
Into this:
Let’s get started!
Want to learn more from Gayle? Join her online class, Organic Wire-Wrapped Pendants.
How to antique jewelry
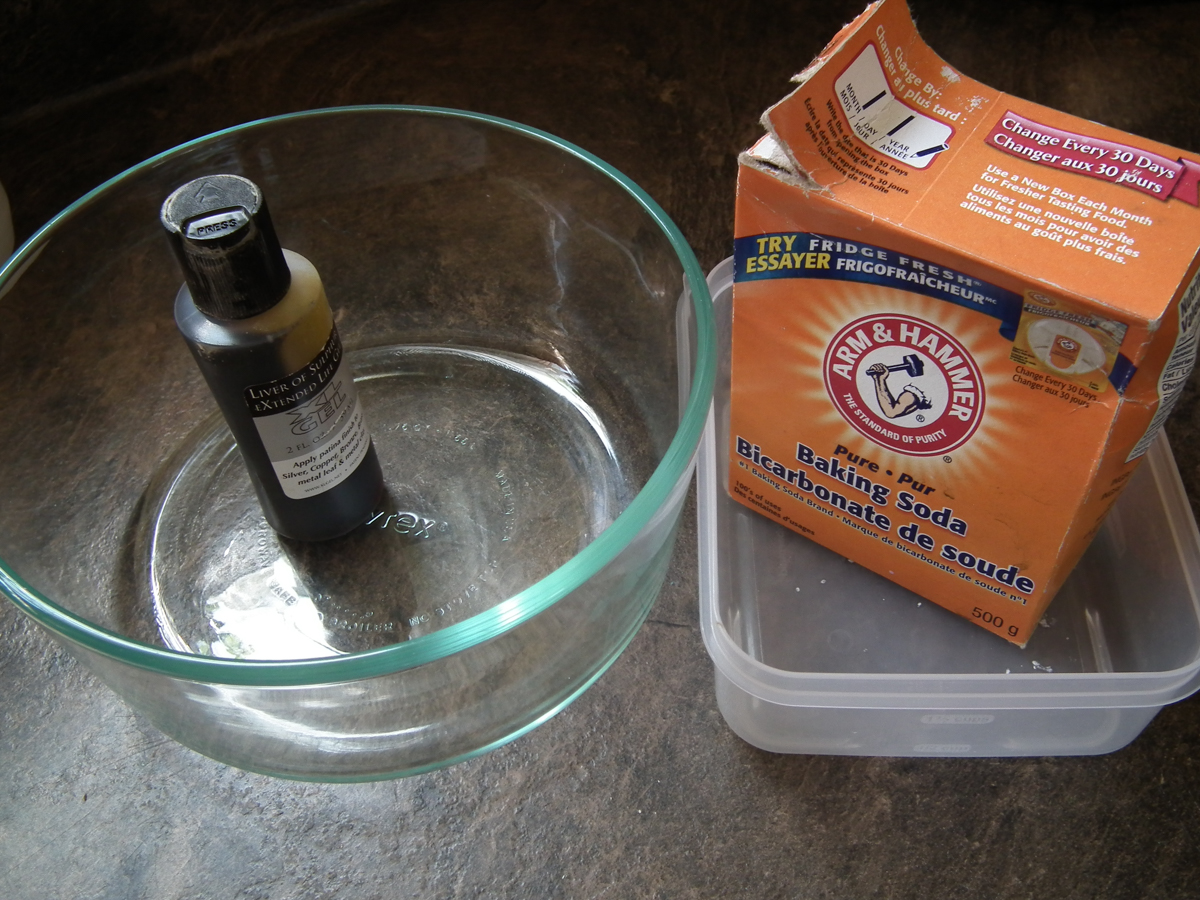
Supplies you’ll need:
- Liver of sulfur: I use the gel – it’s pretty simple to use and store —I like simple!)
- Glass dish: It’s best to use a dish you don’t also use for food, just in case, since liver of sulfur (LOS) is a tiny bit toxic.
- Baking soda: You need to use a solution of baking soda and water to neutralize the LOS on both your jewelry and in your containers and sink.
- Plastic dish: Again, keep a separate dish just for this.
- Green kitchen scrubbies
- Tumbler with steel shot (optional)
Step 1:
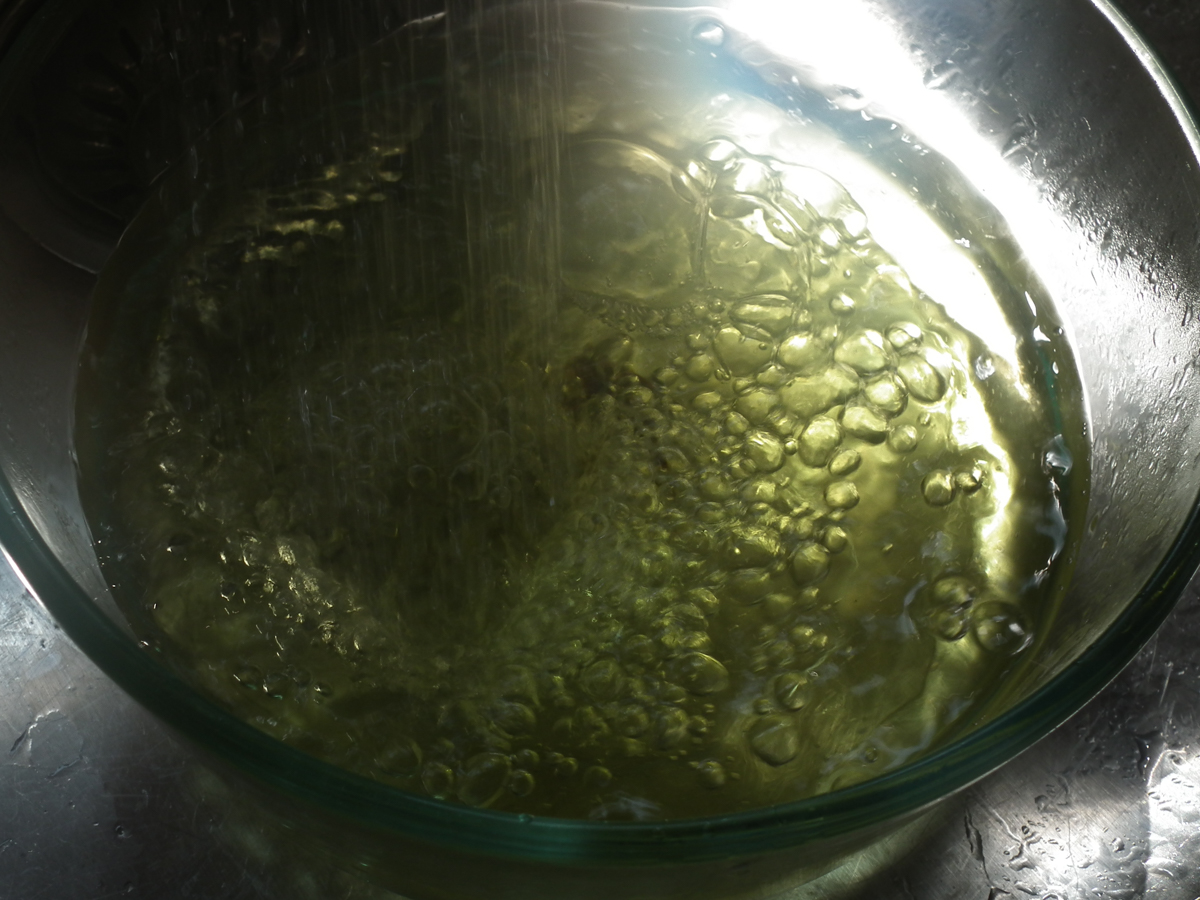
First, you want to put a small amount, about the size of a dime. of the liver of sulfur into the bottom of your glass dish. Add hot water to the dish and swirl it around to mix up the solution.
Note: I really should have used slightly less water here — I was trying to get a photo of it mixing and got distracted and left the water running too long!
Step 2:
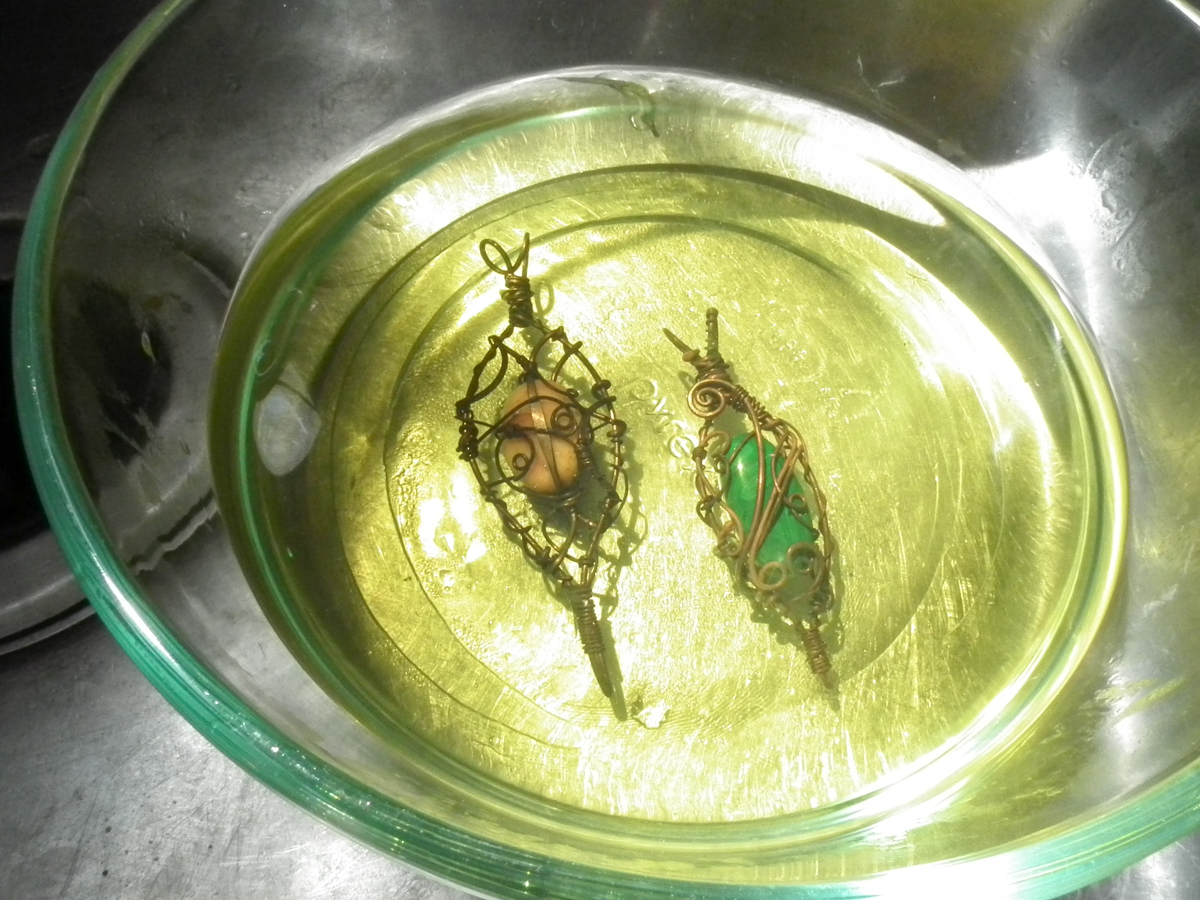
Dump your copper or fine silver piece into the mixture and let it sit. The metal will slowly darken (more quickly if the mixture has a heavier solution) until it’s eventually pure black. While the reaction is happening, prepare a baking soda solution in your plastic dish (a good amount of soda vs. enough water to cover your pieces).
 Step 3:
Fish the pieces out of your liver of sulfur solution (do NOT put your hands in there unless you like them black!) using a dedicated utensil and dump them into the baking soda solution to neutralize the chemical reaction that is causing the black finish to appear.
Rinse off your jewelry in cool fresh water.
Dump the baking soda into the liver of sulfur and mix it to neutralize the whole solution; it will then be safe to dump down the drain. I will sometimes send more baking soda down after it, as well.
Step 4:
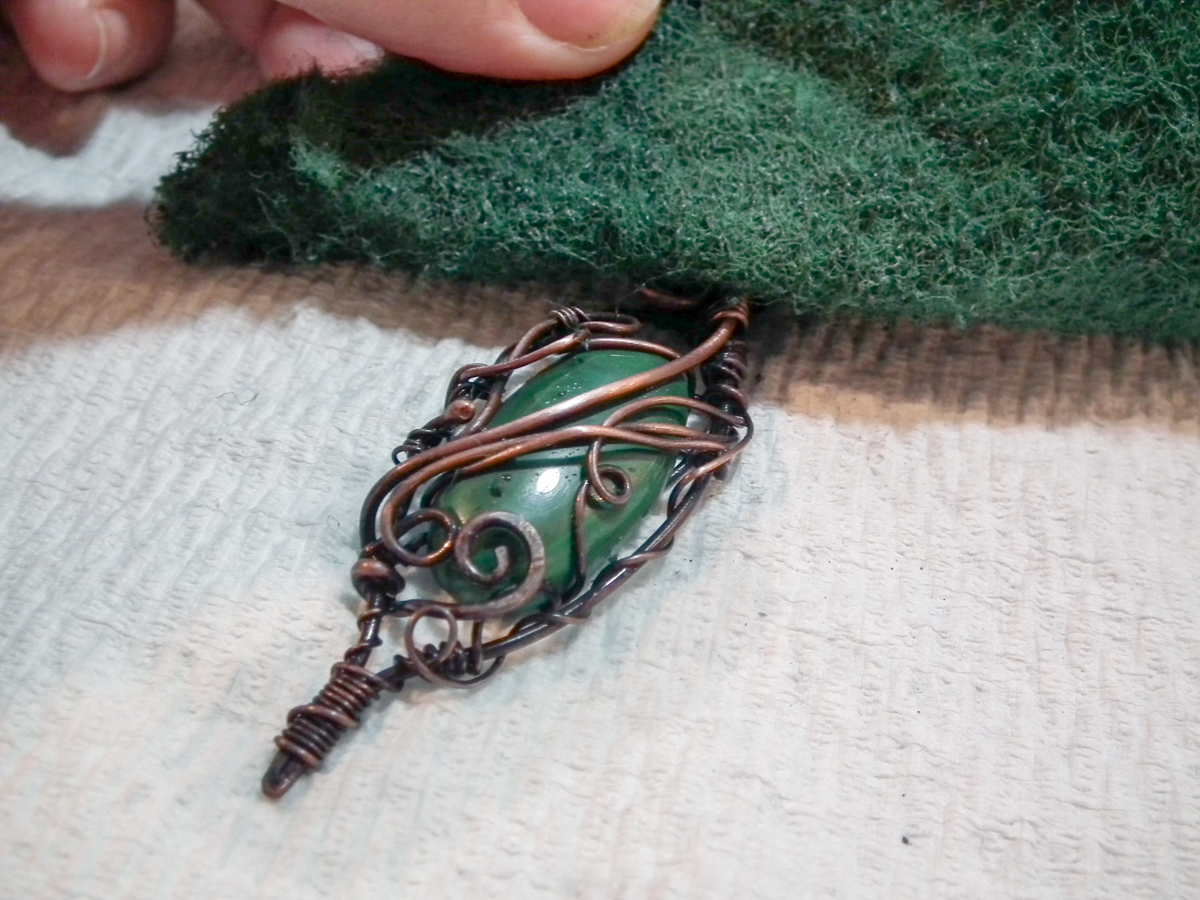
So, your jewelry is all black. Now what? Well, you basically want to buff the black back off the high points of the wire, leaving it dark in the crevices. You have two options: elbow grease or technology!
Option 1: Elbow grease
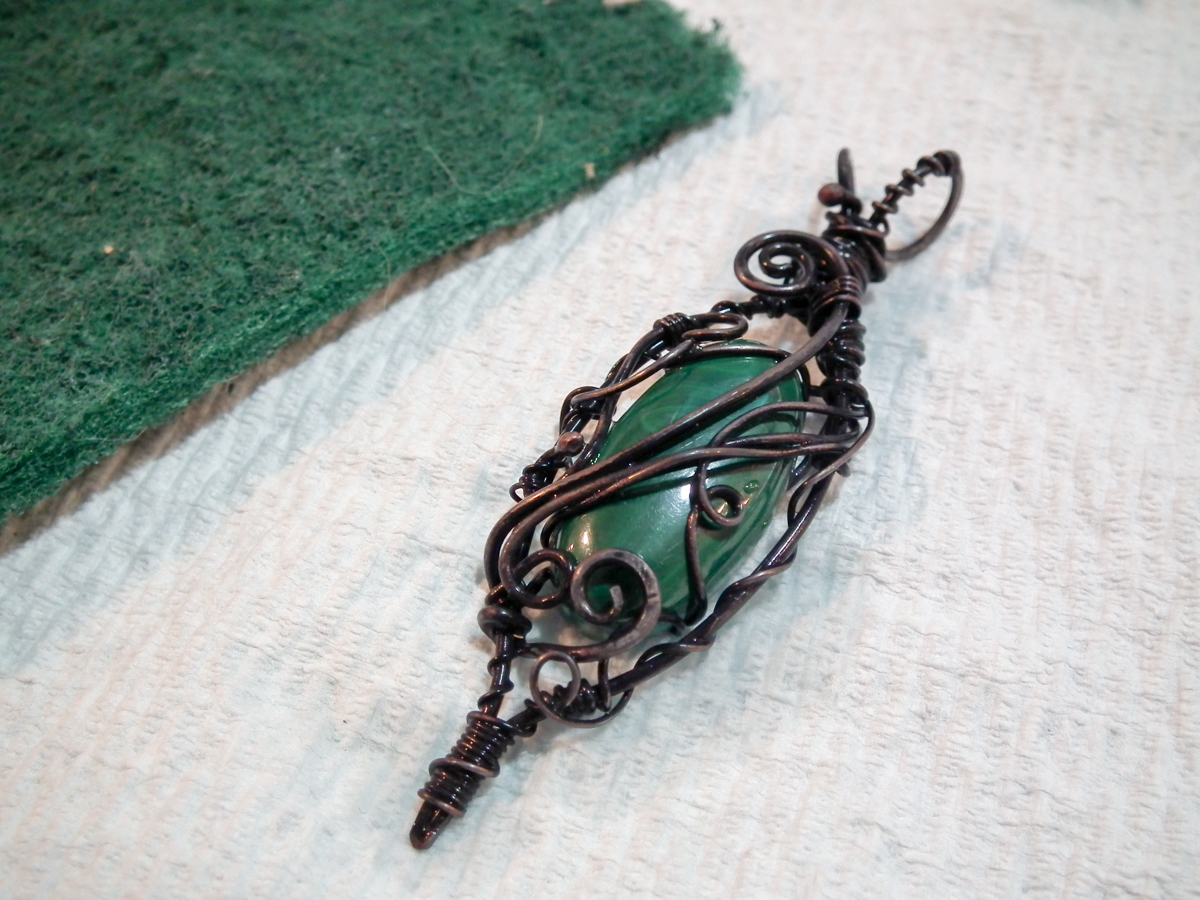
Use a green kitchen scrubbie to gently buff or sand the black off the high points of the blackened piece. This is dirty work — wear gloves if you’re worried about your manicure! The benefit of this method is complete control over where you remove the black and what you leave behind.
The problem with this, aside from it being filthy, is that it can be hard on the hands – especially if you have a lot to do!
Option 2: Technology
So, I came up with another option. I have a Lortone tumbler with a couple of pounds of steel shot in there. I wondered one day what would happen if I cut up the green scrubbie and shoved it in with the blackened jewelry and a drop of Dawn dish detergent?
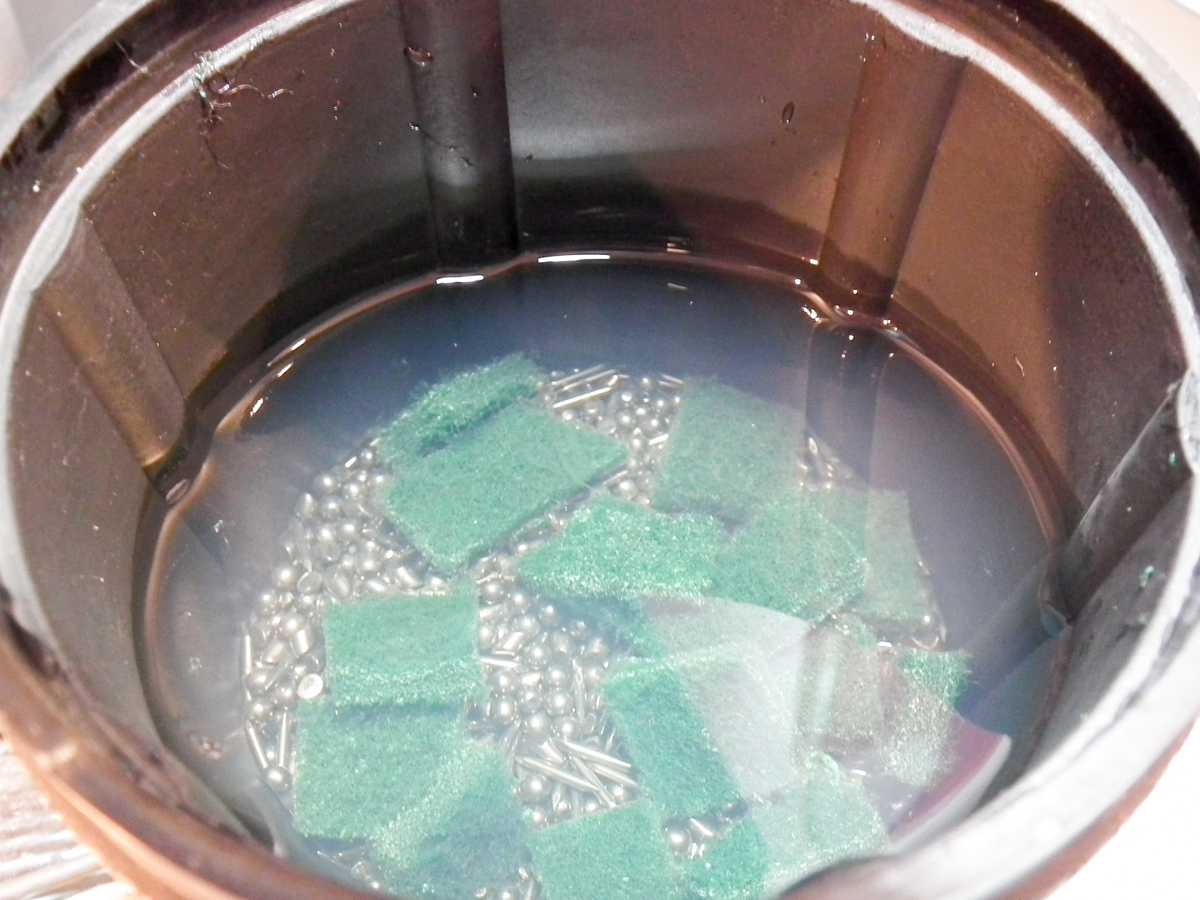
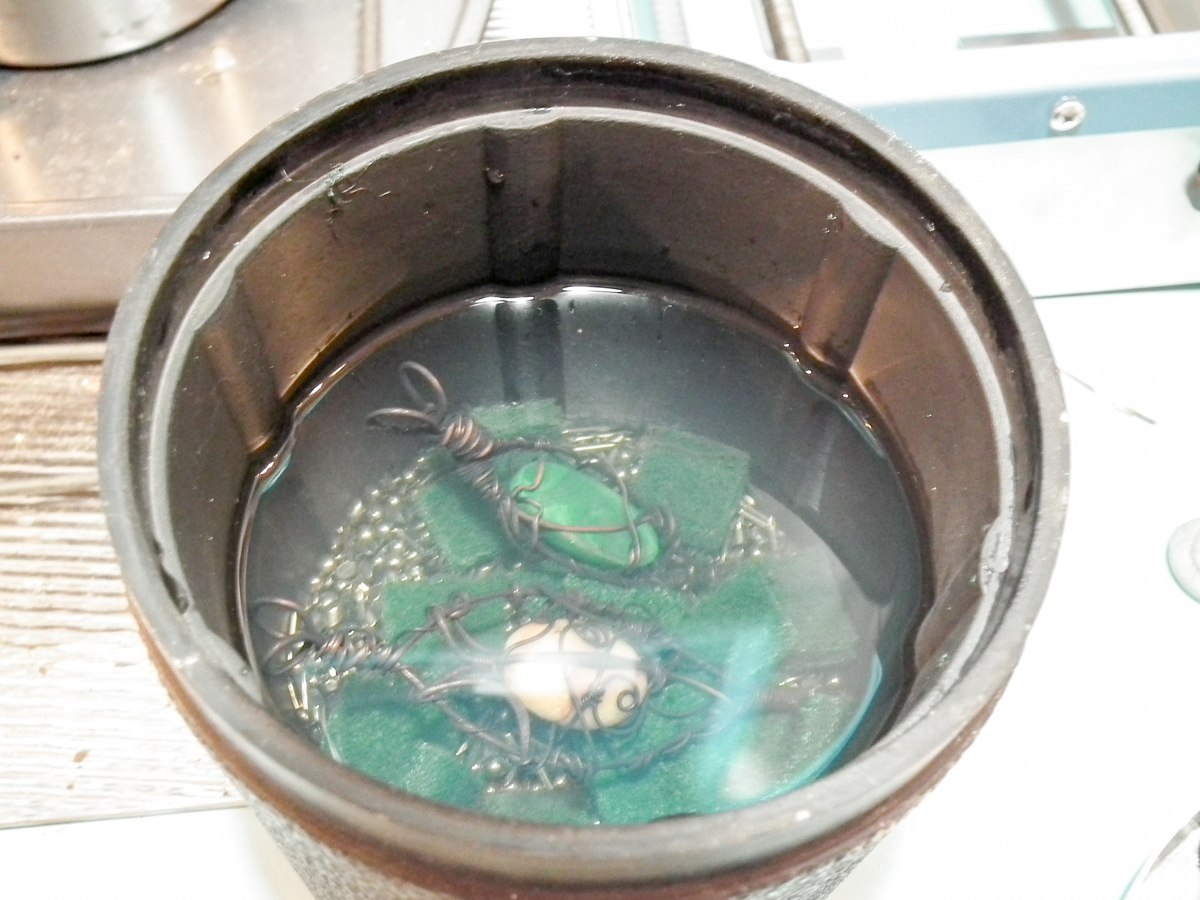
And it turns out, it does a BEAUTIFUL job. The benefit here is that the piece absolutely GLOWS when it comes out of the tumbler — and it gets tumble-hardened in the process.
The downside is that you have less control over the results, and if you leave it too long, it will remove almost ALL of the patina. I wouldn’t leave it in much longer than an hour — check it after half an hour, just to gauge how it’s working.

Tumbler-polished vs hand-polished antique jewelry
Whatever method you choose to polish, antiquing jewelry is a clever, simple way to add sophistication and instant class to any piece you make.
What makes online Craftsy classes great?

Learn for life! With lifetime access to your classes, you can watch lessons at your preferred pace and easily revisit your favorite concepts with just a click.

Kick up your feet! Enjoy classes anytime from the convenience of your home or even on-the-go with our mobile apps.

Get personalized guidance! Ask your fellow students questions to receive all the answers and feedback you need to succeed.

Love it! There’s no risk in trying when it’s free.
Share tips, start a discussion or ask one of our experts or other students a question.
No Responses to “How to Make Antique Jewelry in 4 Easy Steps”