
There are several basic techniques for blending with Copic markers. I recently referenced one-color blending in my first Copic marker tutorial. Today I will demonstrate tip-to-tip blending, feathering, palette transfer and on-paper blending.
Techniques for blending with Copic markers
Tip-to-tip blending
Tip-to-tip blending is used when a more subtle effect is desired, i.e. flower petals or cheeks. By touching a light marker tip to a dark marker tip, ink is transferred to the lighter marker. When applied to paper, the darker ink is transferred to the paper, followed by the lighter ink for a blend of the two colors.
Palette transfer
Palette transfer is similar to tip-to-tip but uses a light marker to pick up darker ink from a palette, acrylic block or acetate. The resulting blend can be a bit more dramatic than that achieved with tip-to-tip.
Feathering
Feathering is used to blend two different colors together as opposed to shades of one color, i.e. pink and blue. One color is flicked up, for example, while the second color is flicked down, resulting in the colors blending in the center. This technique takes some practice but once mastered, it can produce beautiful results. Feathering can be used in landscapes, on butterflies or flower petals, just to name a few examples.
On-paper blending
The most common blending technique is on-paper blending. A light, medium and dark ink from the same blending group (i.e. R01, R02, R05) are used to create highlights and shading. Each lighter shade is used to blend the edges of the darker shade.
How to blend Copic markers
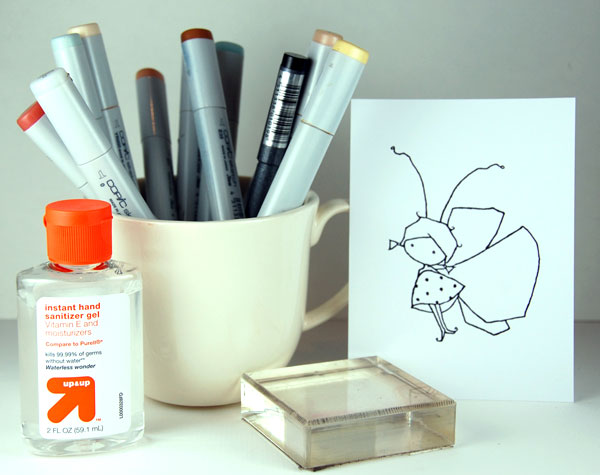
Supplies you’ll need:
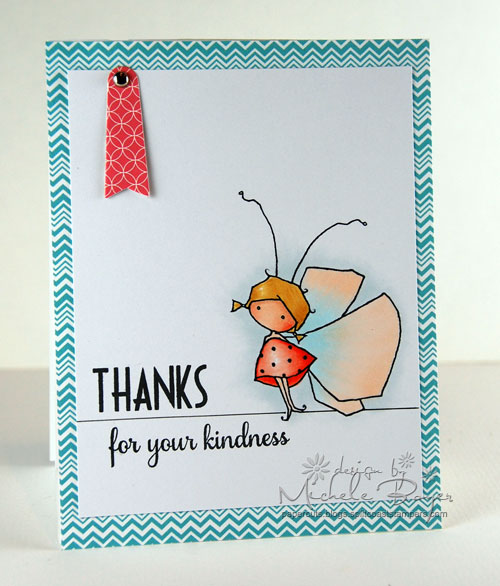
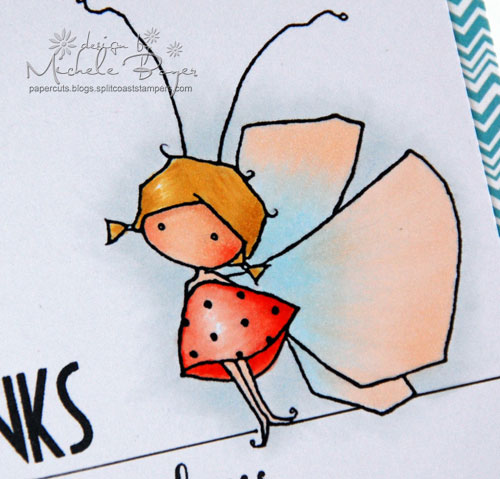
- Image stamped or printed onto Copic compatible paper (I used Bitsy Bug Dot digital image by A Day for Daisies printed on X-Press It Blending Card)
- Copic markers (I used BG0000, BG70, E00, E11, E35, R01, R02, R05, Y21, YR000)
- Copic 0.3 black Multi-liner
- Copic Colorless Blender Pen
- Acrylic block
- Hand sanitizer gel/paper towel

Step 1:
Using smooth circular motions, base color face with E00.
Step 2:
Add thin line of E11 around hair line. Apply slightly more ink to right side.
Step 3:
Immediately blend edges using E00 and small circular motions.
Step 4: Tip-to-tip blending
Touch tip of E00 to tip of R02 to transfer color. Place marker tip at edge of cheek and flick in toward face to create cheek color. Repeat until desired amount of cheek color has been applied.
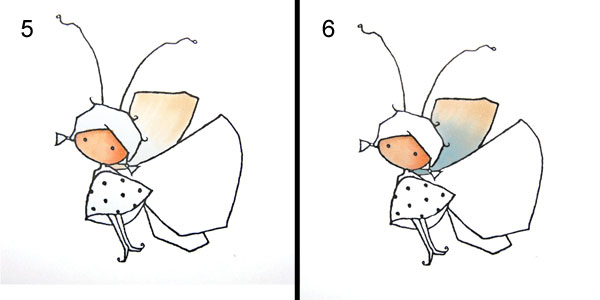
Step 5: Feather blending
Using YR000, flick color from outer edges of wings in toward body, following shape of wings. Coverage should extend about three-fourths of the length of the wings.
Step 6:
Using BG0000, flick color from body toward end of wing, overlapping previously laid color. The two inks should overlap in the center.
Step 7:
Repeat process for remaining wings, adding inks until smooth blend is achieved.
Step 8:
Using Y21, color hair, moving marker in the direction of the hair flow. I left a few white areas as highlights.
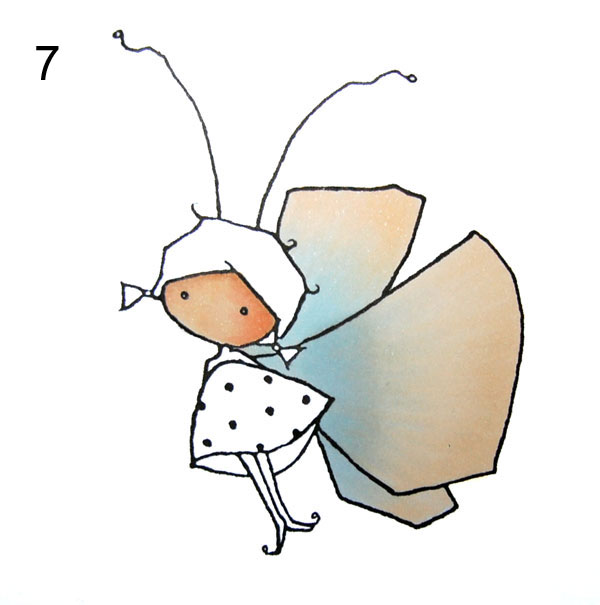
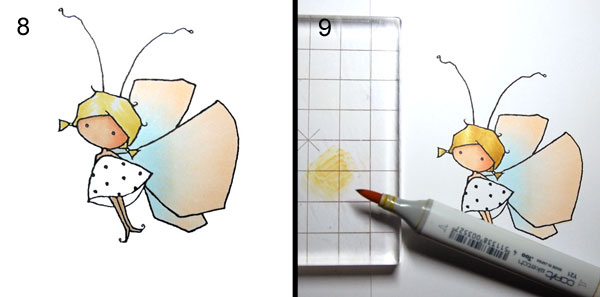
Step 9: Palette Transferring
Scribble E35 onto acrylic block, piece of acetate or palette. Pick up the darker color from acrylic block with Y21 marker and add shadow to hair. Do not over-blend or E35 will be lost. To clean acrylic block, add a drop of hand sanitizer and wipe clean with a paper towel.
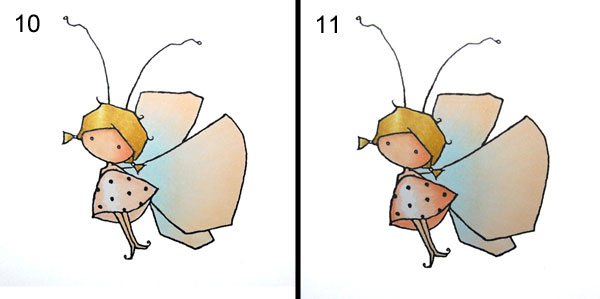
Step 10: Paper blending
Apply base dress color using R01. I left a white area in the center as a highlight.
Step 11:
Begin to build shadow using R02.
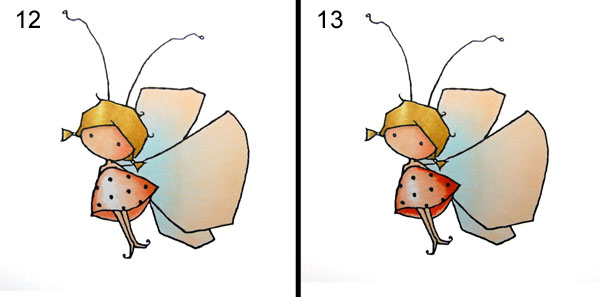
Step 12:
Use R01 to blend edges where R01 and R02 meet.
Step 13:
Use R05 to add darkest shadow.
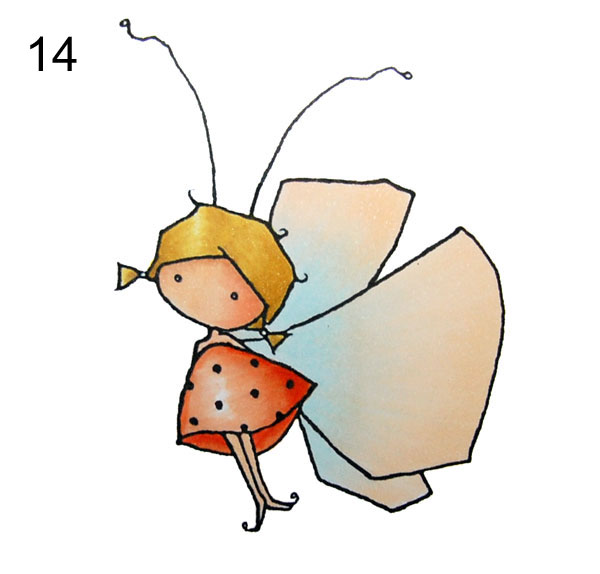
Step 14:
Use R02 to blend R05 edges. If needed, once again use R01 to blend R02 edges.
Step 15:
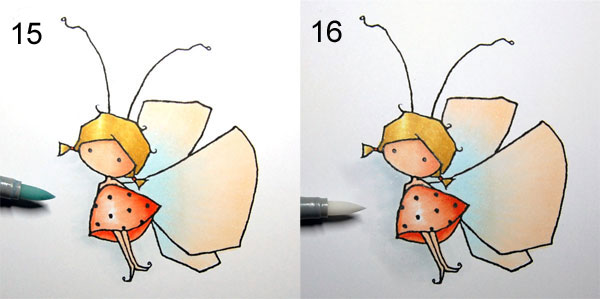
Using BG70, flick from image out to create background shadow.
Step 16:
Using Colorless Blender and small circular motions, immediately blend outer edges of BG70. Use Multi-liner to darken eyes.
Ready to learn more?
Get the most from your stamps and create colorful handmade cards with the online class Vibrant Stamping: Creative Color Techniques. Sign up today to learn fresh techniques, get professional tips and enjoy an entire lesson on coloring with Copic markers!
What makes online Craftsy classes great?

Learn for life! With lifetime access to your classes, you can watch lessons at your preferred pace and easily revisit your favorite concepts with just a click.

Kick up your feet! Enjoy classes anytime from the convenience of your home or even on-the-go with our mobile apps.

Get personalized guidance! Ask your instructor questions to receive all the answers and feedback you need to succeed.

Love it! There’s no risk in trying with our 100% money back guarantee.
Share tips, start a discussion or ask one of our experts or other students a question.
No Responses to “How to Blend Copic Markers”