
Creating your own custom stamps is easy to do with just a few simple printmaking tools! Follow along with this tutorial and make your paper craft projects pretty with a custom carved rubber stamp!
How to carve a stamp
If you’ve ever tried block or linoleum printing before, you already have the proper tools. I’m using a piece of rubber specially-made for printmaking and a hand-held carving tool that has different screw-in tips. In addition, I’ve got a brayer and water-based ink to print with later.
Step 1: Design the stamp
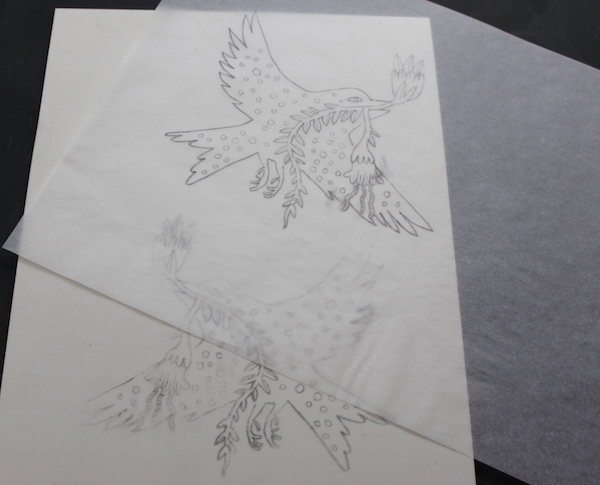
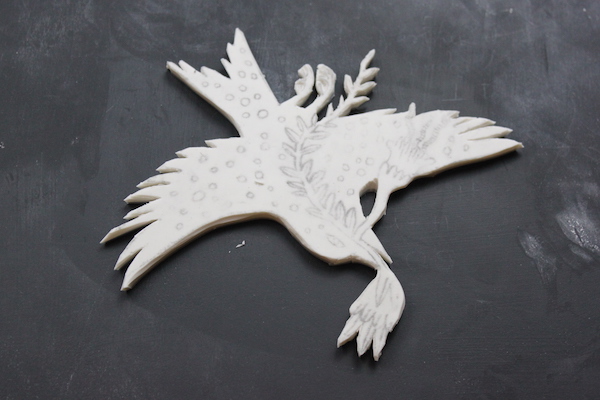
To make a stamp, you’ll first need to design it. Anything goes! Perhaps you have a “signature” doodle, or you run a business and want to recreate its logo to stamp on packages. Maybe, like me, you just really like birds and flowers. Take some time to perfect your image. Keep in mind the size of the envelope you want to print on. You’ll want to make sure there’s enough room to address the package with your design. Once you’ve got a version you’re happy with, draw it on tracing paper using graphite (the softer/darker the pencil, the better).
Step 2: Transfer the image onto the rubber block

The great thing about tracing paper is that here, it acts like a carbon paper. Flip your image over and place it on top of the rubber. Make sure your artwork doesn’t exceed the edges of the rubber. Now, rub the image on to the surface, pressing gently. It should transfer this way. If not, take your pencil and trace over the lines to ensure they are on the rubber. They might look faint, but that’s okay. You need them just dark enough to carve.
Important: When you print your stamp, it’ll print opposite to how you carved it. By us turning the paper over and transferring it, we will carve in the correct direction.
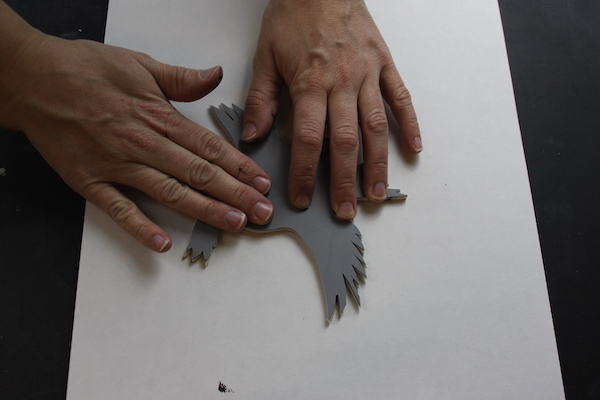
Step 3: Cut out the outline of the stamp
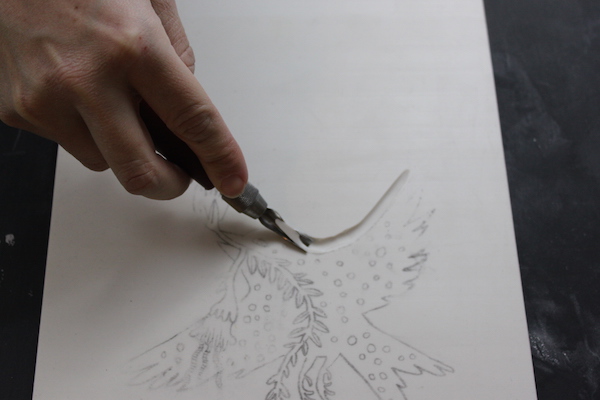
Before starting on the fine details, cut out the entire shape of your design. I did this using a combination of carving and an X-ACTO knife. First, I used the wide tip to carefully trace around my image. Then, I used my knife to cut it away the excess stamp.
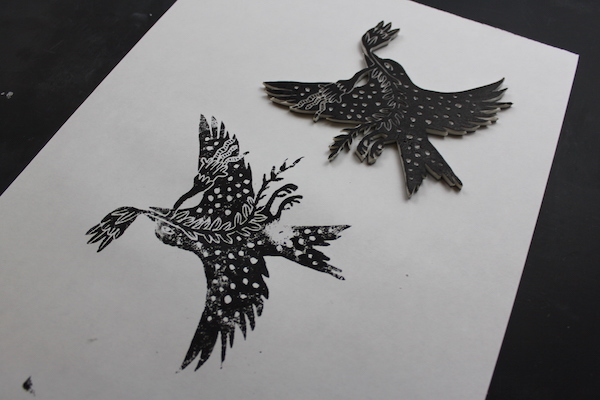
Step 4: Carve out the fine details
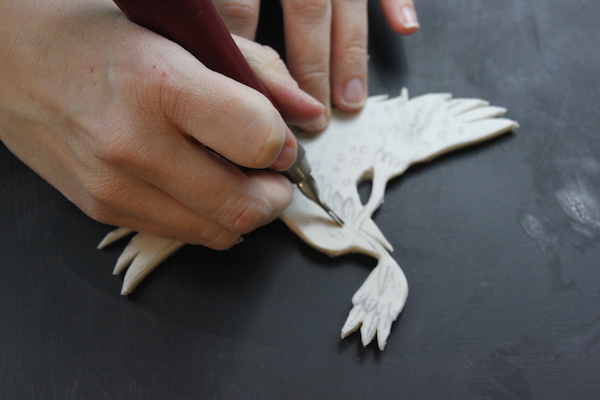
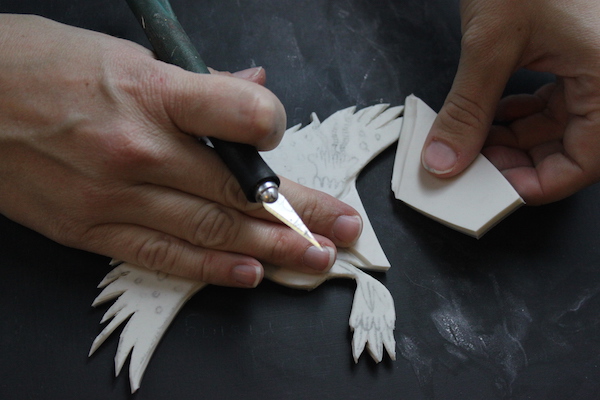
Here’s the fun (and most tedious) part of the entire process. With your tools, start to carve out your design. I have three types of tips for this purpose, and they’re basically small, medium and large sizes. The smallest tip will produce the finest details. Since I had a ton of small lines, that’s what I used.
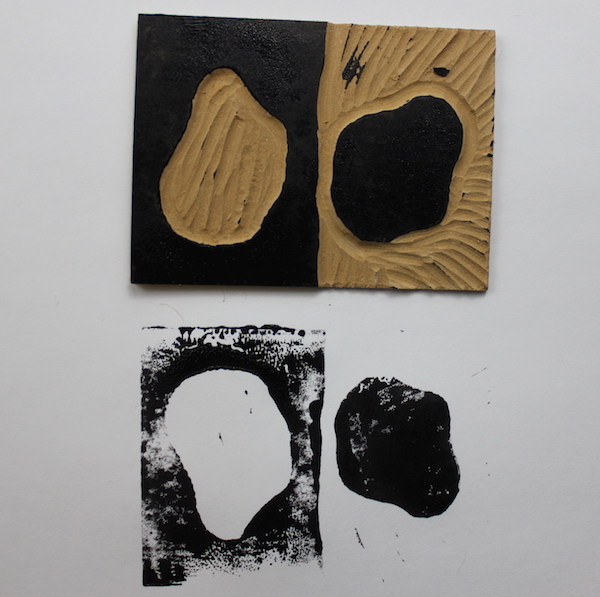
Remember: If you carve a line out, no ink will print — it will be the color of the paper. If you don’t carve it, the ink will print on the paper. Here’s an example:
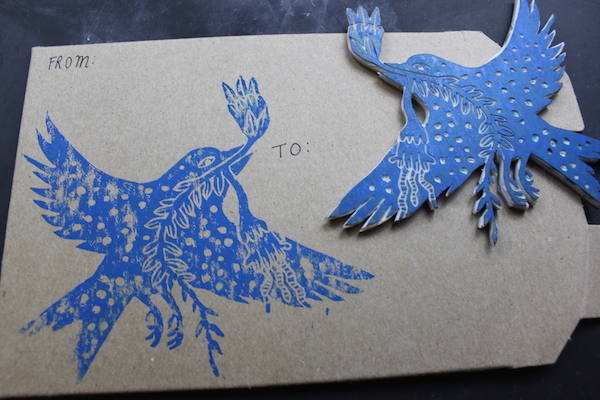
Step 5: Ink your stamp and practice
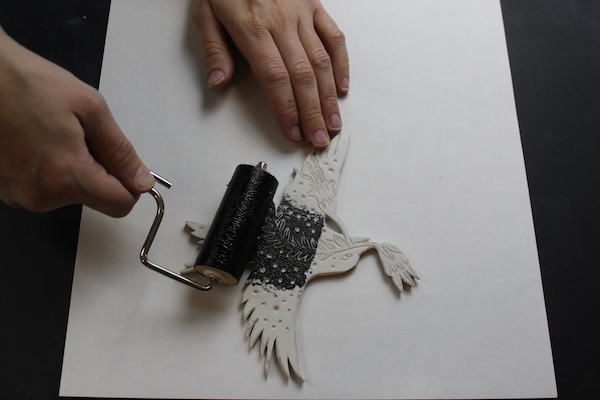
Once you’re done with carving, it’s time to ink your stamp and try it out. Don’t grab your envelopes yet, though. We’ll want to test out how the print looks before we adorn any mail. Using your brayer and ink, apply pigment to your stamp. Flip it over and press it onto your paper. Be firm but gentle – if you press too hard, some of the ink might smear into the crevasses.
Now, remove your stamp and assess the print. Does it look how you want it? Are there any areas where the ink mistakenly printed? You might have to recarve some lines or use less ink. Practice printing until you feel confident about your print.

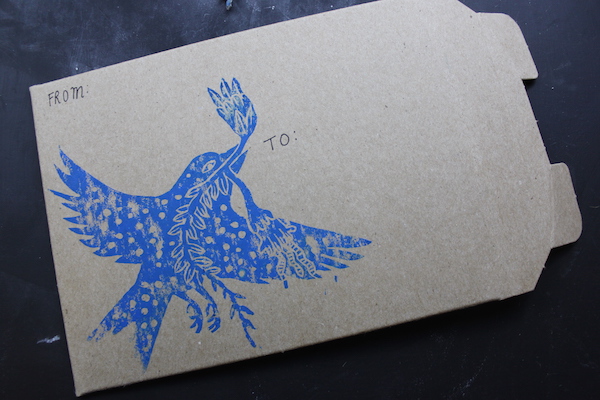
Step 6: It’s showtime!

Once you’re happy with how your stamp is printing, it’s now time to adorn your envelope. Ink it as you normally would and apply. Remove it, address it, and send it to the lucky recipient!
Share tips, start a discussion or ask one of our experts or other students a question.
No Responses to “How to Carve a Stamp for One-of-a-Kind Paper Crafts”