
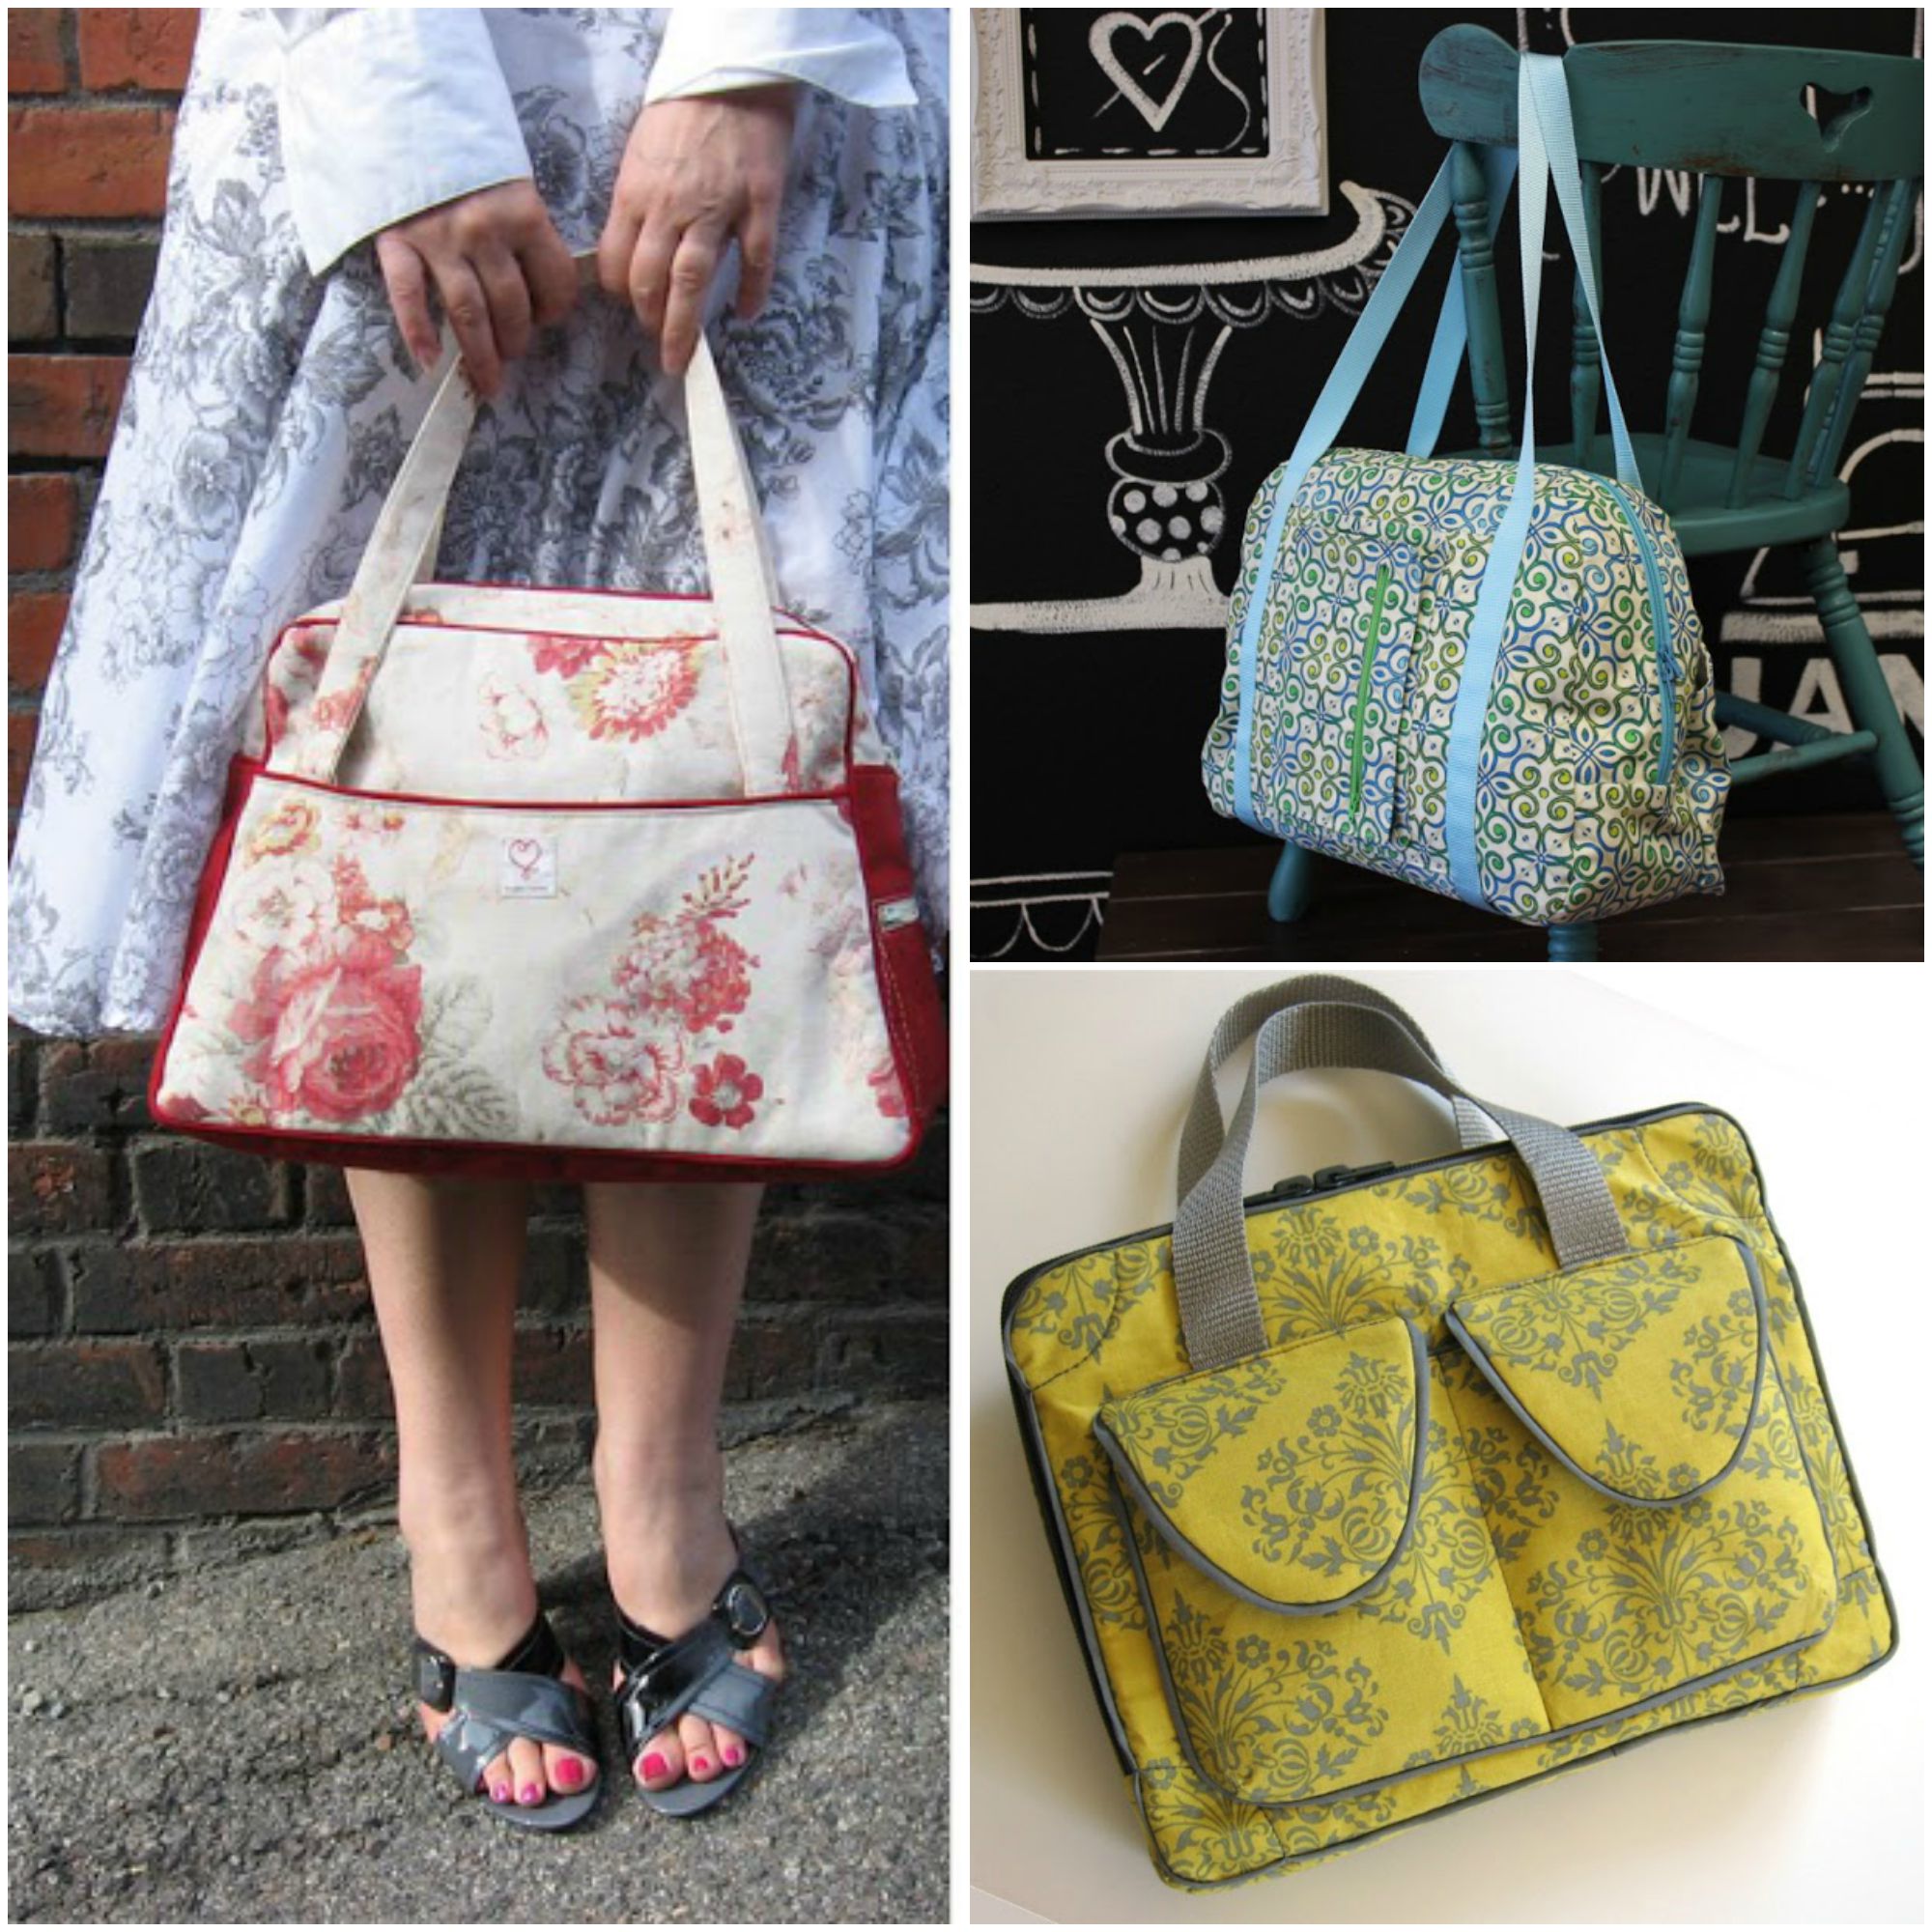
Bag designers give a lot of thought to the size and shape of their bags based on their intended use and fabrication. There may be times when you would like to make a slight adjustment to a pattern to accommodate your special needs. This step-by-step tutorial will teach you how to change a pattern and make customized patterns for personal use, starting from patterns like the Departure Satchel or the iPad Case.
How to change the size of a bag pattern
**This tutorial may not be used to derive patterns for sale.
Before you get started, answer yourself these three questions:
- What are the finished dimensions of the pattern you have?
- What are the finished dimensions you want?
- What is the difference between these two?
In places where you are enlarging the bag, the difference will be a positive number. In places where you are reducing the bag, the difference will be a negative number.
If you are making a bag that does not have physical pattern pieces, you can do these next steps by sketching them out on paper. If it has pattern pieces, do these steps literally, physically with all of the pattern pieces.
Step 1:
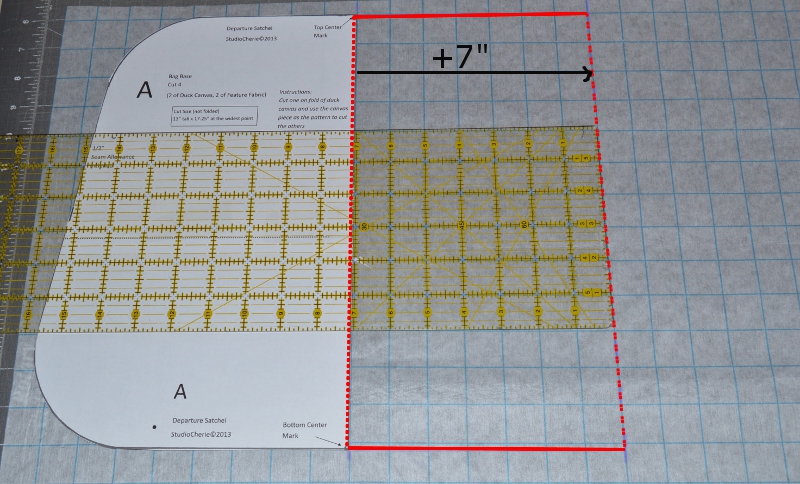
Start with half of an actual pattern piece laid out on pattern making material. I am using Pellon 810 Tru-grid. My pattern is made to cut on fold, so it is already cut in half. If you have a whole pattern piece, cut it in half to start. Line up the center of the original pattern on one of the lines of the Tru-grid and mark that line.
Step 2:
Draw lines as shown to extend the pattern width by the desired amount—the width difference number in your chart. In my example, I want to add 7” to the width of my departure satchel to turn it into a departure duffle.
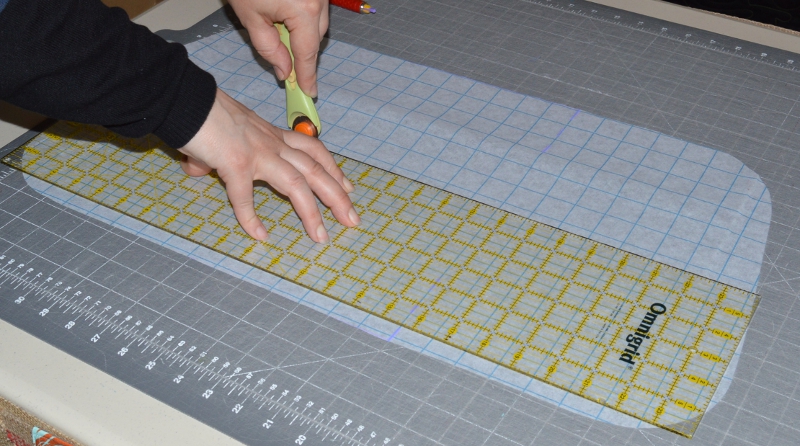
Step 3:
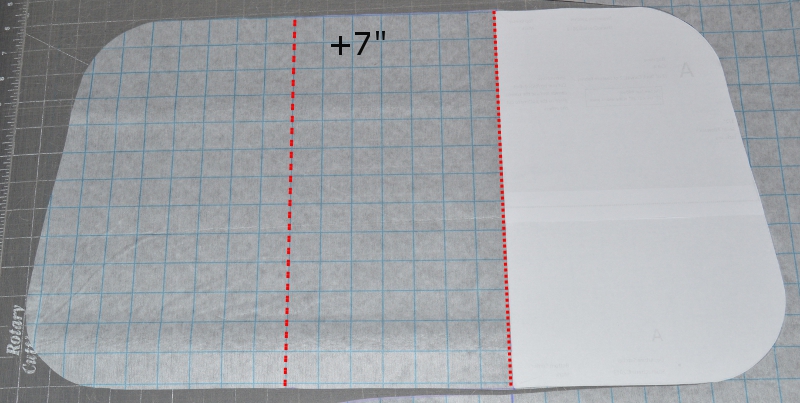
Cut out the grid material around the left side of the pattern piece and flip the pattern piece over to the right side. Line it up on the line you just drew as shown and finish cutting it out. If I were reducing the width of the bag, I would draw a line to the left of the original center line at a distance equal to my negative width difference and line up the right side with it.
Step 4:
Adjust the height in the same way you adjusted the width. Use your new pattern piece you just made with the adjusted width as your starting point.
Step 4(a):
Cut it in half horizontally and mark the top and bottom centers of each piece.
Step 4(b):
Place the top and bottom pieces on the grid material. Line up the center marks on one of the grid lines to keep it aligned.
Step 4(c):
Add or reduce the size as needed, using the height number in your chart. In my example, I am adding 2” to the height.
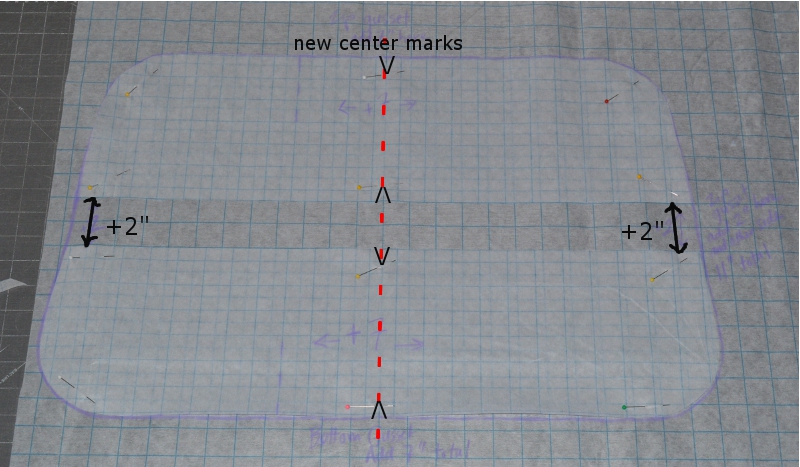
Step 4(d):
Write the increase or decrease measurements on each of the four sides of the bag on your new pattern.
Step 5:
Step 5(a):
If you have pockets that cover the entire width of the bag, they will need to be split and adjusted the same difference measurement as the front and back of the bag.
Step 5(b):
If you have two individual pockets on the bag, you may want to add or subtract half of the increase or decrease to each pocket.
Step 5(c):
Adjust the height of the pockets by splitting them horizontally.
Step 5(d):
Flaps over pockets will also need to be adjusted in width in the same way the pockets were adjusted. You may choose to keep the pocket flaps the same height, if they still look good.
I have added significantly to the size of my bag, so I will try out some different pocket ideas rather than adjusting the pockets from the departure satchel.
Step 6:
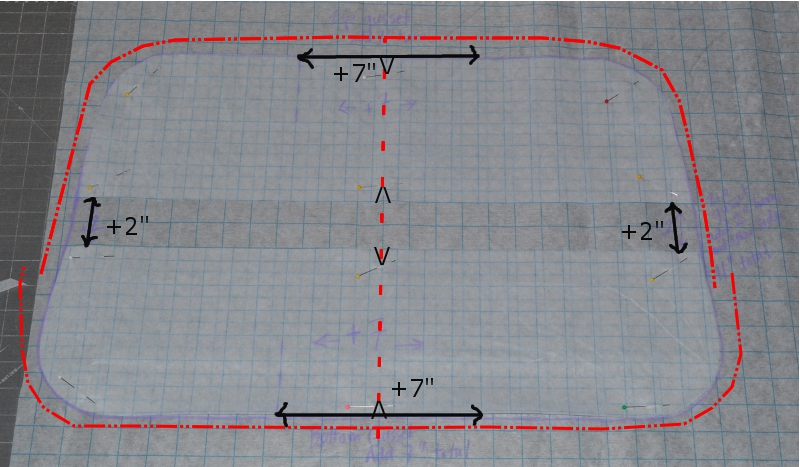
The gusset is the part of the bag that adds the depth. In bags like the iPad case, the departure satchel, and back packs, there is a top gusset that runs down the sides. It is also the zipper gusset. Then there is a second gusset, which may just be called the bottom on your pattern.
Whatever you add or subtract to the front and back of the bag, also needs to happen to the gusset part that connects to them. In my example, I have to add 11” total to the length of the zipper gusset, that is 2+7+2. I will add 7” to the length of the bottom. The illustration shows how that works. The zipper gusset is represented by the top dashed line and the bottom is represented by the bottom dashed line.
Step 7:
Add or subtract the desired depth difference shown on the chart to or from both the zipper and the bottom gusset pieces. If they have a shape, you will split them down the center, add or subtract and find a new center line. If they are rectangular strips running on one side of the zipper, give the full adjustment to that one side. If you have 2 rectangles, one on each side of the zipper, you will add or subtract 1/2 of the adjustment to each of them.
Step 8:
If your bag is larger or deeper, you will want to increase the strap length as well. Look at where the strap is sewn to the bag and how the handles curve at the top much the same way we looked at the gusset. If the strap passes over a part that was changed from the original, add or subtract from the strap length to equal the change that it passes over.
I would love to see the bags you make using your custom sizing — please share photos of your work in the Craftsy Sewing Projects gallery!
Warm regards,
Cherie
About the author
 Cherie Killilea is a talented pattern designer and instructor of the popular online classes Custom-Fit Slipcovers: Chairs and Custom-Fit Slipcovers: The Wingback Chair. Join one of her classes today to enjoy hours of up-close instruction on how to give your beloved furniture a fresh new look.
Share tips, start a discussion or ask one of our experts or other students a question.
No Responses to “An Easy Method for Adjusting Bag Patterns to Fit Your Needs”