
Mortising by hand may seem difficult or impractical but with the right tools and technique, accurate work can be accomplished surprisingly efficiently. In this post I’ll show you step by step how to chop a basic blind mortise such as the type used to join a rail to a leg in making a table.
Layout
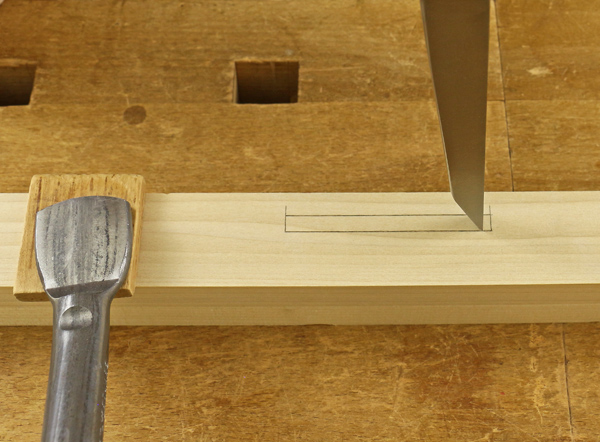
First, define the ends of the mortise by squaring lines across the leg with a marking knife. Then work with the mortise gauge to mark the width of the mortise. In an earlier post, I showed how to set the pins to the width of the mortise chisel. Now the fence must be set to locate the inset of the mortise from the edge of the leg.
In this example, I want the 1/4″-width tenon to be centered on a 3/4″ rail to produce a 1/4″ shoulder depth on each side. I also want the rail to be inset 1/8″ from the face of the leg. Because of this, I have set the fence 3/8″ from the nearest pin. To ensure accuracy, it is best to secure the wood and use two hands to push the gauge as shown below. Run a 0.5 mm mechanical pencil in the gauged lines to make them much more visible.

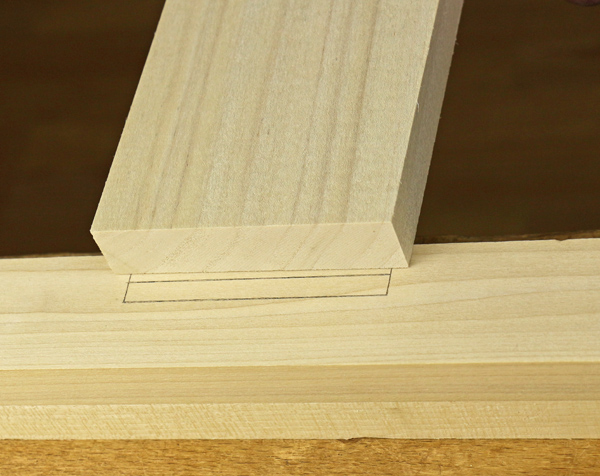
The photo below shows that the length of the mortise is shorter than the width of the rail — by 3/16″ at each end in this case to allow for small shoulders at the top and bottom of the rail.
A variation
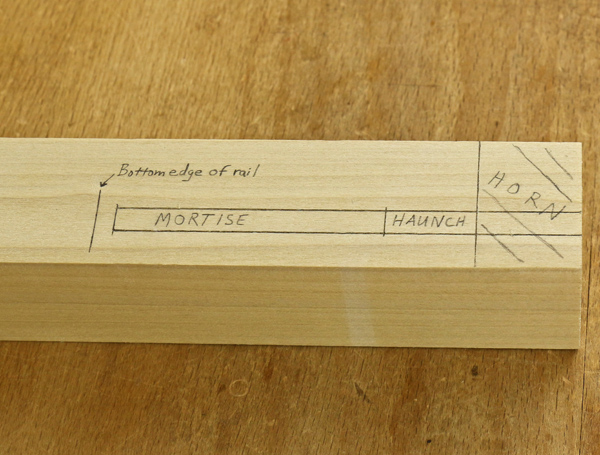
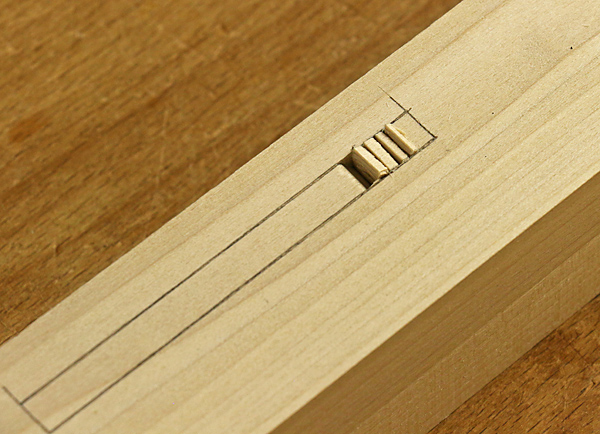
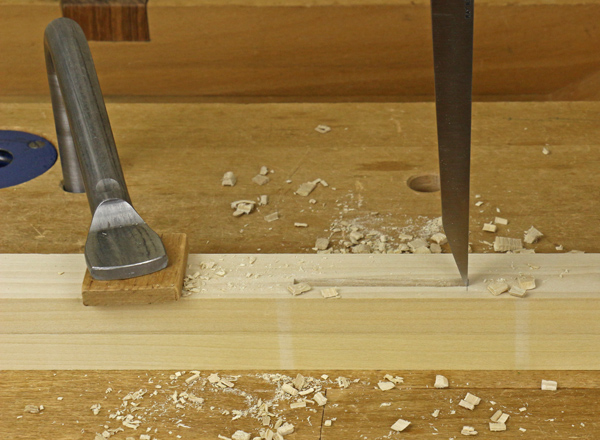
Before we start chopping, let’s look a different, slightly more complex mortise layout for a rail that will be flush with the top of the leg, shown on the right in the photo below. The length of the full-depth mortise allows for a small shoulder at the bottom of the rail. The haunch area will be mortised to only 1/4″ depth.
The horn is an extra 1″ length that serves the temporary function of bracing the wood against splitting while the mortise is being chopped. Afterward it is sawn off at the cross-grain line that extends the full width of the leg, which defines the top of the leg. The shallow haunch area retains wood at the top of the finished leg to prevent weakness that would by caused by a full-depth mortise extending to the top.
Chopping a basic mortise
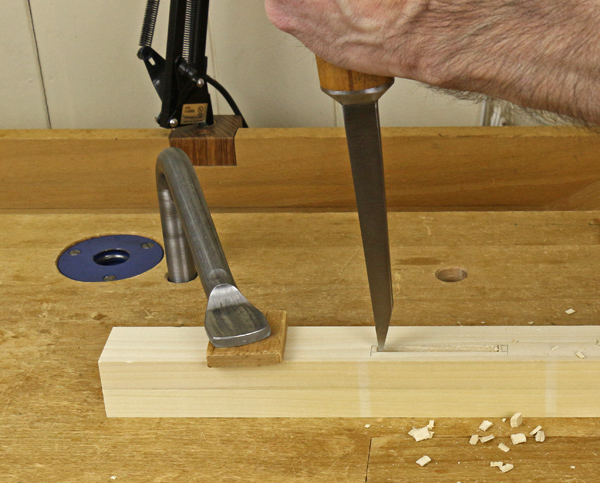
Secure the wood to the bench with a holdfast, clamp or bench dogs. Start by setting the chisel edge between the sidelines, about 1/8″ from the end line nearest to you, with the bevel facing away from you. Be sure to accurately plant the chisel each time in this first row of cuts and use both hands if necessary.
Stand in line with the length of the mortise, not at the side, so you can view the accurate side-to-side vertical orientation of the chisel blade as you strike with the mallet. Your handgrip on the shaped chisel handle and your eyesight will monitor the parallelism of the chisel with the mortise layout. Twisting the chisel will disturb the accuracy and consistency of the width of the mortise.
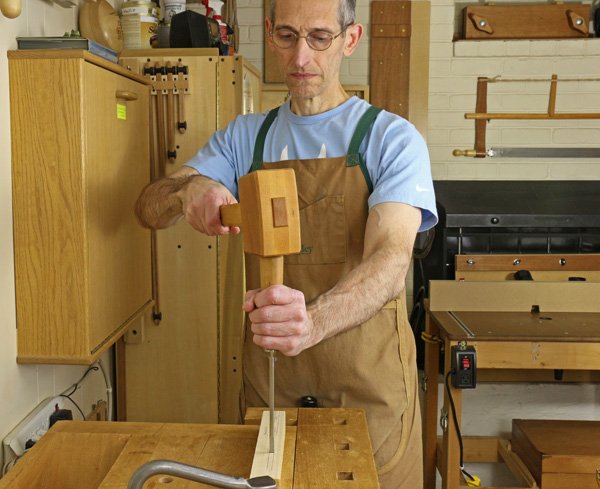
Strike the chisel squarely with a single firm blow of the mallet rather than multiple tentative taps. The chisel does not drive straight down into the wood. Rather, the bevel automatically causes its path to angle slightly backward away from the bevel, thus undercutting and collapsing the previously cut chips.
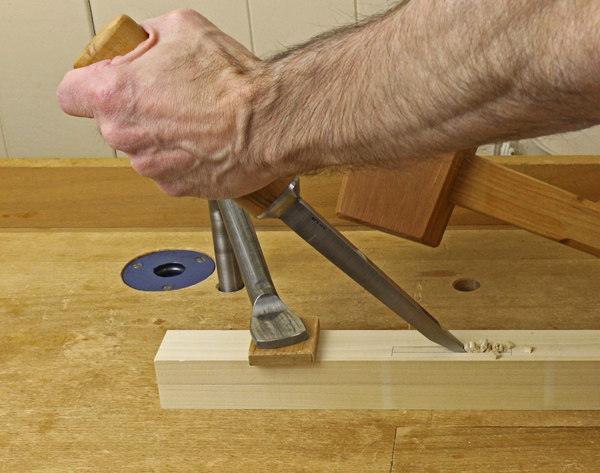
The photo below shows the progression after five chops. The chips are collapsing and being pushed up a bit after successive chops.
Now after each chop, start levering the chisel away from you, using only arm pressure, not striking, and using the intact wood in front of the bevel as a fulcrum. Advance along the length of the mortise in this manner — “chase the bevel” — until you reach about 1/8″ from the far end. You will find that the chisel will easily sink deeper as you progress.
The 1/8″ clearances at the start and end of the row of cuts prevent the ends of the mortise from being inadvertently damaged from the levering action of the chisel.
Now reverse the chisel so that the bevel faces you and continue the same chopping and levering as you advance along the length of the mortise. After the critical first row, the chisel placements are automatic since they are governed by the sidewalls you have already made.
As the chops become successively deeper in this second set, the total depth will naturally start to even out along the length of the mortise. Depending on the desired final depth, a third pass or more may be necessary, along with some ad lib clean up along the bottom using the chisel with the bevel up or down.
Keep in mind that the bottom of the mortise is not a gluing surface and so the final mortise depth generally needs to be only very approximately consistent, provided that the desired depth is at least reached throughout and there will be clearance at the end of the tenon.
The end is near
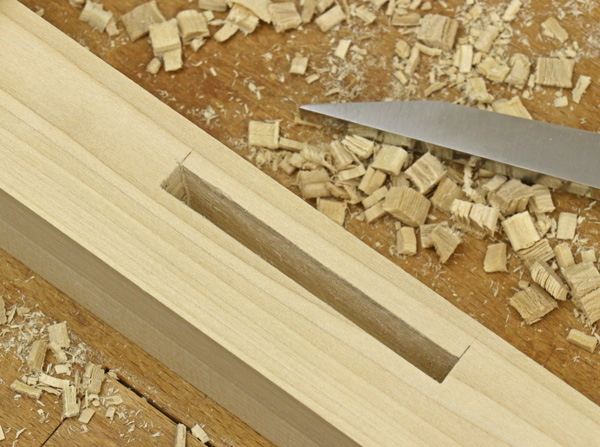
Cut the ends of the mortise by facing the bevel toward the middle and chopping successive slices until you meet the layout line. Make the final slice thin to prevent over cutting the line. The end wall should be vertical but a trace undercut is fine because it is not a significant gluing surface.
Woodworkers new to mortising by hand commonly wonder how the sidewalls of the mortise can be formed without being directly sliced by the cutting edge of a blade. Think of the mortise chisel as a giant rip tooth saw blade with only one tooth that runs true without wobble. Skillfully used in straight-grained wood, it will produce a true mortise with vertical walls of consistent quality, such as shown below. Paring the sidewalls is generally not necessary and often will diminish the accuracy of the mortise.
Practice. You can do this.
Learn techniques for working with chisels, handsaws, joints and more as you create three projects in Craftsy’s Woodworking Essentials: Benches and Boxes class.
Share tips, start a discussion or ask one of our experts or other students a question.
No Responses to “How to Chop a Mortise by Hand”