
Hand embroidery patterns are a great way to create imagery in floss. But what if you can’t find the exact pattern your looking for? Or you have a specific photograph you want to stitch? What steps can you take to convert a picture to an embroidery pattern?
 Photos via Leighlalovesyou
Here are tips to translate your images into embroidery patterns!
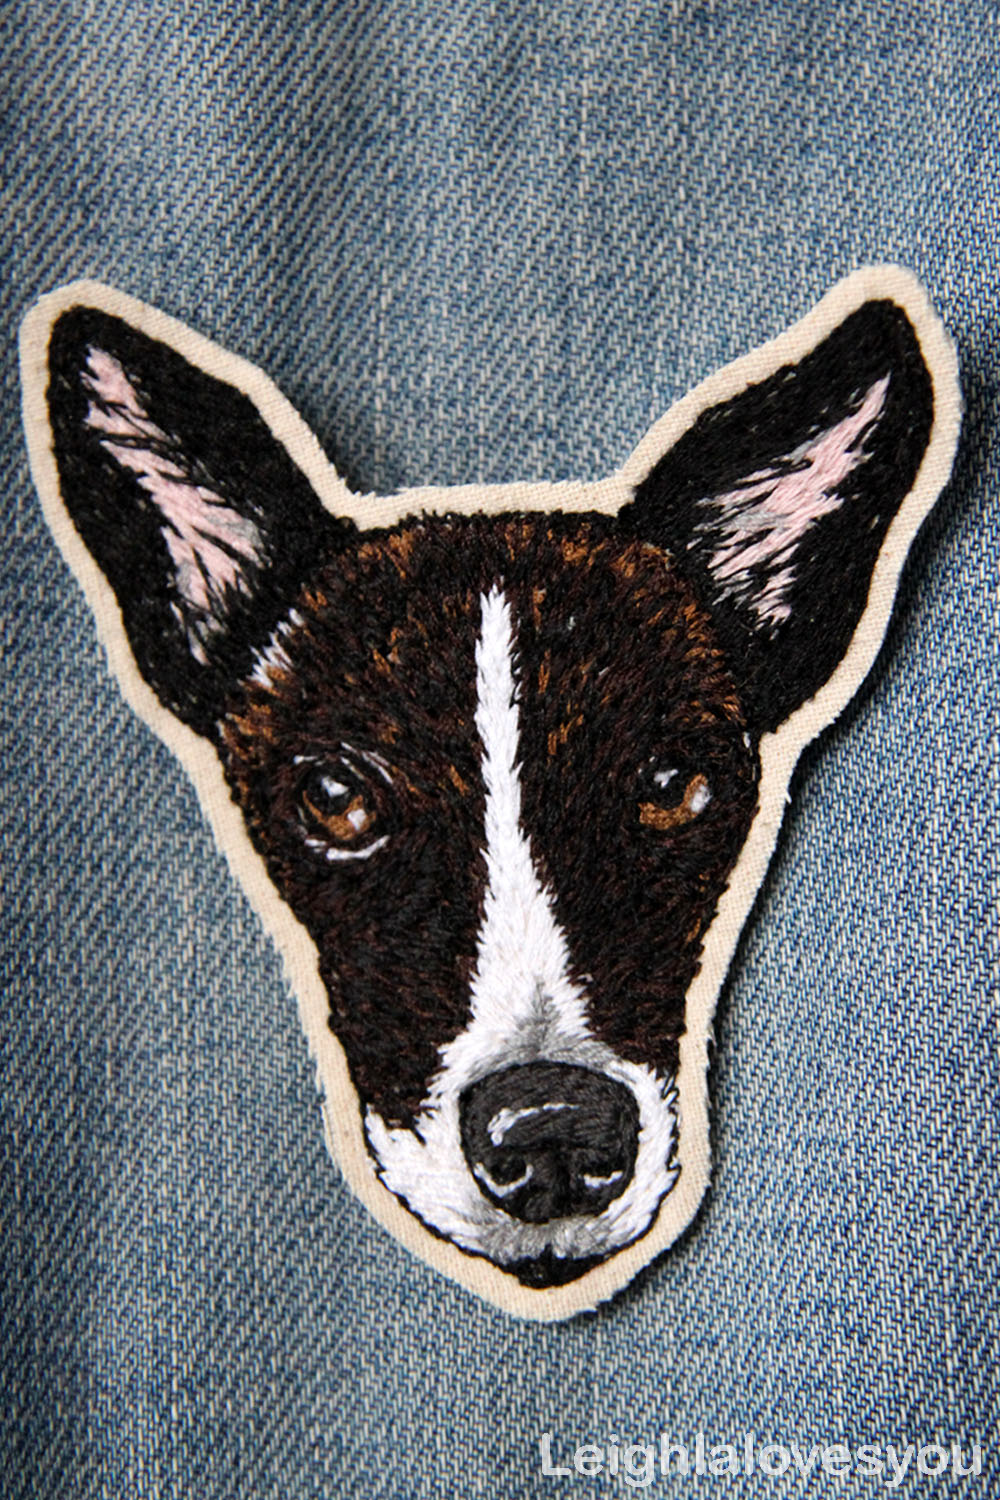
The pet portrait above will provide us with an image guide for creating an embroidery pattern. Although the stitching technique used for this piece were free-hand machine embroidery, the process and steps taken are the same with any hand stitching.
Step 1: Creating the outline
You have selected your image/photograph, and now you need to make it into a pattern- but how? Don’t worry if you’re not a sketch artist, here are a few steps to get you on track:
1. Tracing is not cheating: Don’t be afraid to use tracing paper to get an outlines just right.’
2. Don’t worry about detail: Get as much as you feel comfortable with. It doesn’t have to have 1,001 lines for it to look exact. By picking up the right elements you can make the image look effective but not overdone.
3. Remember the stitch: Don’t forget, you have to convert these pencil lines to embroidery thread, so consider thickness and closeness of lines and how this will be translated later on.
4. Use technology! There are tons of ways you can convert your image on your computer, rather than by hand. Websites or software like Adobe Photoshop can put your image through a filter to give it a simpler outline!
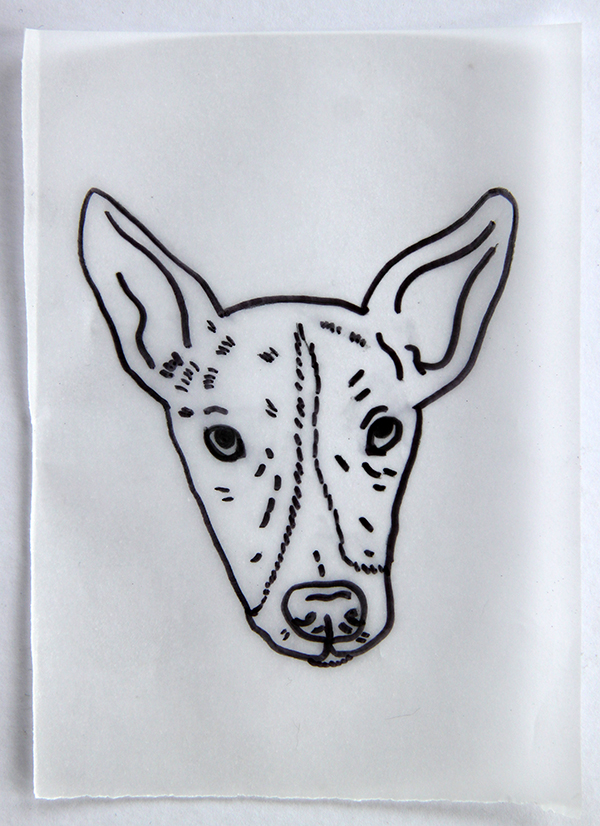 Outline pattern drawn onto paper.
Step 2: Transferring the image to fabric
Outline at the ready, but how do you put it onto fabric? Many of you will have experience using embroidery patterns, and will have your own tried and tested techniques. If you haven’t, there are many ways your image can make it’s way from paper to fabric, so here are a few ideas to get you going:
1. Using a light box can be very effective. However, you don’t need expensive equipment to get results- just use a window! Taping your outline onto the glass, and then your fabric on top means you can trace the image directly, either in pencil or water soluble fabric pen. Another method would be to use your computer screen as a light box, tracing direct from digital outline to fabric.
2. Carbon paper is probably the simplest method of transference. Just place the carbon paper between your paper outline and your fabric, then trace away!
3. Water soluble stabilizer is a great way to transfer an image onto darker fabrics. Trace your design onto the stabilizer and place on top of your fabric. Stitch through both the stabilizer and fabric layers, then soak the stabilizer away before you do your filling stitches. Wild Olive explains this process perfectly!
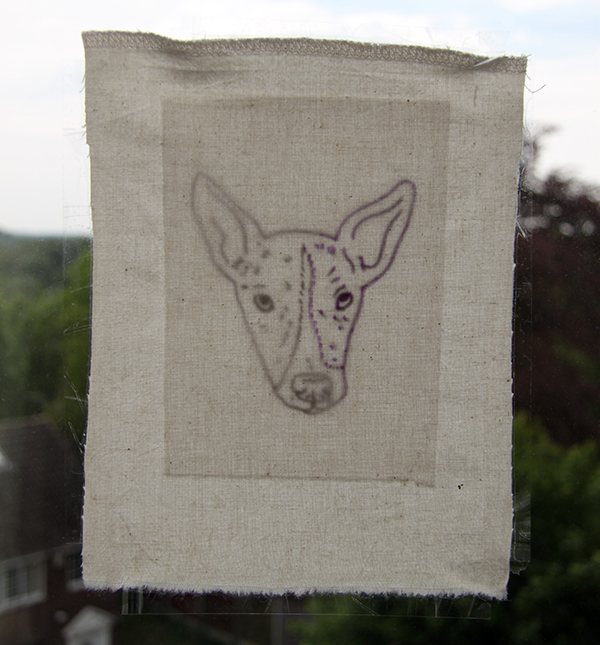 Tracing outline from paper to fabric using a window as a light box
Step 3: Stitching
If you’re not a seasoned stitcher, the next part could be a little scary. Don’t worry, we’ve got it covered:
1. Think about your outline: Will it match the interior colors or be a bold contrasting color (i.e. black outline with colors inside). What type of stitch would work best for this?
2. Consider your color palette. Are you going to stick with colors from the original image or choose your own? Don’t be afraid to mix it up! Selecting a limited amount of colors can also look great, and you can coordinate them with surroundings (e.g. the photo frame, the rooms interior tones).
3. Using a “color by numbers” type technique to build up layers of tone can be really effective. I often work from light to dark, but it can depend on the project. Mark the areas that your going to stitch with a water soluble pen and stitch one tone at a time.
4. Be experimental with your stitches. Consider stitch direction for areas such as hair or fur to add realism and texture.
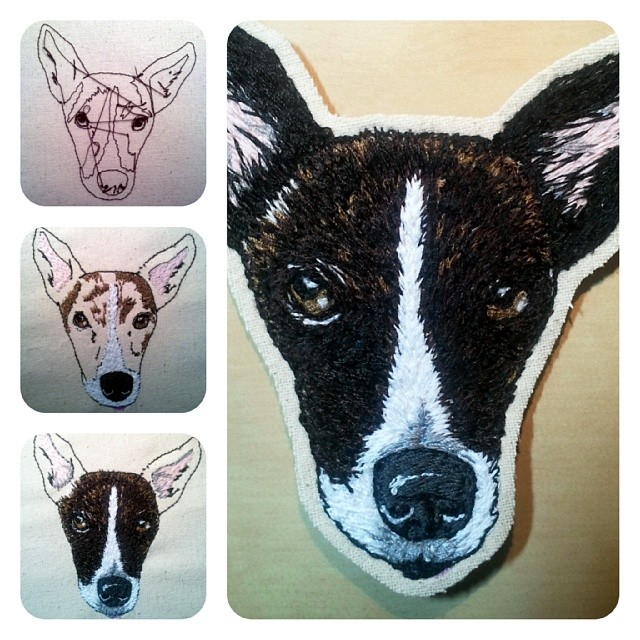 Working from light to dark
Finally, do not put too much pressure on yourself to make the embroidery look exactly like the original image. Remember, the materials and techniques of creation have changed, they’re not going to be exact matches. Plus, part of the fun is giving it a new lease of life, and putting your own personal stamp on it!
[box type=”shadow”]
If this all sounds exciting, but you’re still not totally clear on where to begin, why not try one of our online classes? Design It, Stitch It: Hand Embroidery with Jessica Marquez has it covered! Or, expand your embroidery skill set with Kristin Nicholas in Stitch It with Wool: Crewel Embroidery!
[/box]
Oh my, this is exactly what I was hoping to find. You've done a great job explaining. We just lost a favorite cat, and I'm going to start the project to have it finished by Christmas. Thank you so very much. Woo Hoo!
I’ll love to turn a picture into an embroidery
hoping to convert pix of Pope john paul 2 into embroidery