
A rabbet joint is a great way of joining two boards at right angles, such as for the corners of a box, if some attention is paid to the arrangement of the boards. But in the right situation, it can be a fast and easy way to make a strong joint. In this tutorial, we’ll show you how to make a rabbet joint using hand tools.
How to make a rabbet joint with hand tools
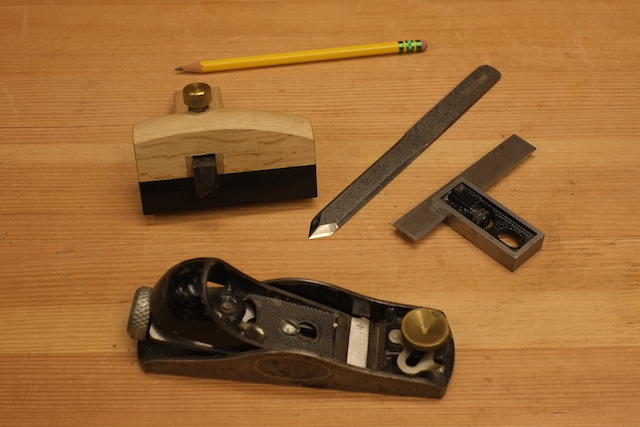
Tools you will need:
- Pencil
- Marking gauge
- A marking knife (optional)
- A plane (in this case, we’re using a block plane)
- A small square
- Some method of removing wood (Here, we use a plow plane, but other methods can be used)
Notes:
One of the realities of working with wood is that grain direction makes a difference when deciding which joint to use to bring two boards together. Long grain to long grain joints hold glue very well, and will be quite strong. But end grain to end grain joints will not hold glue as well. Luckily, it’s easy to tell what situation your boards are in, as can be seen in the diagram below.
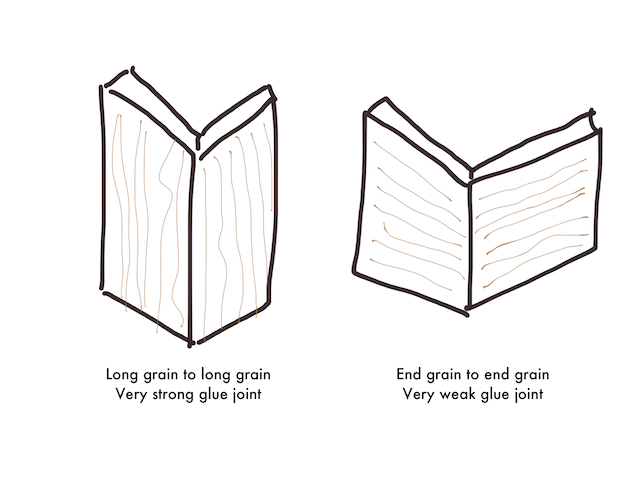
If your project involves two boards coming together with long grain matching up to long grain, as seen in the left side of the diagram, then a rabbet joint is perfect for this situation. If your joint has the grain wrapping around it, like on the right side of the diagram, then you should consider a different joint, like a box joint or a dovetail joint. These joints work well in this case since the sides of the interlocking portions of the joints create small long grain to long grain glue surfaces.
Step 1:
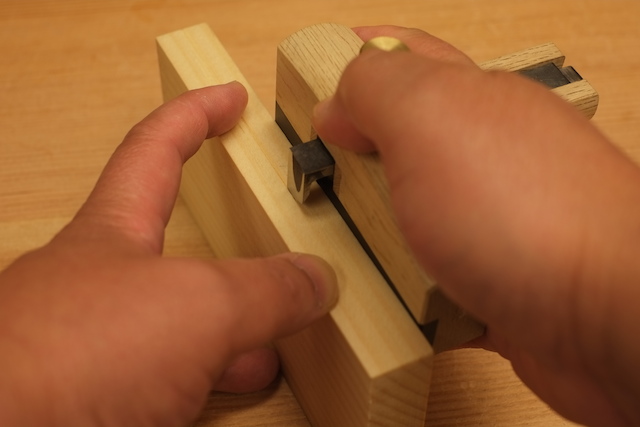
The first step in making a rabbet joint is to mark the joint. A rabbet joint involves one board fitting into a recess at the edge of the second board that is sized to the width of the first board. This is going to be very easy to mark. All you have to do is put one board up against the other and draw a line.
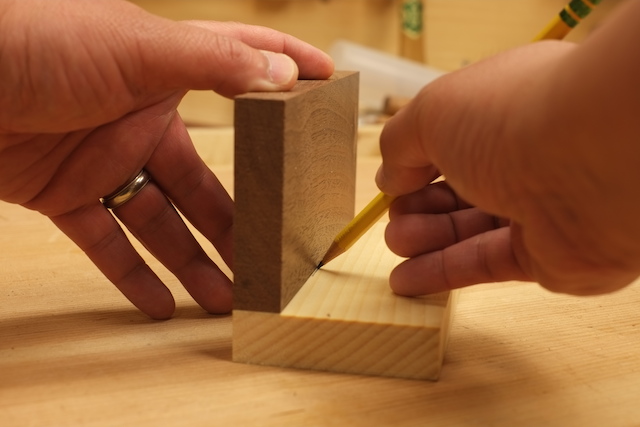
If you want, you can use the marking knife for this step.
Step 2:
The next step in marking is to mark the depth of the rabbet. This can be easily done with a marking gauge. Aim for about half the thickness of the board.
Step 3:
Finally, remove the wood so that you have a square recess. I’m using a plow plane to do this. (We will cover more tips and tricks on how to use this useful tool in a future post. )
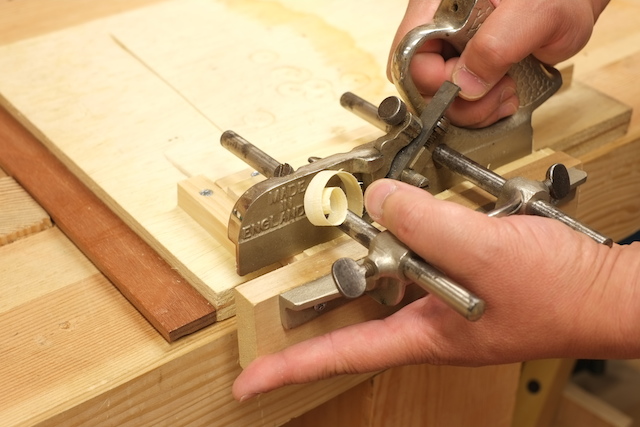
You can also use a rabbet plane, or even a saw and chisels. If you use power tools, you can use a router or a table saw.
Step 4:
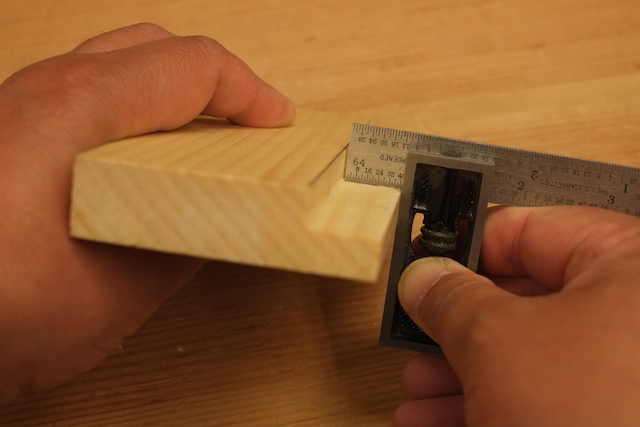
Once the wood is removed, check the rabbet to see that the recess is square. Check at a few points along the rabbet. Make any corrections needed with a chisel.
Step 5:
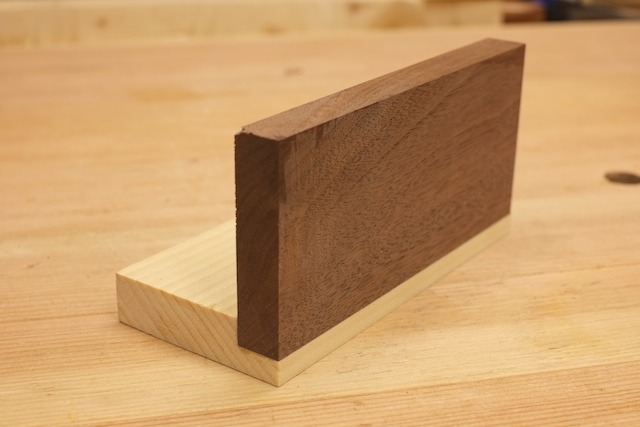
Finally, apply some glue and clamp the joint together. If all goes well, the joint should look like the photo at the top of this article. If the boards are a little uneven, use the block plane to smooth out the joint.
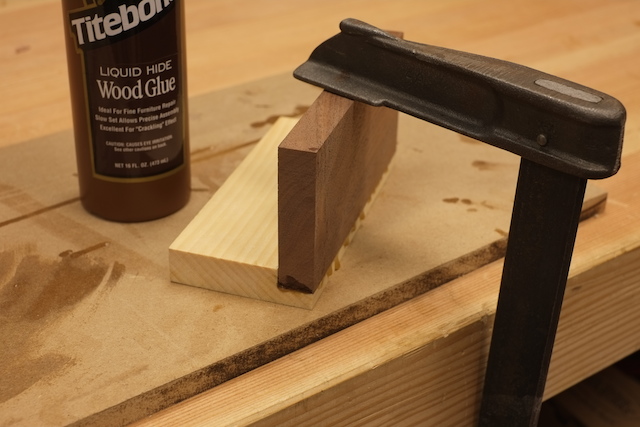
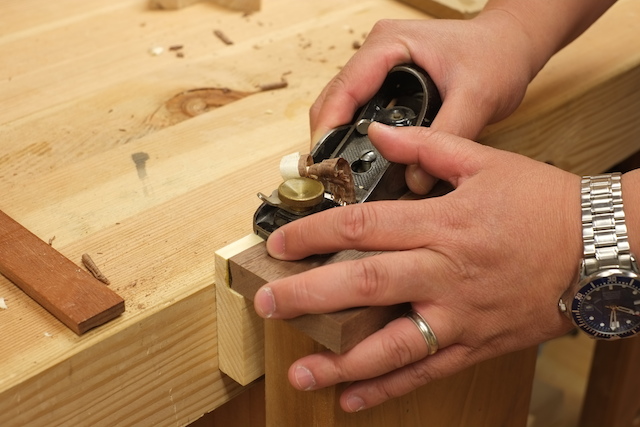
When you’re done, your joint should look like the picture at the top of the post. Congratulations!
Share tips, start a discussion or ask one of our experts or other students a question.
No Responses to “A Quick Tutorial on How to Make Rabbet Joint With Hand Tools”