
Necklaces and bracelets can be a great addition to artwork, but getting them just right can take practice.

Image via Shutterstock/Yulia Yemelianova
We are going to draw a variety of jewelry pieces in three mediums: graphite pencil, digital drawing and colored pencils. This way you can see some examples of how to render different types of details like chains, pearls, bangles, etc., while using different tools. Get inspired by your favorite medium and draw your designs with any tools you wish!
How to draw a necklace: Graphite pencil
If you want to draw precise technical illustrations, your best choice is graphite. Reaching for a thin mechanical pencil will allow you to capture refined details while avoiding smudges on your paper.
Step 1.
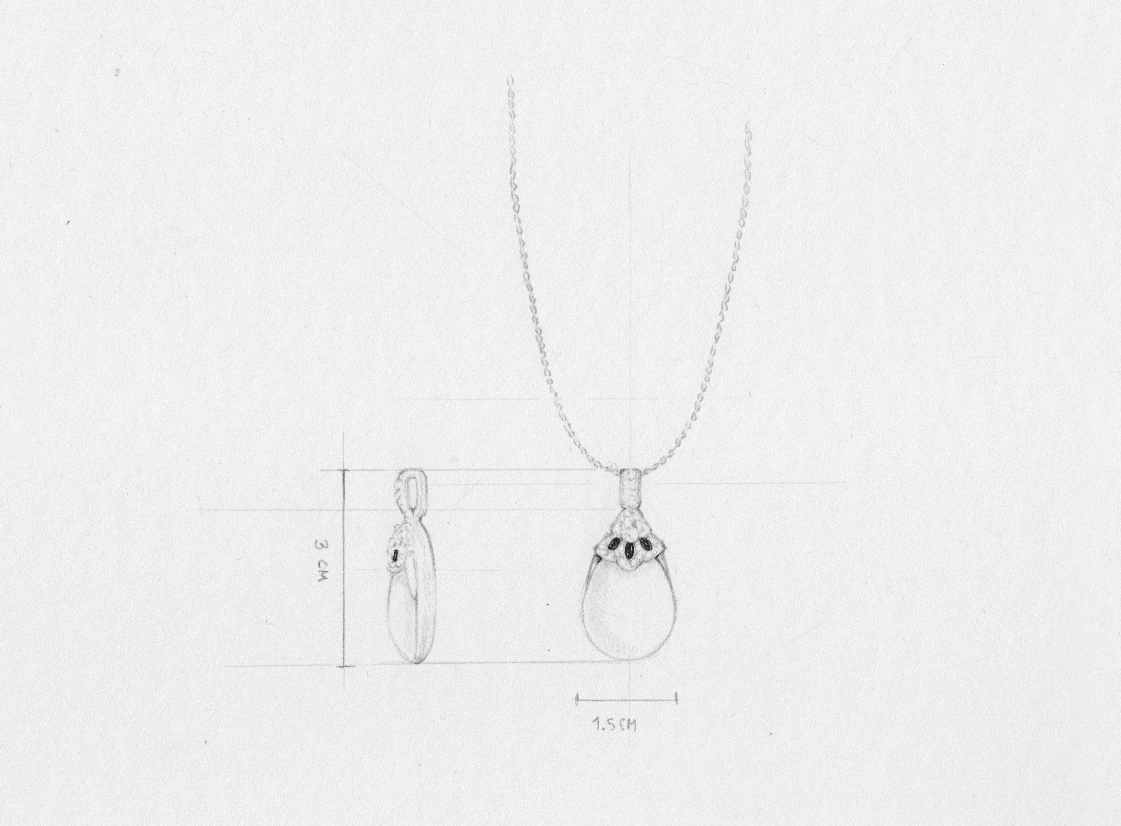
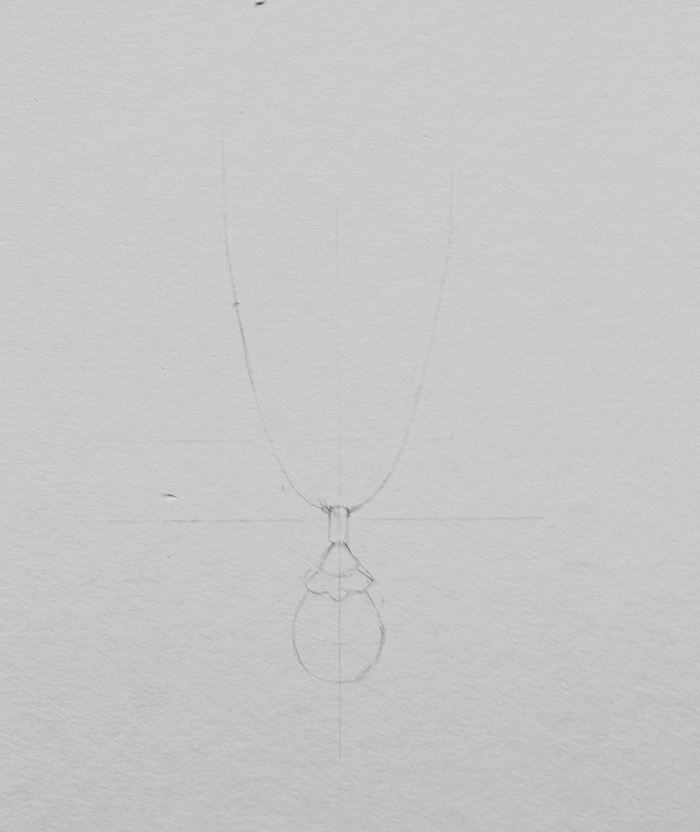
It is important to always kick off your technical drawings with guidelines. Use a ruler to lay down a vertical center axis and several horizontal parallels. Generally speaking, your design is probably quite (if not fully) symmetrical. therefore, make a loose sketch of it right in the middle of the center axis, making sure each element has the same distance to each side of the main line.
Step 2.
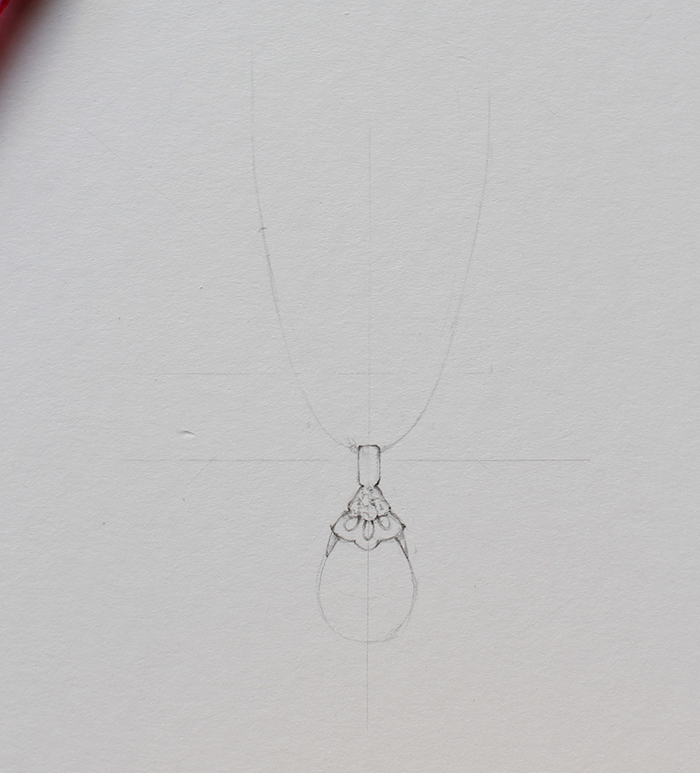
This is where that mechanical pencil comes in most handy. Start refining the main shapes and general details of your design.
Step 3.
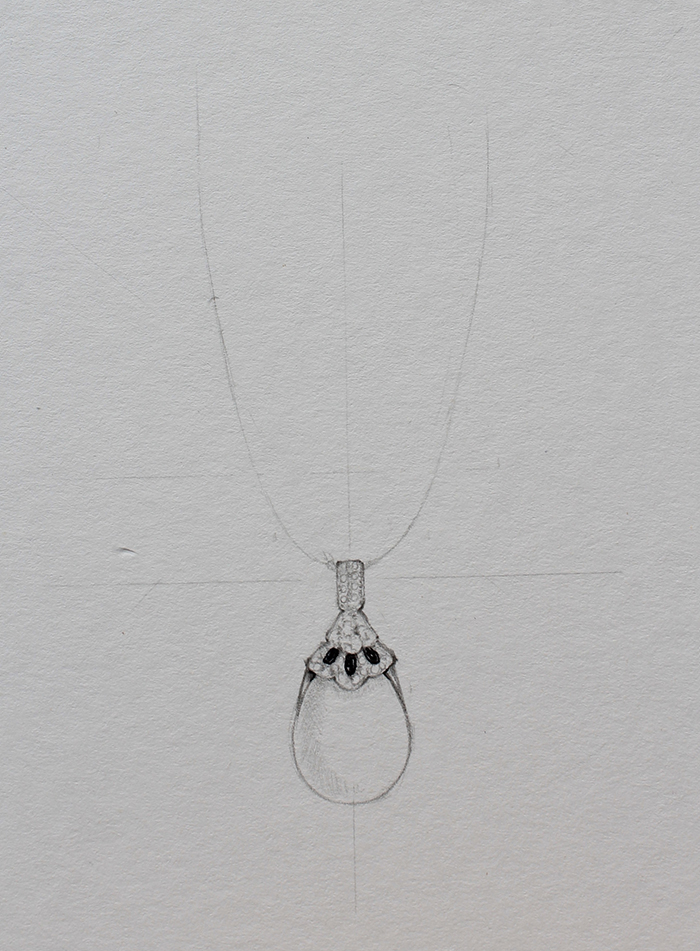
Continue building up details and lay down some shadows. Work up as much or as little detail as you wish.

Step 4.
In order to give as much visual information of your design as possible, we will need to draw at least one more view. Extend horizontal lines at each main level of the design and draw a side view of your design.
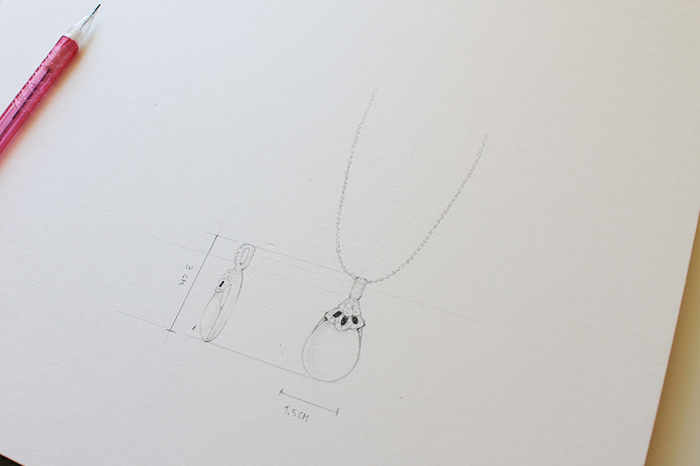
Step 5.
Make sure you include important information in your technical drawing such as width and height on gems, lengths, etc. The type of information you need to include will depend on your type of design.
Drawing a bracelet: Digital
You can also opt for a slightly looser drawing as opposed to a technical drawing. You can do this either with graphite, markers, ink, etc or digitally with a drawing tablet. The main steps and principles apply to all these tools and mediums.
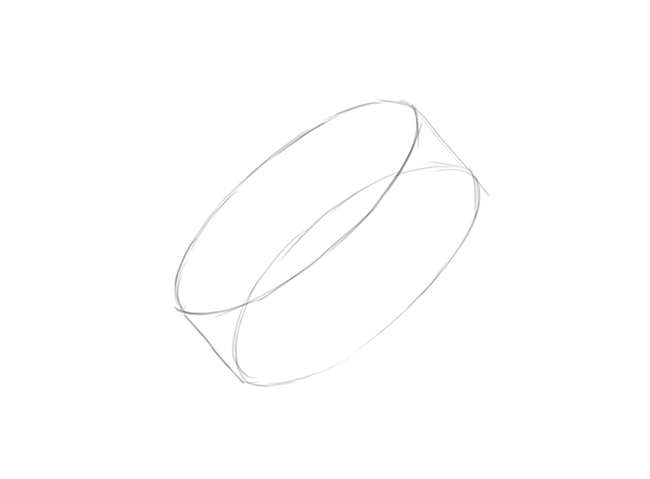
Step 1.
To draw a bracelet (especially bangles) we will need to start off with a basic round prism. Sketch this basic shape with the general height and width of your piece.
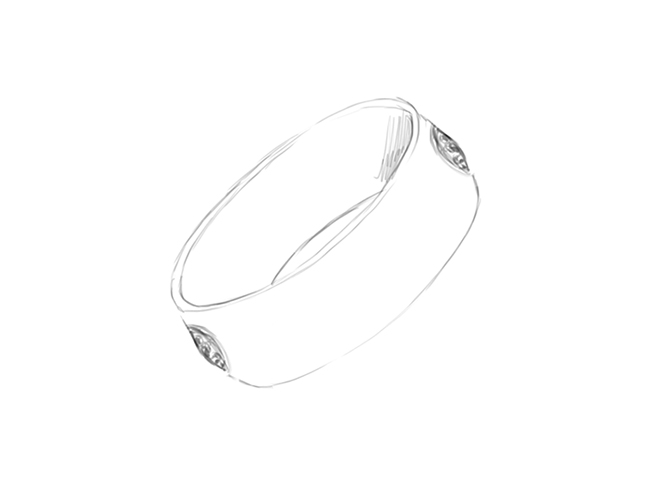
Step 2.
Keep working over the basic prism to give shape to the bracelet and star to add details like gems, rims and edges.
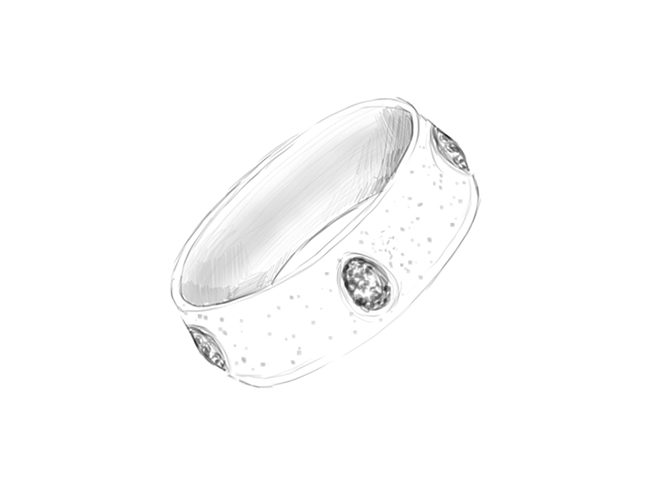
Step 3.
Finally, shade the inside of the bracelet and add any more necessary details.
Drawing pearls: Colored pencils
Personally, I find this method the most fun and enticing. There’s something about painting with a white pencil over a dark surface that makes any drawing pop right off the page and look more interesting and realistic.
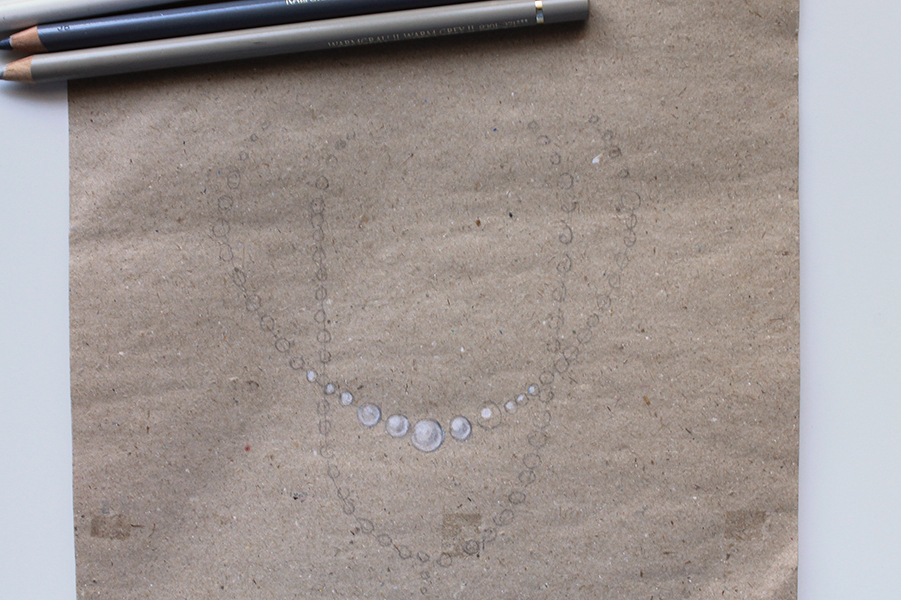
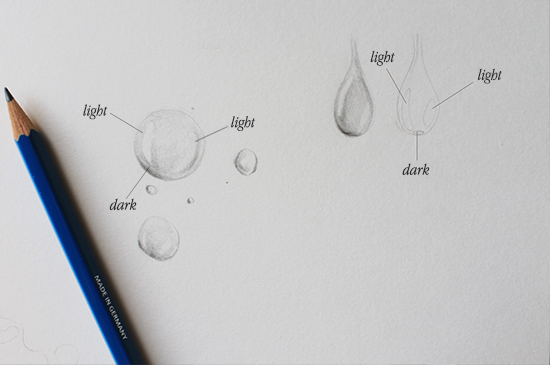
The lightest areas are the top and bottom edges, while the darkest portion is right in the center.
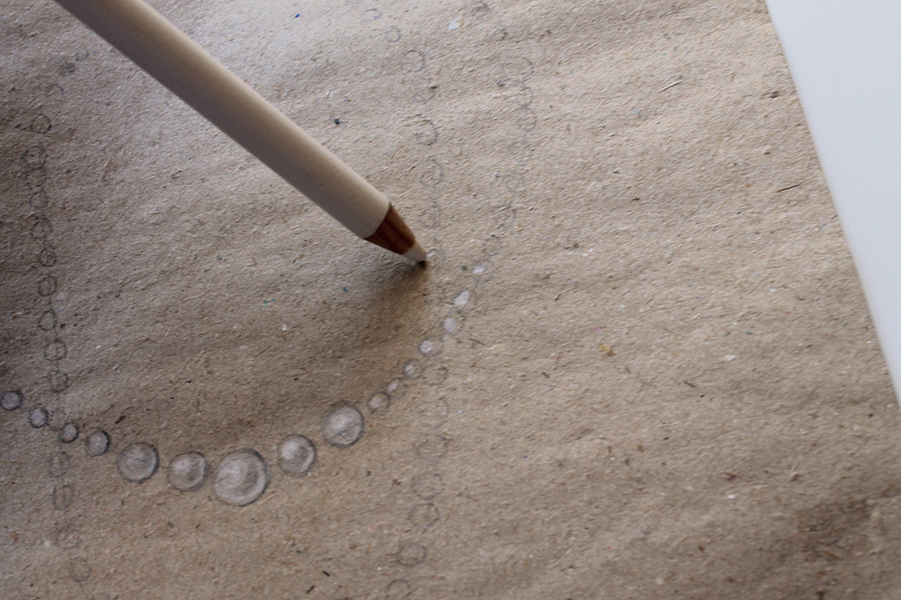
Step 1.
Use a white pencil to paint the lightest areas of the pearls right where the light hits it and on the opposing edge, at the bottom.
Step 2.
Using a light gray pencil shade the center of each pearl to give it depth and dimension.
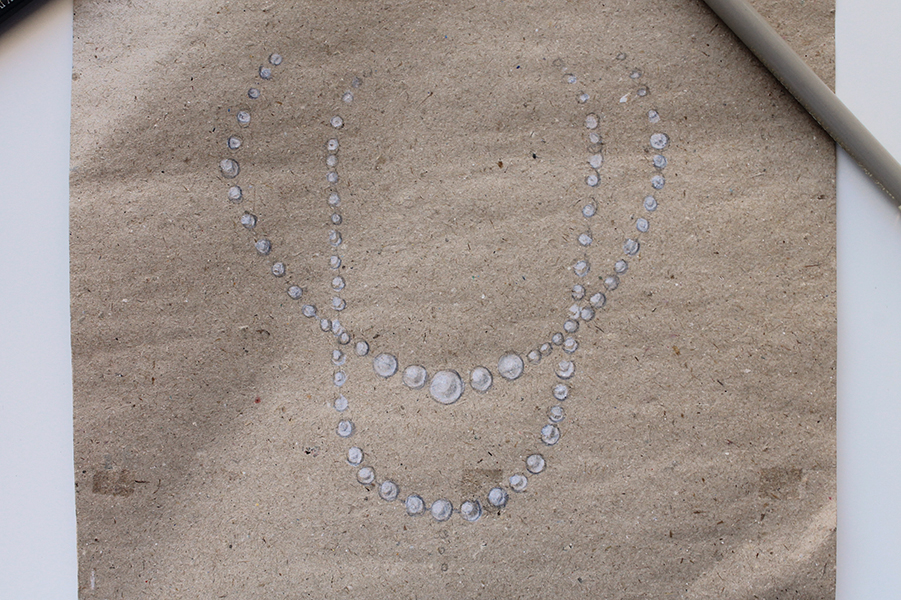
And there you have it! Three different types of jewelry using three different mediums.
Share tips, start a discussion or ask one of our experts or other students a question.
No Responses to “Drawing and Designing Jewelry: How To Draw Necklaces and Bracelets”