
Drawing peacock feathers in colored pencil is not as difficult as many beginners might think! Although it looks complicated, when you break it down to basic shapes, the subject becomes simple and fun to draw in color.
Start with a picture
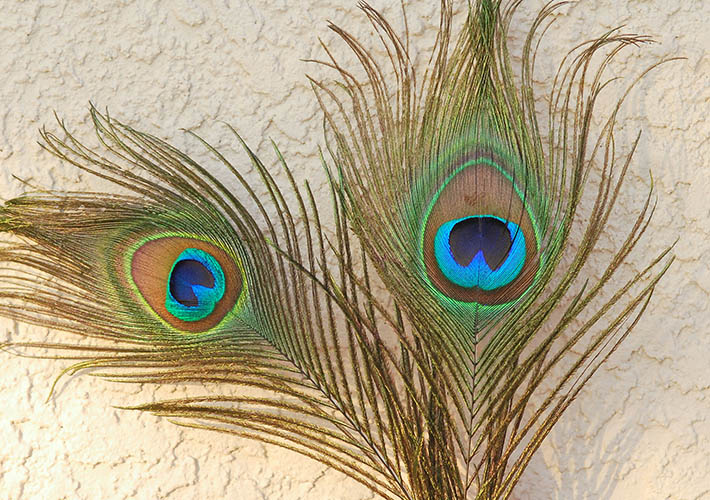
A good setup is the key to an accurate drawing, and having a few peacock feathers (even if they’re fake) can help quite a bit. Using a directional light that gives you some shadows, take a close-up picture of your subject.
Consider the color and tone of your background at this step. Light or dark? Empty or with some pattern in it? The peacock feathers look complicated enough, so place them against a non-intrusive background space, if you are a beginner.
Understanding basic structure
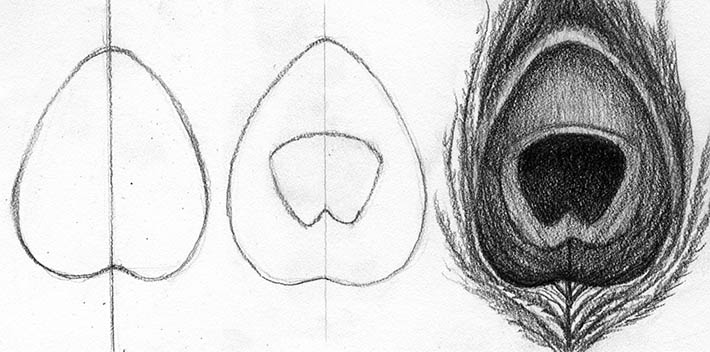
Let’s look at the basic structure of a peacock feather. You can easily break down a complex feather into a few simple shapes. Always start sketching by placing a directional line first (here, it’s vertical), and then drawing shapes along the line to get the right length and rotation of the object.
Step-by-step drawing
Step 1:
Make an outline drawing using an HB graphite pencil. Softer pencils might leave grease and residue, so a harder pencil is ideal. Tap the lines with a kneaded eraser to make them as light as possible and achieve that feathery look.
Step 2:
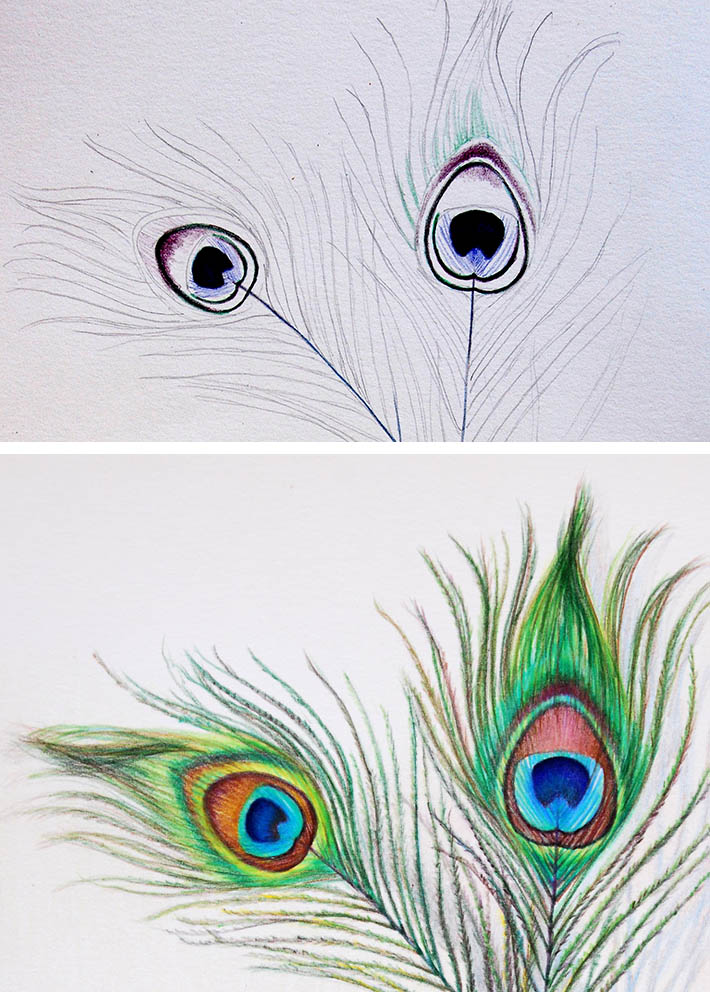
Start shading the darks. Mark the peacock feather’s “eye” with a medium blue pencil (I used Prismacolor Premier indigo blue). Place soft but dark line outline on the feathers. Mark the second darkest spots on the feathers. Here, I use black grape colored pencil at the top of brown area.
Step 3:
Fill in the aquamarine part around the “eye.” Add browns around it. I used warmer browns on the left peacock feather and cooler browns on the right. Finally, pick the greens according to your picture. I made my greens colorful by adding a little bit of brown and yellow shading over the greens.
Step 4:
Add a light cast shadow behind the feathers.
Realistic texture
There are three components to making a peacock feather look realistic: the outline drawing, the color and the type of shading. Every object has a specific texture that you aim to depict through shading.
In this demonstration, the object is divided into several color groups, each having its specific stroke to show the texture of the feather’s bristles. For instance, the aquamarine section has longer strokes going left and right. The brown section has shorter strokes, and the long green feathers consist of numerous tiny short strokes. Pay attention to texture and always think how you can convey it on paper.
Peacock feather drawing inspiration
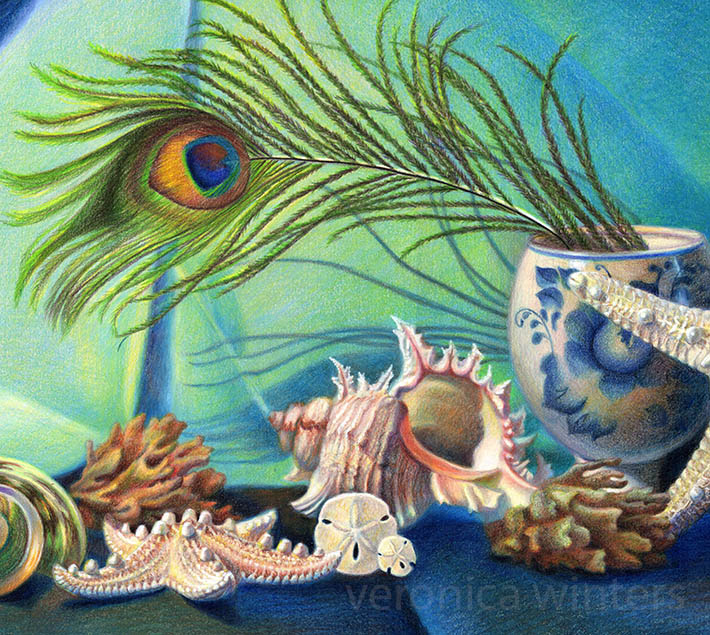
In this drawing, the peacock feather is illuminated by a warm, electric light coming from the left, and thus it has warmer colors overall. The brown part has some warm yellows and the greens lean towards the warm color temperature, too. A lighter, flat background color makes it stand out.
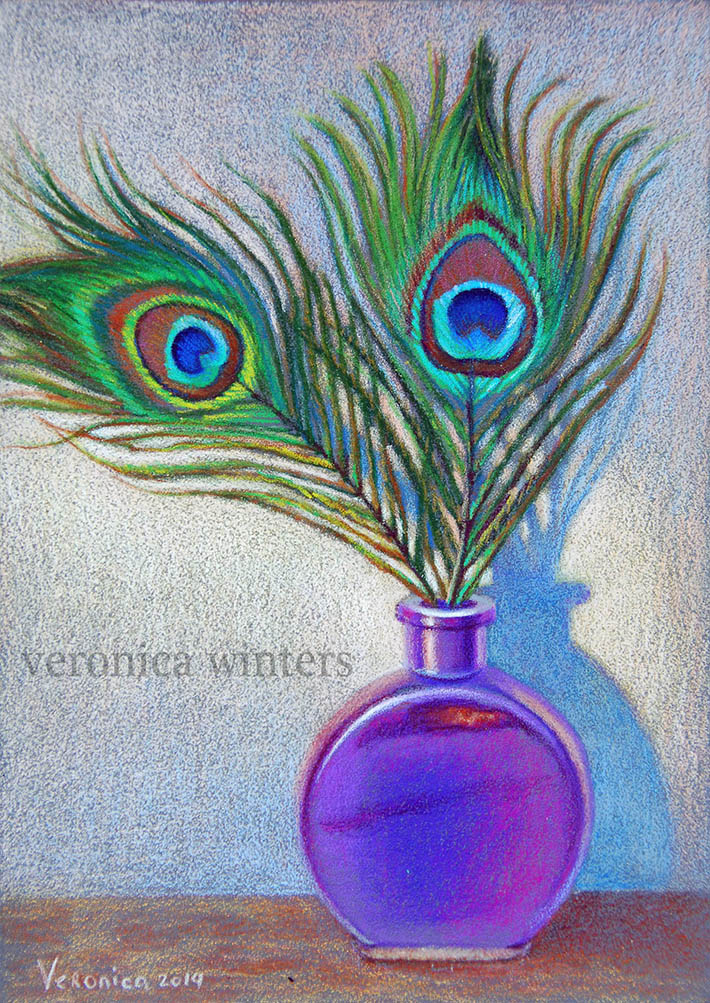
While the previous drawing was completed on white paper, I drew this one using lightfast colored pencils on Ampersand Pastelbord, which is a durable and archival surface with a gray color. It’s quite tricky to draw on such boards for beginners, so I recommend drawing on smooth white paper before drawing on color paper of medium tone. Colored pencil colors tend to “react” to certain color papers and thus look more vibrant.
Share tips, start a discussion or ask one of our experts or other students a question.
No Responses to “How to Draw a Peacock Feather — Simplified!”