
There are over 100,000 species of trees, which means one tree might look vastly different from another. In fact, even trees within the same species look different.
In this drawing tutorial, we’ll take a look at a generic tree with leaves. However, the steps in this tutorial are fairly universal, so this primer on how to draw a realistic tree will be useful whether you’re drawing an ash, maple, pine or any other type of tree.
Find a reference
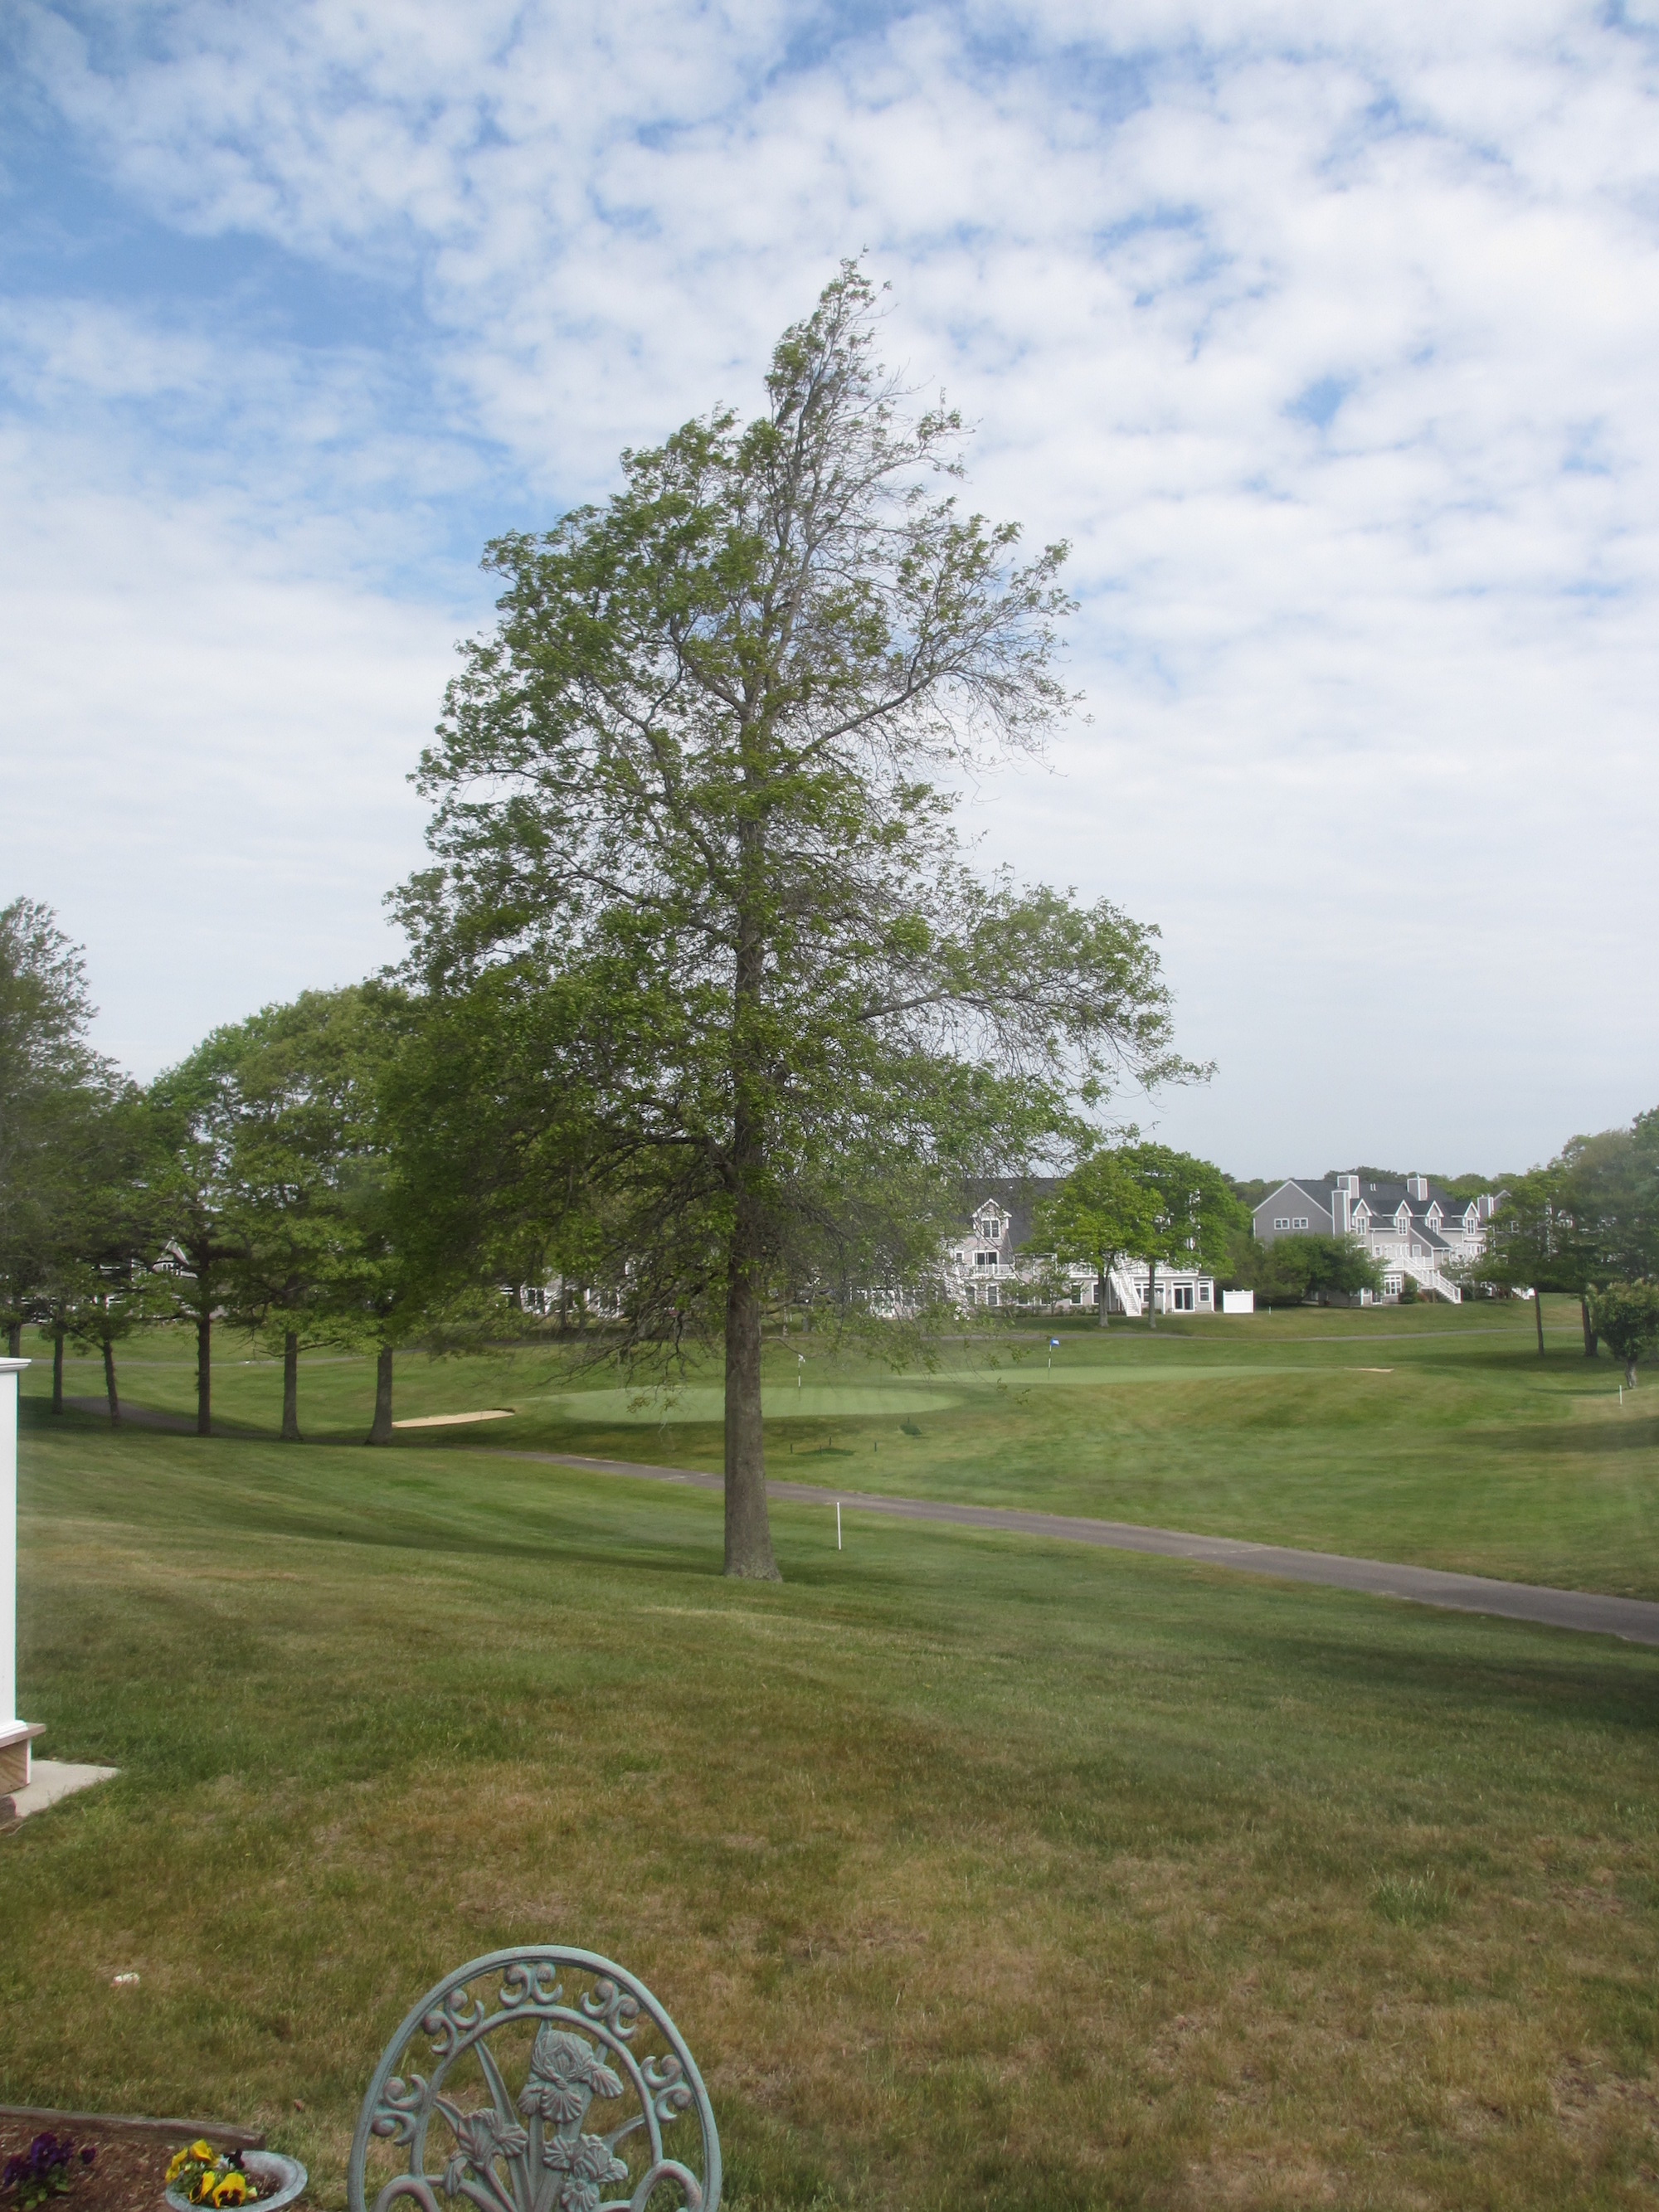
Whenever you draw something, use a subject for reference. Either research it online or go out into the world to take photos or just observe. Studying your subject matter might clarify your ideas and help you visualize the fine details. I used this photo of a tree outside my window. Notice the long, lean trunk with random branches peeking through patchy areas of leaves.
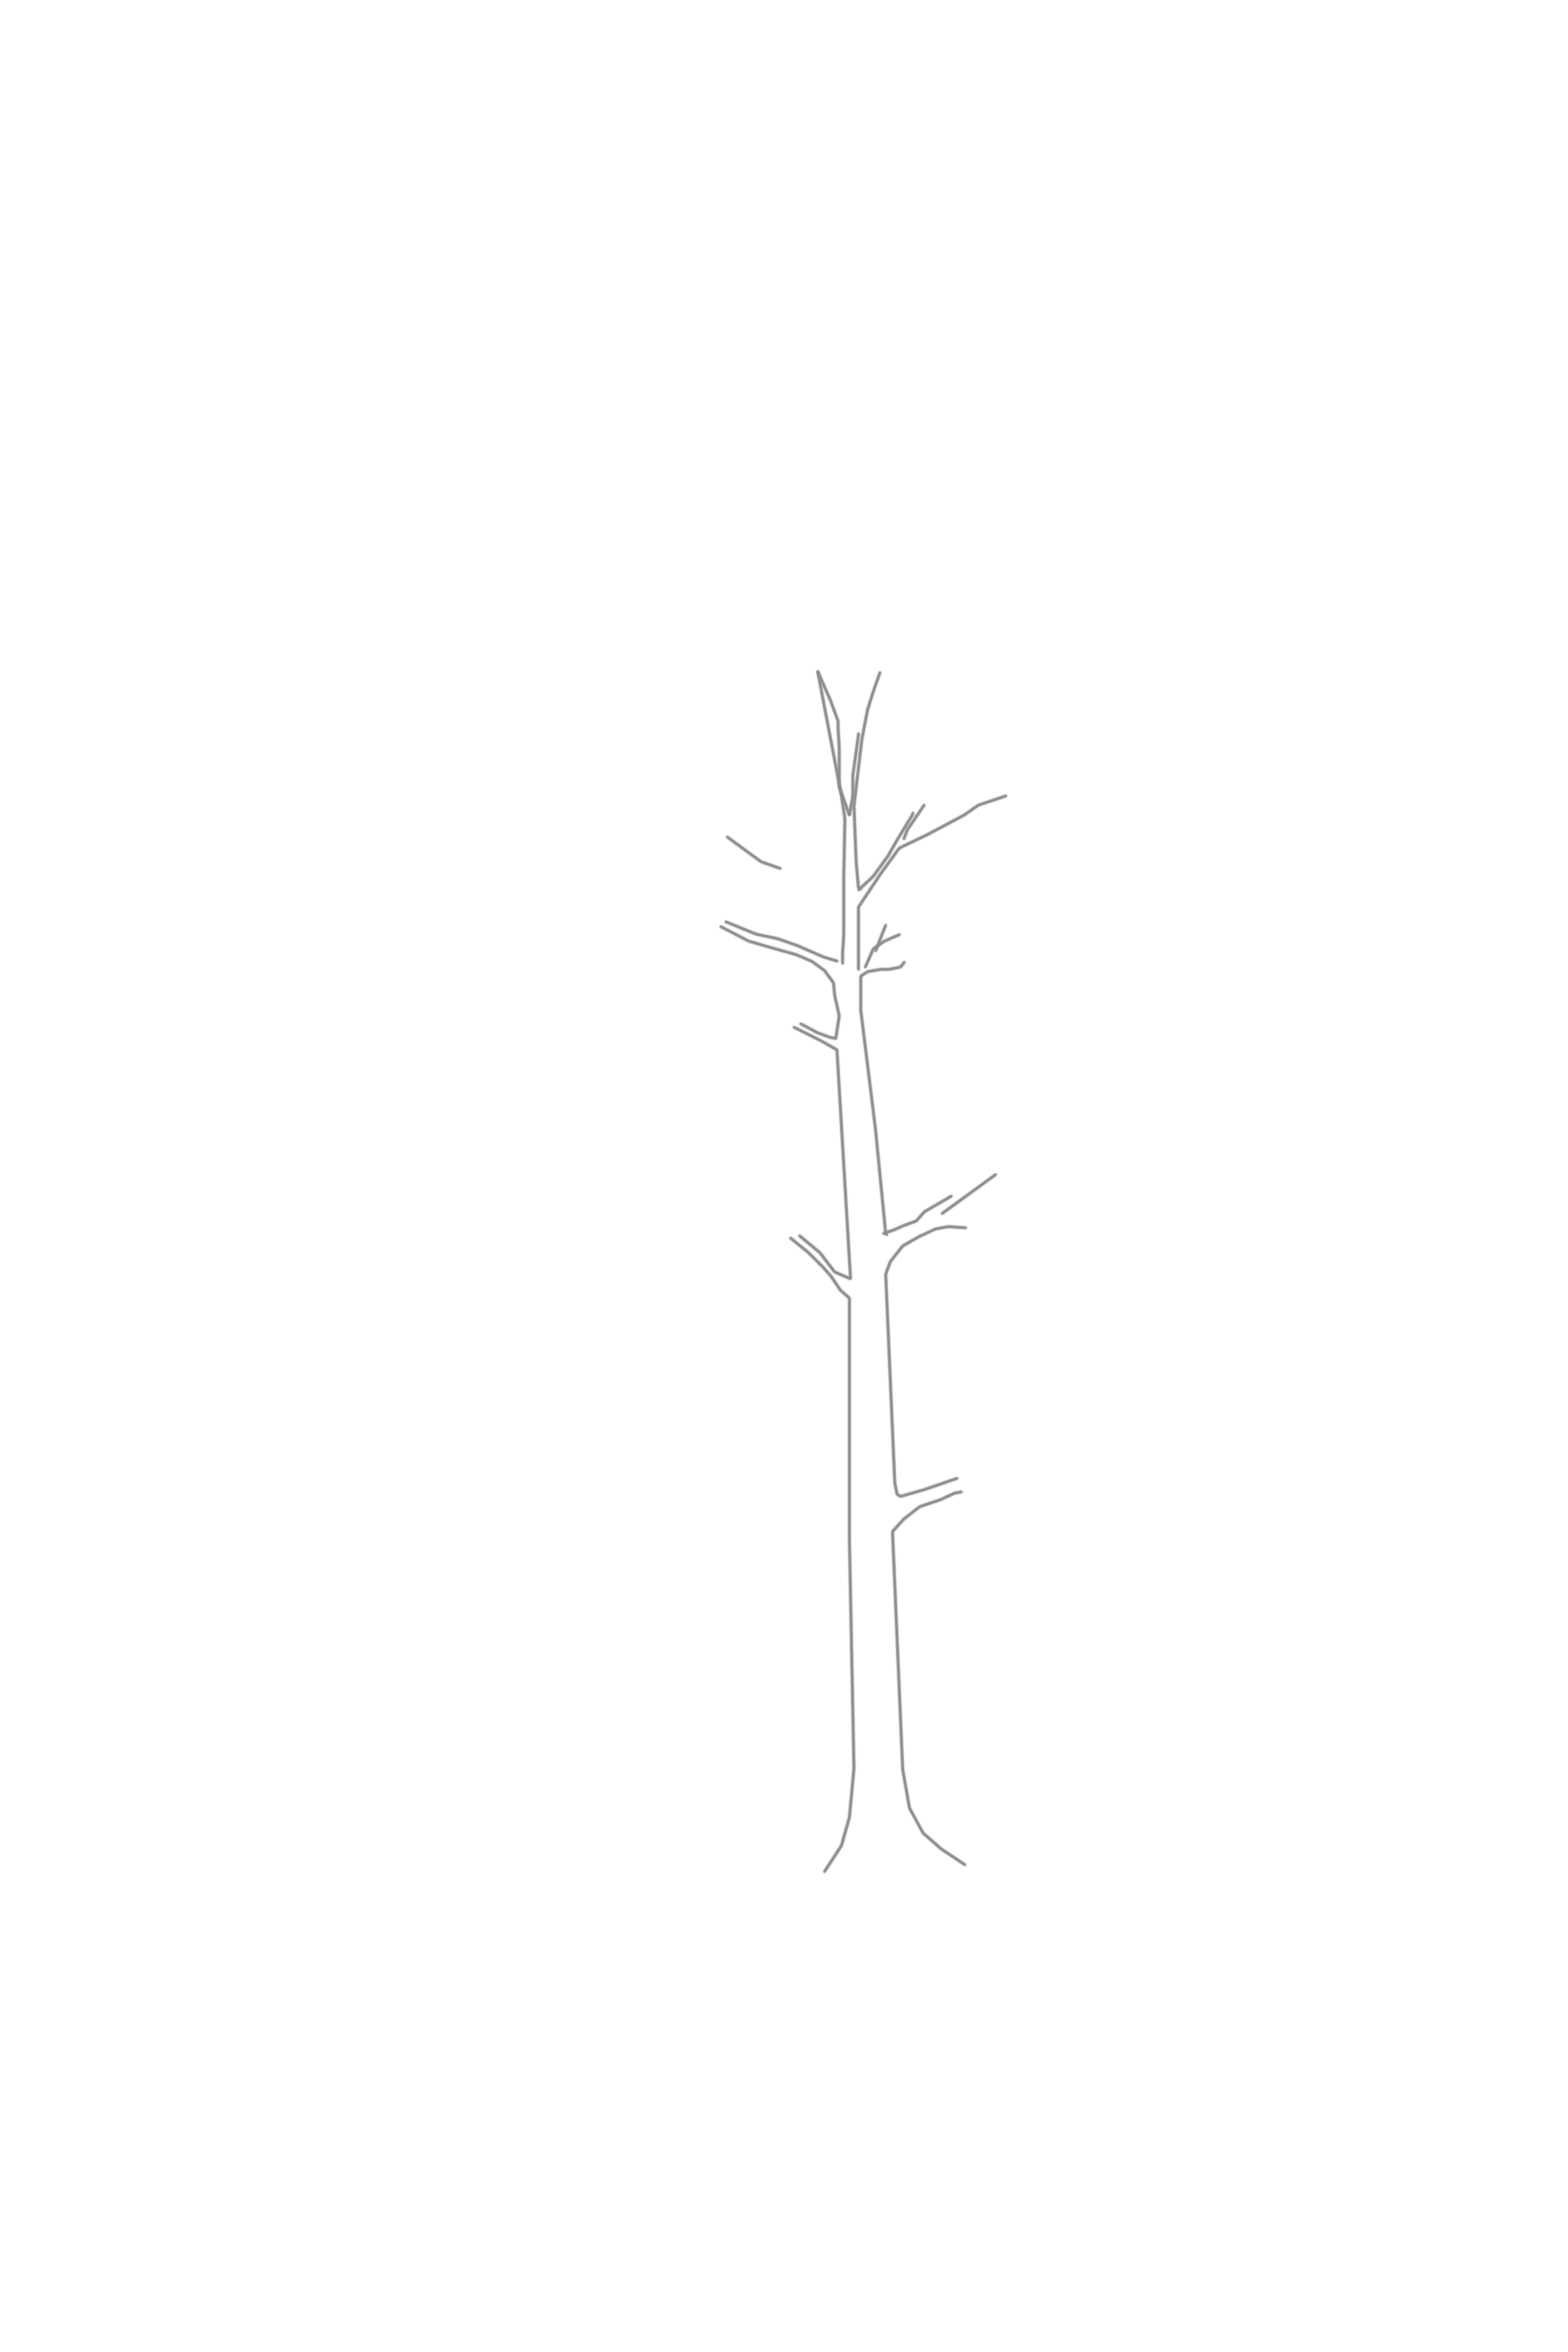
Step 1:
Start with a basic trunk and a few bits of branch. Notice the angle of the branches is slightly upward. Branches on trees grow up and out — think of them as reaching toward the sunshine. Do not use a ruler for this process. A natural, organic tree will have lumps, curves and inconsistencies. For more natural results, stay away from perfectly straight lines.
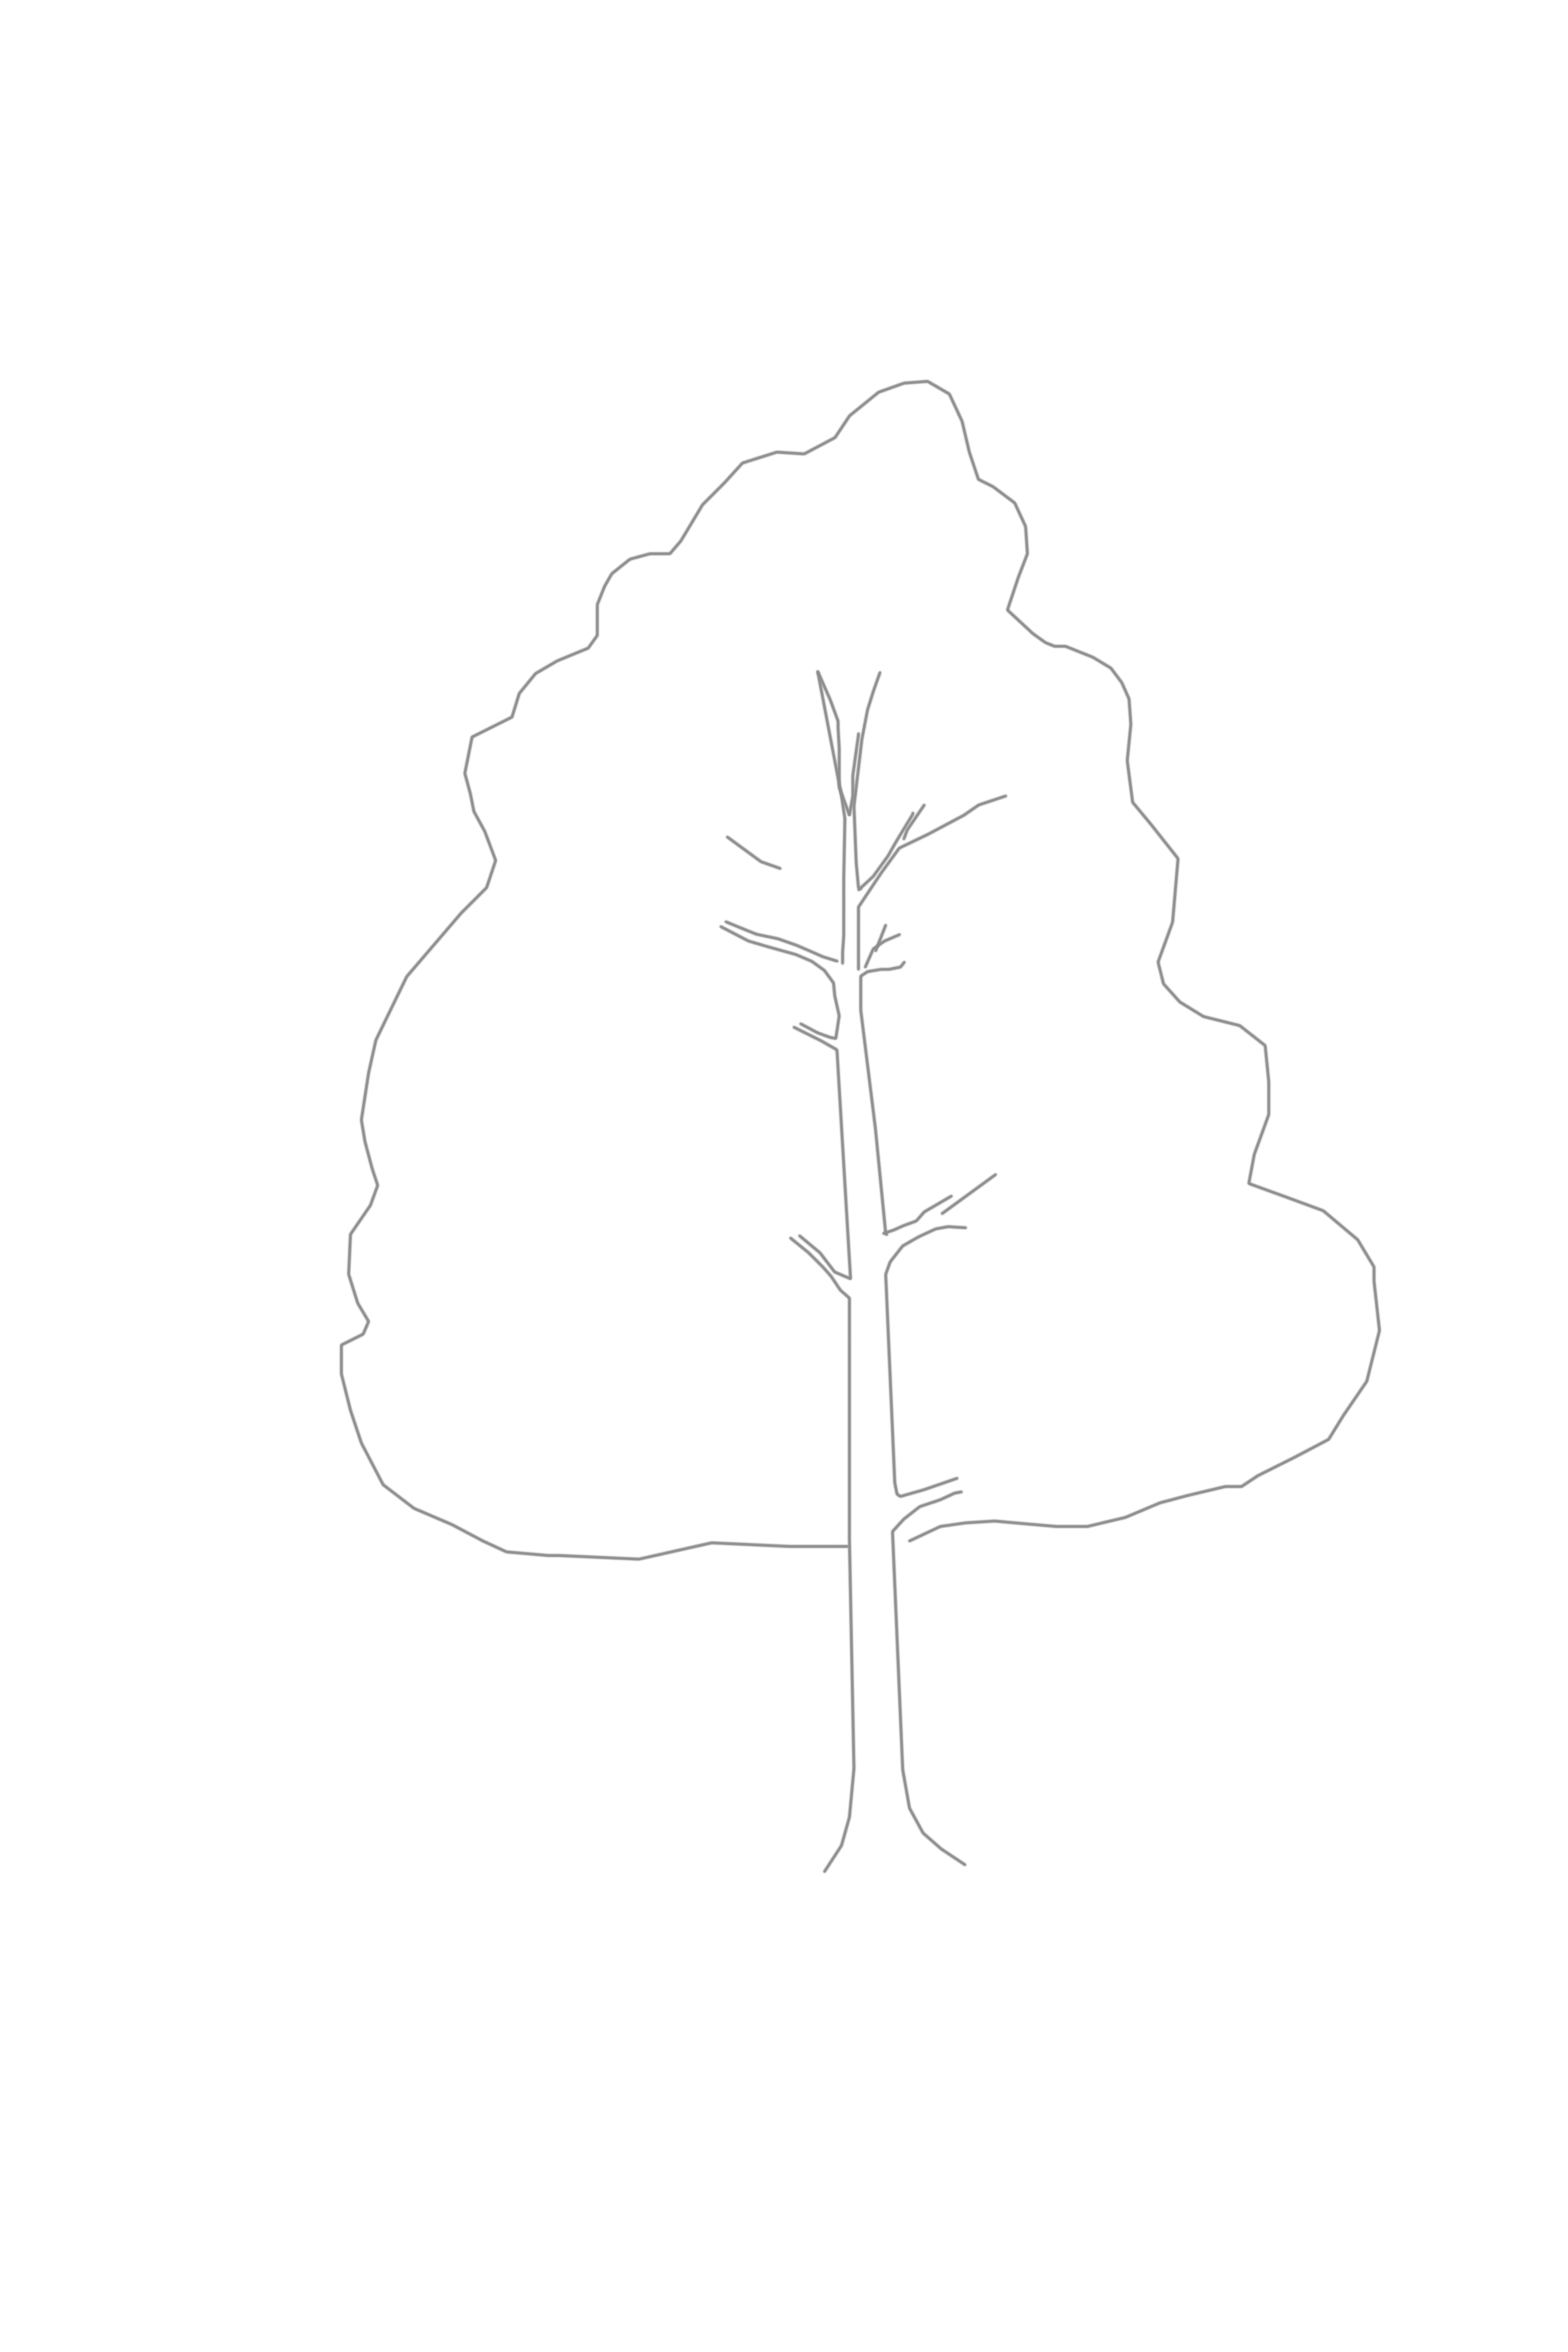
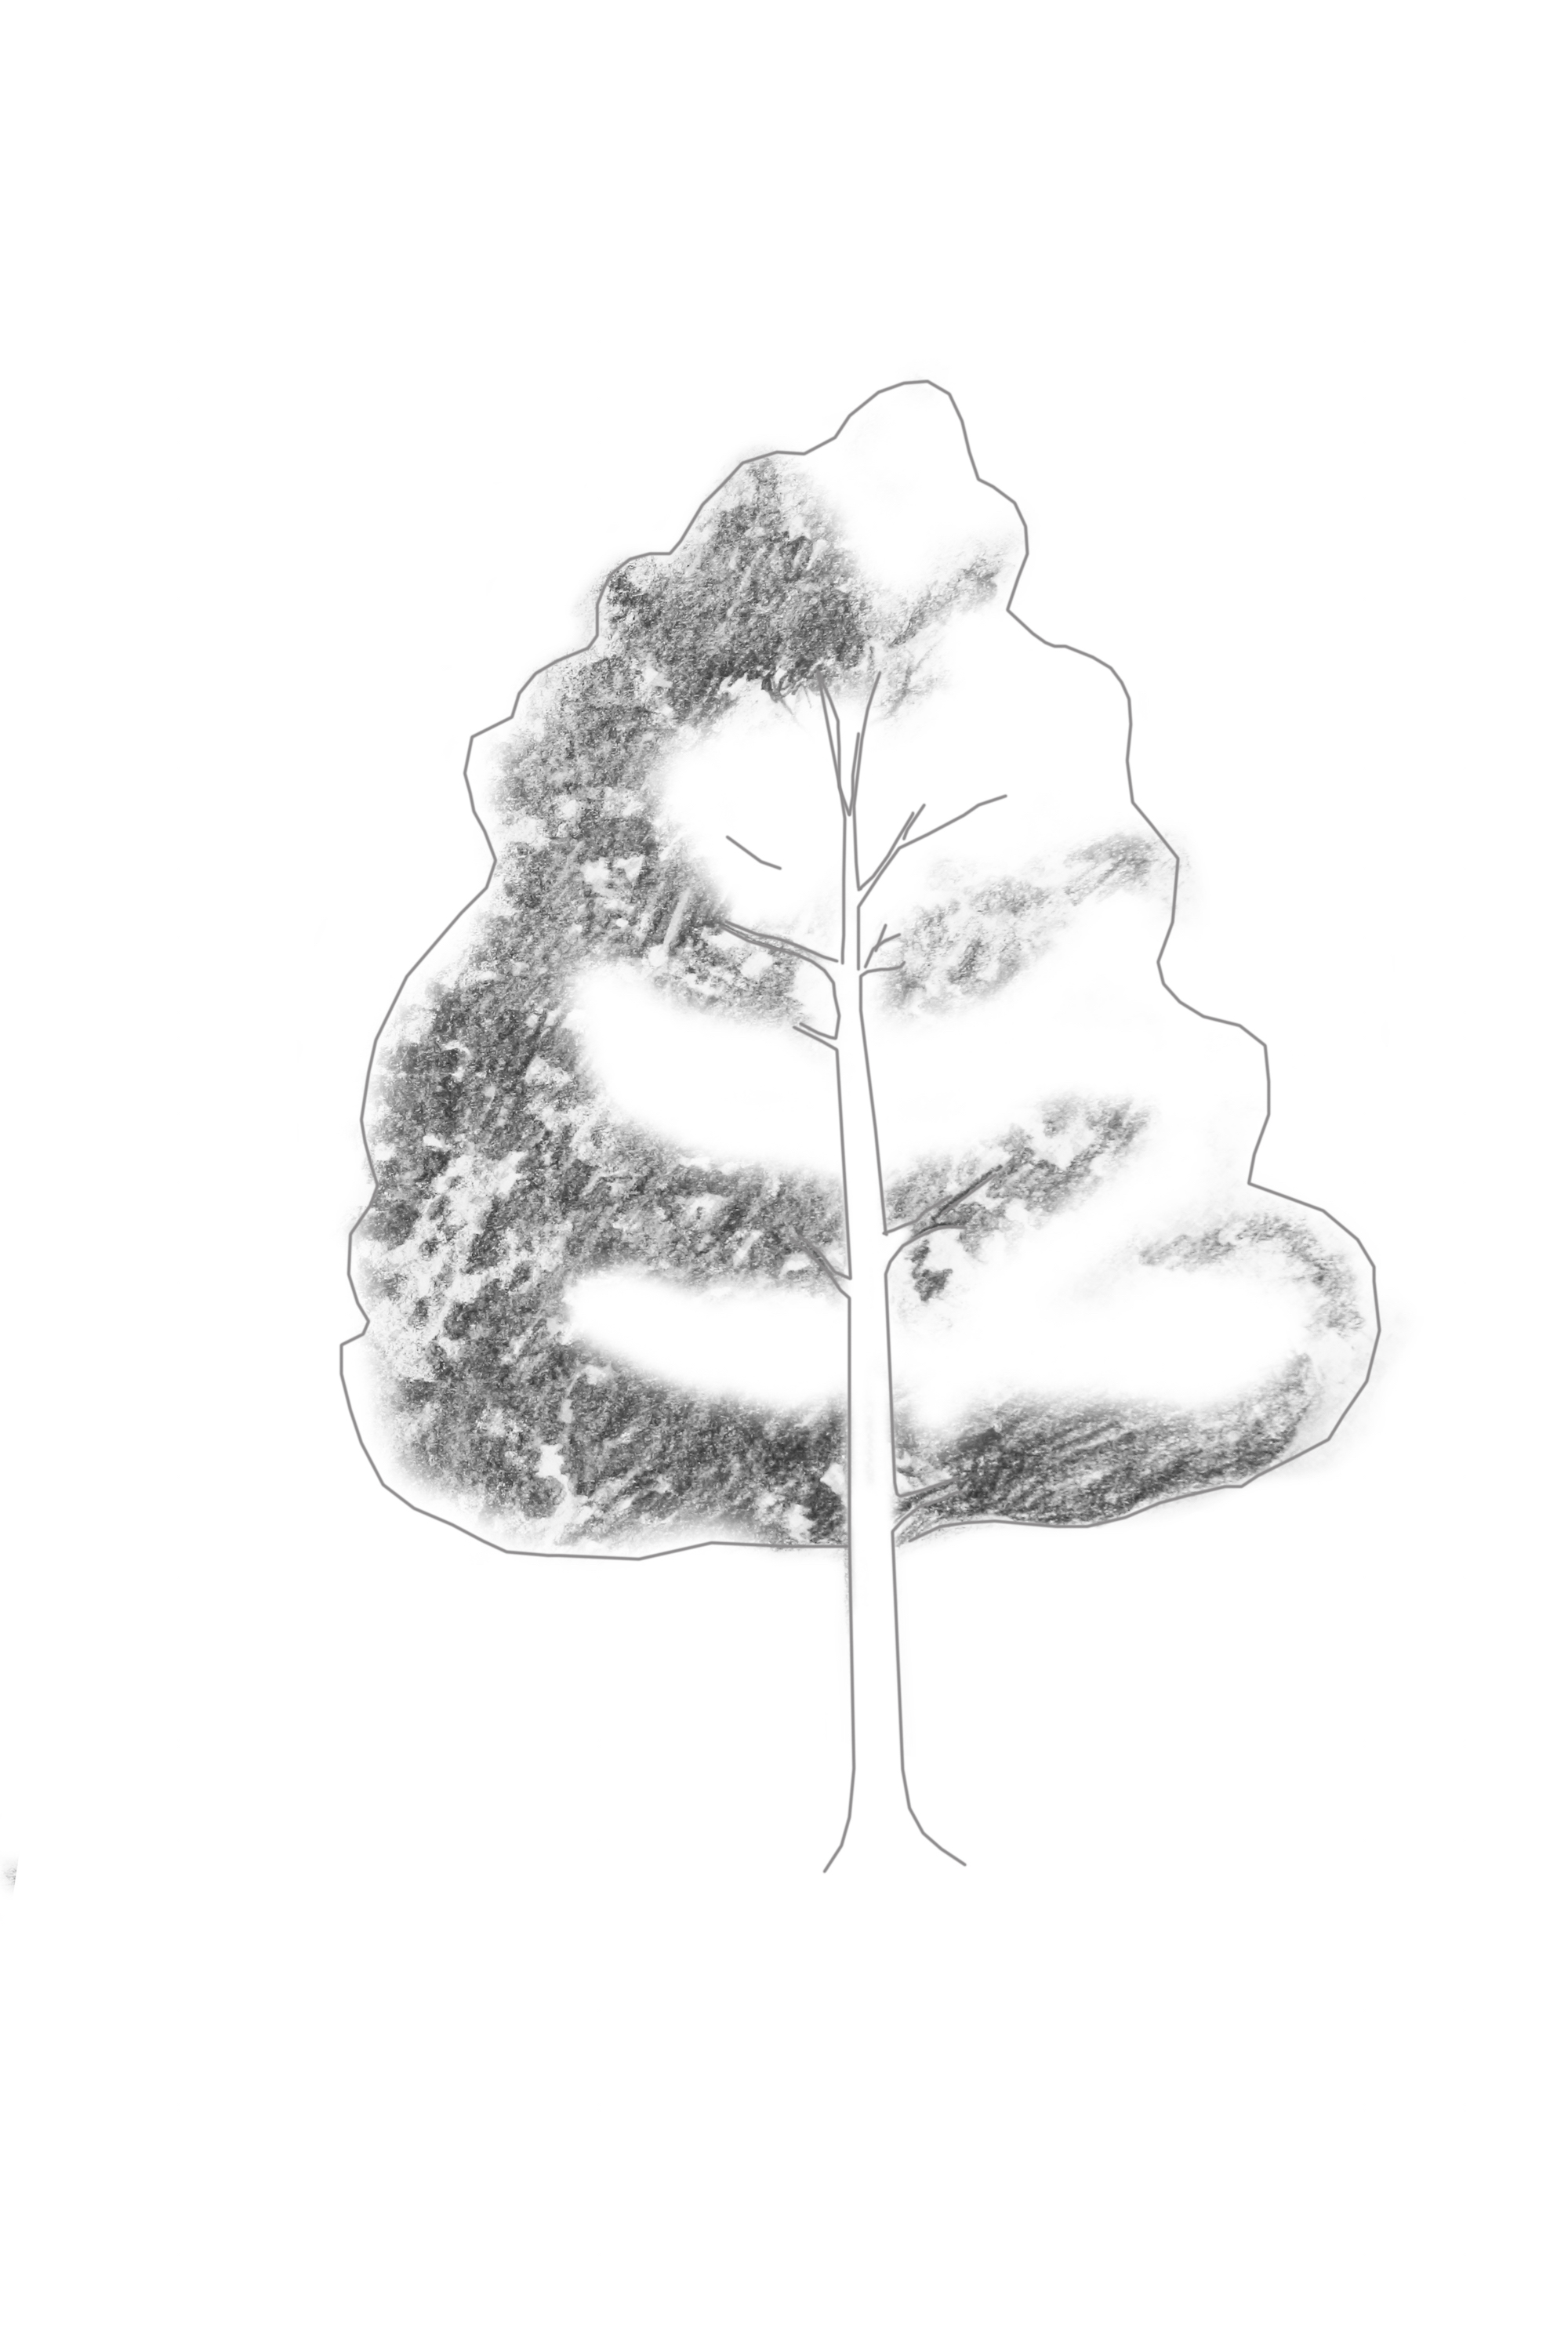
Step 2:
Next, add a light outline of the area where the leaves will be. The shape of this will probably change once you start adding detail, but blocking in the general area helps you visualize the final product. Don’t make it perfectly symmetrical — trees are organic structures and are never exactly the same on both sides.
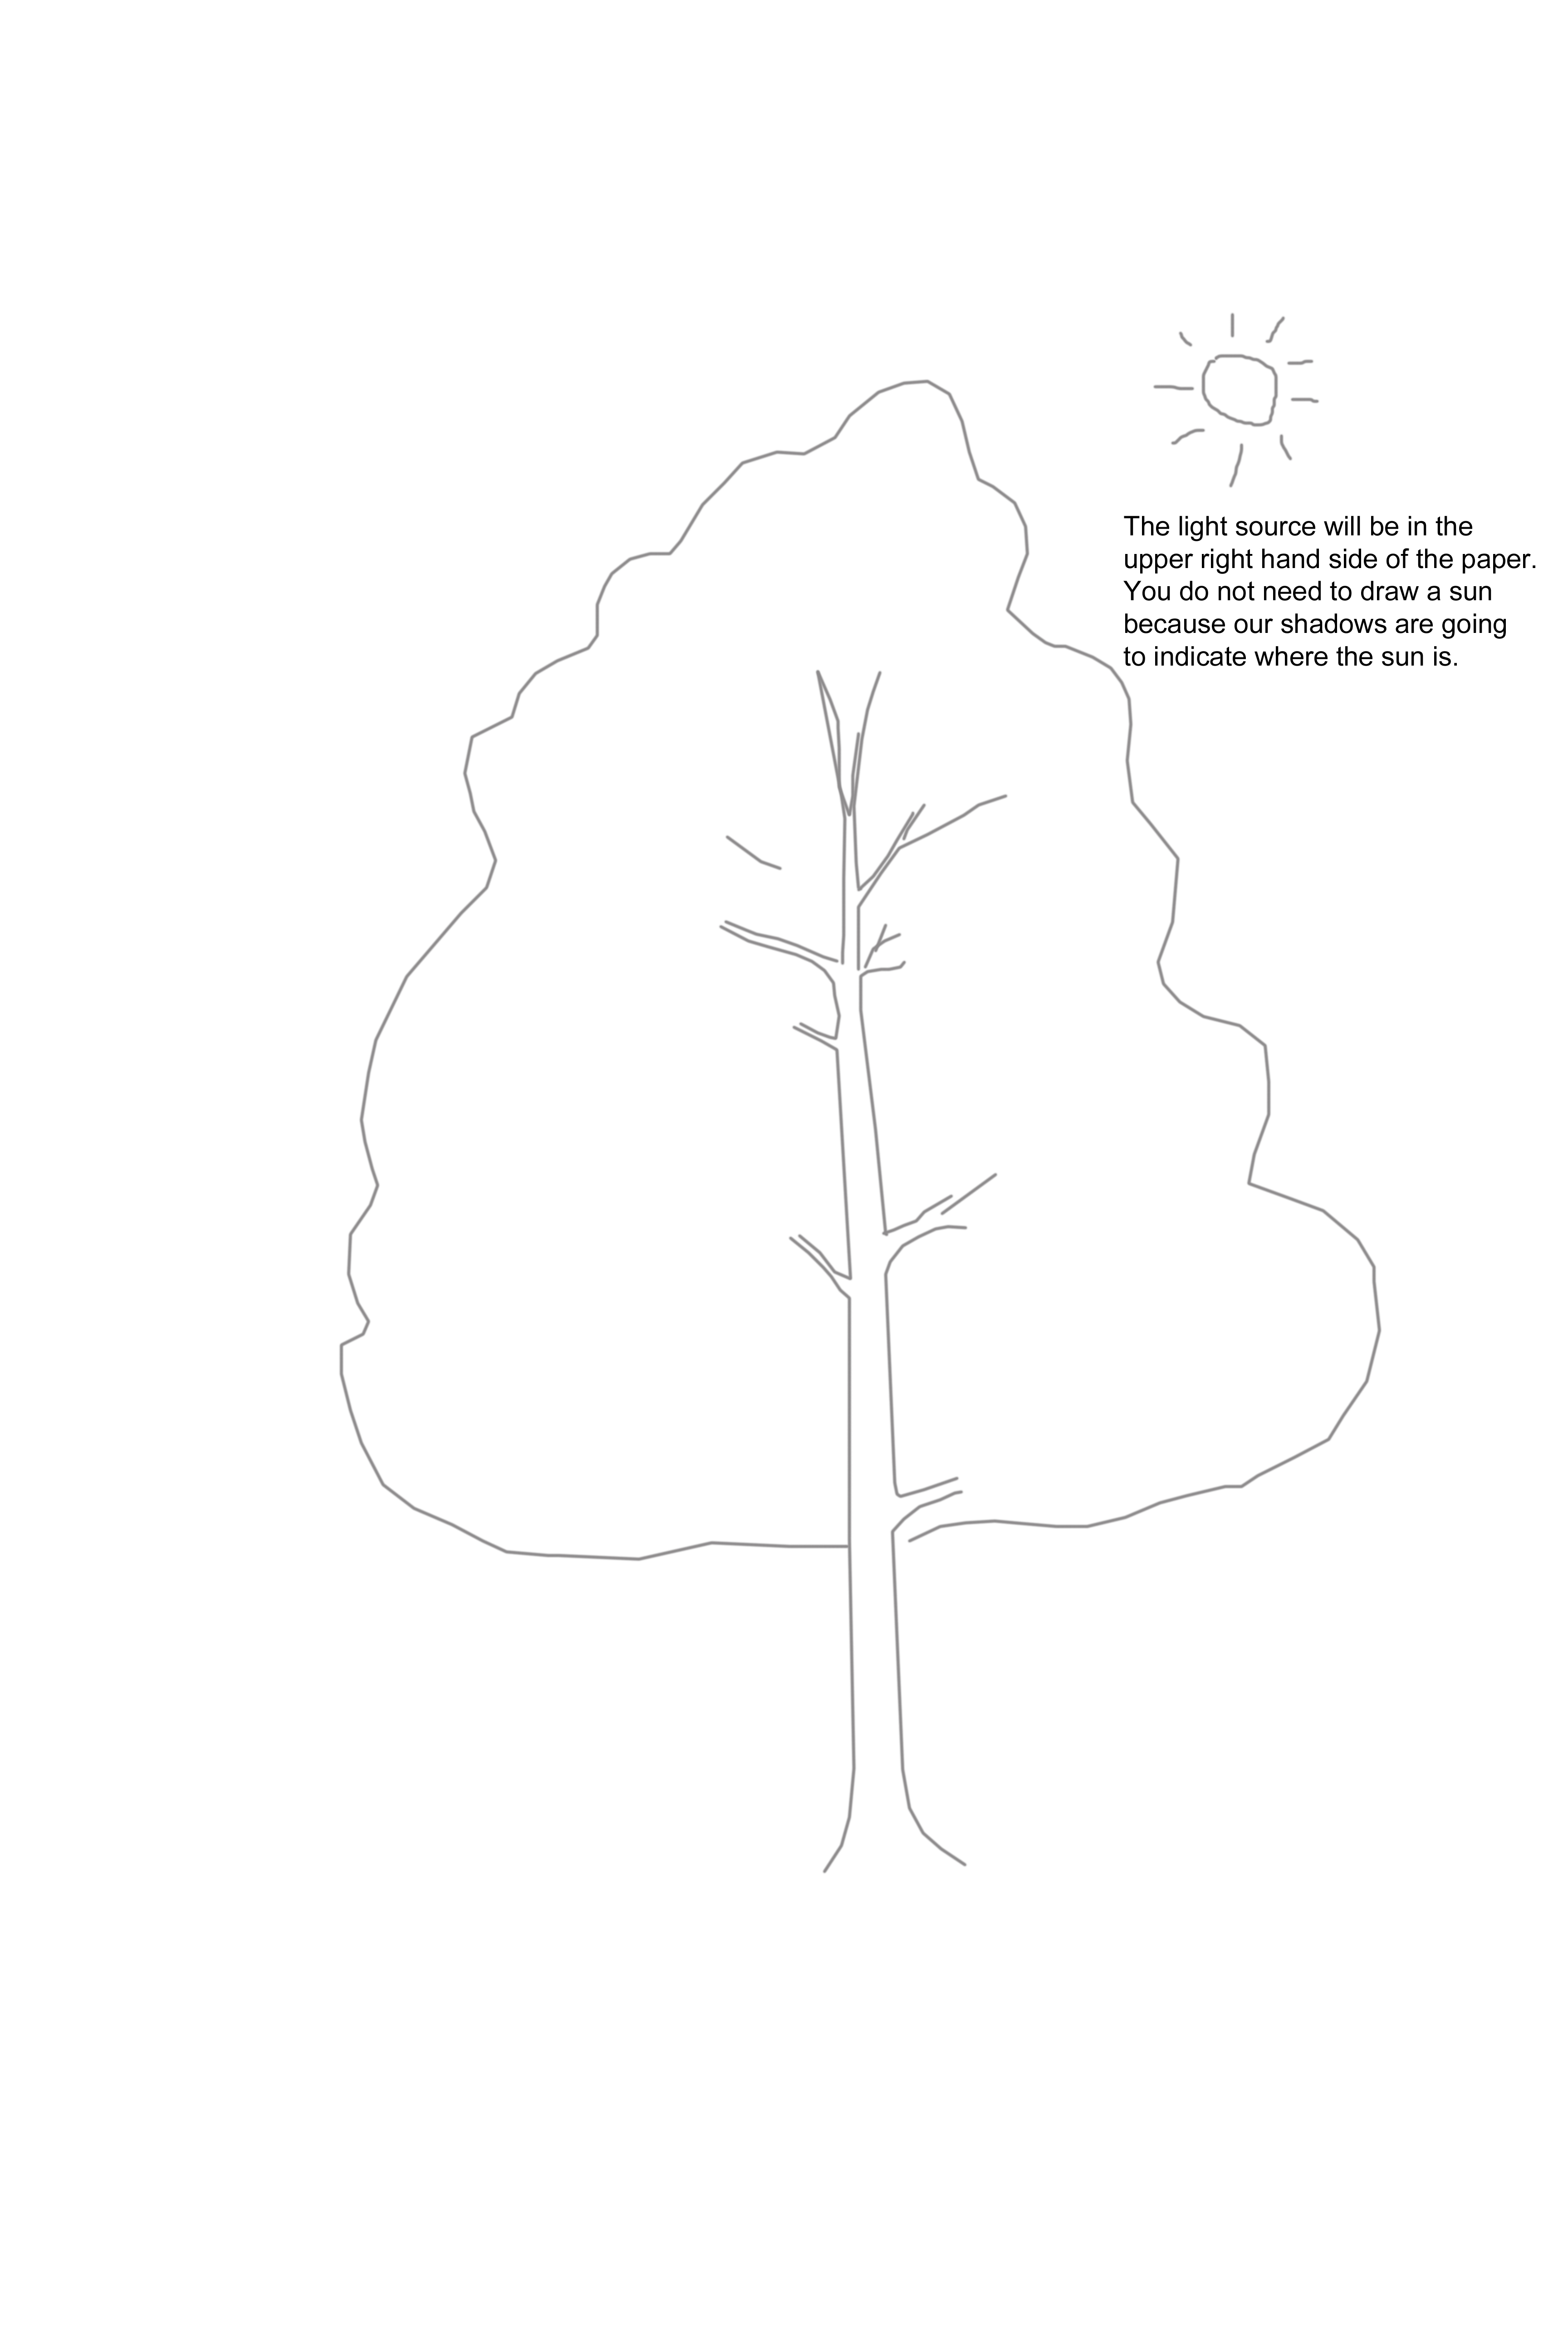
Step 3:
Shading is crucial to add the illusion of depth and dimension to your work. Before you begin this process, determine the main light source so you know which areas of your tree will be highlighted and which areas will be in shadow. It will also determine where the cast shadow will lie.
Step 4:
Once you’ve chosen where the light is coming from, begin blocking in areas that are shaded. I used a 6B pencil in a circular, scribble-like motion. The scribbling keeps the leaves loose and not too detailed. Continue to fill in the tree using clusters of circular scribbles. The bottom of each tuft of leaves should be darker than the top.
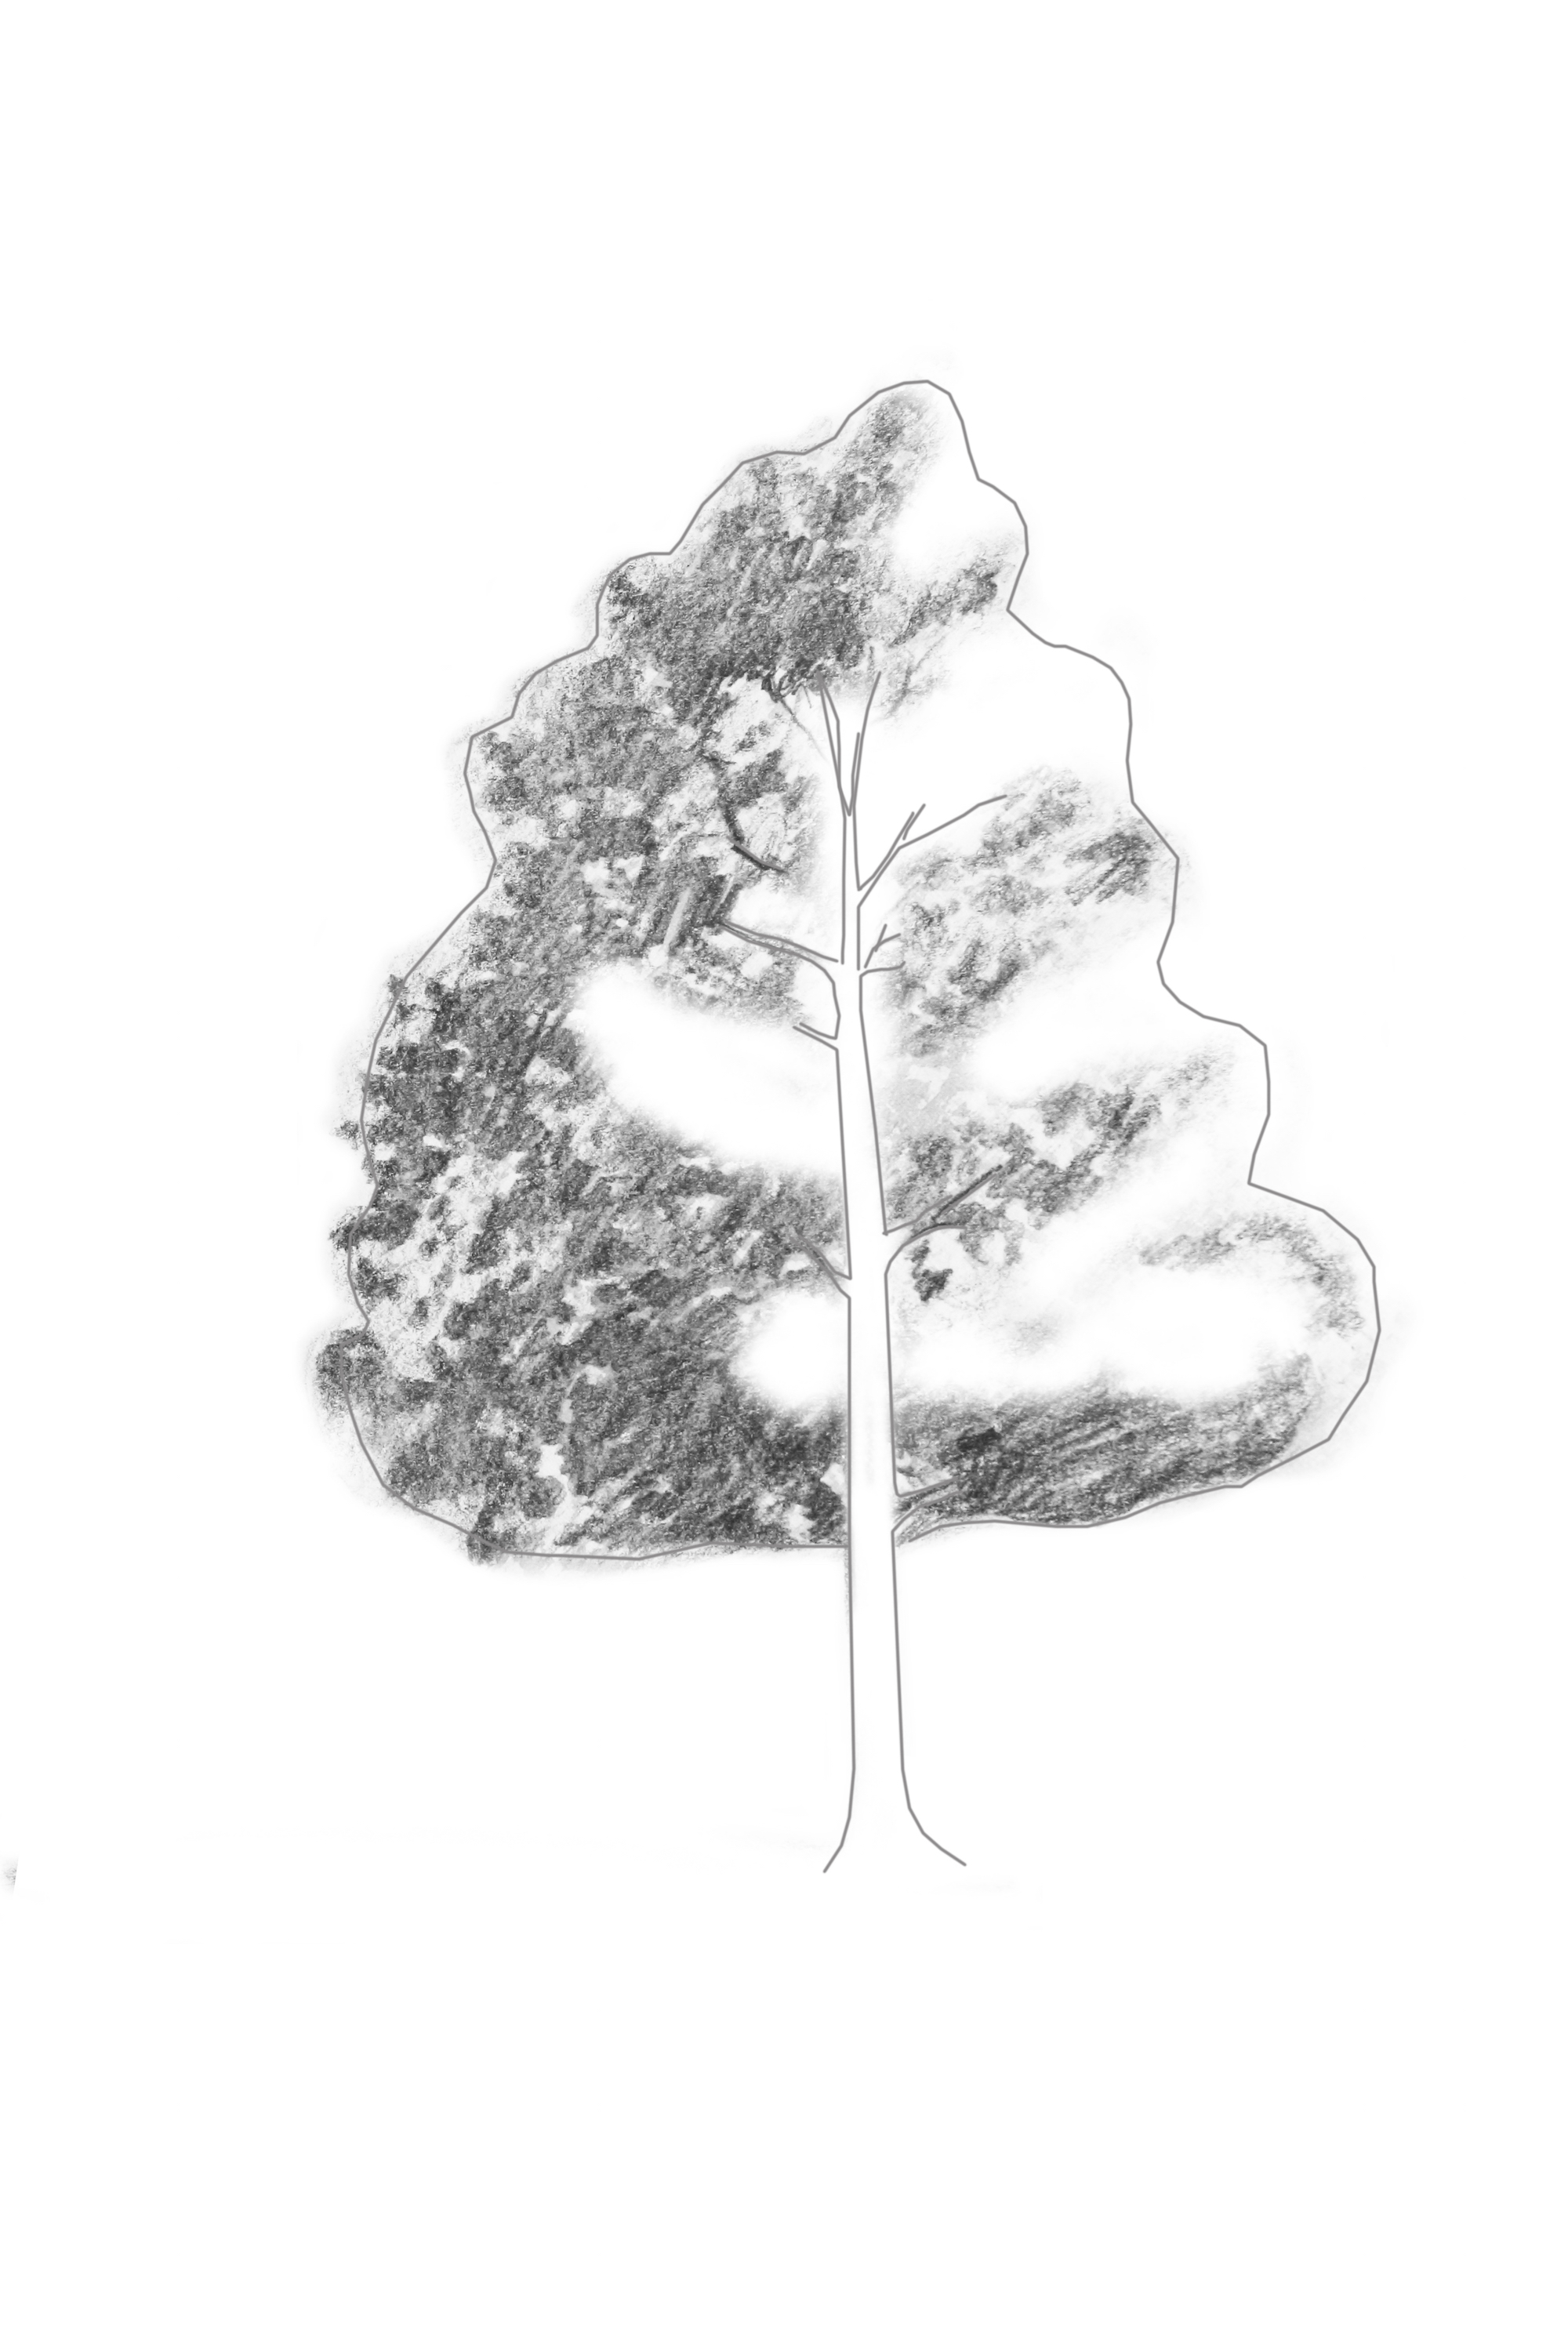
Step 5:
Continue to fill in all of the leaves, keeping the right-hand area light. If you accidentally make it too dark, you can go in with a kneaded eraser and dab at the darkness to pull up some of the pigment.
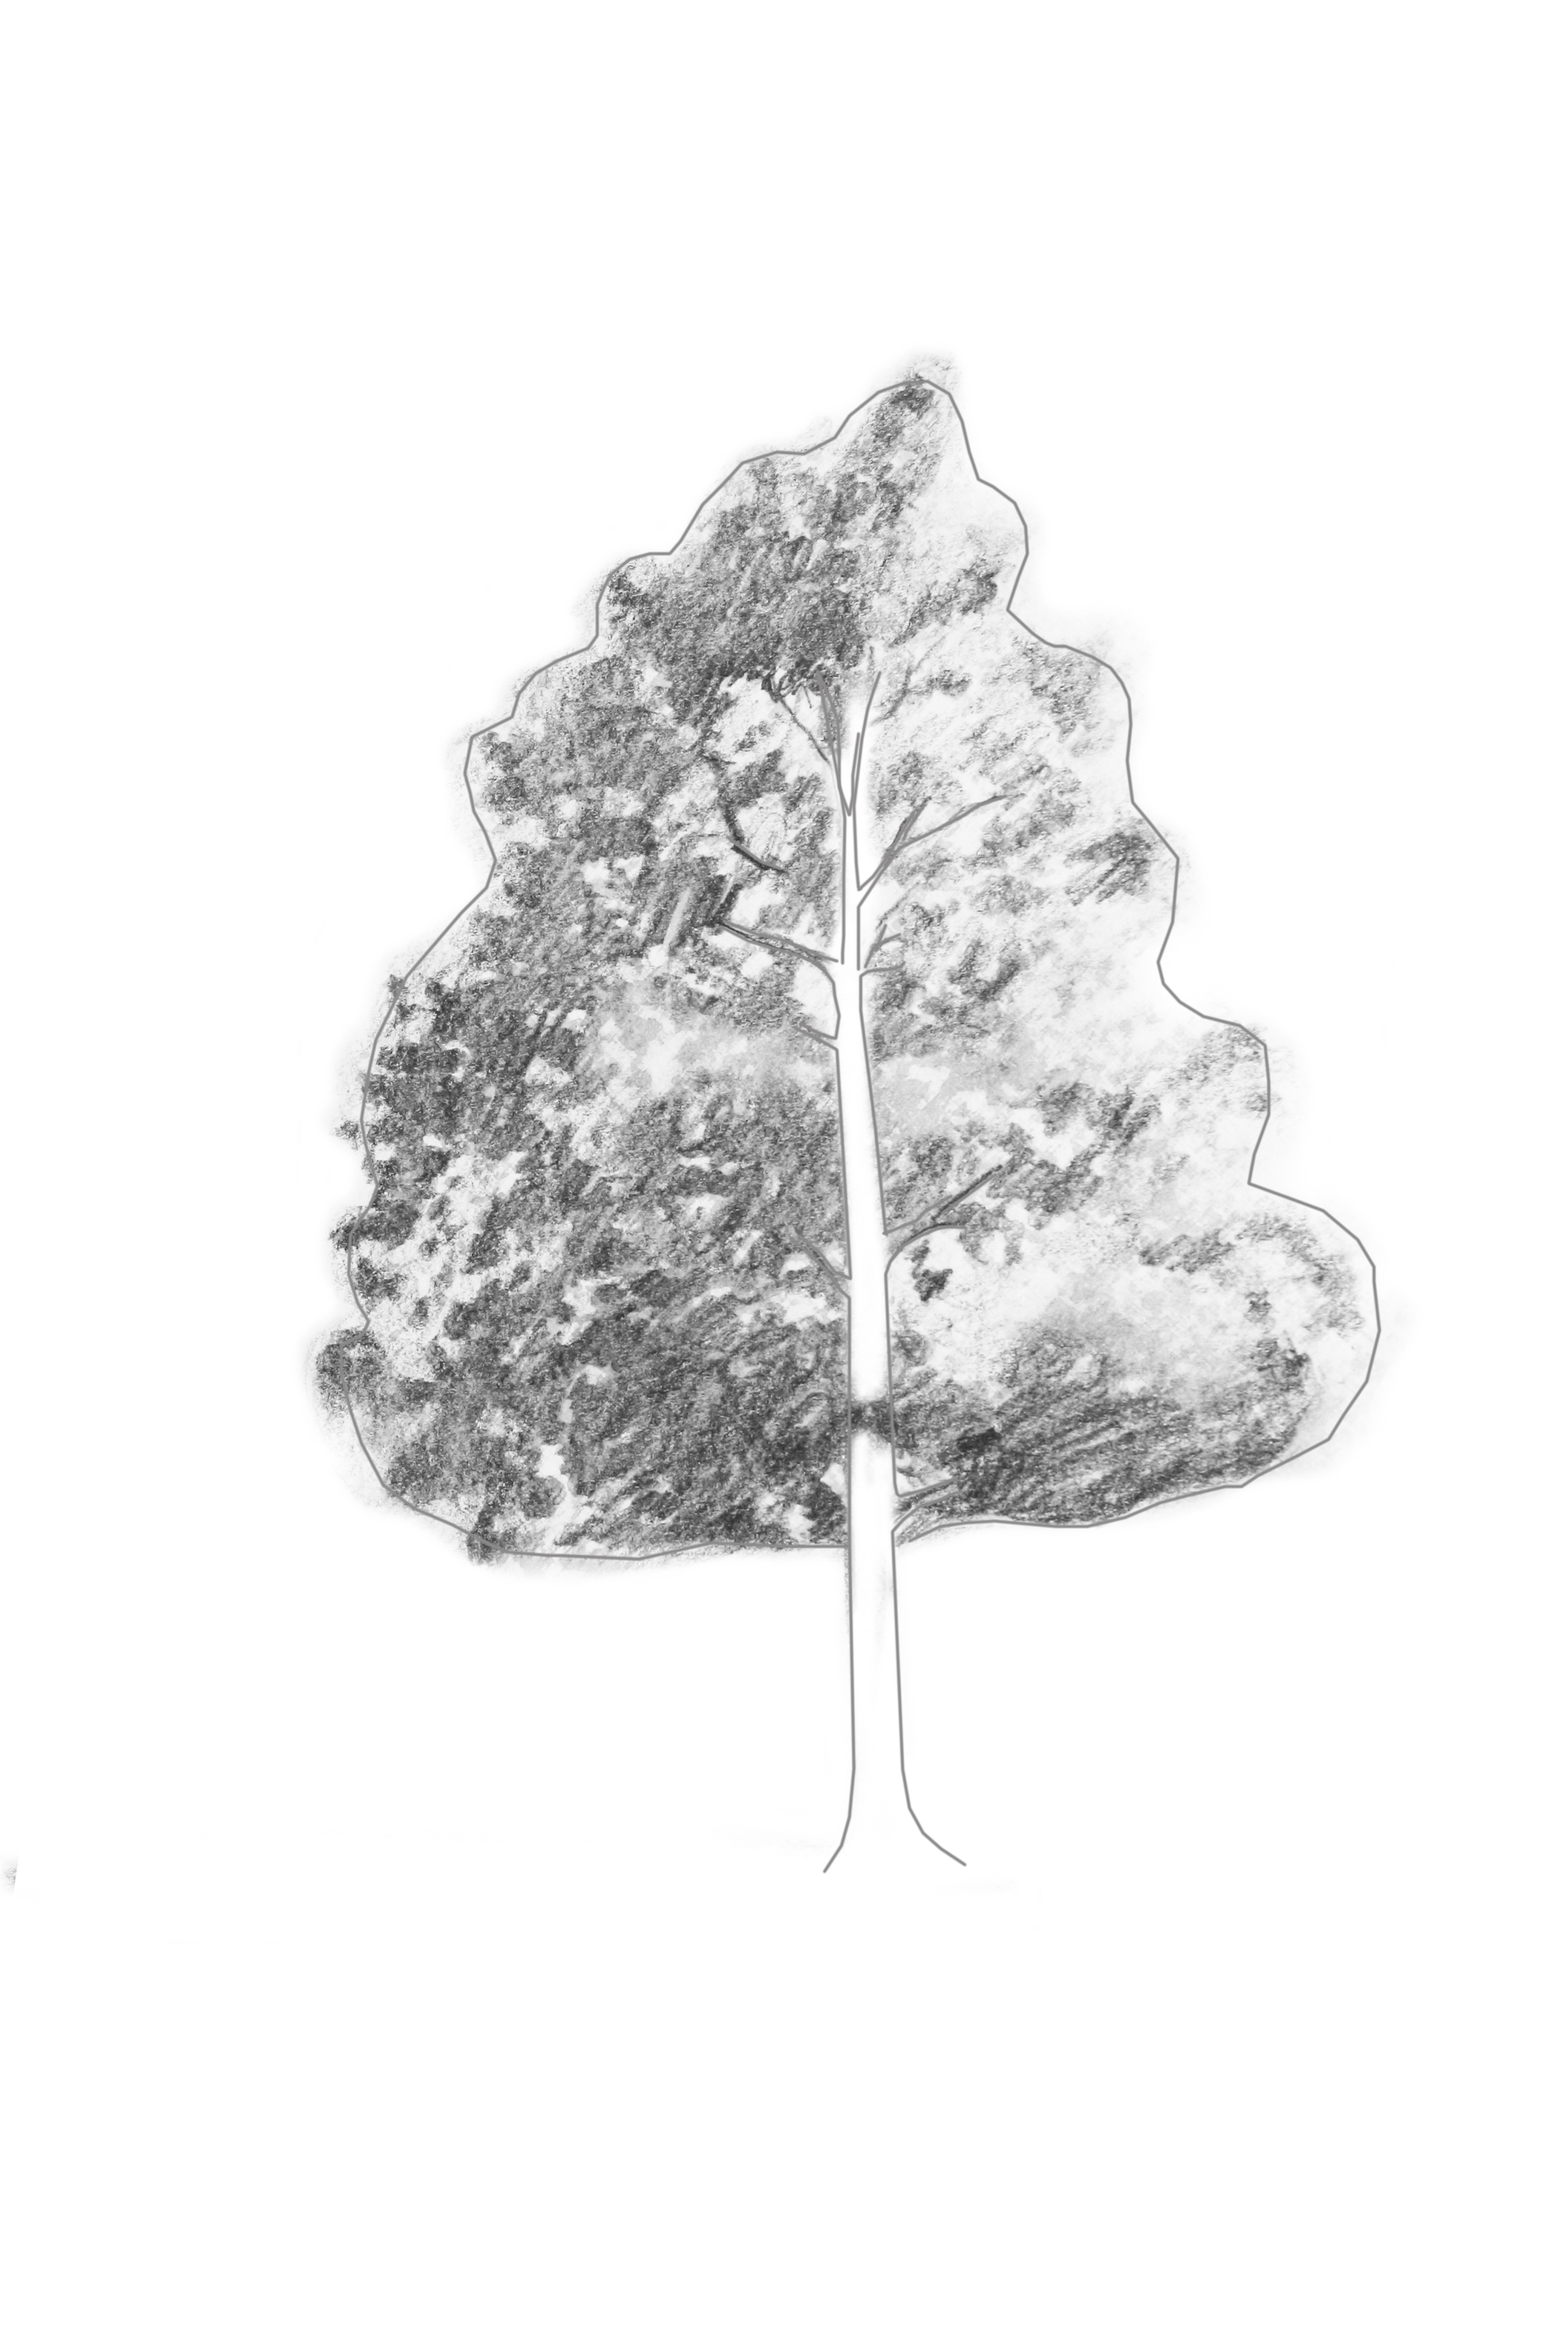
Step 6:
Don’t forget about the trunk. If the light source is on the right, like in this example, the left-hand side of the trunk and branches will be a bit darker. There should be a tiny sliver of lightness on the right to indicate reflected light or light that has wrapped around the cylinder of the trunk.
Step 7:
As you continue to shade, the original outline of your drawing should begin to blend in with the tree. Just as objects in real life are not outlined, your realistic drawing should not be outlined either.
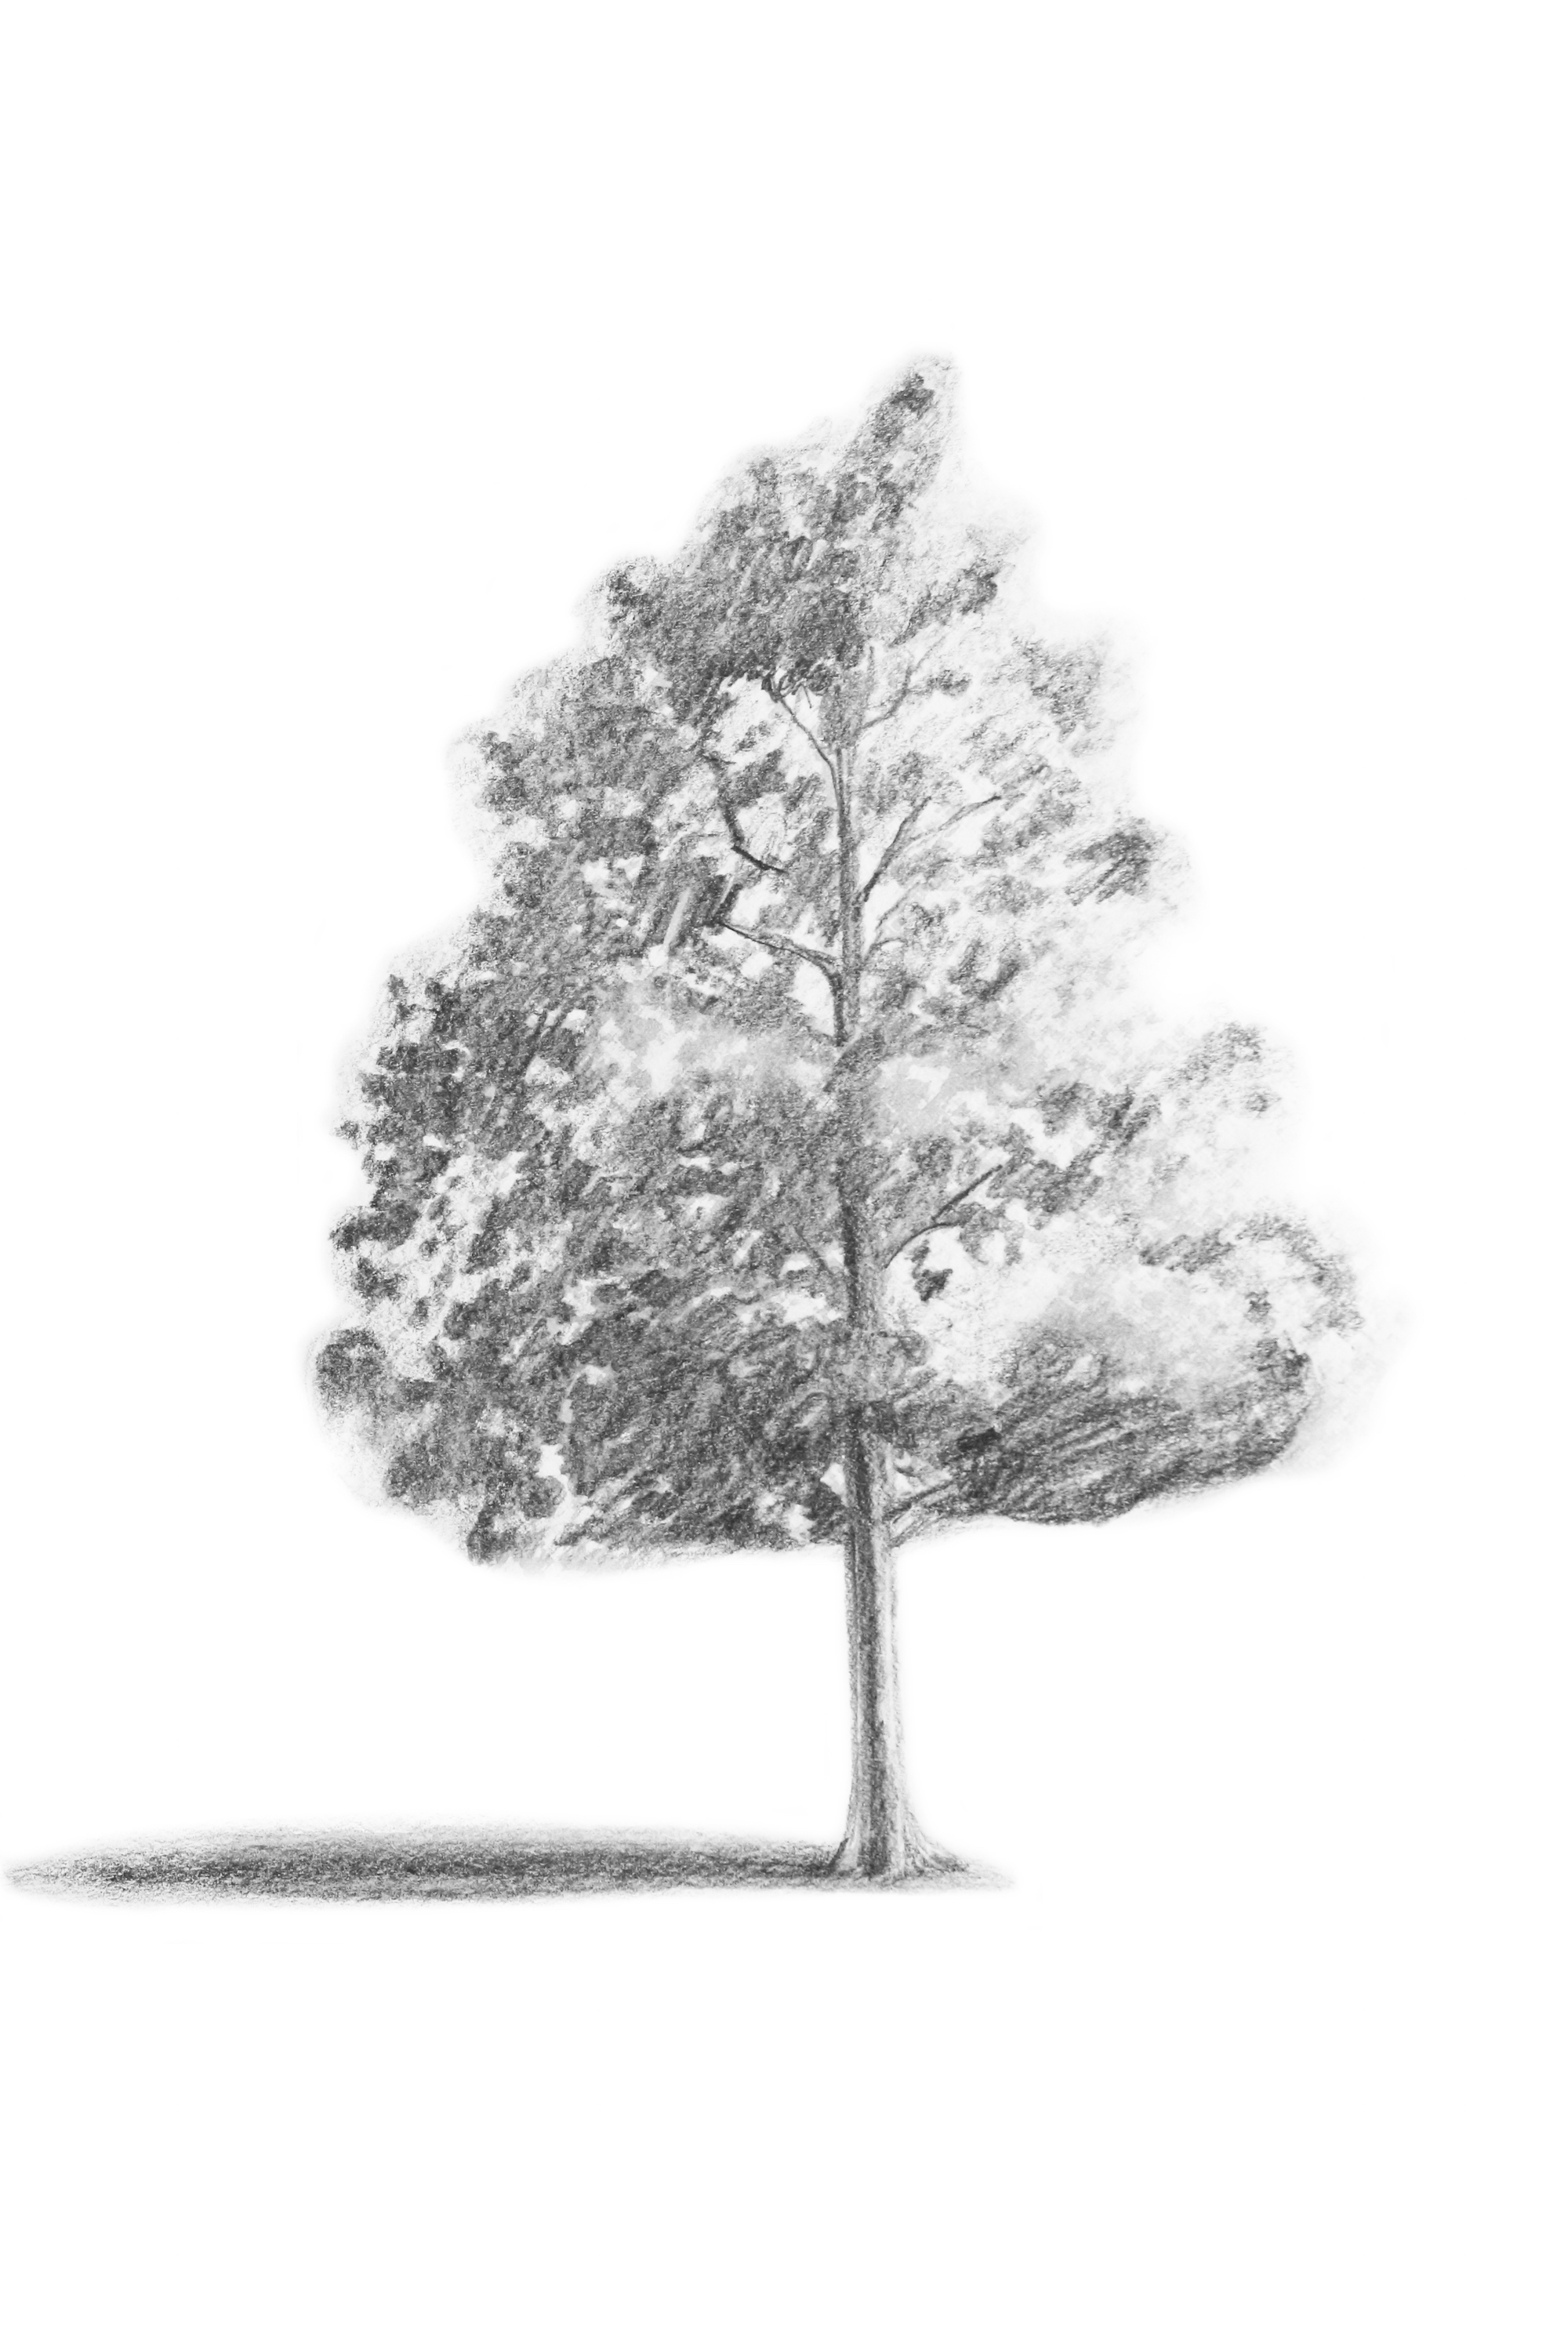
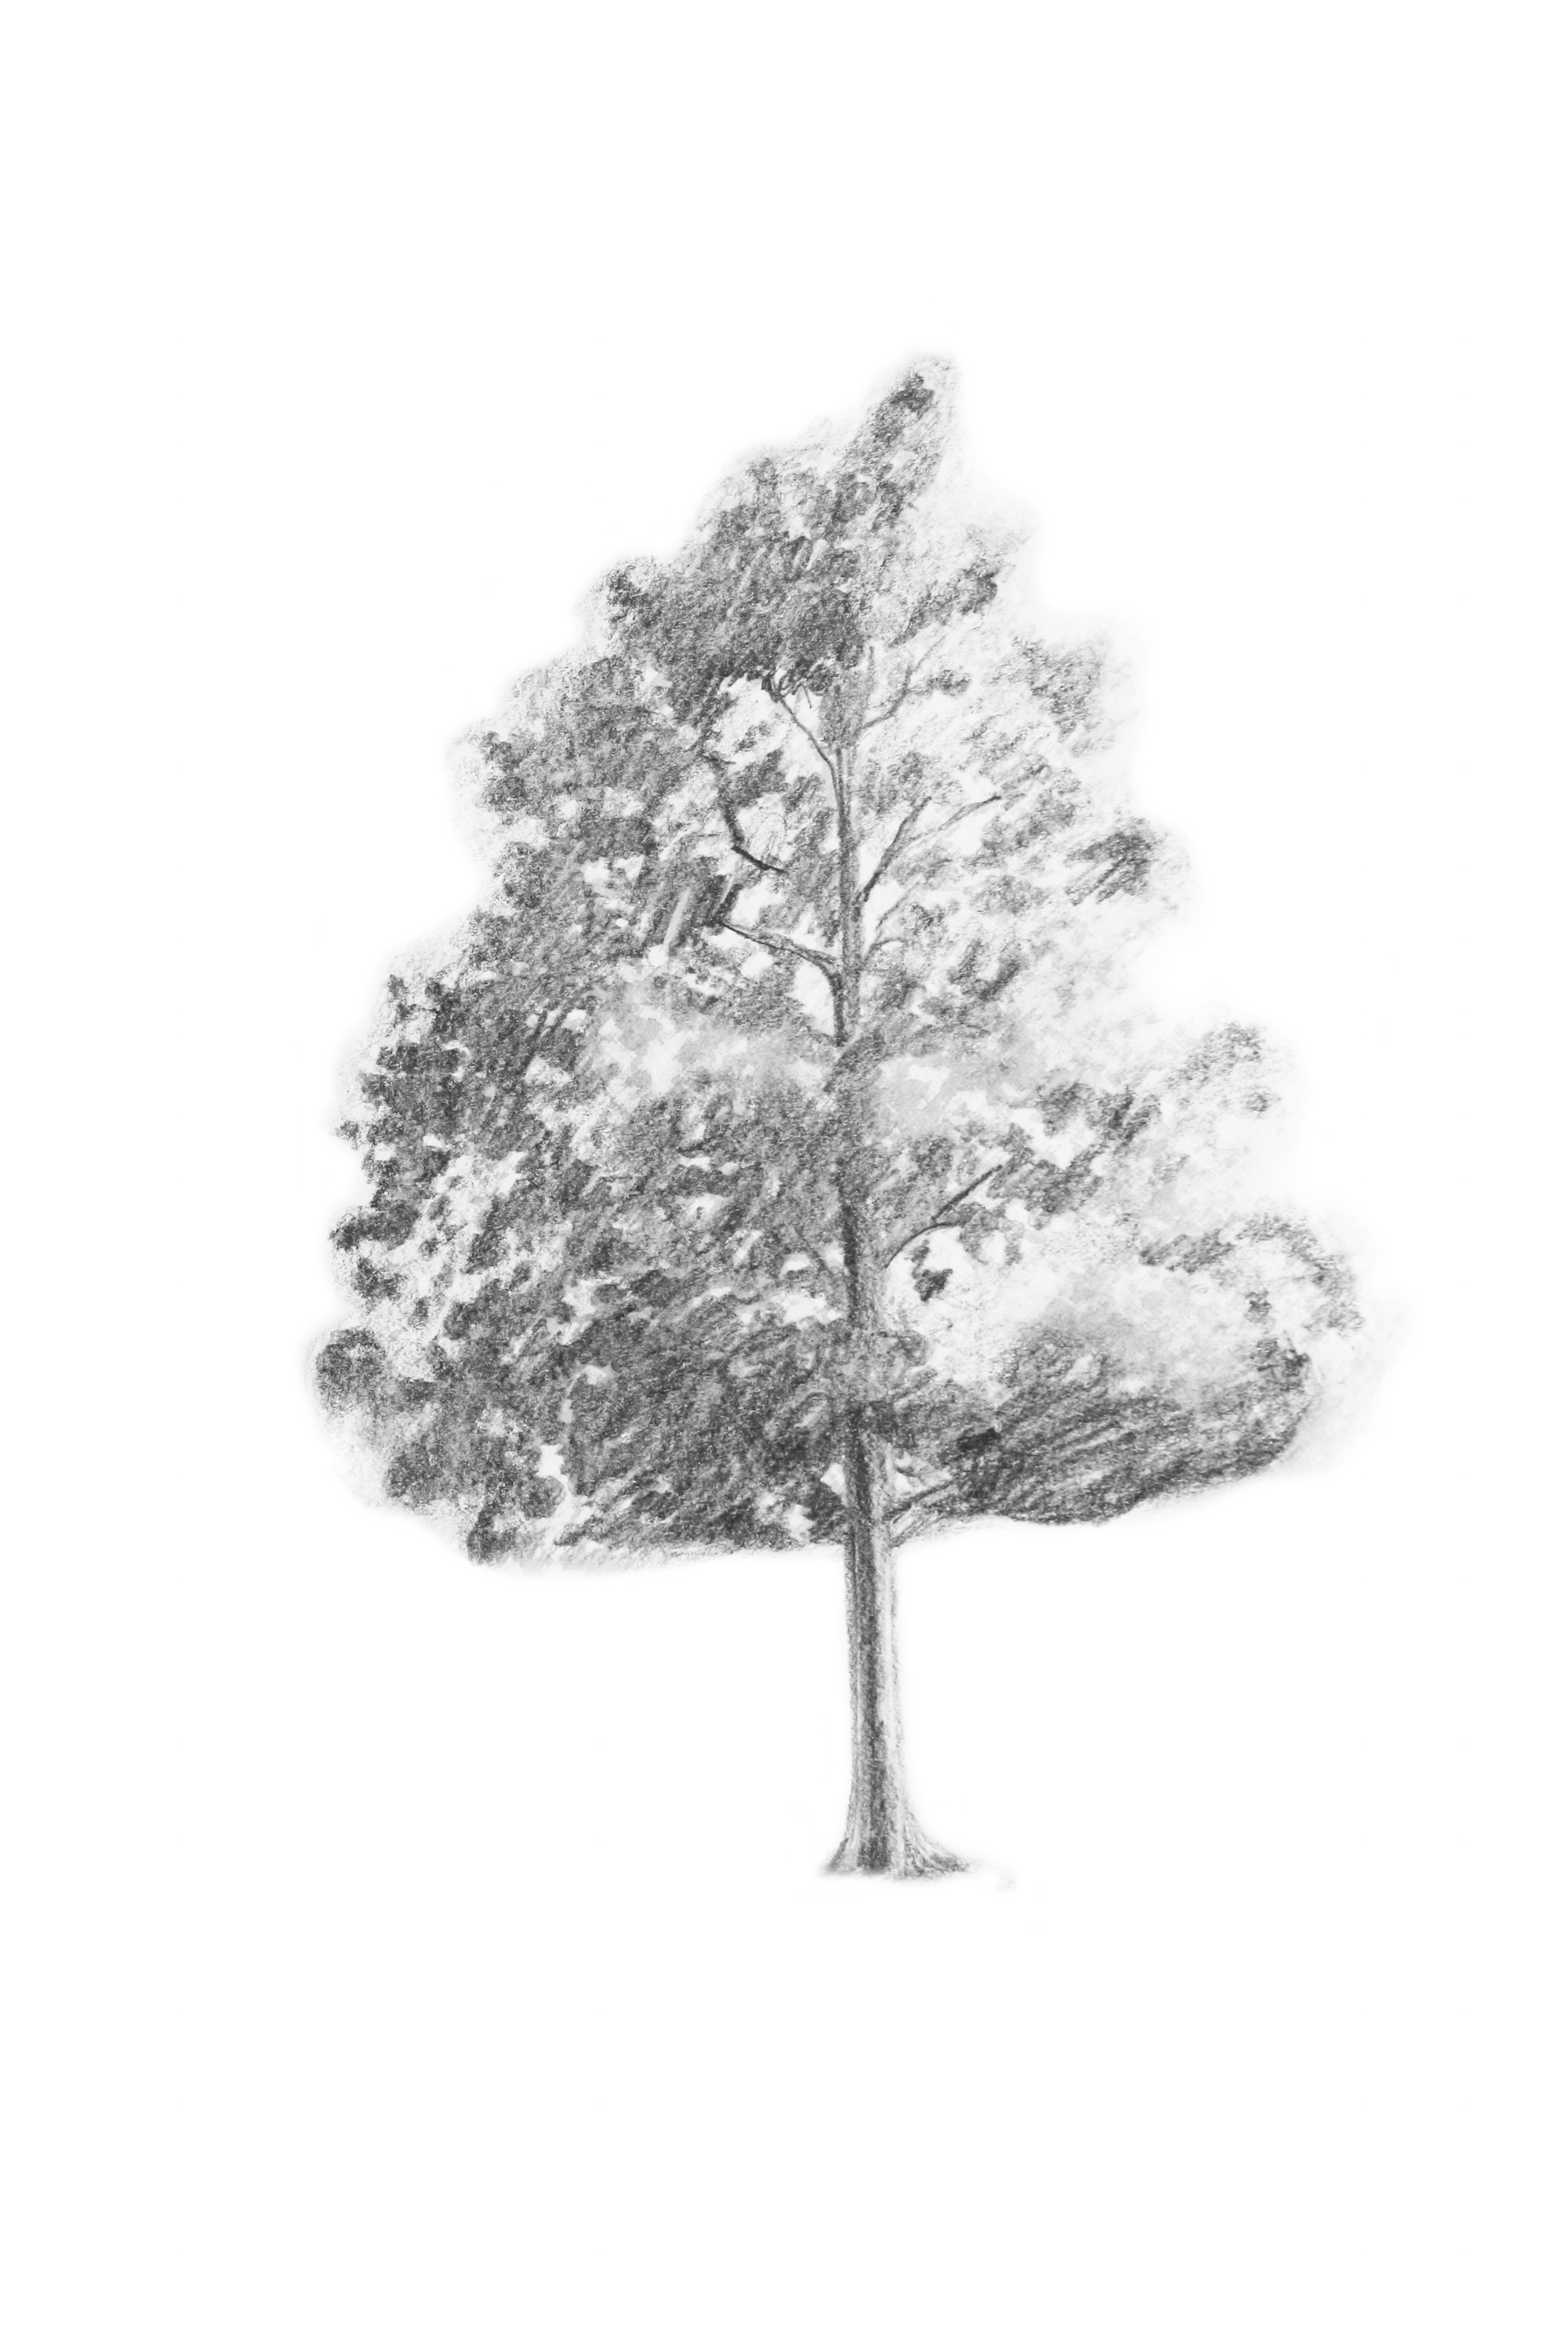
Step 8:
Finally, add a cast shadow. Cast shadows are more simplified versions of the object that produces them. In this case, I created a medium-toned area coming diagonally from the tree base and headed in the direction away from the light source. This shadow further reinforces where our light source’s direction.
Learn more about drawing from Craftsy instructor Catherine V. Holmes in her class Drawing Dimension: Shading Techniques on Craftsy!
blah