
You might love looking at repeat patterns — like the decoration on your favorite tote or shirt — but do you know how make them? If not, then you’re not alone. Drawing them is notoriously tricky.
Follow this tutorial to learn how to a draw repeating patterns.
All you’ll need to begin is a clean piece of paper and a pen or pencil. Your choice. I always start with pencil and trace over the lines with a pen. You probably won’t want to smudge your patterns.
Step 1.
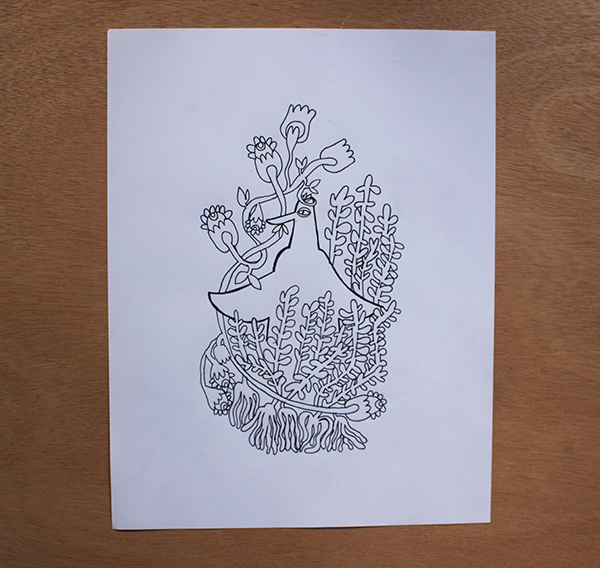
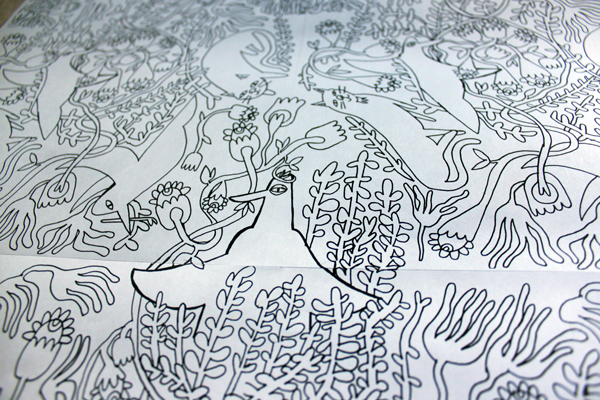
Begin by drawing a design in the middle of your paper without letting any of your design touch the edges. This is extremely important, because otherwise your pattern won’t perfectly match up. You can see that my design is a bird and different types of plants, and it’s all very stylized. Yours, of course, doesn’t have to be that way. It can be whatever you like to draw — animals, people, buildings, shapes — the possibilities are endless!
Step 2.
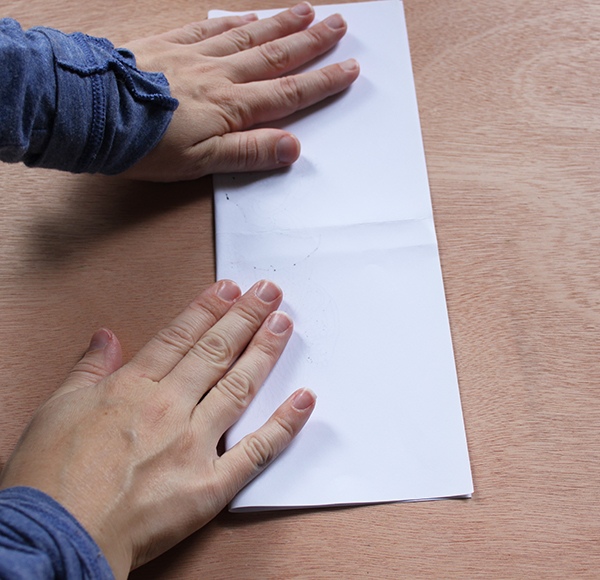
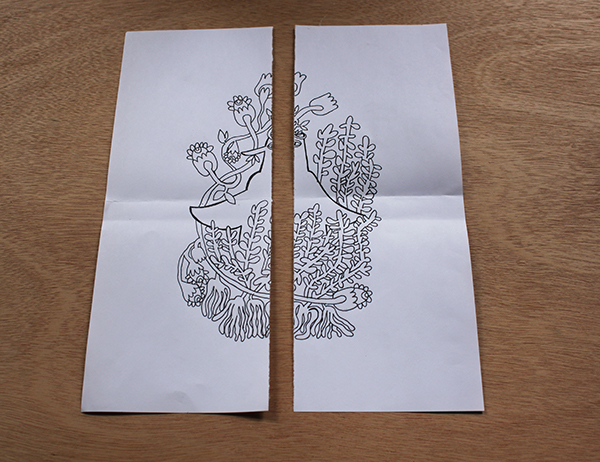
Once you’ve finished your drawing in the middle of the paper (nothing is touching the edges, right?), then you are going to fold your paper in half and cut it. This is a scary step, but it’s a crucial one. Now, flip the two pieces. The top is now the bottom and the bottom is now the top.
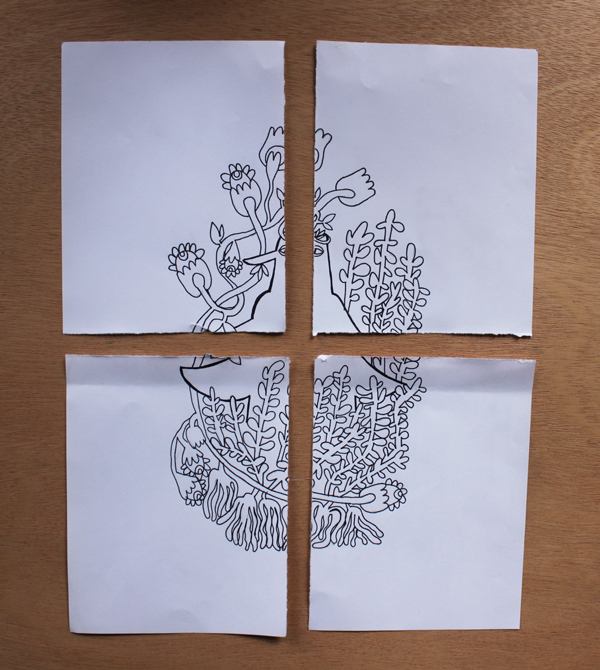
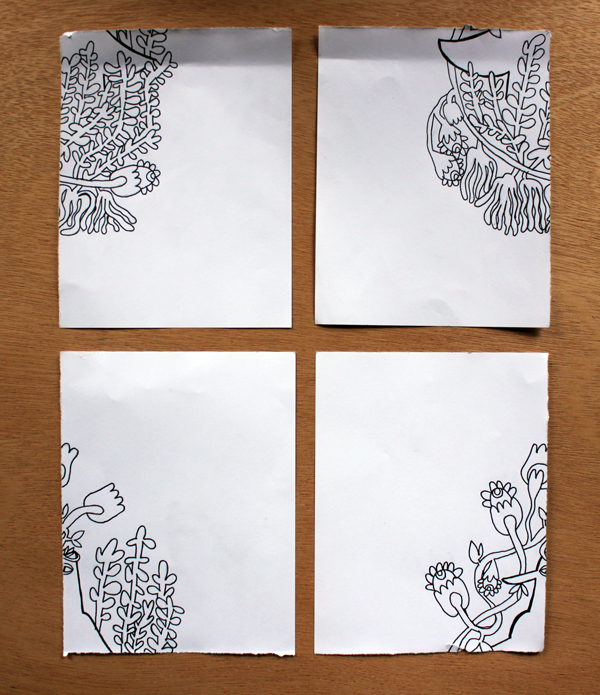
We’re going to cut the paper again! This time we’ll fold the two halves like a greeting card and cut along that line. Once you’ve done that, flip the pieces. The left is now on the right and the right is now on the left. If you’re having trouble picturing this, look closely at my photos.
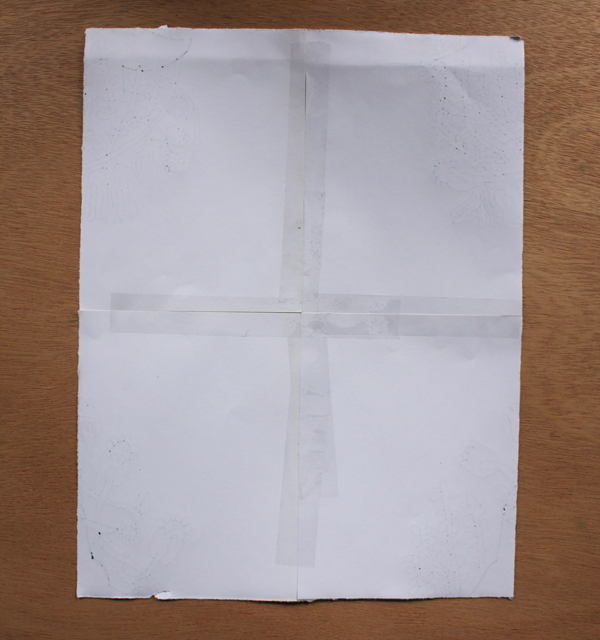
Afterward, tape the pieces together. Put the tape on the backside of the paper so that it won’t obstruct your drawing later.
Step 3.
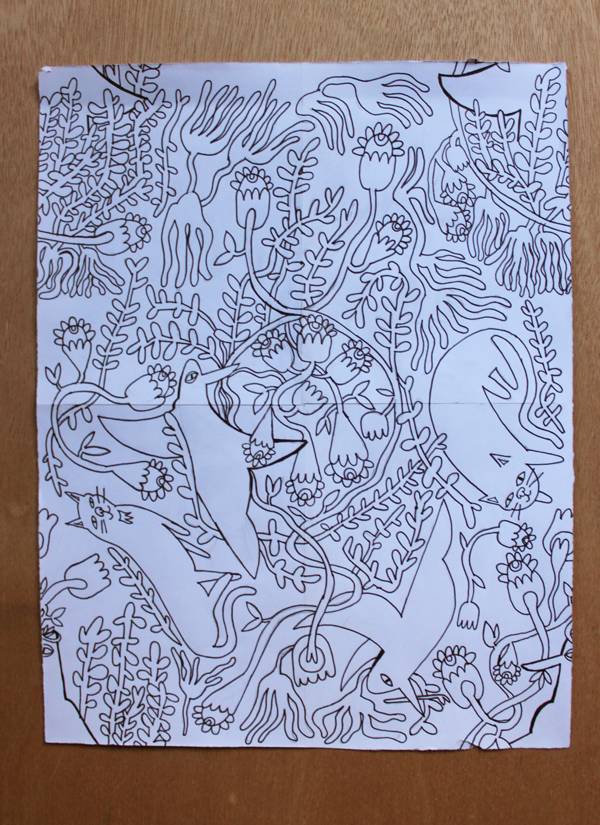
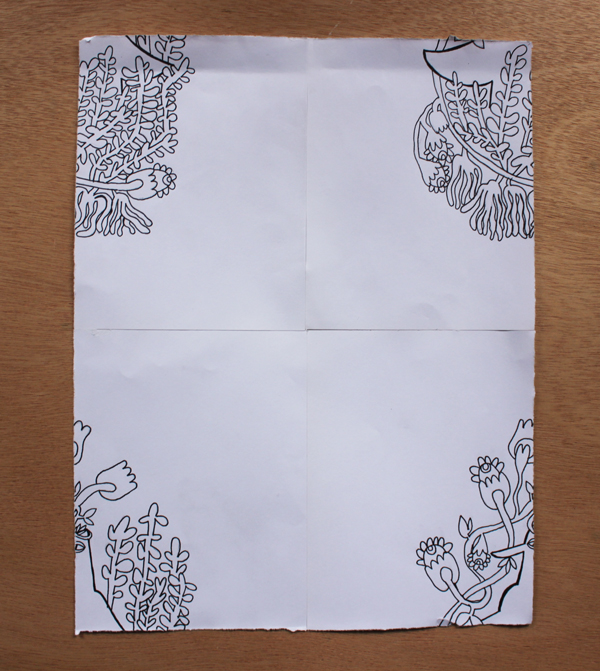
You’ll see that there’s a whole bunch of white space in the middle of the page with your original design on the sides and corners. Here’s where you’ll fill in the rest of your design. And remember — don’t draw to any of edges of the paper! Once you’ve finished that, ta-da! You have your repeatable tile.
Step 4.
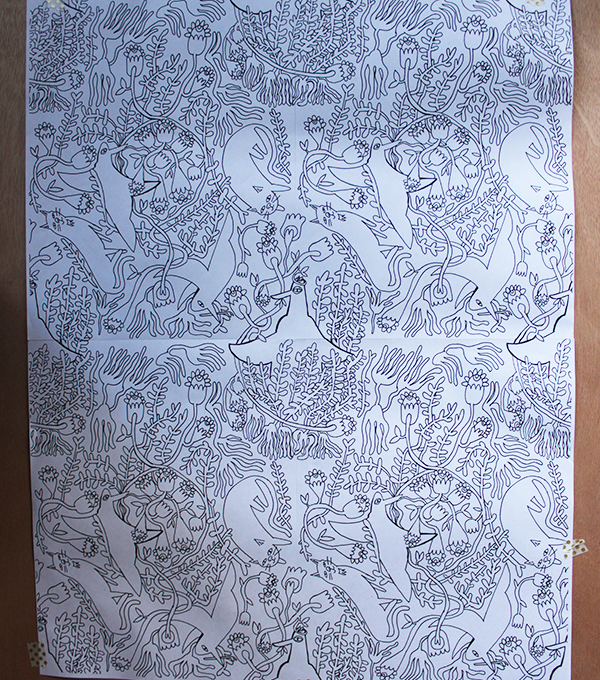
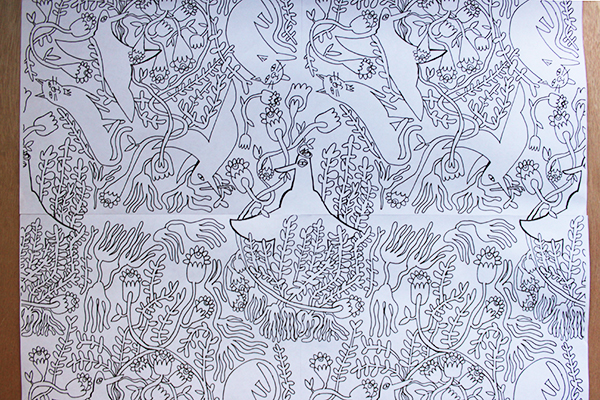
Now it’s time to do something with your repeat pattern. I duplicated mine on a copy machine and lined the pages up and then taped them together (it was helpful to have traced over the lines with pen). Otherwise, you can scan this drawing into your computer and edit it using your favorite software. You can color and repeat it from there.
What can you do with a repeating pattern?
Having a repeat pattern already created and in your art arsenal is a very handy tool, especially if you have it scanned in and saved on your computer. You could have it printed and later used in collage or other papercrafts.
Think about incorporating it in a scrapbook or on a greeting card. Or, better yet, there are even places that will print customized gift wrap for you! With the gift-giving holidays right around the corner, you could draw a totally unique pattern that your friends and family will be sure to love.
Share tips, start a discussion or ask one of our experts or other students a question.
No Responses to “Learn How to Draw a Repeating Pattern — No Computer Needed!”