
Follow along to learn how to draw a seahorse step by step:
Step 1. Plan your composition.
Gather your reference material for your seahorse. The library and Internet have lots of great images of seahorses. Decide how you want your drawing to look and draw a simple pose or take a stretch and draw a more complicated pose. Either way, your seahorse will come out great with these simple steps.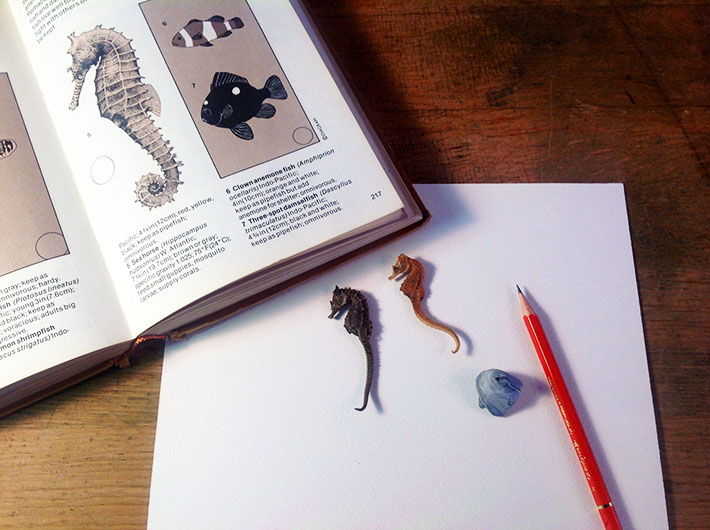 Step 2. Rough out your sketch.
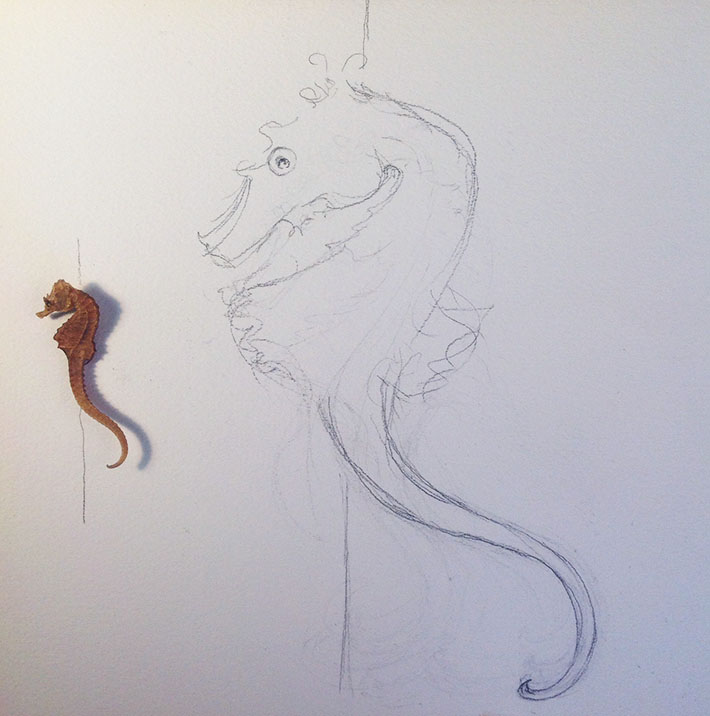
This may take a little while as you try to form your seahorse.
If this is the first time you have ever tried to draw a seahorse, you may be surprised by the shaping of these creatures as you try to draw them. The eyes are high and far up on the head and the dorsal fin is very low on his back. It might take a few attempts to get a feel for it.
You can see my “struggle” sketch lines on the lower part of my sketch. I finally placed a straight line under my “model” and then in the same place on my sketch to help me roughly line up where the curve of the tail was to begin in respect to the top of the head.
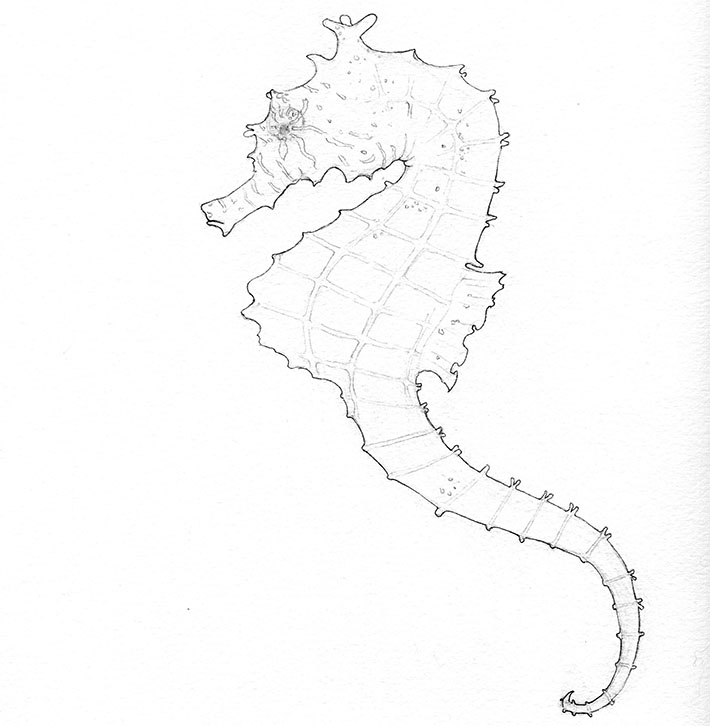
Step 3. Refine your sketch.
Refine and clean up your sketch lines as best as you can. Start the foundation for your detailing (which is where the fun begins!), by following steps correlating to the letters on the sketch below. A. Shape your seahorse’s eye as a circle within a circle. The inner circle will be the pupil of the eye so keep it fairly small and keeping it off center will give a little personality and life to him, as if he is looking at something. B. Draw the same vertical lines that I have drawn on the seahorse’s body, curving them to the shape of the the body. C. Shape the fin as you like. I took artistic liberty and gave it a flowing shape, but still in the correct anatomical placement. D. Shape the little nubs that run up and down the seahorse. Some are a little pointier and wave-shaped on the head, with one being a larger crown, but the rest are much the same. Notice the dotted green lines for instruction D — this means to try to place the nubs evenly from side to side. We will be connecting these “nubs” to form a pattern on his body in the next step.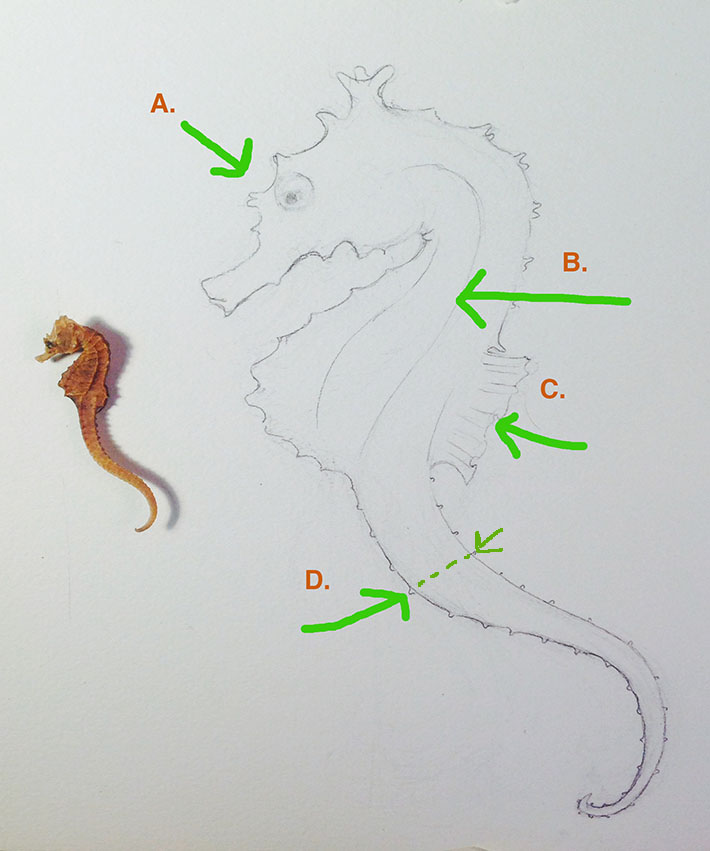
Step 4. Detail your seahorse.
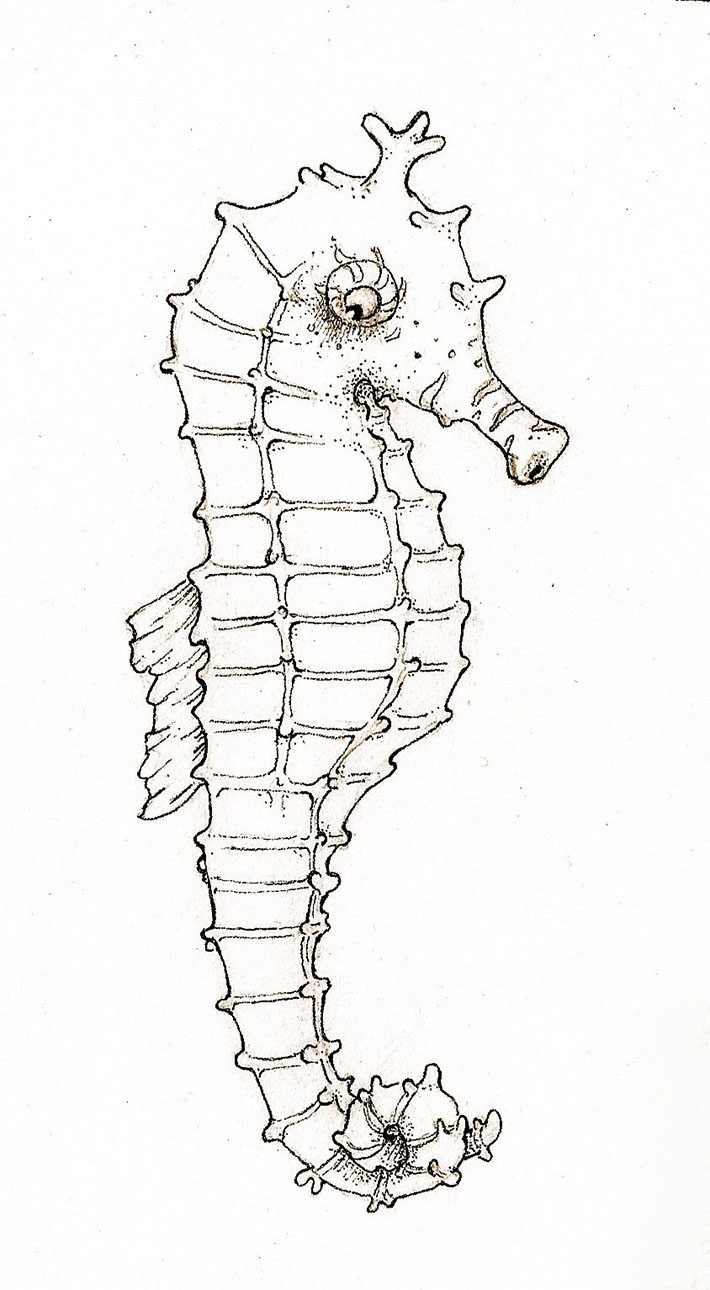
Following the vertical lines (Instruction B), draw horizontal lines across in an even pattern, meeting on either side of the seahorse’s outer nubs. You may have to move some of the nubs to keep one side even to the other. Think of it as drawing rounded edge squares inside each square, like windowpanes.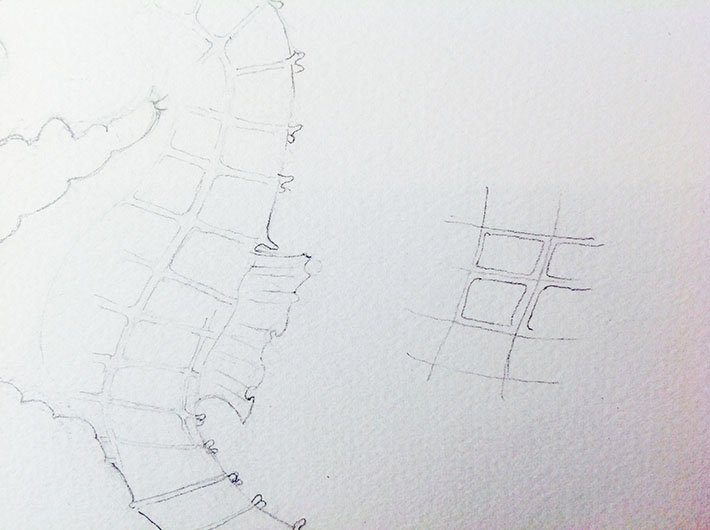 Continue the pattern through the whole mid-section tapering into the head area. At the lower part, taper into the tail to just even horizontal double lines all the way to the tip of the tail.
Add interesting markings if desired, especially around the eye area, and tidy up your sketch in preparation for paint.
Continue the pattern through the whole mid-section tapering into the head area. At the lower part, taper into the tail to just even horizontal double lines all the way to the tip of the tail.
Add interesting markings if desired, especially around the eye area, and tidy up your sketch in preparation for paint.
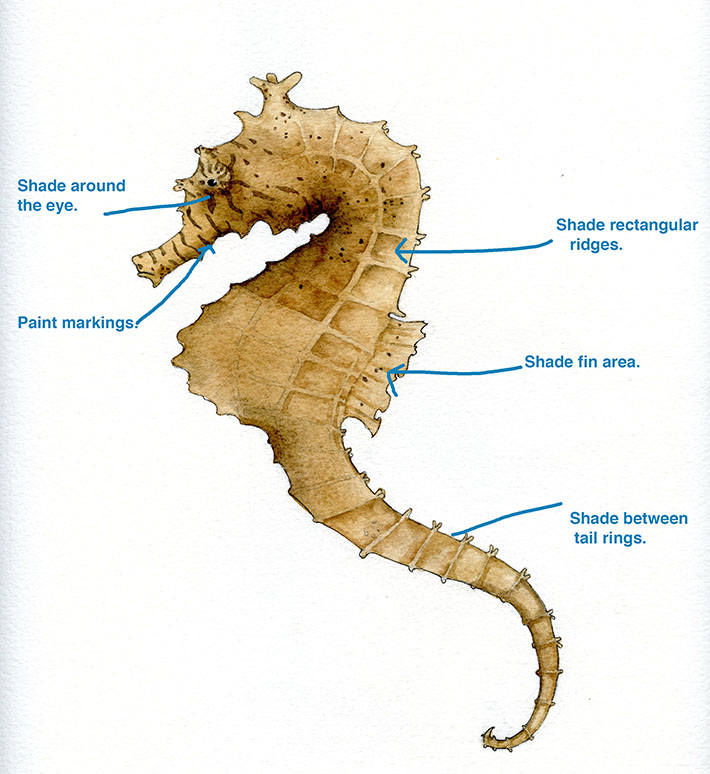
Step 5. Apply finishes.
Wet your seahorse and lay down a base color. I am using a mix of Burnt Sienna, Ivory Black with a tiny bit of Quinacridone Gold. While wet, it is a good time to shade around the eyes and the crook of the neck and anyplace else you feel your piece will benefit from. When dry, start your detailing:- Shade near the eye – partial shading around half of the outside of the eye is enough to give depth.
- Shade in the rectangular ridges of the seahorse tail rings and the dorsal fin.
- Paint the markings on the seahorse. I used the same mix I used for his body with some sepia added.
 Take a good look at your finished piece and deepen or add more detail if you think it need more definition.
Share tips, start a discussion or ask one of our experts or other students a question.
No Responses to “Explore the Sea: Draw and Paint a Seahorse Step-By-Step”