
 Photos and drawings via CakeSpy
By starting with a simple outline and filling it in with alternating patterns, you’ll slowly build a drawing that will help you build skills, master the art of drawing patterns and thrill you with the intricate outcome.
Photos and drawings via CakeSpy
By starting with a simple outline and filling it in with alternating patterns, you’ll slowly build a drawing that will help you build skills, master the art of drawing patterns and thrill you with the intricate outcome.
What is a zentangle?
First things first: What on earth is a zentangle, other than a funny word that your computer or cell phone desperately wants to autocorrect to “pentangle”? A zentangle is sort of like a doodle with intention. It typically starts with a simple shape or outline, which is then filled in using delicate line patterns — and sometimes, there are patterns within the patterns. While they look impossibly intricate and complex, a zentangle is actually quite easy to draw and is accessible to all levels. It’s true, and this tutorial will prove it!How to draw a zentangle
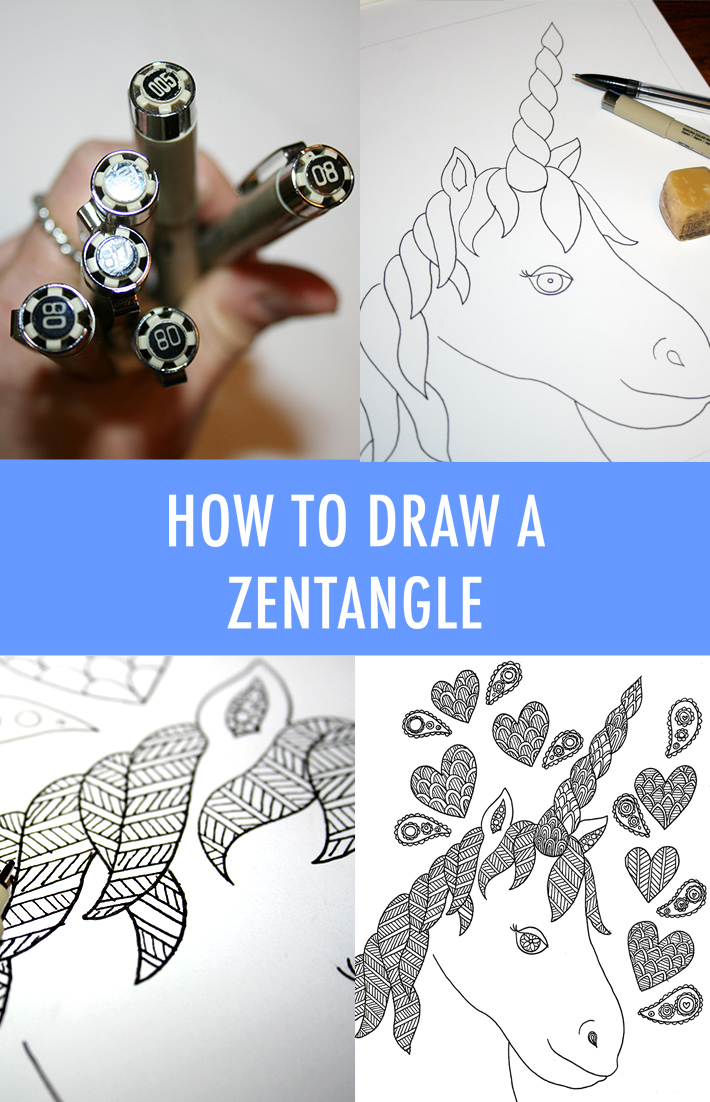
You’ll need:
- High-quality drawing paper (for this tutorial, I used Bristol board)
- Pencil and eraser, if making a sketch first (optional)
- Pens, in 2-3 different thicknesses
Step 1:
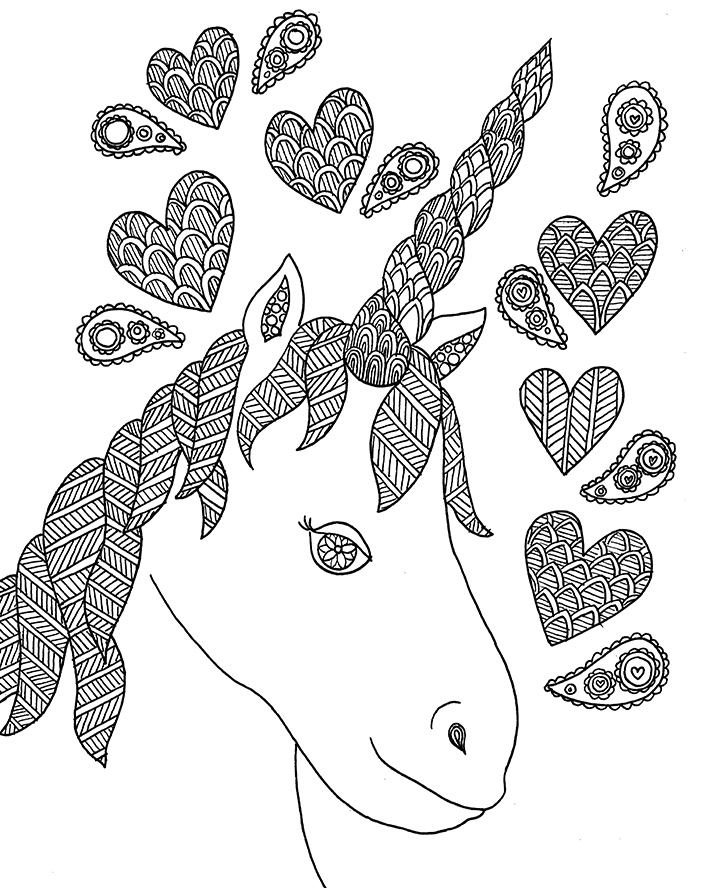
Using your thickest pen nib, create the central image for your zentangle. It’s best to choose a fairly simple outline image to start: a flower, tree or an outline that includes assembled organic shapes. It’s important that the portions of your outline have “closed” edges. Think about the image as if you’d be coloring it in. In essence, that is what you will be doing: filling in each portion of the initial image as if it is a mini canvas. This one began as a fairly simple unicorn outline drawing. Note how the components of the outline, such as the locks of hair and portions of the horn, are all actually individual shapes.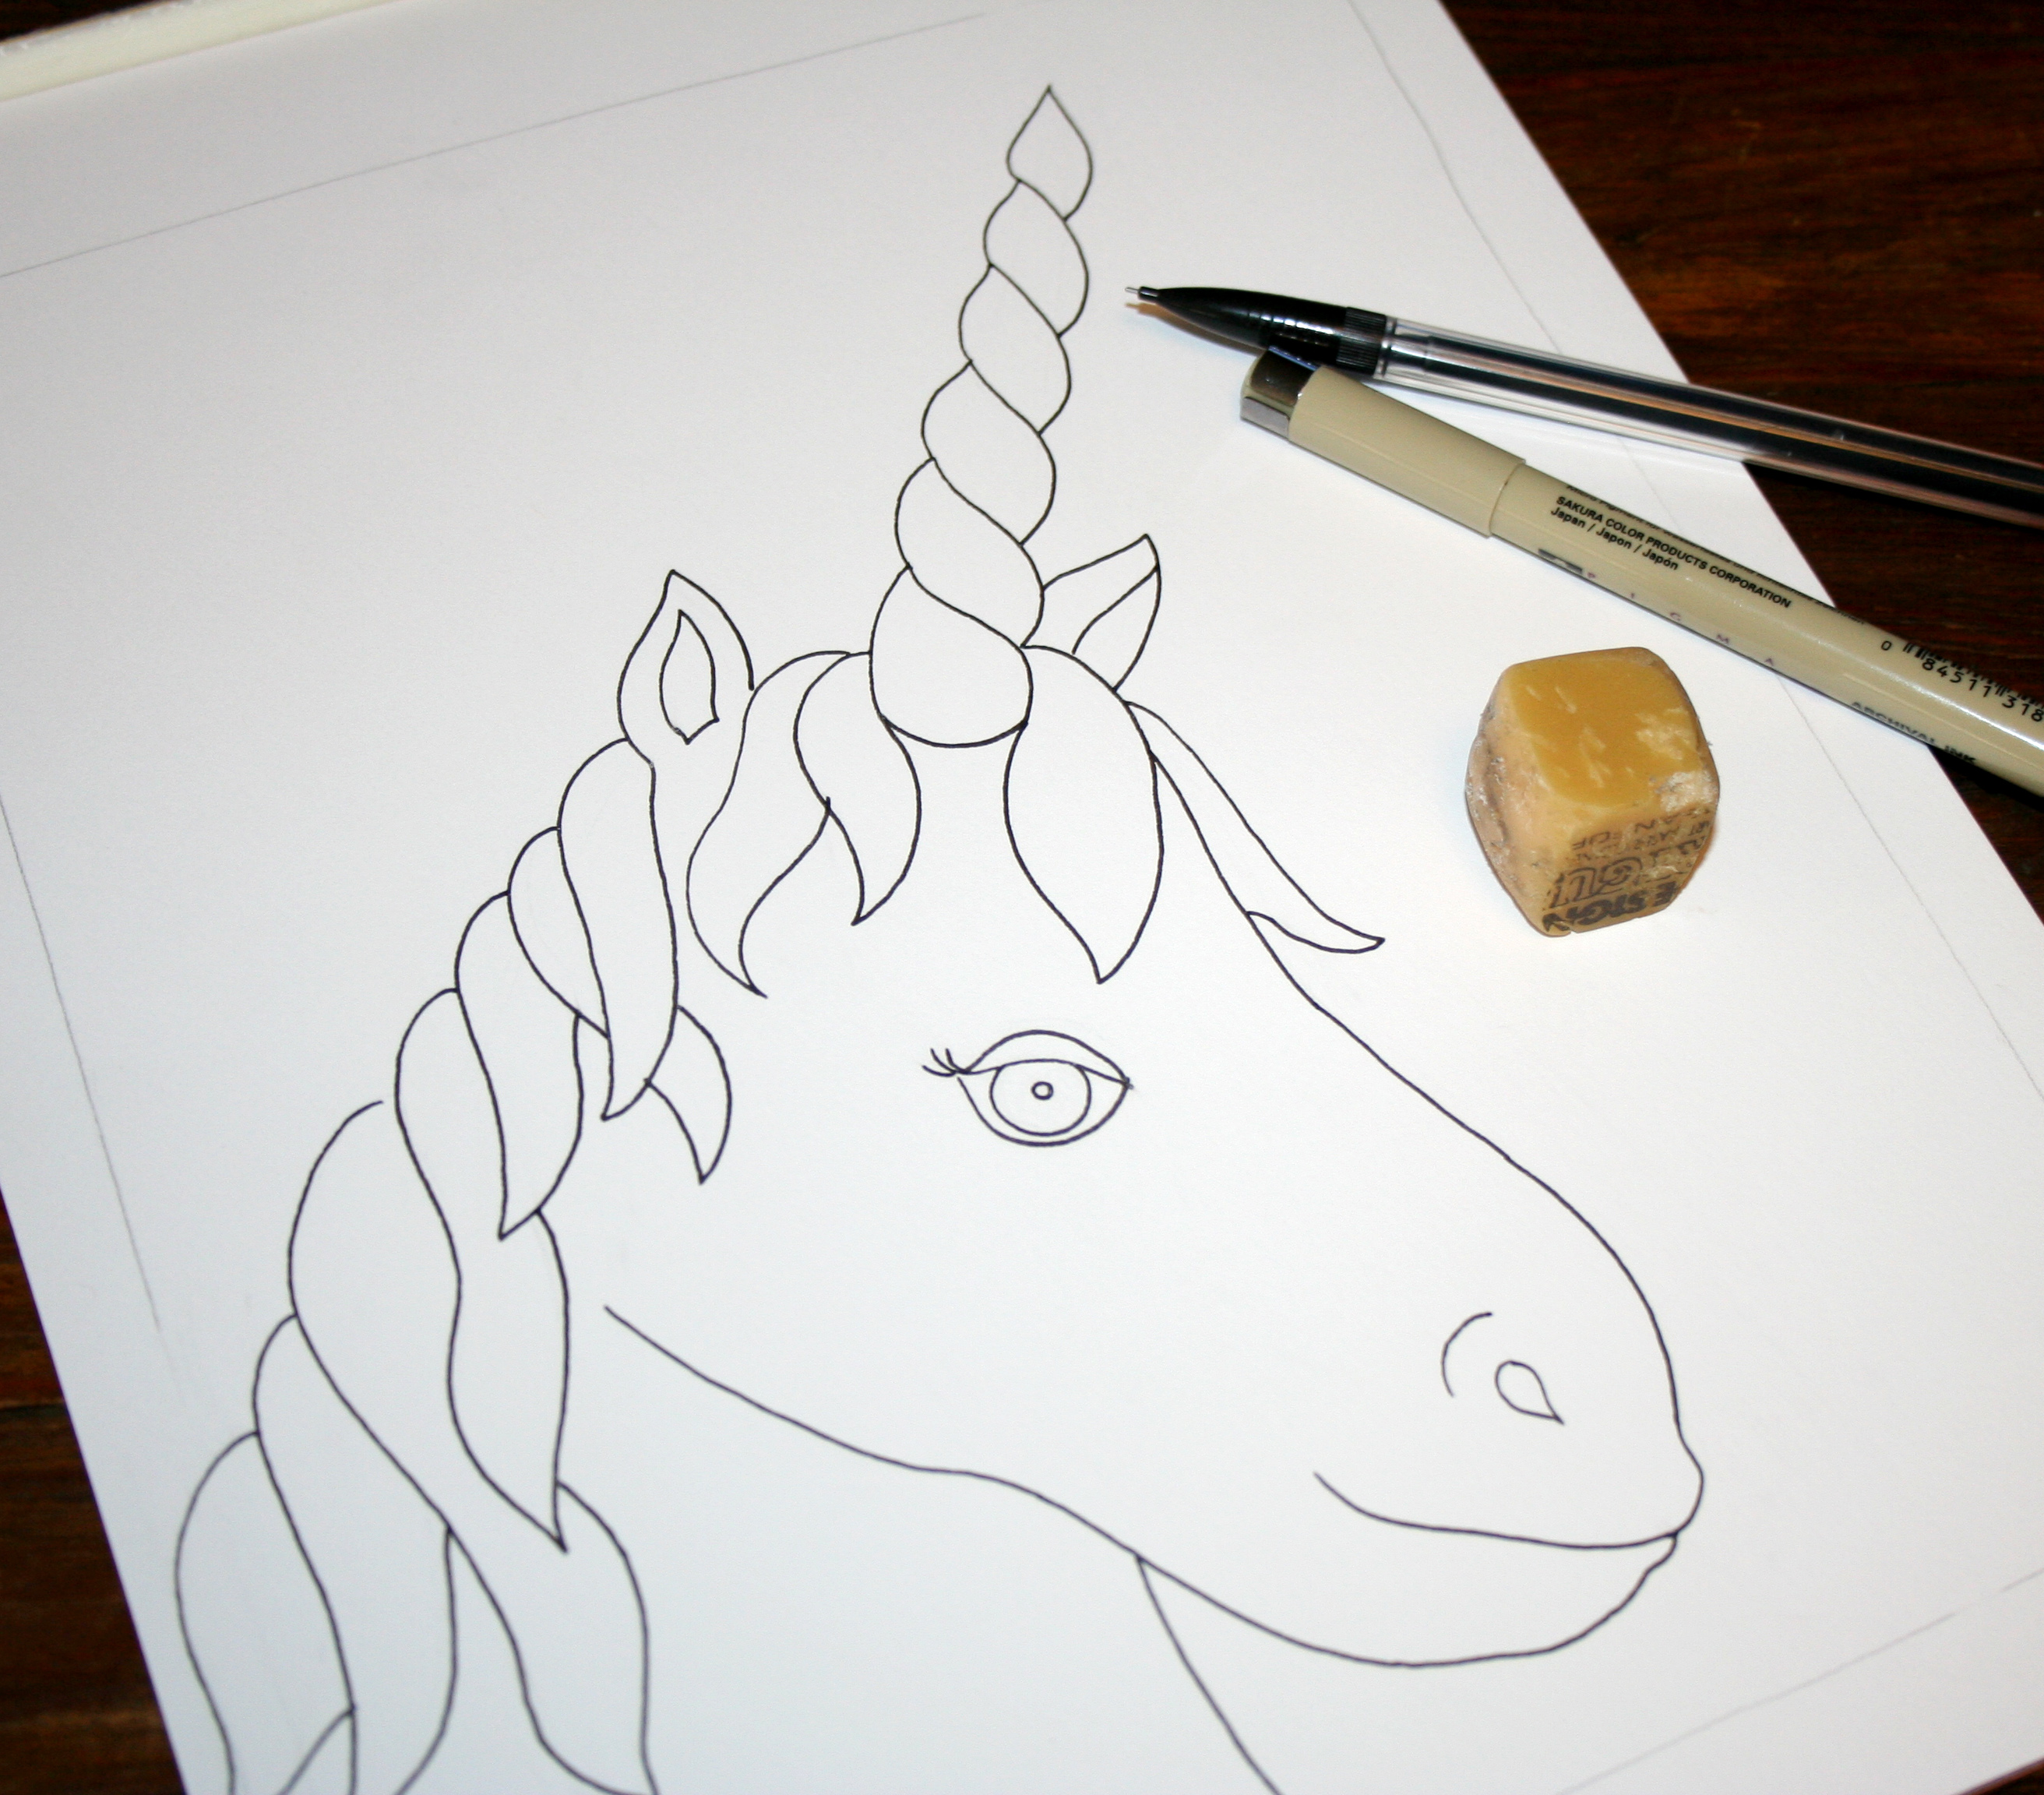
Step 2:
Using a slightly thinner pen nib, fill in each portion with a simple pattern, treating every closed portion of your outline drawing as its own mini canvas. Use different patterns for different portions. In the below image, you’ll see that various lines, scale-like patterns and even circle patterns were employed to fill in the various parts of the unicorn’s horn, ears, mane and eye. The face of the unicorn itself was left pattern-less in this case, as I opted instead to add background elements to balance out the composition. But depending on your preference and the shape you chose for your zentangle, you could add as many patterns as you’d like.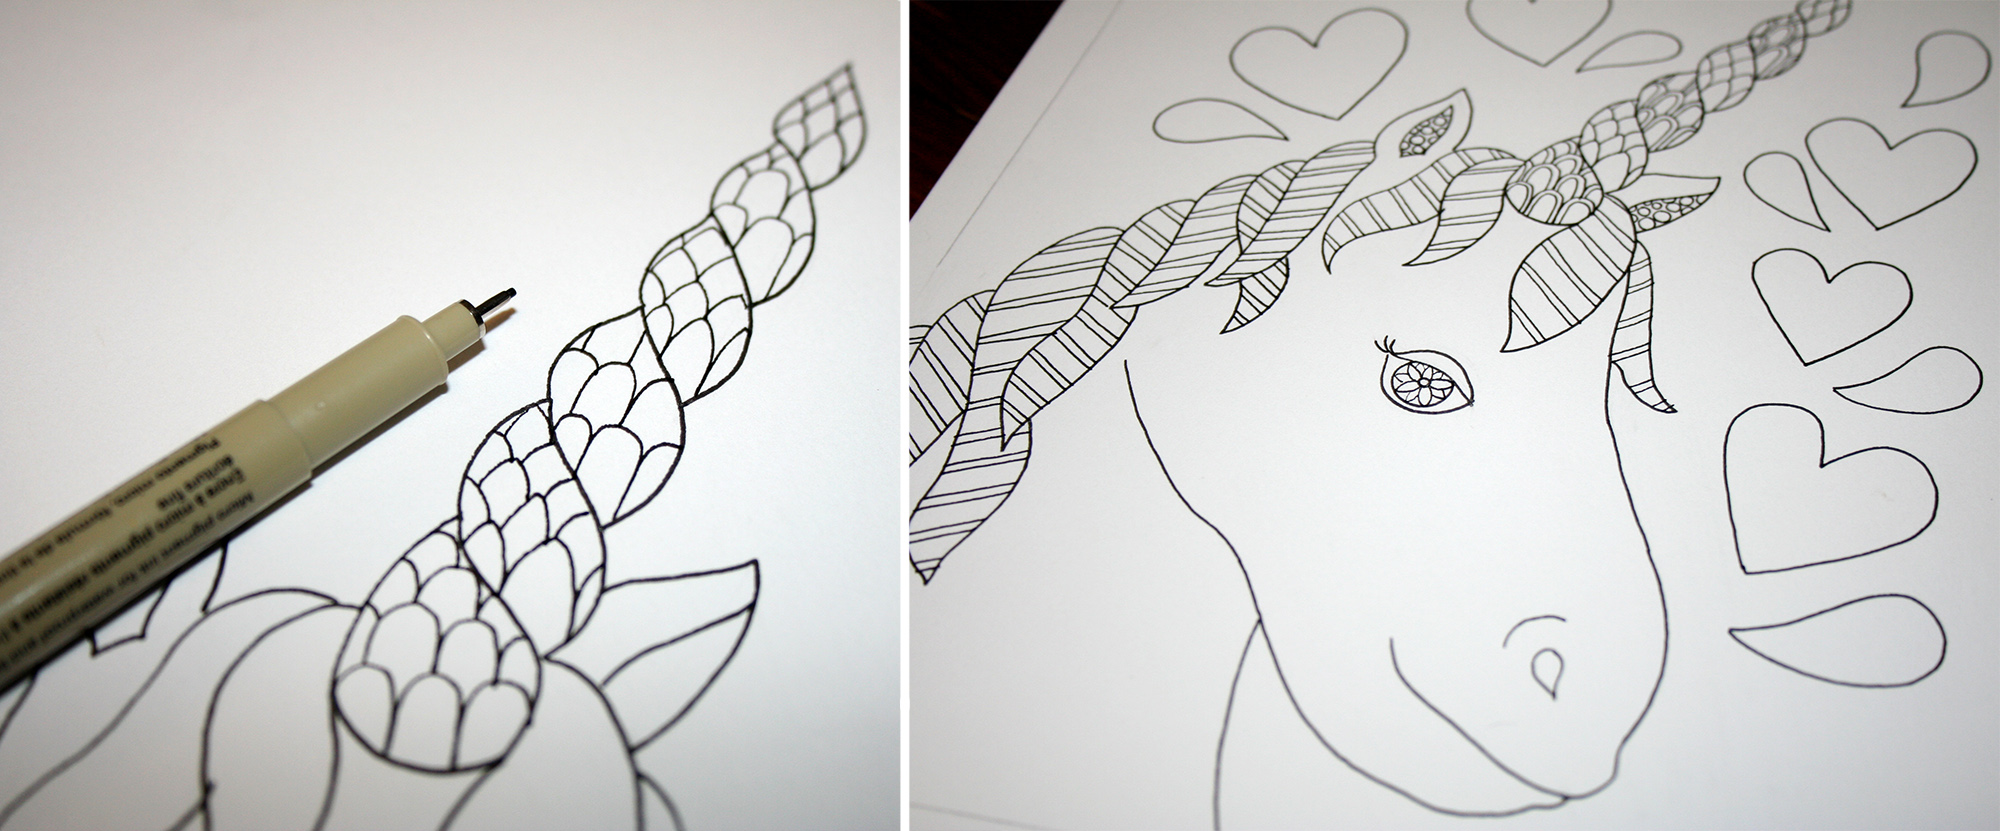
Step 3:
Make each mini portion of pattern more complex by adding more detail within the patterns. For instance, within the stripes on the unicorn’s mane, I added a hatching pattern in alternating directions. Suddenly, the very simple pattern began to look quite complex.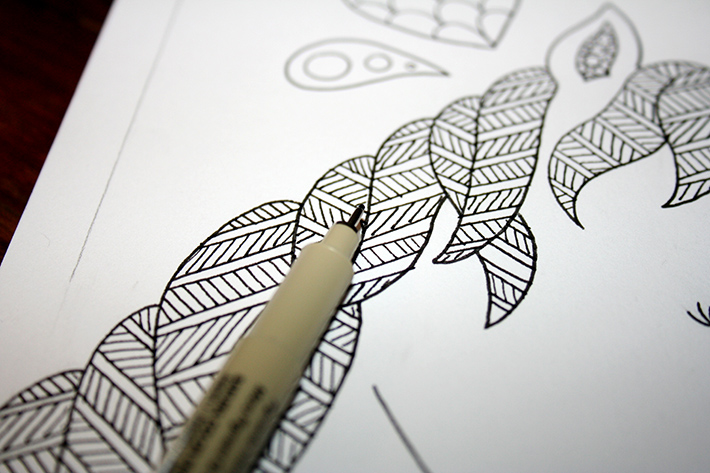
Step 4:
Continue adding detail and more pattern elements to your liking. As you begin working smaller and smaller, you may find that it feels better to switch to thinner pen nibs to fill in more intricate or tiny areas of pattern.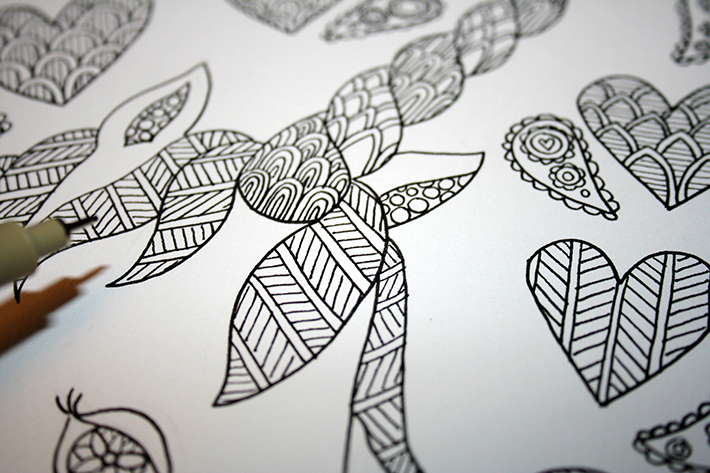 You’re the boss of when your zentangle is complete. You may choose to leave some areas of negative space, or you might want to fill in every surface of the page. That is up to you and your artistic preference!
 When you’ve added patterns to your heart’s content, you could leave your artwork as is or treat it as a custom coloring page! Get creative filling in all the spaces with different colors.
patricia go to zentangle.com or look up zentangle on you tube
I love the idea of a Zentangle but have more abstract pictures in y mind. The ones I see make up the most beautiful drawings. I am amazed that there is no "structure" to the drawings.