
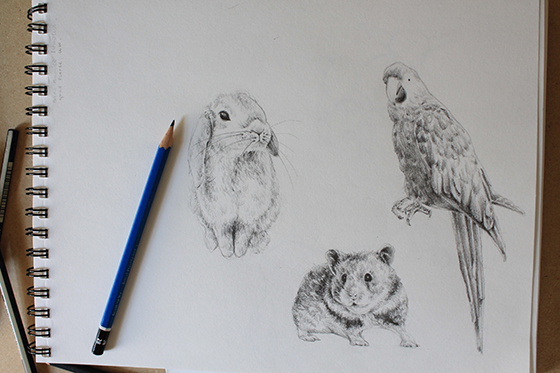
Follow along with this tutorial to learn how to draw animals!
Drawing the base sketch:
Step 1:
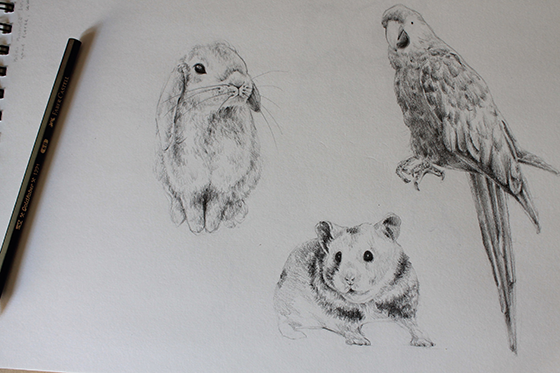
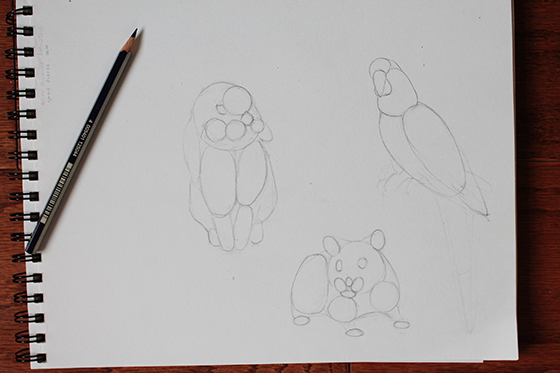 As usual, start by locating the animals on your paper. Use these basic shapes to determine the proportions of the bunny, parrot and hamster. I drew the outlines of these shapes particularly dark so they could be seen easily, but you’ll want to keep these lines light so you don’t have a hard time erasing them in the next step.
For the hamster, most of the shapes will be very circular since this is naturally a very round animal. In contrast, the bunny and parrot are more elongated animals, therefore you will use more oval shapes to define their proportions.
As usual, start by locating the animals on your paper. Use these basic shapes to determine the proportions of the bunny, parrot and hamster. I drew the outlines of these shapes particularly dark so they could be seen easily, but you’ll want to keep these lines light so you don’t have a hard time erasing them in the next step.
For the hamster, most of the shapes will be very circular since this is naturally a very round animal. In contrast, the bunny and parrot are more elongated animals, therefore you will use more oval shapes to define their proportions.
Step 2:
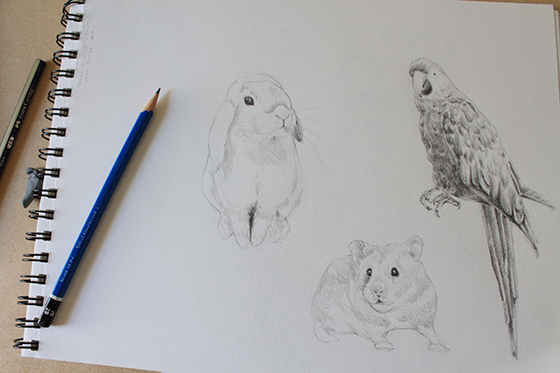
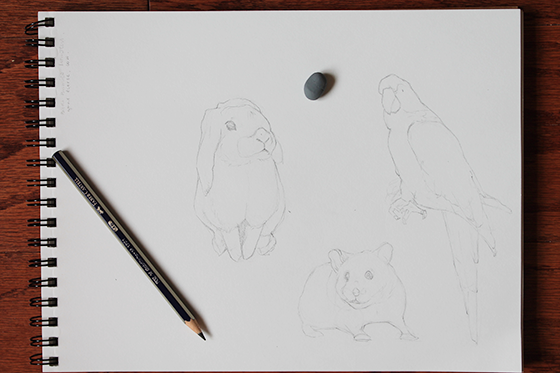 Using our sketch made up of basic lines as a guide, you can now start to outline the shapes of each animal and draw their eyes, mouths and beaks. Keep your lines smooth and pencil strokes light.
Drawing a parrot:
Step 1:
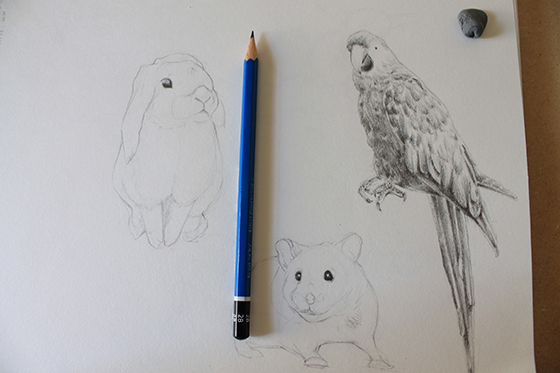
 After you have achieved your base sketch for the parrot you can start shading some shadows. We will begin with the beak and face, and make our way down the body. The bottom of the beak is one of the darkest areas, so use a 4B pencil to shade this.
Step 2:
 In this step you will need to shade the chest and bottom feathers of the parrot so we can begin to give it more dimension and realism. Scribble darker sections throughout to create the look of feathers on the chest, and press down on the pencil right under the feathers of the wing to create darker shadows. An easy technique to render the top feathers that still makes it look realistic without having to spend too much time on the details is to simply scribble curvy shadows in the shape of a “U,” as shown above.
Step 3:
Drawing a bunny:
Step 1:
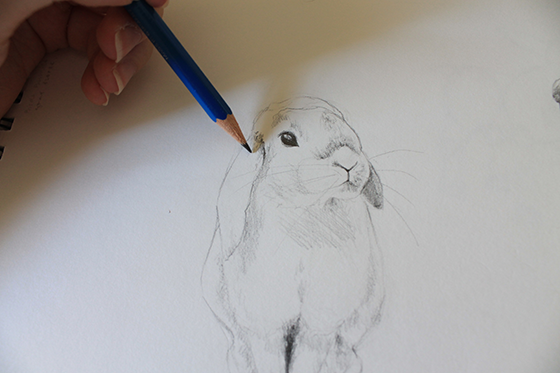
 Bunnies are very cuddly and furry, so we really want to capture that by using a technique that will make its fur look fluffy and soft. The first step is to lay the general shadows in large strokes. Also, use a 4B pencil to darken the the shadow between its front legs and the eye. Remember to leave a white circle on the eye to give it a realistic look.
Step 2:
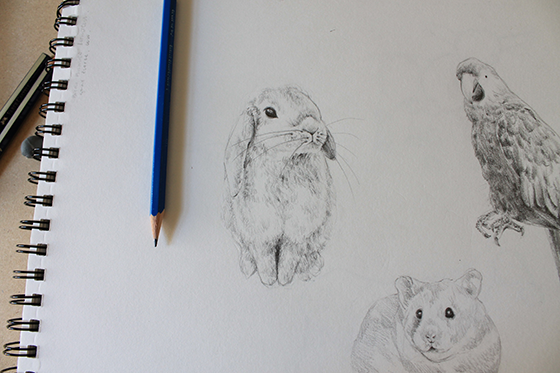 We don’t need to draw these throughout the whole body, just the sections where there are some shadows, like under the ear, underneath its mouth and on its legs. Keep drawing a few darker strokes and shading the bunny, but try not to overwork the drawing so that some parts of the fur remain blank. Leaving certain areas of the fur blank is exactly what will create the effect of fluffy hair.
Drawing a hamster:
Step 1:
 Let’s now go to our hamster sketch. We will begin the same way we did with our two previous drawings: By defining the larger areas of shadow. To do this, use a 2B pencil and shade places like the ears, snout, eyes and spots on the fur. Use a 4B pencil to darken the eyes. As always, make sure you leave a white circle in each to represent the reflection of light to make it look more realistic.
Step 2:
 Now that your drawing is coming together, use the same 4B pencil as in the previous step to start creating depth in
the ears and on the face.
Now that your drawing is coming together, use the same 4B pencil as in the previous step to start creating depth in
the ears and on the face.
Step 3:
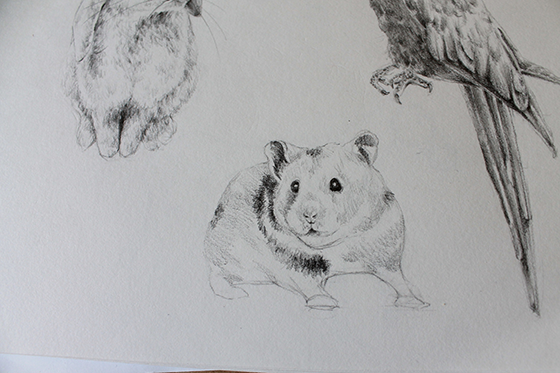
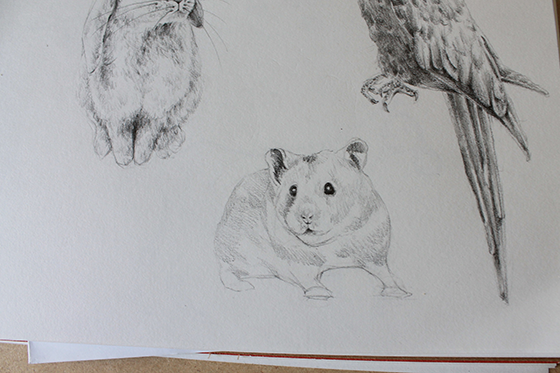
 We will render the fur of the hamster similarly to how we did the bunny, but the strokes will be darker and more prominent, with less areas left blank. Reach for that same 4B pencil and draw short lines on top of the areas we shaded on Step 1.
Continue to do this until you cover all of the shaded areas. And there you have it! Three guided tutorials on how to draw different pets. I hope you enjoyed it.
Celebrate your pet with a unique portrait! Learn techniques to sketch and paint dogs and cats for lifelike portraits in Craftsy’s Pet Portraits class taught by Pat Weaver.
We will render the fur of the hamster similarly to how we did the bunny, but the strokes will be darker and more prominent, with less areas left blank. Reach for that same 4B pencil and draw short lines on top of the areas we shaded on Step 1.
Continue to do this until you cover all of the shaded areas. And there you have it! Three guided tutorials on how to draw different pets. I hope you enjoyed it.
Celebrate your pet with a unique portrait! Learn techniques to sketch and paint dogs and cats for lifelike portraits in Craftsy’s Pet Portraits class taught by Pat Weaver.
Puppy