
Adding perspective might seem like a complex aspect of creating drawing, suited only to advanced painters and illustrators. But really, it’s quite a simple thing to incorporate into your work, whether your style is bold and cartoon-like or realistic and painterly.
Illustrations via CakeSpy unless otherwise noted
[box type=”shadow”]
Loved learning about perspective? Download our free eGuide “How to Draw With Perspective” for step-by-step drawing tutorials that will help you master the art of drawing space and dimension!
[/box]
What is perspective?
In the art world, perspective refers to drawing solid objects on a two-dimensional surface in a way that gives the correct impression of size, depth and position from a given viewpoint. To simplify that a bit: Perspective is a way to create the impression of a three-dimensional world when you’re working in two dimensions. It’s an effective way of making your artwork breathe life. As Leonardo Da Vinci said, “Perspective is to painting what the bridle is to the horse, the rudder to a ship.”
Getting started with perspective
In this post, we’ll introduce you to some of the key aspects of perspective, including easy ways to add perspective to your artwork. These easy-to-follow tips can be applied to any style, from bold cartoon-like illustrations to realistic, painterly pieces. So get ready to change your point of view on perspective.
First, pick a point
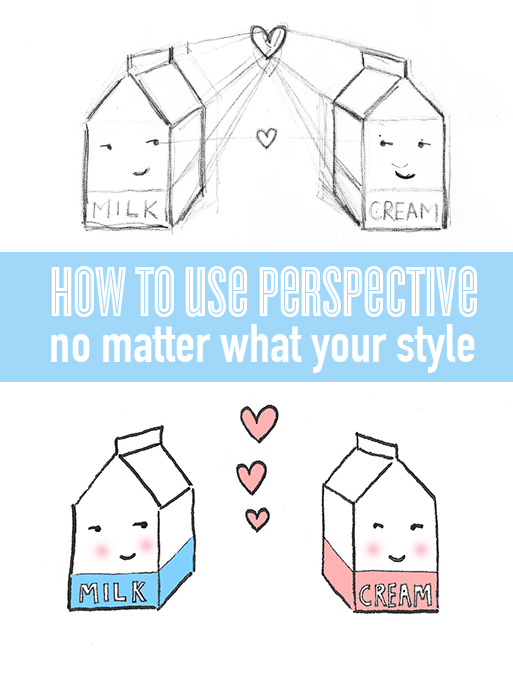
An easy way to start mastering perspective is by starting with a single point–some call it a vanishing point. This doesn’t have to be an actual object in your piece, but it is the place from which the perspective starts. Sound confusing? Let’s illustrate the idea of perspective stemming from a single point with, well, an illustration.
This illustration might seem like fairly straightforward love story and perhaps an explanation of how half and half was made.
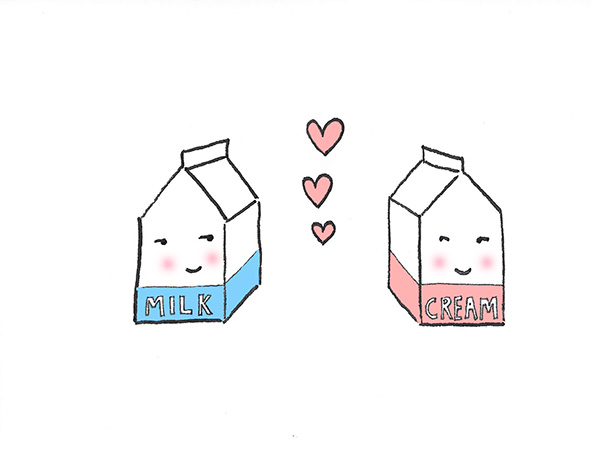
However, when you look below the surface, there’s science going on behind the scenes to create the proper alignment and angles. The heart on the upper portion of the illustration is the perspective point. Imagine this point like the sun, shooting rays in every dire
[three_fourth]ction: all of the angles, whether it’s a row of buildings or the sides of milk and cream cartons, will follow the trajectory of these “rays.” This is single point perspective.
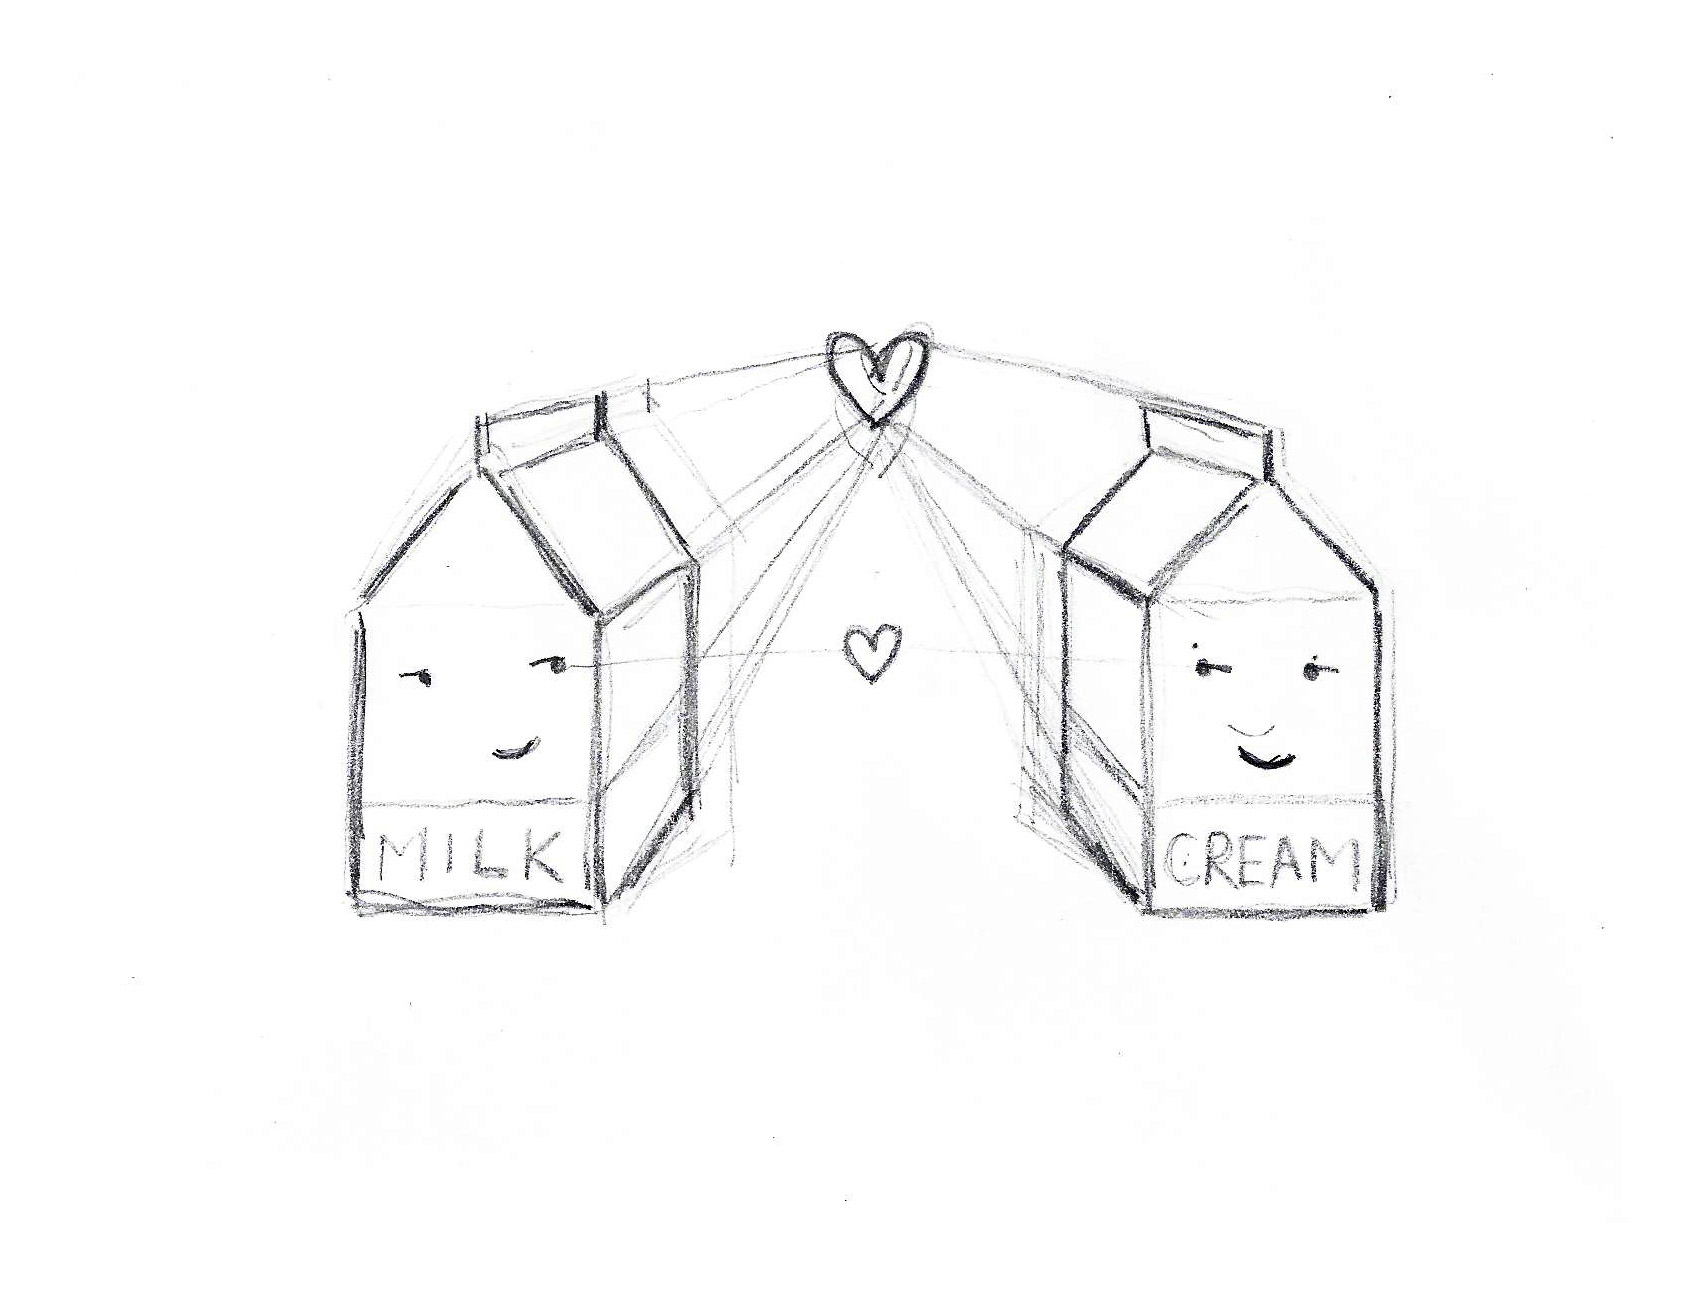
To begin mastering this method of using perspective, start drawing “rays” out from a single point in your piece of artwork. It can be in the center, but it doesn’t have to be. After a while, it will start to feel like second nature, and you may find that you can add perspective without even using the guide lines. You’ll also start to notice perspective points everywhere, from whimsical cartoons to realistically rendered paintings.
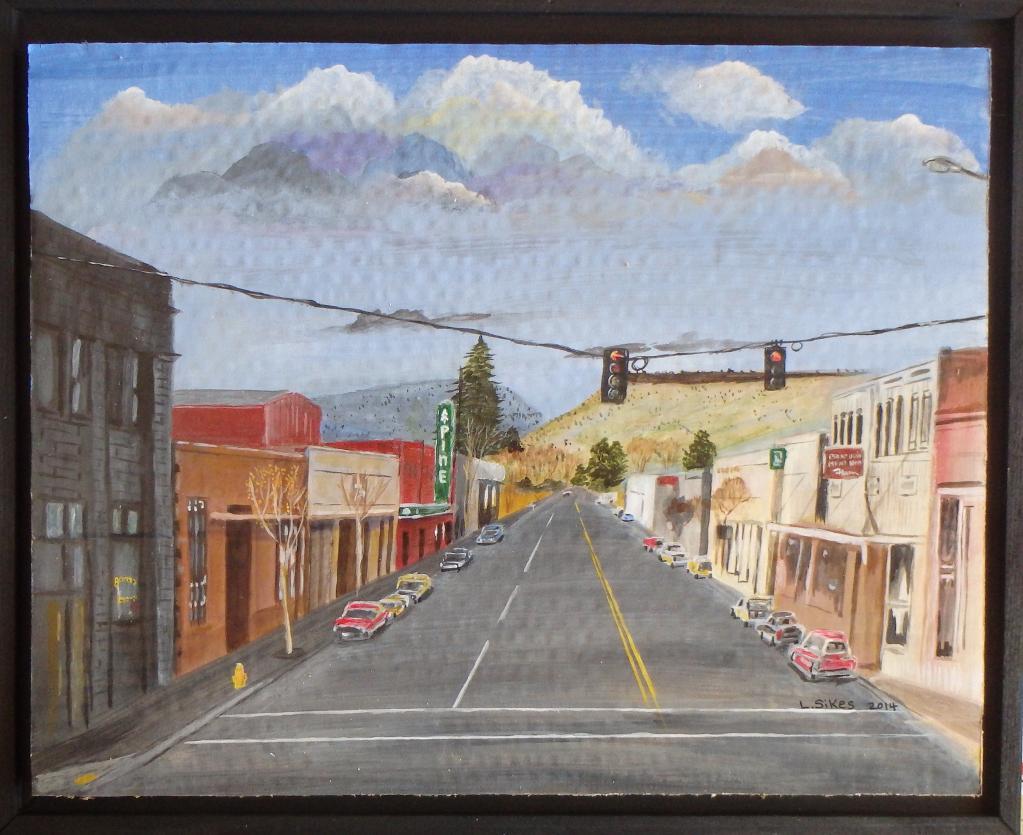
Main Street Pineville via Bluprint member Lonnie Sikes
Multiple perspective points
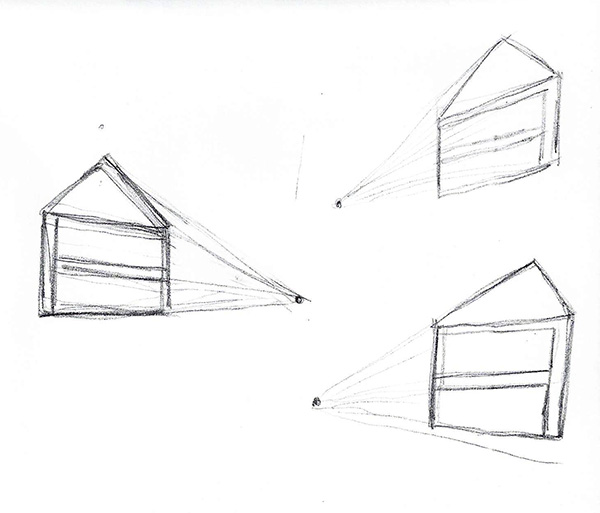
While working with a single perspective point is an easy way to get started, you are not limited to one point. You can use multiple perspective points to create a dynamic piece with plenty of movement. For instance, on the above sketch, you can see how three slices of cake following different focal points could make for an engaging piece once filled in with plates, a table, and some fancy cutlery. If you’ve ever spent time looking at the work of M.C. Escher, his pieces are absolutely amazing examples of multiple perspective points.
Perspective doesn’t always have to be perfect
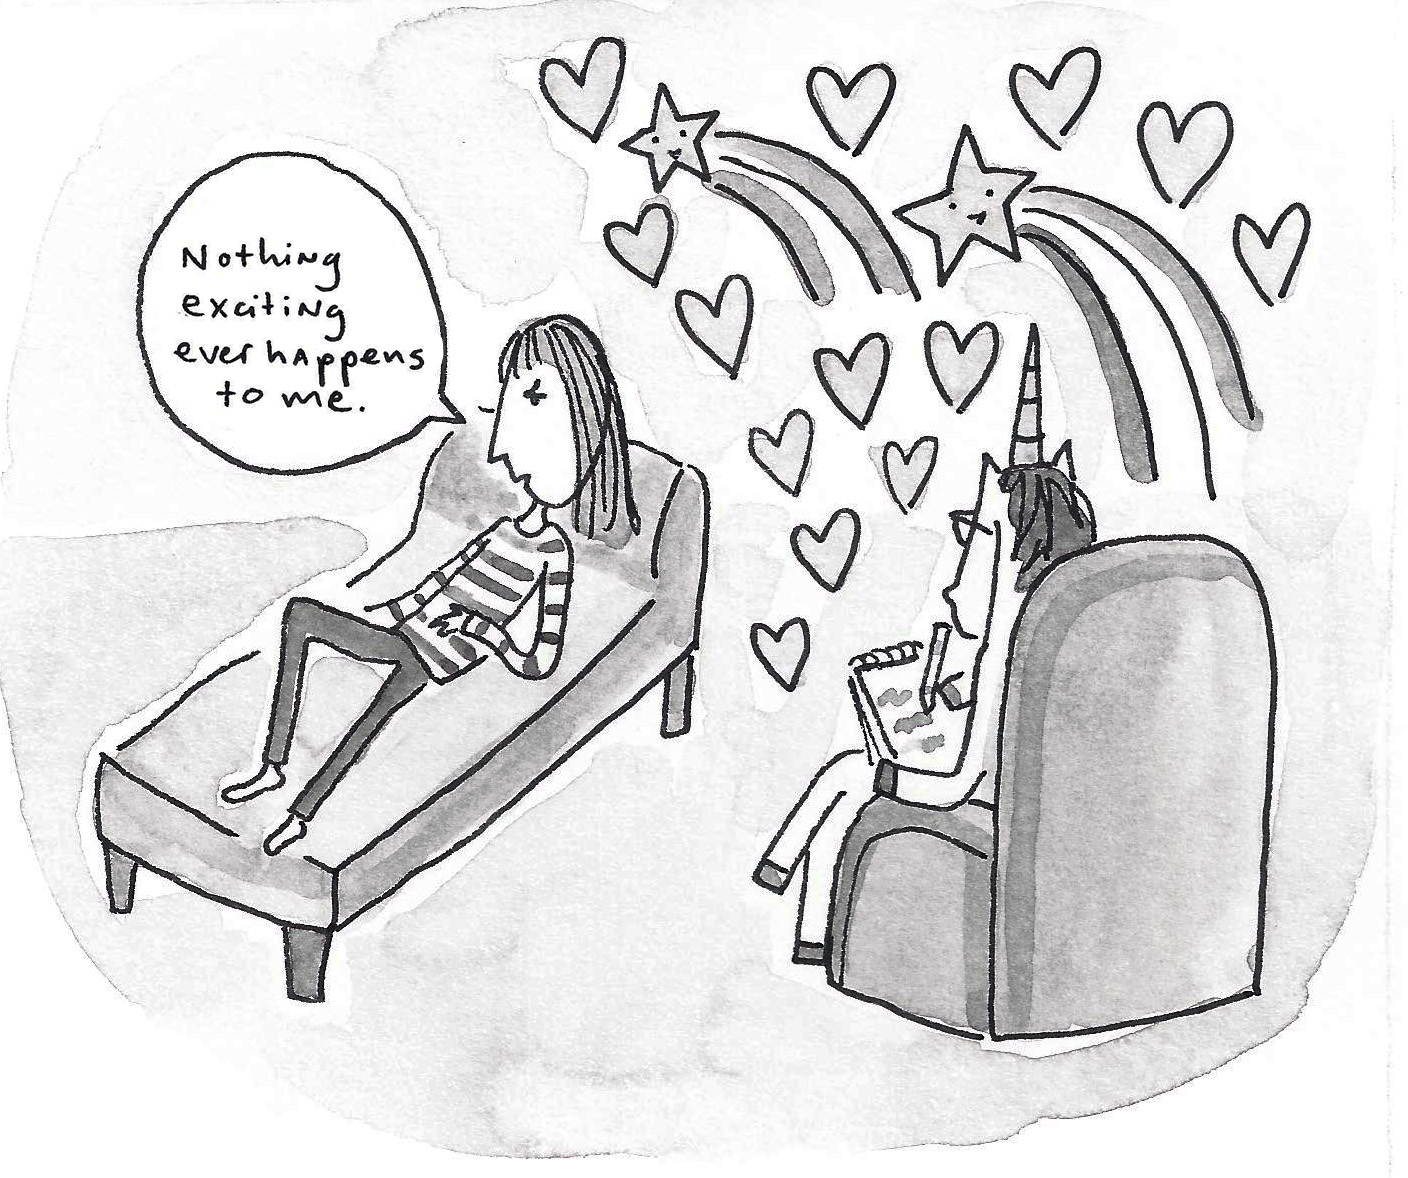
Sometimes a slightly wonky perspective can be charming, as on the above image, which acknowledges focal areas but doesn’t follow with razor-sharp precision. This is not a lazy move — rather, it is a consciously chosen, looser and more whimsical style.
It’s OK to approach perspective in a slightly askew way, but be consistent with this “inconsistency.” Make sure it is a style you follow throughout a series of illustrations or a project. If you have a series of perspective perfect pieces and then one more whimsical one, it will stand out, and not in a good way.
Refining perspective
Once you’ve started getting the hang of using perspective in your art, there are a number of ways to refine your work. Here are a few key ways:
Foreshortening
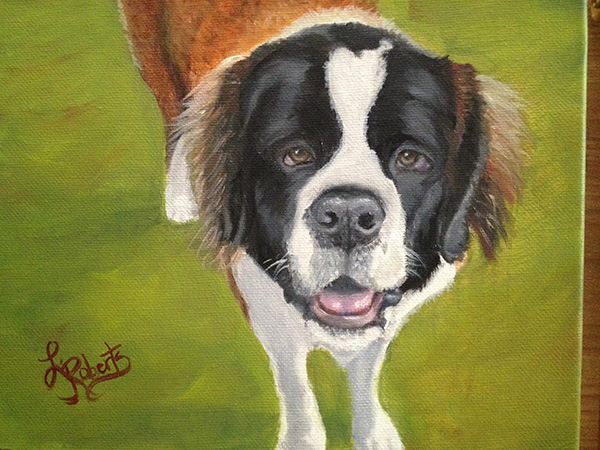
Annabelle via Bluprint member Lysa Roberts
Foreshortening goes hand in hand with perspective. It’s a way of portraying an object or scene as being closer than it is or having less distance as an effect of the angle. For instance: In the above image, the dog’s head looks larger than the rest of the body, but this isn’t because there’s something wrong with the piece. The conscious manipulation of scale makes it look as if the dog’s head is closer to the viewer, and its body further away, adding more dimension and depth to the overall piece.
Use perspective to amplify point of view
Be clever with your perspective points. Rather than a single point in space, it can be a key character or object in a scene. If all of the other elements in the piece angle toward a single item, it brings more attention and emphasis to this character or object.
The art of the fade-out
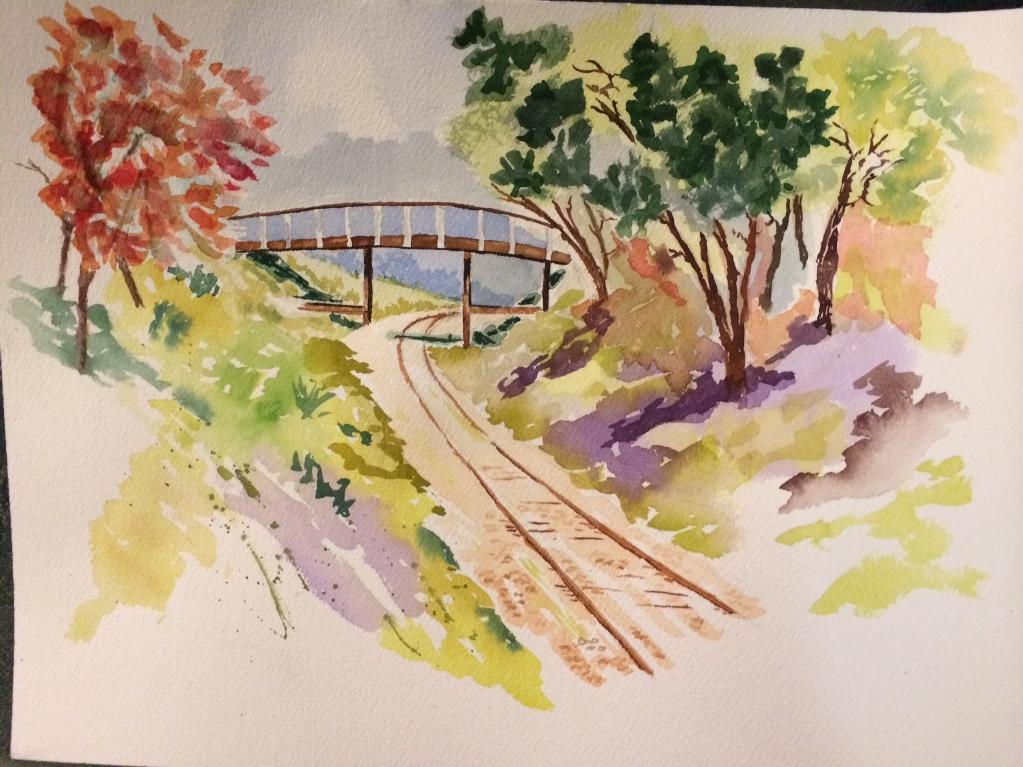
Practice landscape via Bluprint member lmfr
You can emphasize the space and distance in a piece by reducing emphasis the further away they are from key perspective points. This is beautifully illustrated in the piece above, which reserves the strongest color and line quality for items near the center of the piece, and then gradually fades the elements out from there. Using thinner ink or slightly lighter color not only creates more space in the piece, but it keeps the viewer’s eye fixed on the key aspects of the piece and keep things from becoming too flat.
[box type=”shadow”]
Special offer!
Sign up for The Art & Science of Perspective to get step-by-step guidance through one of fine art’s most challenging and crucial concepts — perspective! You’ll enjoy a front row seat to expert instruction from architectural illustrator Jeff DiCicco, with the opportunity to ask him questions throughout 8 HD video lessons.
[/box]
Share tips, start a discussion or ask one of our experts or other students a question.
No Responses to “A Matter of Perspective: How to Add Dimension to Your Art”