
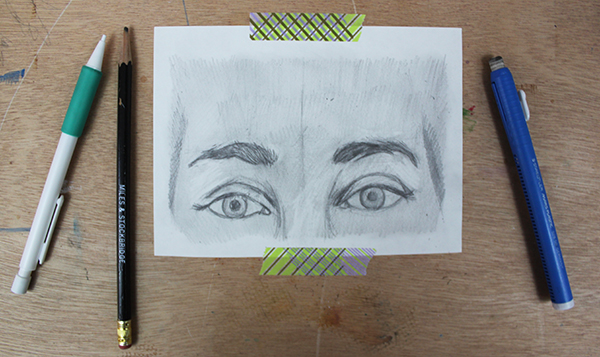
Drawing eyes may be the best way to convey what someone is thinking or feeling, but the eyebrows play an important role, too. They accompany the expressions being conveyed, and their emotion will make your portrait appear more convincing and realistic.
Learn the simple steps for how to draw eyebrows!
Tools for this exercise:
You don’t need any special materials for drawing eyebrows — just use your favorite drawing paper, eraser, and pencils. I found that a mechanical pencil was great for small, precise details, and an HB wood pencil was ideal for soft shading and drawing larger shapes.
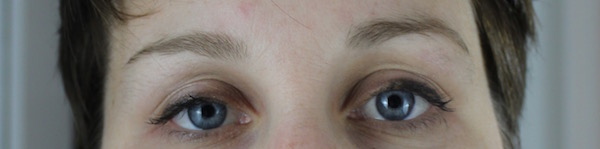
In addition to your tools, you’ll need an eyebrow reference. It’s easiest to use yourself as one, but you can also snap a photo of another person’s eyebrows, too. But regardless of whose they are, you’ll want a reference that clearly defines shape, size and relationship to eyes.
1. Prepare your surface.
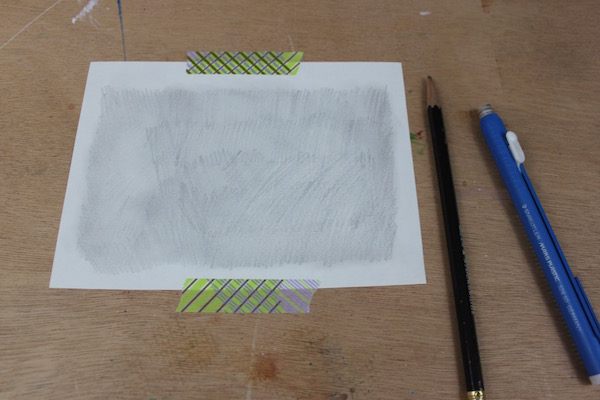
When you really study eyebrows, you’ll notice that at least some skin shows between and below the hairs. Because of this, I mimicked “skin” by adding a thin layer of graphite to my paper before working on top of it. I lightly pressed my pencil onto the paper and then used my fingers to smudge the surface. This step is totally optional, but can give you a good medium tone to start from.
2. Sketch guidelines.
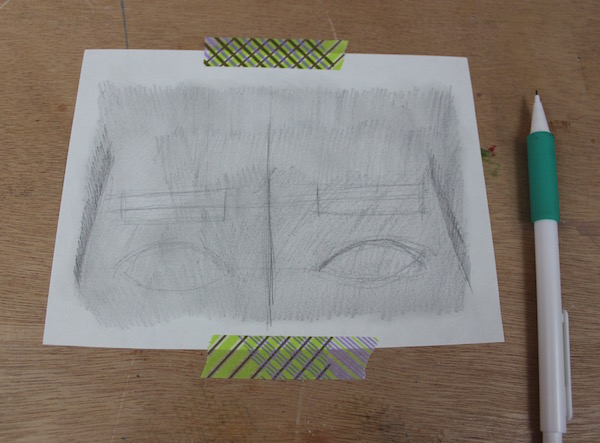
Before you begin drawing the eyebrows, first figure out where they’ll go on your page. Draw a line down the middle of the composition to signify the bridge of the nose, then sketch almond-like shapes for the eyes. Afterwards, draw a rectangle above each eye to note where the eyebrow will sit.
A few details to remember about eyebrows:
- An eyebrow is generally longer than the eye itself, extending farther on the outside of the head.
- Nearing the center of the face, eyebrows typically line up with eye.
- The distance between eyebrows is about the width of an eye.
- Eyebrows are siblings, not twins. They aren’t going to look exactly alike, and that’s OK — that’s not how our eyebrows grow.
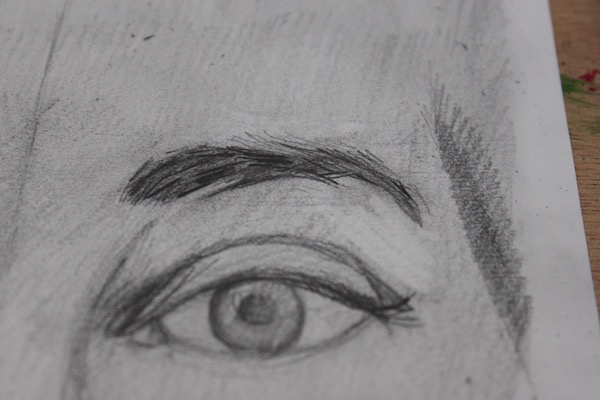
3. Block in shapes of eyebrows.
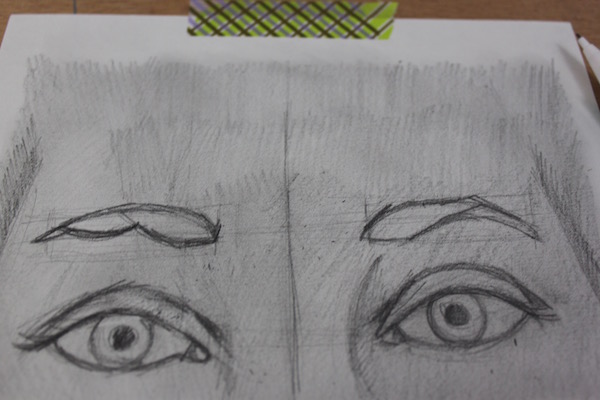
Now that you’ve identified where your eyebrows will go, draw their shapes. This is easier said than done, so I use this trick: Start at the thickest part of the eyebrow and break it into two, three or four smaller shapes. Make sure each element overlaps with one another, as this will help the overall shape to feel like a cohesive brow.
4. Apply overall tone the eyebrow.
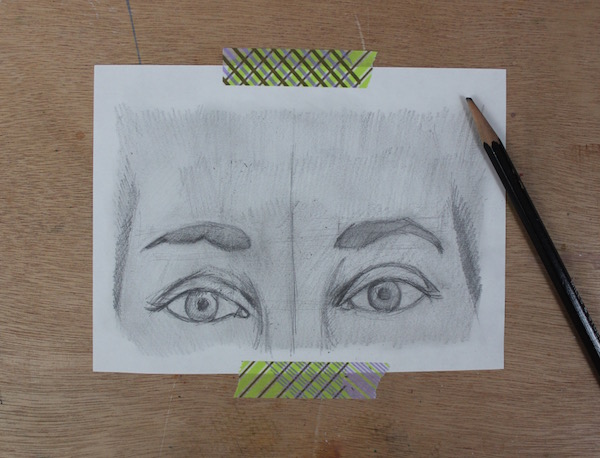
Once you’ve drawn your eyebrow shapes, use a soft pencil to apply an overall tone. This is optional, but could be helpful if you’re drawing someone with dark eyebrows. It will also give them the appearance of being fuller.
You might avoid this step if you the eyebrows are blonde or appear very faint on your subject.
5. Draw eyebrow hairs.
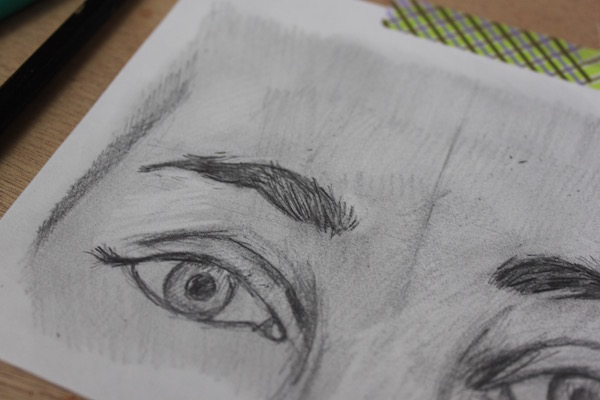
Here’s where you give the eyebrows their character! Use a fine-tip or mechanical pencil to draw their short, fine hairs. Look closely at your reference photo to mimic them. Ask yourself: What direction are they going? Are they slanting up or down? Do they appear individually or in large groups? Depending on where the hair sits on the brow, they will appear shorter or longer.
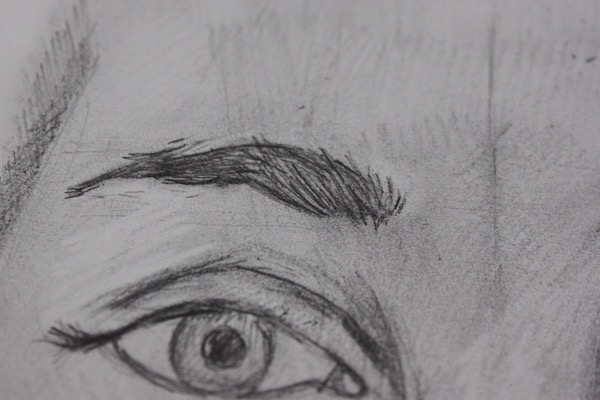
Remember, eyebrows are a combination of small hairs, plus areas where they look brushed together. To make your drawing appear realistic, include this combination on both eyebrows.
Share tips, start a discussion or ask one of our experts or other students a question.
No Responses to “Adding Expression: How to Draw Eyebrows Step by Step”