
Drapery and fabric appear in many pieces of art, from portrait sketches to still life paintings. Most beginners feel intimidated by fabric folds, thinking it will be too hard to draw. But when you learn how to draw fabric by breaking it down into zones and studying the formula of light and shade in each zone, it’s much easier to conquer.
Basic types of fabric folds
Compression wrinkles
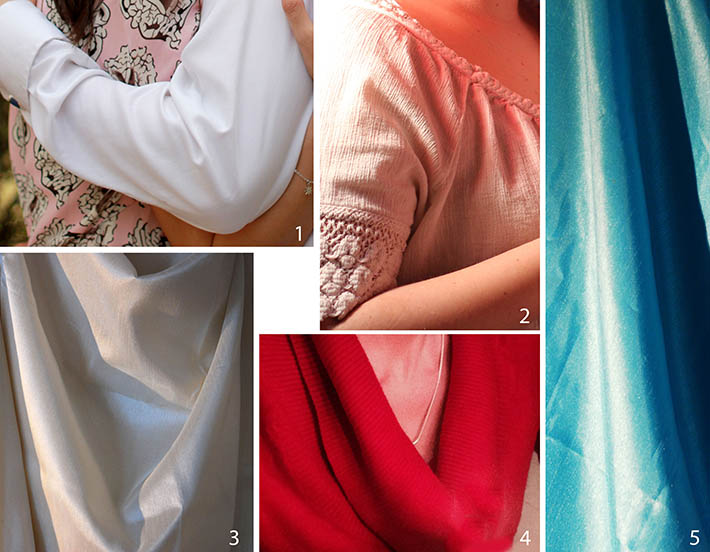
Photos 1 and 2 above demonstrate compression wrinkles, which relate to tension or force created by a moving body part, like an arm or an elbow.
Hanging folds
Photos 3 and 4 show the swag and hanging wrinkles that appear on fabric clipped on both sides. Greco-Roman clothing of necklines shows these folds.
Pipe folds
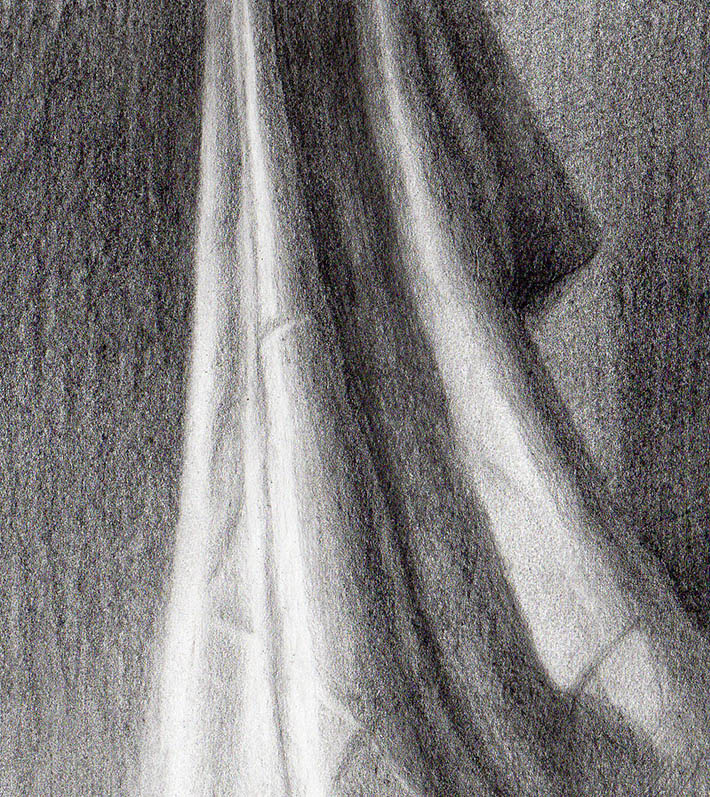
Photo 5 is an example of a pipe fold: loose pieces of fabric hanging freely. Usually these are found in curtains, flags and other loose, hanging fabric.
How to identify types of fabric folds
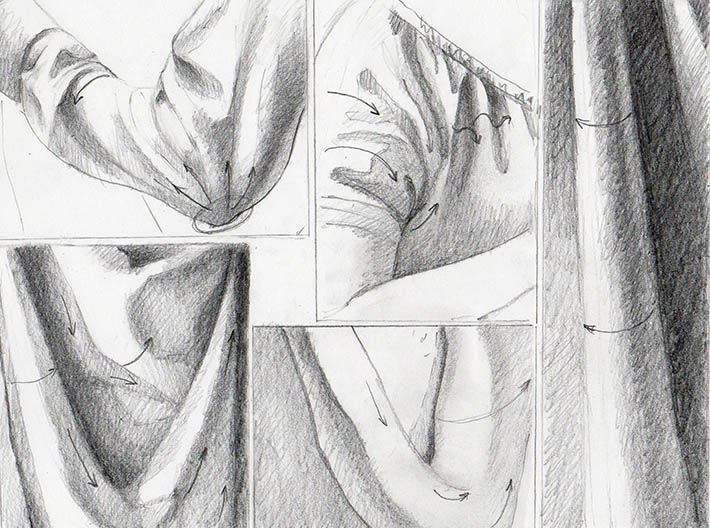
Even if you can’t remember the names of these types of fold, you can identify them easily. Look for places of tension or force created in fabric.
If it’s clothing, the body parts, like elbows or ankles make compression wrinkles or sag-and-collapse wrinkles. As fabric wraps around the figure, creating the folds, pay attention to its movement in relation to the figure itself, and how tension or force makes changes in the folds. I marked the direction or movement of the folds with arrows in the sketches above.
How light, value and pattern affects fabric folds
The distribution of light on fabric
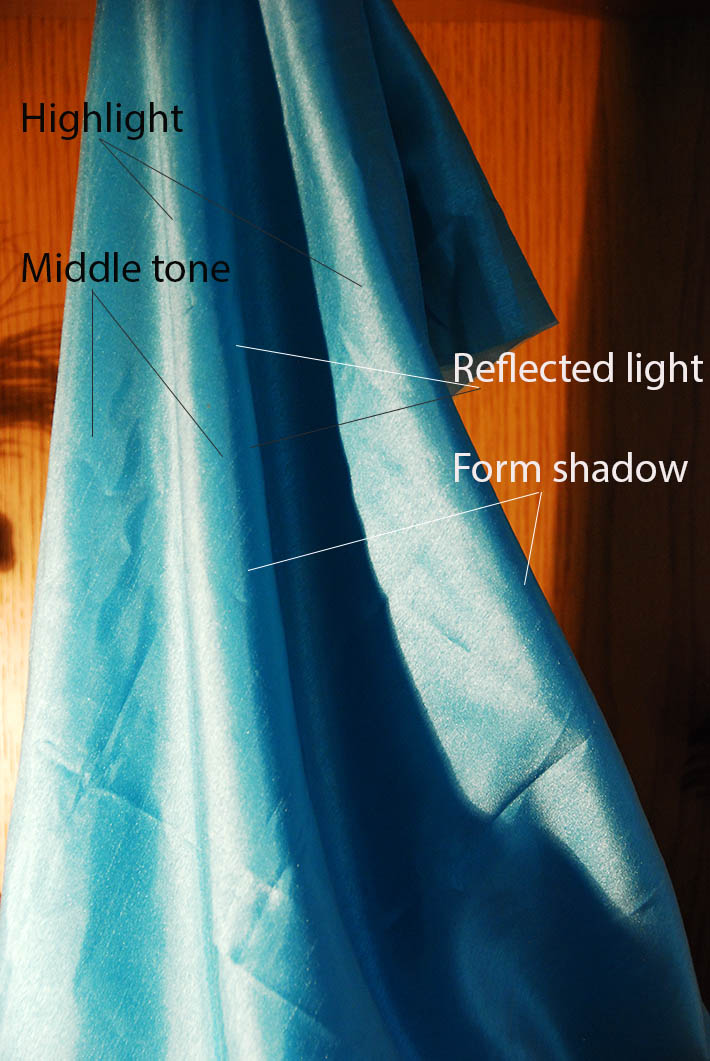
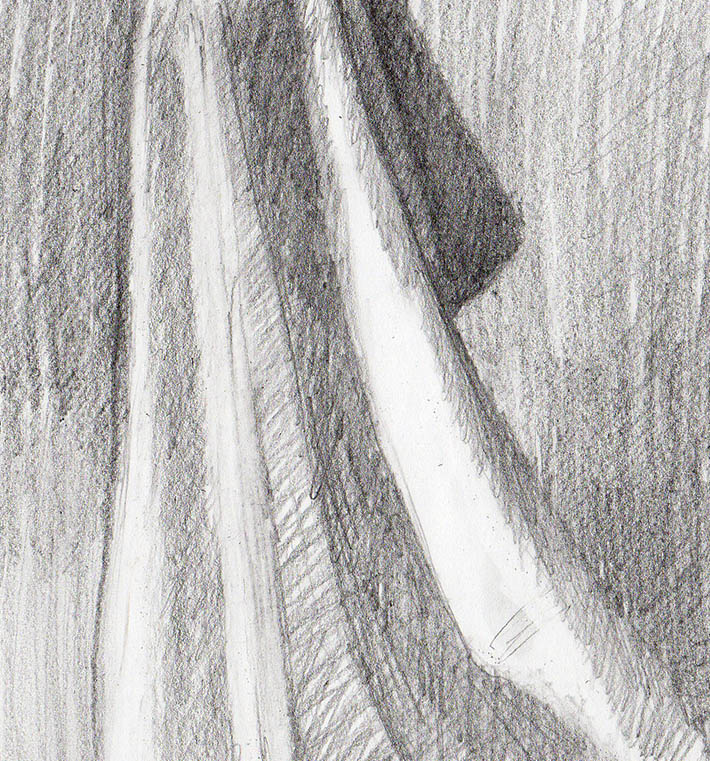
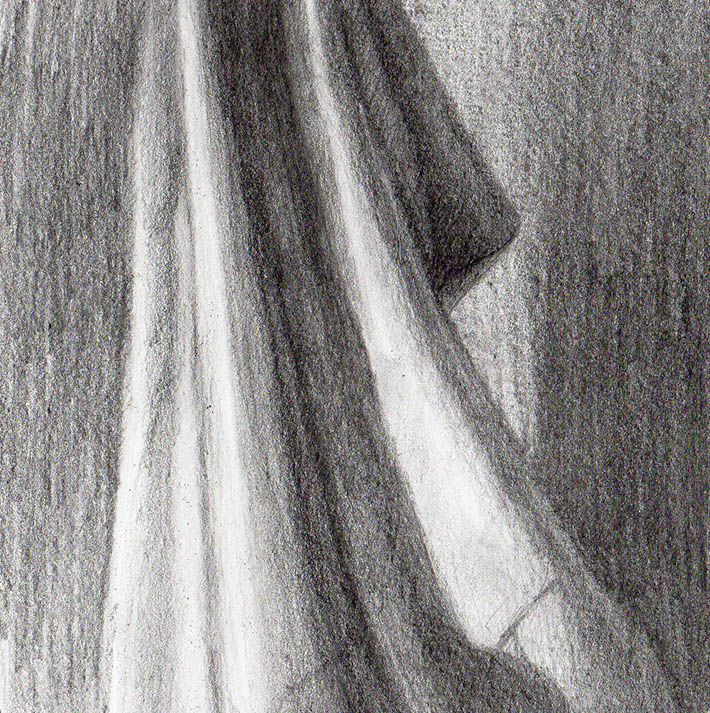
Every wrinkle or fold has the same basic break down of light and shade.
In the image above, I’ve indicated the highlights (the strongest light), medium light or middle tones, form shadows (the darkest area in the shadow) and the reflected light (the second darkest shadow that sits on the edge of the fold). Study this image carefully and begin looking for the patterns in your fabric folds, as this variance in light will affect how you depict fabric on the page. Essentially, each fold is a small cylinder with a highlight and a middle tone, form shadow and the reflected light.
A strong light source helps you see the value differences much easier. Diffused light eliminates definite shadows and highlights, producing very subtle shifts in tones.
Values
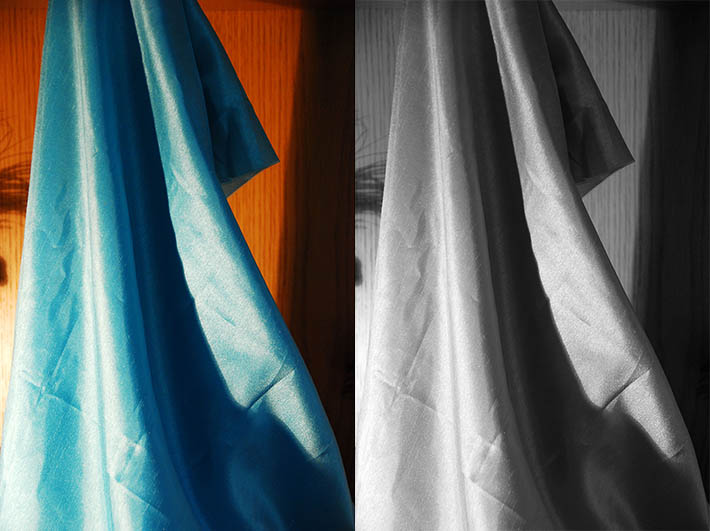
Values play crucial role in the creation of a visual illusion on a flat surface. The photo on the left has the original color. The photo on the right is stripped off of the color, revealing values. Notice how this bright color changes our perception of values. In the grayscale image, you can clearly see the tonal transitions.
Pattern
If you are a beginner, avoid drawing fabric with a pattern. It can fool or confuse you with too much detail and curvature. If you are more advanced and feel confident about it, you can try drawing a patterned fabric. Remember that patterns curve around the roundness of the form and folds, parts of the pattern appear and disappear with the folds.
How to draw fabric step by step
To start your drawing, mark the most prominent lines that have the movement or specific direction and then place shadows on those lines. Then we’ll move into the more detailed steps of making your fabric look realistic.
Step 1:
Sketch out the outlines. Separate between the light and the shade. Begin shading, focusing on the shadows first. I usually draw the form shadow with the reflected light as a dark block in as you see here.
Step 2:
Deepen the darkest shadows and fill in the background. Fill in the middle tones roughly to show a slight difference between the form shadow and the reflected light placed next to it. Pull out the highlights with a kneaded eraser.
As I shade, I visualize the 3-D quality of the fabric using the directional strokes, while I keep the parallel strokes in the background.
Step 3:
Step back from your sketch to see if you have enough contrast. Students tend to draw middle-toned images, as they are afraid to push the darks to make it work. Reinforce the lights as well, keeping the lightest fold on the left because the light comes from the left. Make sure that you create transitions between the values.
Finally, I make adjustments of lines and edges, keeping most of them very soft. Fabric can’t have hard, outlined edges to appear realistic, because of its fluid nature. I spray the drawing with a fixative outside when I’m done.
Drawing fabric in colored pencil
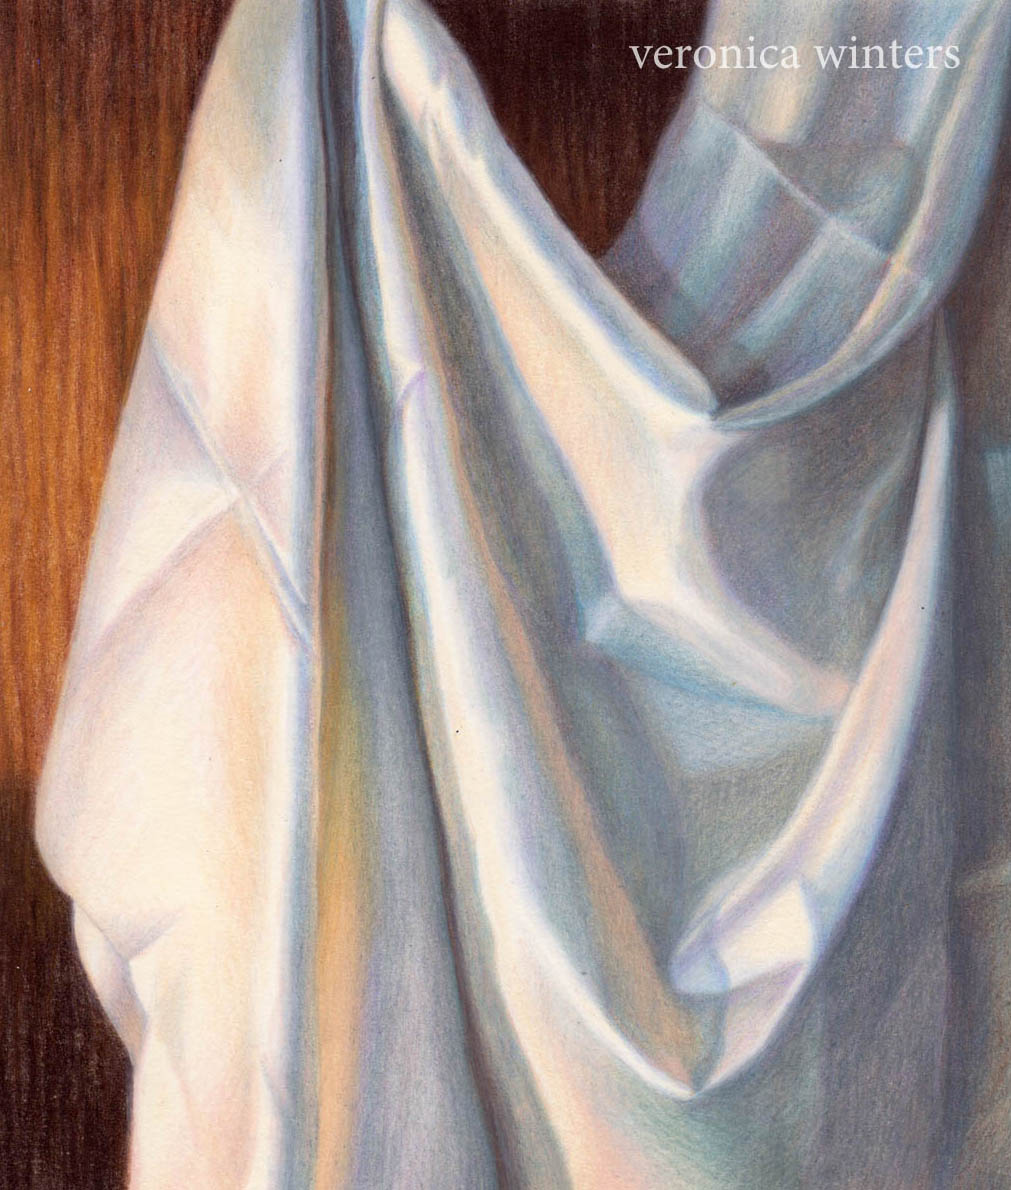
Drawing in color is more fun and more difficult at the same time because you have to observe the pattern of light and shade along with the color temperature (cool or warm). You have to match and layer colors of a specific tone. In this drawing of white silk, I used cool shades of blue-grays in the shadow and warm shades of light cream and peach in the light. The complex white folds contrast the dark, simple background.
If you draw on colored paper, you’ll need to layer white over the light colors; if you draw on white paper, the highlights stay free of any shading as white pencil would make it cool and chalky.
This really helped me with my drawing! It could get me a fine arts degree!
I am a sand sculptor developing my drawing skills for a few years now. Fabric is a challenge in both sand and on paper. I am very grateful for your instructional.