
Let’s face it. Drawing a realistic portrait is challenging. Fun, but not the easiest thing to do. There are many components, and to me, it’s easier when we break it down into manageable steps. Today, let’s focus on the hair!
Follow these easy tips to learn how to draw hair in pencil!
Some people spend so much time on their hairdo. So, when the times comes, you’ll want to do it justice. These steps will help give the illusion of the real thing.
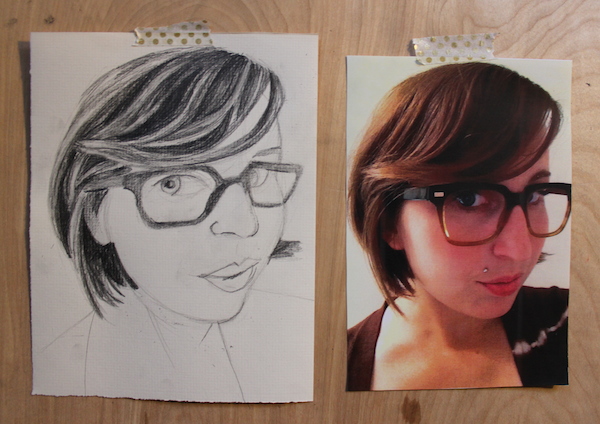
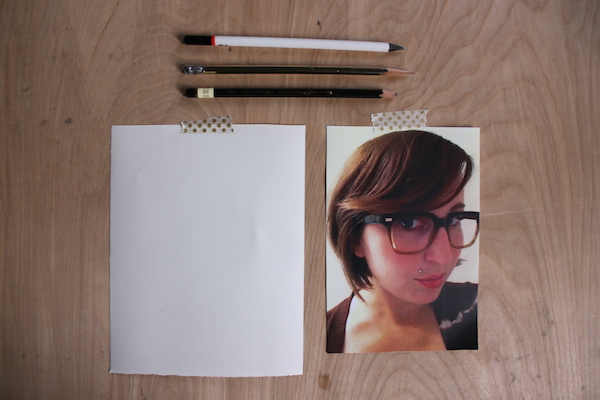
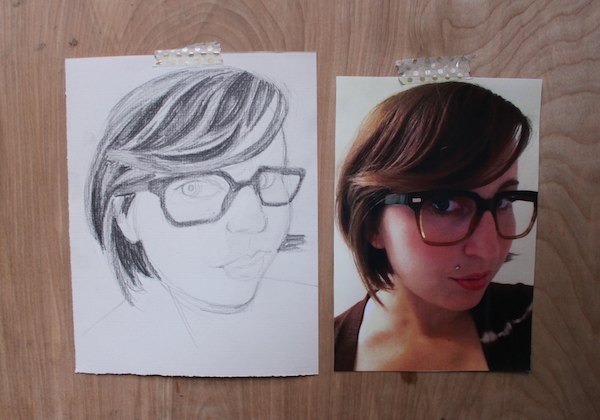
You’ll first want to grab a reference photo. Maybe your favorite celebrity? Or, you could take a picture of yourself. That’s what I did! I made sure to focus on my hair. To draw all of this, I’m using graphite pencils (2H, HB and 3B) and general art paper.
1. First, take a look at those luxurious locks.
Before we put pencil to paper, let’s consider how hair behaves. Sometimes the part is in the center, other times its off to the side (like my hairstyle), but that’s a good place to start. As we travel down the head, hair often looks like it’s in sections. Maybe because of highlights or the texture, but it’s simple to point out different “parts of the hair.” We know that someone’s head is made up of countless strands, but it doesn’t always look that way, does it? This idea is the focus of our drawing. Instead of recording each individual piece, we’ll create sections of hair with some emphasis on certain groups of strands.
Hair can be unwieldy (just think of the frizz!), but, much like my tutorial on drawing shiny objects, we’ll break it up into multiple and manageable steps. With this in mind, it’s time to start drawing. I am going to first use my HB pencil. It’s soft but not too dark, which makes it easy to erase a mistake.
2. Draw the general outline.
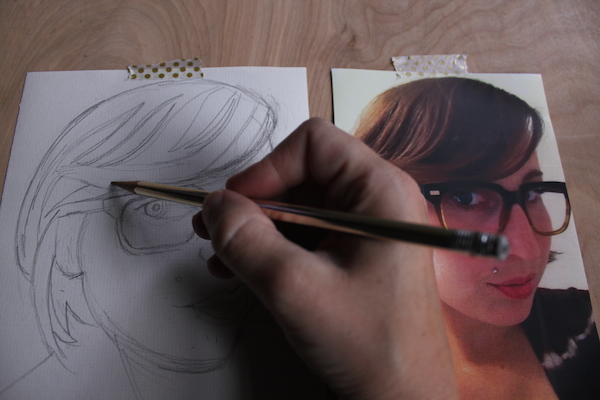
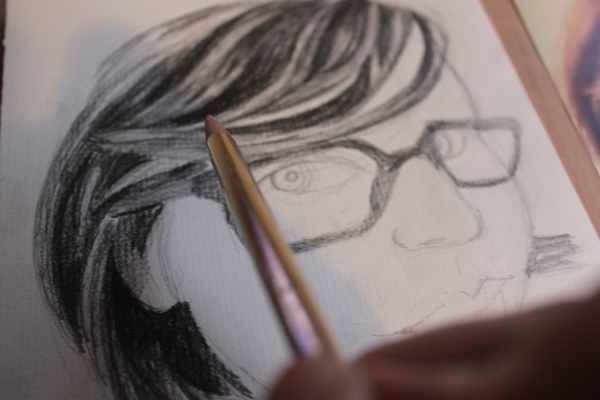
I’ll draw the face to get a sense of where my hair will go—This includes blocking in the eyes, nose and mouth, but just for placement purposes. I can use where they’re located on the face as a way to match where the hair falls against the head.

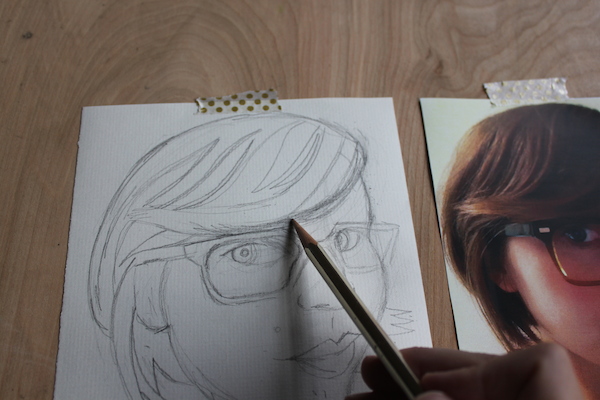
After I’ve roughed in those features, it’s time to look for shapes in the hair. Do any emerge? I notice that my long, sweeping bangs are a very bold shape across my forehead. Behind that are some textured areas, and then a small, dark area behind my ear because the hair is in shadow. Take your time noticing all the “shapes” that make up the ‘do. This is the most important part of your drawing. Think of it like planning stages. You wouldn’t want to move on without having everything in place!
3. Start to fill in and shade.
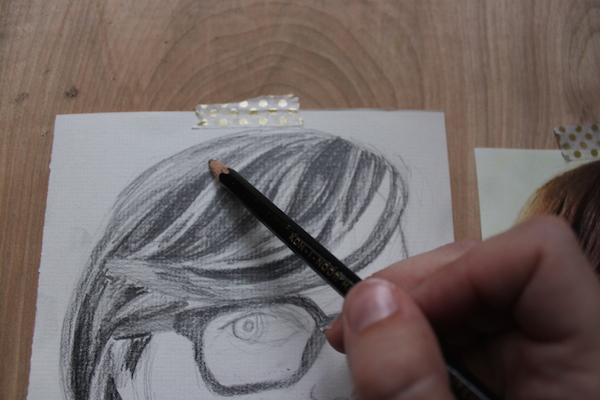
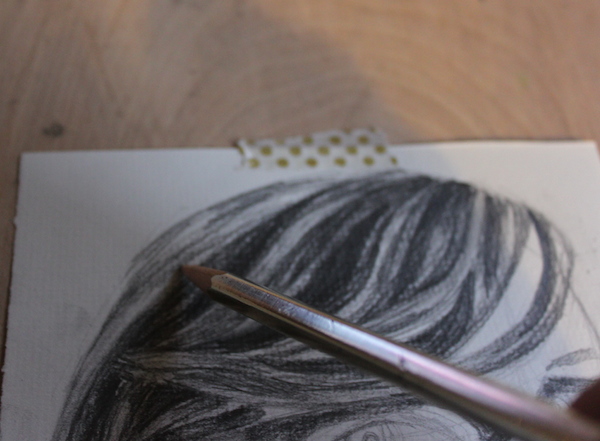
Now that we have our plan, let’s start to fill it all in. Look again at your reference. Which direction is the hair going? Is it straight, wavy, curly or just all over the place? How long is it? In the case of my bangs, I am going to shade in a swooping motion that looks like a continuous form across my head. This will show that the group of hair is similar.
If the strands are shorter, make the marks appropriately short. Longer hair means longer shaded shapes. Basically, you’ll want to mimic the texture and length without drawing individual lines.
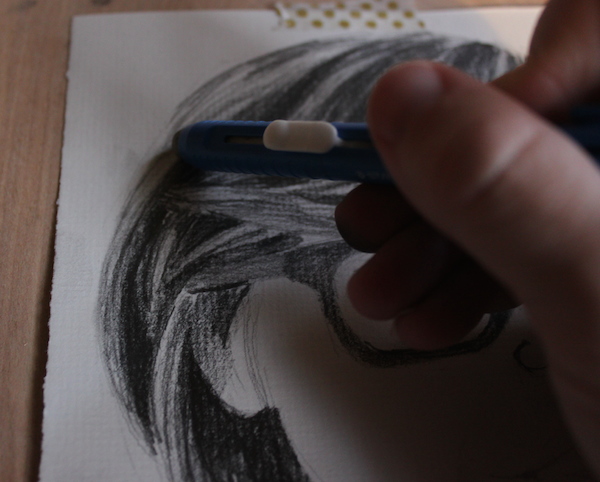
Also take notice of the highlights or sheen of someone’s hair. This will give your drawing a more rounded feel. I’m erasing pencil lines to give more highlight in the above image.
4. Define a few key areas.
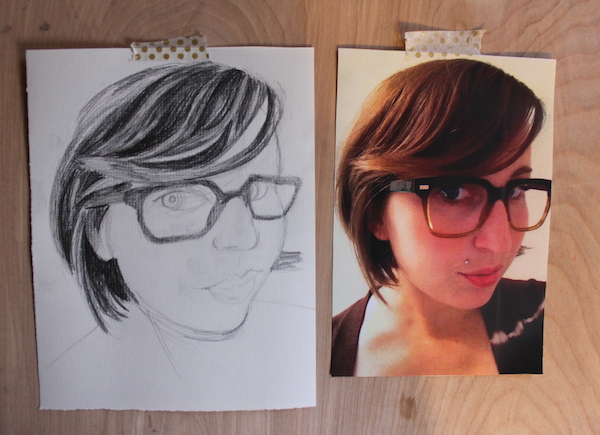
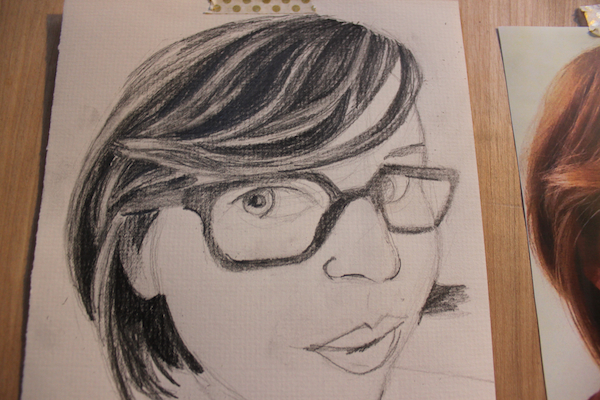
Now that you have the general feel to the hair, take some time and define some smaller strands. Use the soft lead to make dark, concentrated lines where you’d like to emphasize a small area of strands. It’ll make your drawing seem more natural to have a few pieces out of place.
Once you’re confident in your image, erase the smudges. Congratulations, you’re done!
Share tips, start a discussion or ask one of our experts or other students a question.
No Responses to “Luxurious Locks: 4 Tips for Drawing Hair in Pencil”