
You can learn a lot about a person without ever looking at their face — just look at their hands. Hands give us an indication of mood (using body language), a person’s age, their personality and even their lifestyle. Similarly, you can convey all those same things through a drawing of hands.
Learn how to draw hands in a step-by-step pencil tutorial!
Tools to use
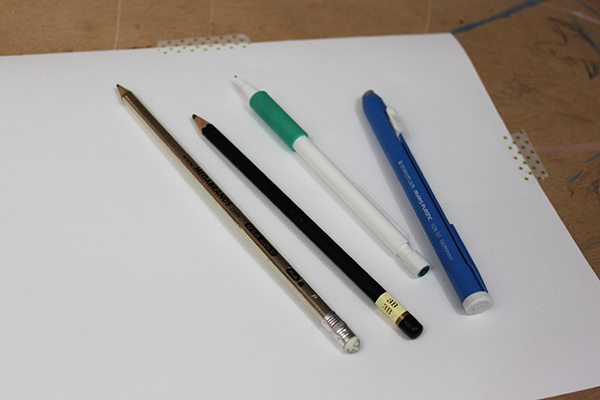
When drawing, I always use multiple pencils in varying shades of graphite. I have at least one pencil that’s an HB (middle of the road, neither too hard or too soft) and another one that’s darker (like a 3B) that creates rich shades. In addition, I have my trusty eraser and some drawing paper.
<!–The Ultimate Guide to Drawing Hands

Draw true-to-life hands with simple techniques. Learn anatomy essentials, achieve accurate proportion, render hands in motion and more in this online video class.
Gather your reference
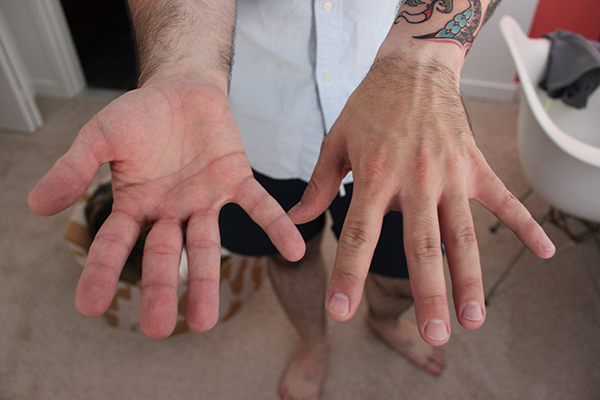
To complete a drawing of hands, you’ll need some sort of reference. This could be your own hand, a model or friends’ hands, or a photograph. I wanted a bit of a challenge, so I snapped a picture of a friend’s hand — one of the palm and the other of the back.
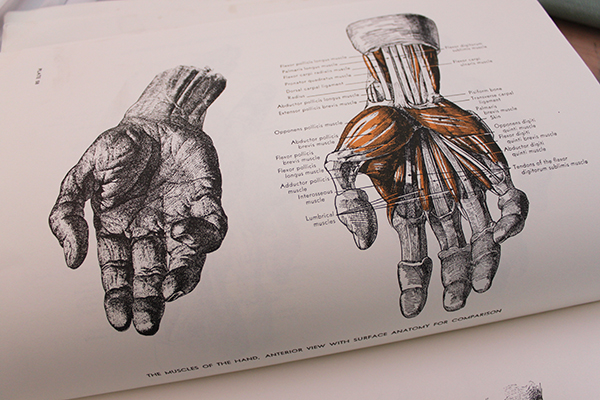
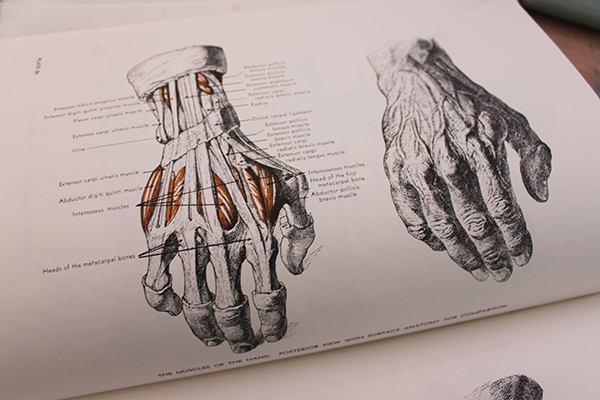
Understand anatomy
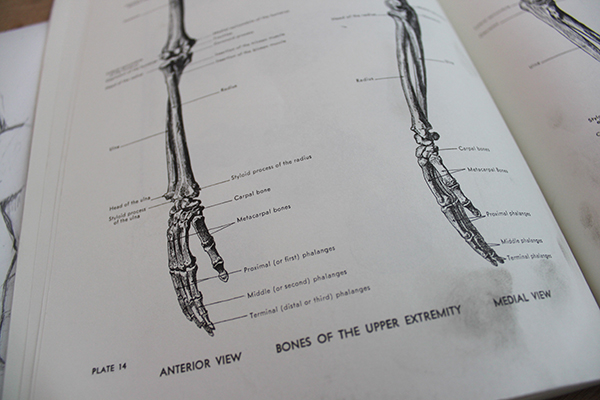
Did you know the human hand has 27 bones? You might not realize it, but it’s true! Before you embark on your drawing, take the time to study what’s below the skin. I own Atlas of Human Anatomy for the Artist, and I often refer to it when drawing the human body.
Step 1: Break down the hand into simplified shapes
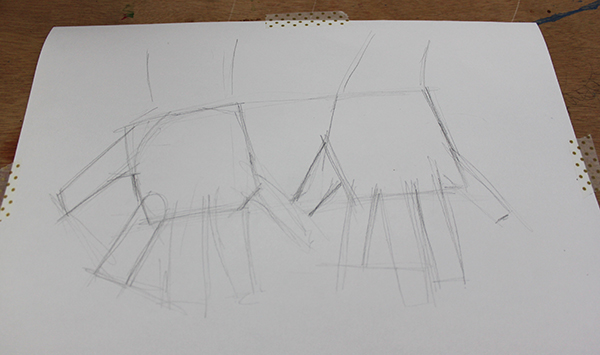
At first glance, the hand looks pretty complicated. Aside from the palm and fingers, there are nails, tiny bones, veins, joints and creases in the skin. To make drawing the hand less daunting, we’re going to first break it down into simplified shapes.
Each person’s hands are different but have common characteristics. Think about the palm as a square(ish) section, while the fingers are long cylinders. Circles indicate the joints.
Determine how long you’ll make the middle finger, and then use that as a basis to measure the others. You can also hold your pencil up to your reference and line it up with the angle of the fingers, and then mimic those lines in your drawing. Do this to again to figure out the space between each finger.
Step 2: Refine simplified shapes
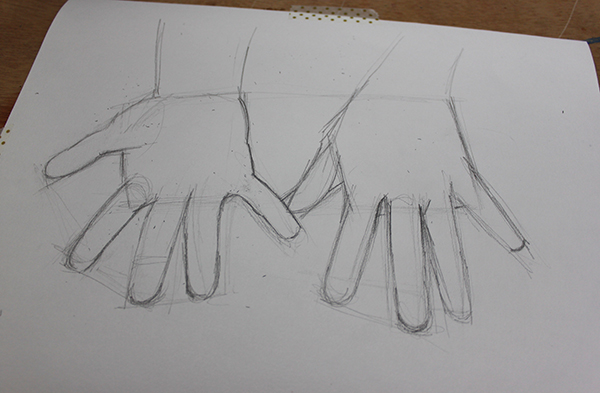
Once you have the essence of your hands drawn, it’s time to work on refining your simple shapes. Think of yourself like a carver, forming more nuanced shapes that will give a more realistic view of the hand.
Draw the outlines and add the small marks for the creases and bones. You’ll use these as a guide for shading, which we’ll tackle in the next step.
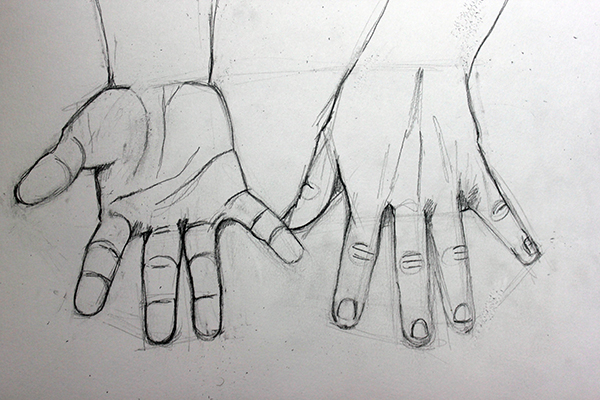
At this stage, it’s also important to make any changes to your drawing. Go back and check your angles. Does something not look right? Fix it before moving on. Once you start shading, it’s a lot harder to correct your mistakes.
Tip: When spacing fingers, look at the negative shapes made between them — it’ll help you when drawing the outline of each appendage.
Step 3: Begin shading
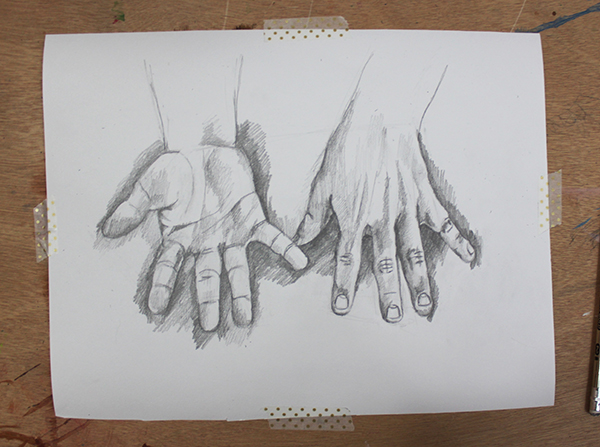
Now that you’ve refined the hands’ shapes, make them look realistic with shading. Since the hand is rounded, start with the darkest tone around the sides of the hands and fingers, leaving the tops and middle of them lighter. This will produce the illusion that these forms are rounded.
Tip: Be careful how much you shade your subject’s hands. Bones, joints, fingernails and cuticles will all have a shadow, but going overboard with your darks can lead to hands looking much older than they are.
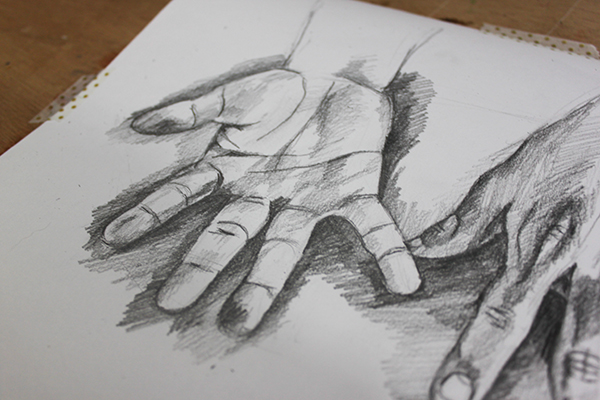
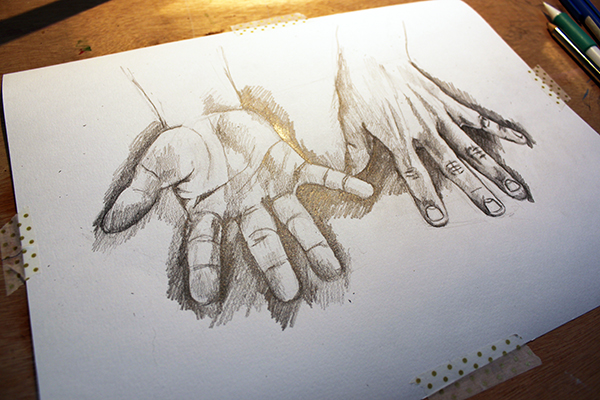
Step 4: Add the darkest shadows and refine your drawing
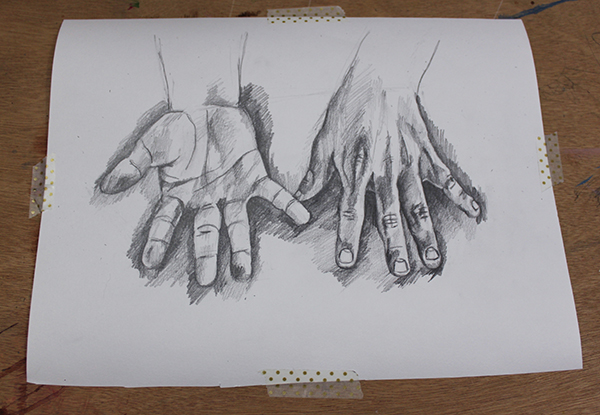
Now that you’ve got even tones, add the last of your shadows. These will be the darkest and should be used sparingly. Afterward, erase any stray lines or smudges, and you’re done!
<!–The Ultimate Guide to Drawing Hands
Draw true-to-life hands with simple techniques. Learn anatomy essentials, achieve accurate proportion, render hands in motion and more in this online video class.
Share tips, start a discussion or ask one of our experts or other students a question.
No Responses to “Are Your Drawings of Hands Realistic? How to Draw Lifelike Hands in 4 Steps”