
Although they can make you jump, insects can also provide a rich study in nature’s colors and designs.
Learning how to draw insects strengthens your finest motor skills and teaches you how to create delicate and intricate work. In this tutorial, I will help you to start learning how to apply these skills to create insect artwork.
Follow along to learn how to draw and paint insects!
Step 1: Choose which insect to draw.
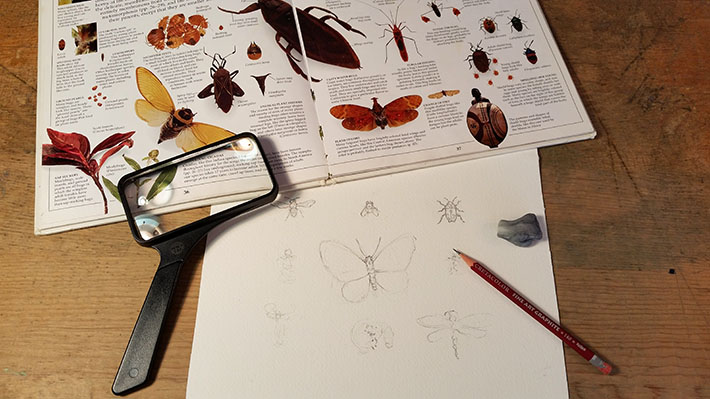
Gather your reference of insects you find interesting or appealing to look at. Try to pick insects that you think you would enjoy drawing.
You can find some great insect books with lots of clear photos in the science and nature sections of the library.
Step 2. Prepare your sketch outline.
After you pick your insect, begin your sketch.
At this stage, try to focus more on the shape or outline of the insect and not so much on the details of the wings (if it has them), legs, body markings and so on. Insects are compact yet highly detailed creatures, which can make it hard to know how to start drawing them.
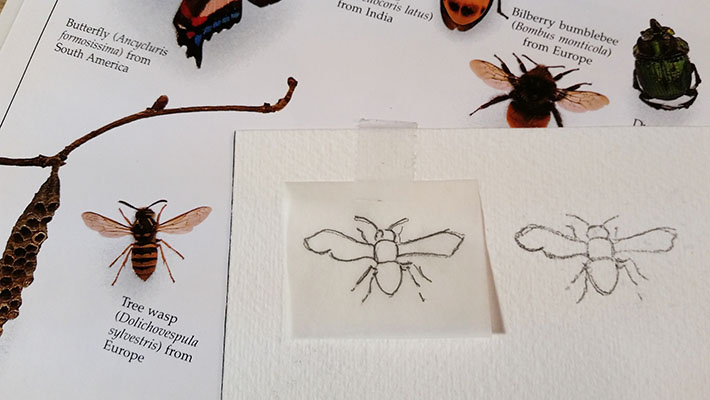
I am working on a wasp drawing. To make it easy to get his shape right, a tracing of the photograph helps me focus on the shape without distracting details for now.
While sketching your insect, take note of where the wings, legs and antennae join and move out from the insect’s body.
Step 3. Sketching in details.
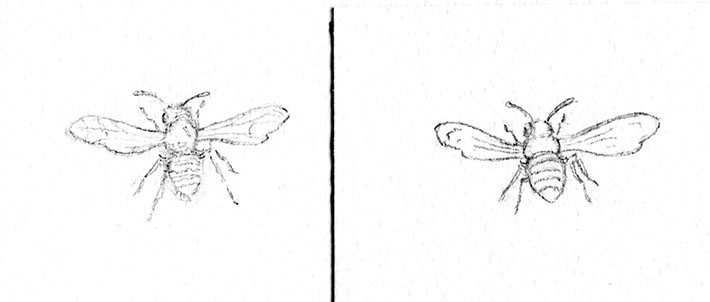
When you are satisfied with the outline of your insect drawing, start to sketch in the details.
You may wish to keep the details less descriptive or go all the way with true nature study detailing.
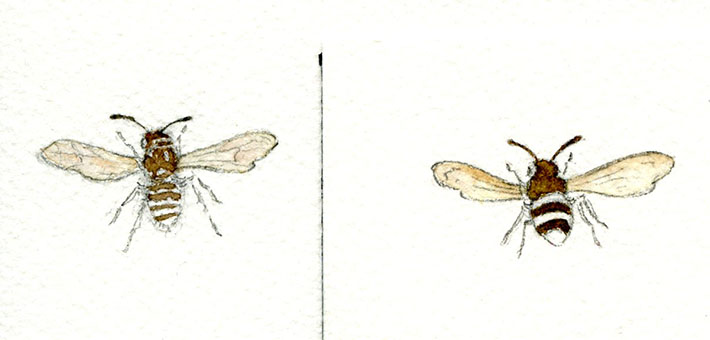
Below I have the first wasp detailed just like the photograph I was working from. The next wasp has much simpler details. This wasp would work better with children’s book artwork where you want it to be more playful and easier to look at.
Tip: A magnifying glass is a handy tool to keep around when working on very detailed drawings. I use it to get a closer look at tiny details in photographs as well as for looking at real samples from nature. And besides, it is fun to use a magnifier!
Work on each part of the insect one by one making sure the markings and all the other features or characteristics are accurate or accurate enough to denote what kind of insect it is.
Step 4. Painting your subject.
Choose you color palette based on the colors of the insect you are working on. You can match colors to the photograph to create a realistic representation or match them close enough using your artistic license.
Paint your insect’s main body color and antenna and wings if there are any.
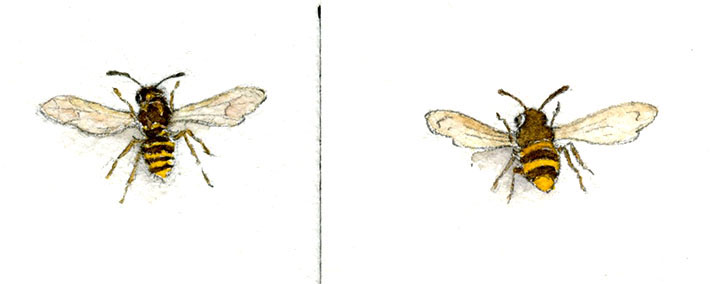
Wings should be fairly translucent so I have used a pale wash of a beige mix (sepia and yellow, very watered down) and then one more uneven very pale wash of a brown/mauve shade.
I am painting both wasp styles side by side, with the left wasp being the more realistic study.
Now paint the rest of the insect slowly, looking at your reference image as a guide. My wasp’s legs are a lighter color than his body.
I continued the color on the top left leg right under the wing creating the translucent effect.
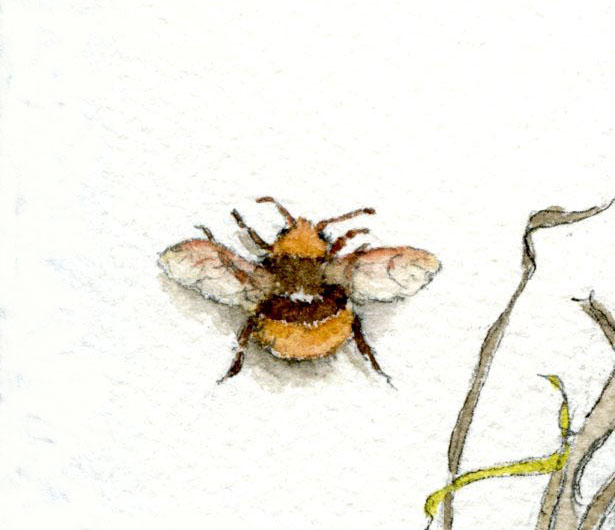
Some light shading on the left outside of the wasp give some nice depth to the piece and we are done!
Have you ever tried to sketch and paint an insect? Did you every try to sketch an insect live from nature?
helpful!