
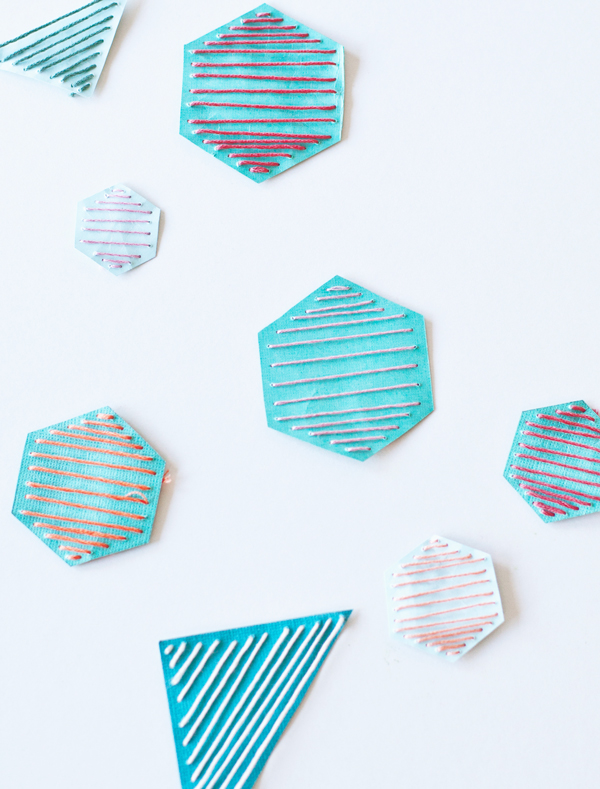
Have you ever tried embroidering paper? It’s an easy and quite unexpected way to create a one-of-a-kind design for your paper crafts projects.
There are lots of tutorials out there that can be a little confusing on this subject, but here I’ll break it down to the basics so you can quickly get crafting. At the end of this post, I’ll also share a few tips I have picked up while embroidering paper.
How to embroider paper
Materials you’ll need:
- Embroidery pattern or handmade template
- Embroidery floss
- Embroidery needle
- Corkboard or foamboard
- Pushpin
- Card stock
- Pencil
Directions:
1. With hand embroidery, you have to first decide what you would like to embroider. There is the option to choose a printable template or design something on your own that can be embroidered. Some of the coolest projects I have seen are when people create a template and embroider their own handwriting.
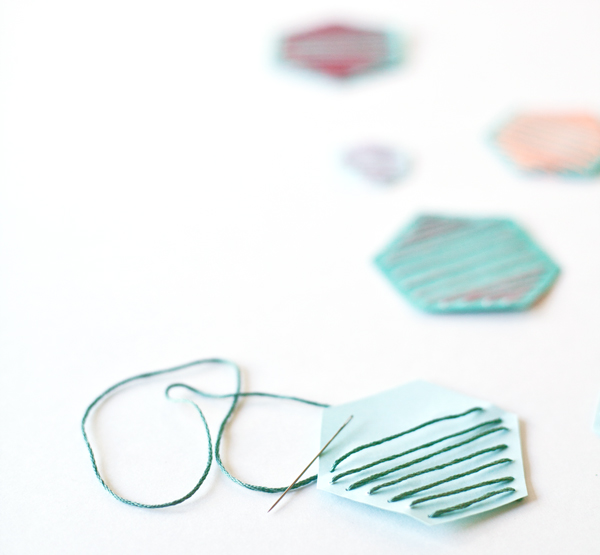
2. Once you decide on your template, take your pushpin and corkboard, and begin to punch tiny holes, tracing the object or word along the card stock while holding on the top of the corkboard to keep from ripping paper. (Sometimes I use my plush carpet underneath for the hole punching).
3. Once you have punched all the holes and are pleased with the outline you have created, it’s time to thread your needle and embroidery floss. Some people prefer a simple hand stitch, for some back stitching works best, I like a combination of a few different stitches (like detached chain stitch and French knots). Keep in mind, you will need to tie off each letter/space if you want to continue without blurred lines on each segment.
And you’re finished! You can always hide the back of the card (it will look a little knotted up and not attractive at all). This will allow you to experiment with layering and embellishments to create a new greeting card, or scrapbook page that is totally you.
A few hand embroidery tips
Perfect the stitching
Practice makes perfect, so make sure to practice the stitch pattern you will be using. Because the card stock can sometimes be a little fragile, it’s important to know the ins and outs of the pattern so it leaves less room for error. Let’s be honest, who enjoys seam ripping?
Carefully erase
Because there possibly could be a little of your line left over on the back of the paper from the tracing, always make sure you have an eraser handy to remove the pencil marks.
There is such a thing as pre-punched paper
For a quicker craft time, like a kid’s project, purchase pre-punched paper at your local craft store. Pre-punched paper makes it easy to complete hand embroidery in typically less than 30 minutes.
You may need a variety of needles
The project may require different size holes and may involve different fibers, depending how intricate your projects are. You don’t want the eye of the needle to be bigger than your fiber or the punched hole.
Choose threads that will be appropriate for your template
Make sure the size of the thread is going to fit when you are tracing and punching holes for your template. Too many times you imagine the template being smaller, but then have a very difficult time getting the thread to pull through the holes. Make sure everything is appropriately sized!
Share tips, start a discussion or ask one of our experts or other students a question.
No Responses to “How to Embroider Paper for One-of-a-Kind Designs”