
Finishing armholes or sleeves with bias strips gives such neat and professional-looking results, yet I only came across this method recently, despite sewing garments for almost five years! Sure, I’ve used decorative bias binding before and sewn in actual sleeve facings on occasion, but I usually just press the raw edge under twice and stitch in place.
This new-to-me method is fast becoming my favorite though, so I thought I’d spread the love with a quick tutorial. Bias strips are suitable for finishing both armholes and sleeves, but I use armholes as an example below and have refrained from referencing sleeves to avoid any confusion.
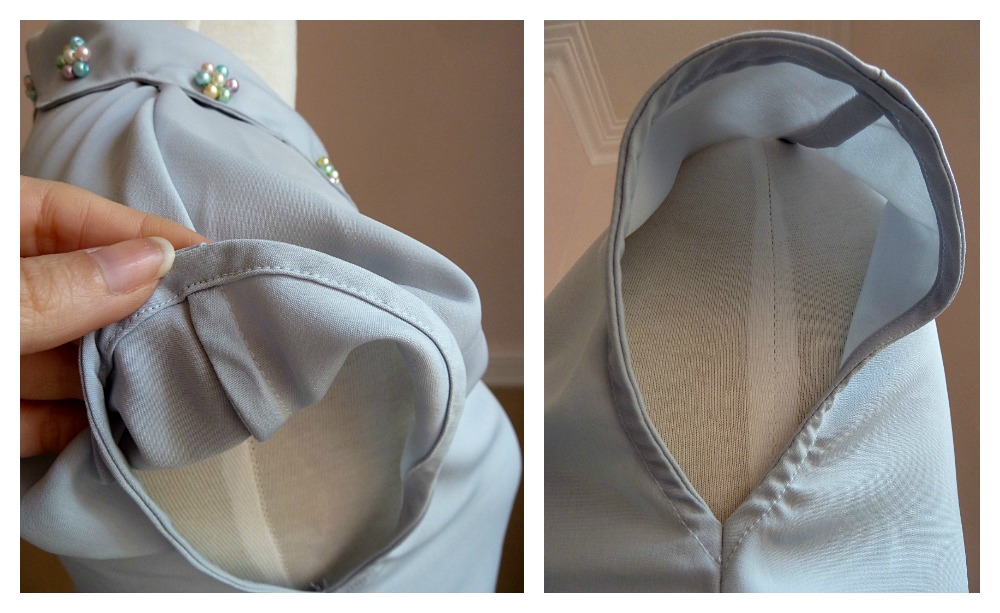
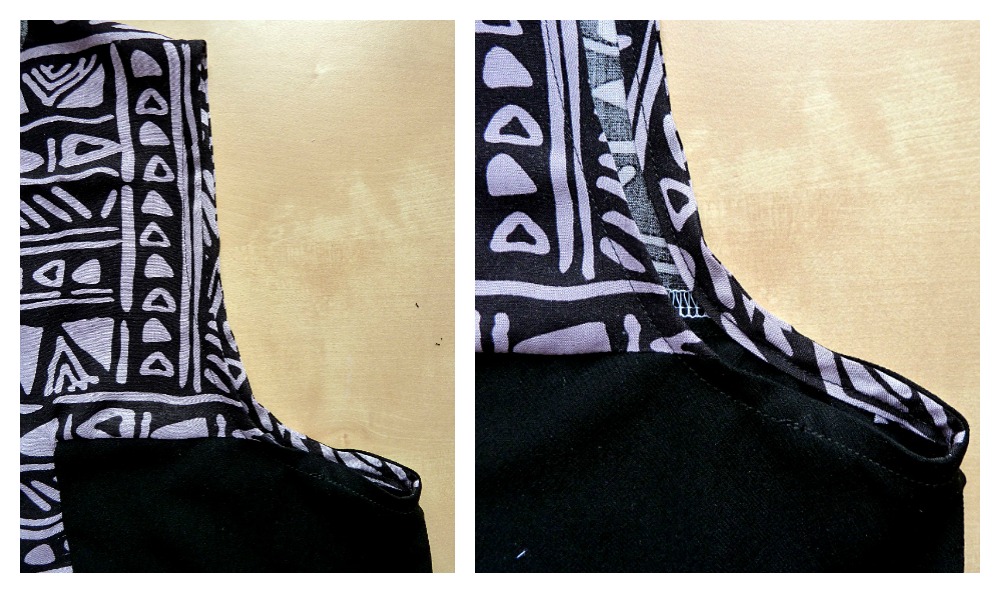
Learn to finish armholes with bias strips for a professional finish.
Want to learn how to sew like a pro? Unlock industry secrets for beautiful garments that trump ready-to-wear pieces with Craftsy instructor Janet Pray. Join thousands of other students in her classic class, Sew Better, Sew Faster: Garment Industry Secrets. Then be sure to check out her newest class, Sew Better, Sew Faster: Advanced Industry Secrets, to uncover even more insider tricks of the trade!
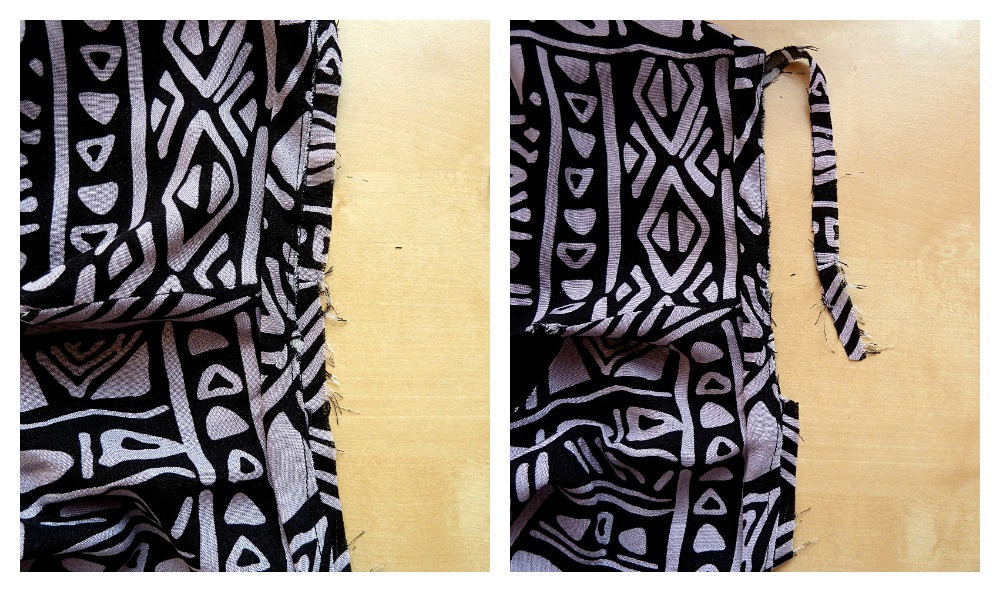
Step 1: Measure and prepare the armhole.
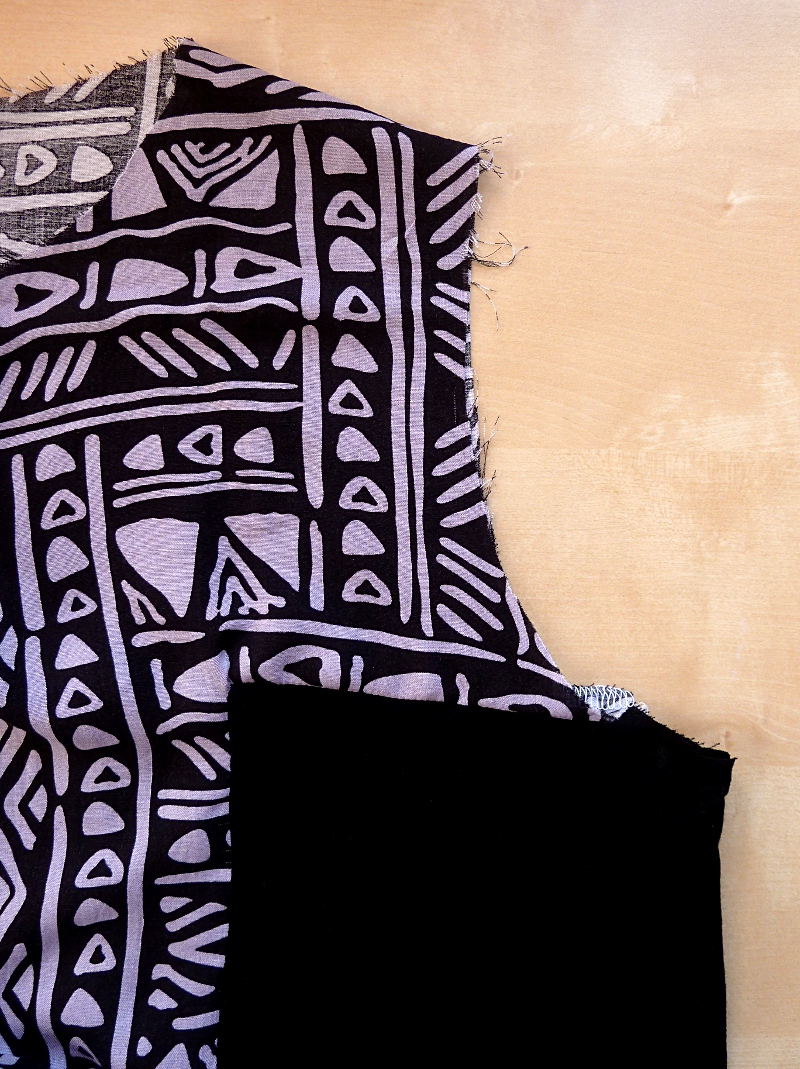
Start by measuring the armhole – you can either do this before you sew up the side seams or after, as is pictured above. If you do it with the side seams already sewn up, make sure you double your measurement to incorporate both the front and back length of the armhole.
Assuming you’re working with a standard 1.5 cm (5/8″) seam allowance, sew a line around the circumference of the armhole, 1 cm from its raw edge. If you’re working with different seam allowances, then you’ll have to adjust measurement this accordingly.
Step 2: Prepare and pin the bias strip.
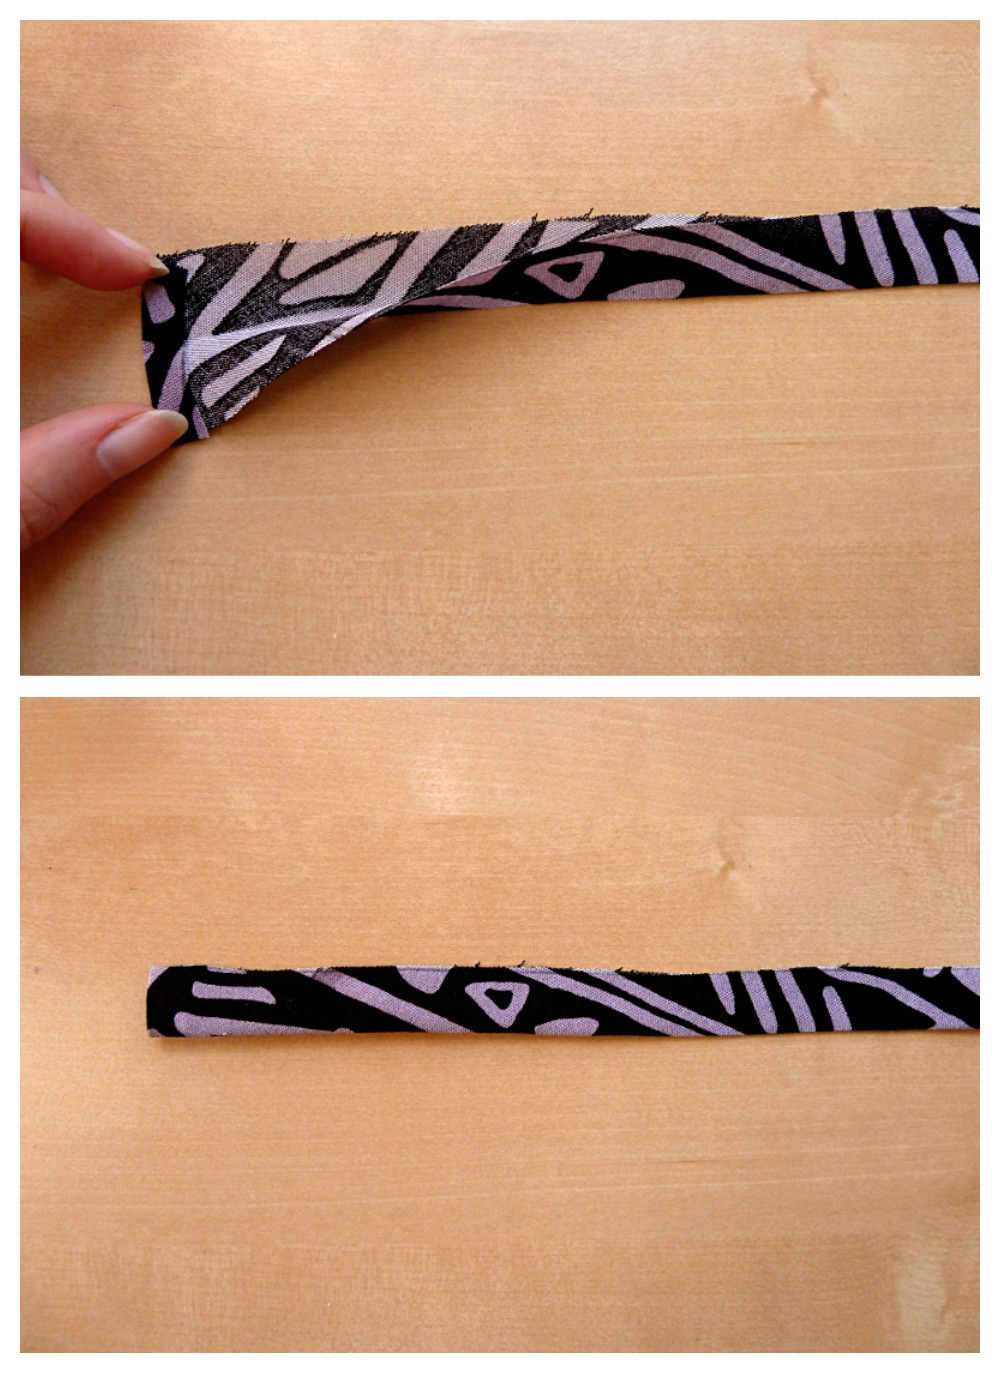
Cut a bias strip of fabric 3 cm wide and long enough to go around your armhole and overlap by 2cm. Fold one short raw edge over, then fold and press the bias strip in half with the wrong sides together. If you don’t know how to find your fabric’s bias, you may find this simple diagram helpful.
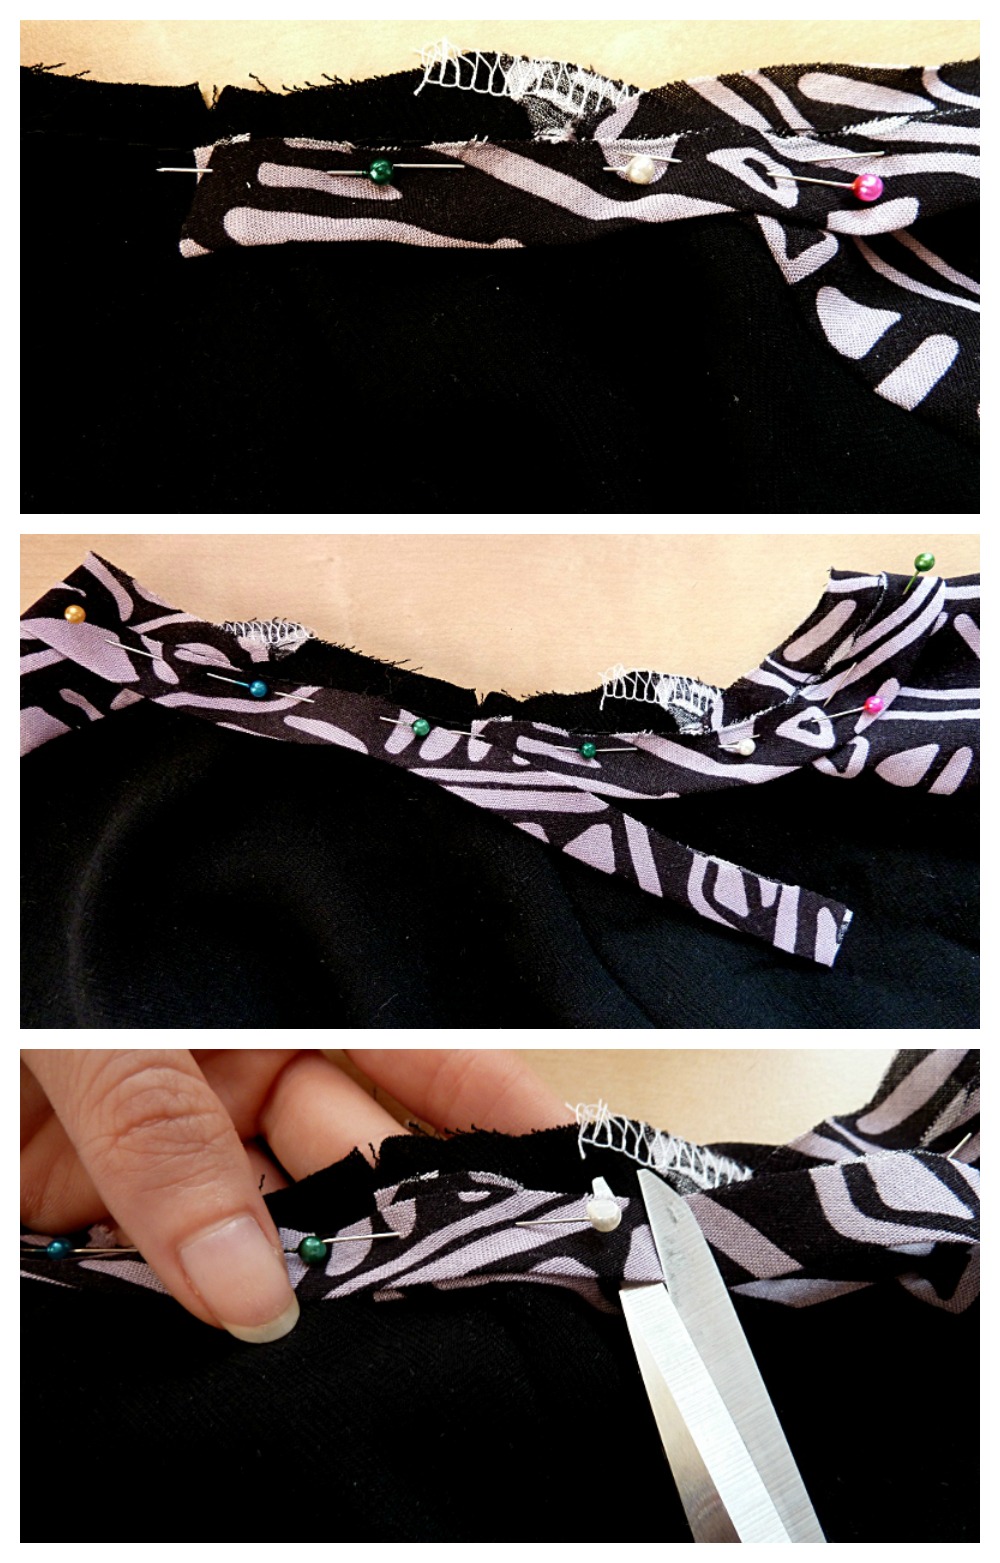
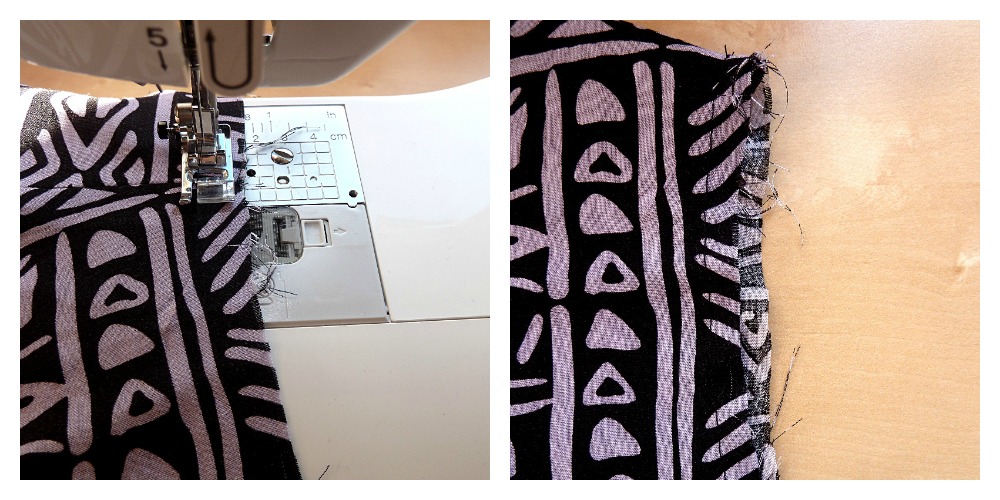
Take the folded bias strip and line up the raw edges with the line of stitching that you sewed 1 cm in from the armhole’s edge. Use plenty of pins to hold everything firmly in place as you go along. Start from the underarm seam, and when you get all the way around, overlap the bias strip by roughly 2 cm.
Step 3: Sew the bias strip on and trim seam allowances.
Sew the bias strip onto the armhole, 1.5 cm from the armhole’s edge. Trim the excess seam allowance right up to where the raw edge of the bias strip begins.
Step 4: Press the bias strip under and topstitch the armhole.
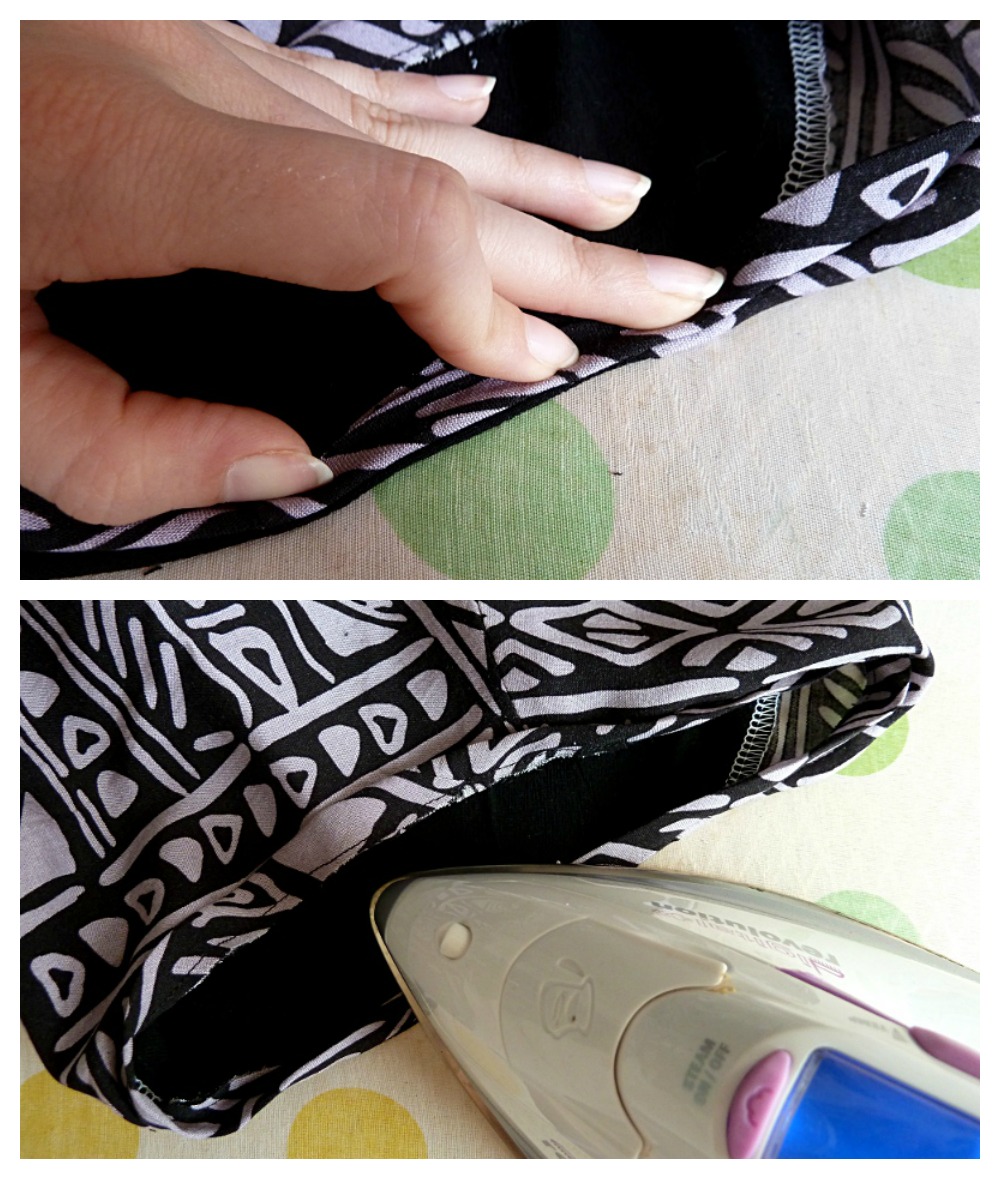
Carefully fold and press the bias strip over to the wrong side of the armhole, concealing the raw edges as you go along.
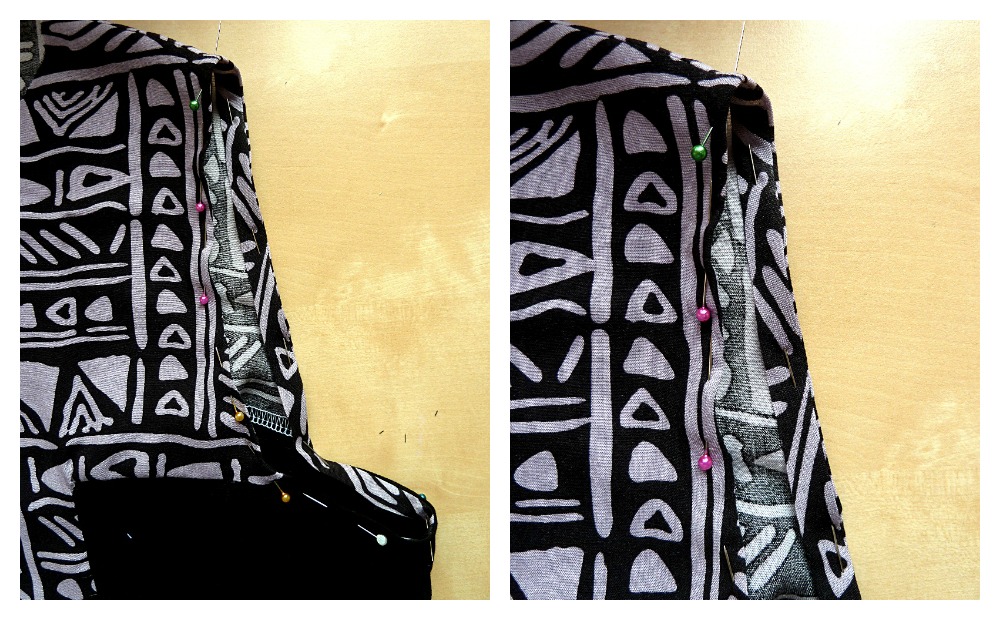
Pin into place on the right side of the armhole and carefully topstitch, making sure you catch the bias strip on the wrong side of the armhole.
Et voila, you now have one very neat and professionally finished armhole! Don’t forget to repeat on the other side!
Need help with conversions? Check out our Fabric Metric Conversion Guide — for easy referencing!
Share tips, start a discussion or ask one of our experts or other students a question.
No Responses to “Sew Like a Pro: How to Finish Armholes With Bias Strips”