
Gluing up furniture can be stressful, especially if the piece is complicated or has to be glued up all at once. It can be like playing a game of Twister, holding one part of the project with your foot while nudging another into place with your chin (true story!). The ideal glue-up is one that you can accomplish calmly without creating problems you’ll have to clean up later. Here are a few tips that will help take the anxiety out of glue-ups and give you the best chance for success.
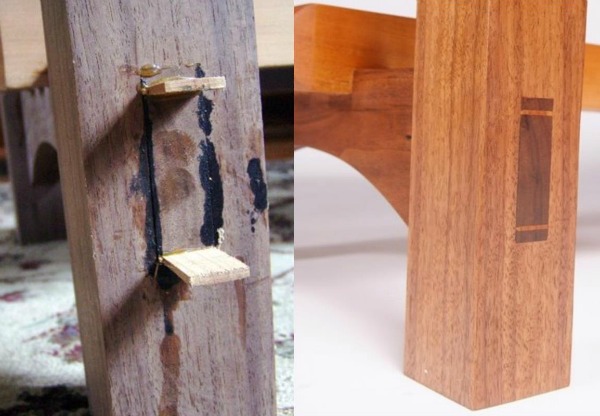
Wedged tenon after a successful glue-up
How to glue up wood
By the time you’re ready to glue up a piece of furniture, you’ve likely spent hours milling the wood, shaping it and cutting joints. After you’ve spent so much time and energy, glue-ups can be nerve-wracking. As soon as you apply glue, the clock starts ticking. With most wood glues, the set-up time is about 30 minutes, but sometimes after only a few minutes you’ll start to feel it setting and it becomes more and more difficult to move things into position. Conversely, sometimes glue acts as a lubricant, so the more you pull two parts together, the more they slide apart. I’ve had my share of glue-ups go south on me, so I’ve learned a few things along the way.
1. Start square
Set yourself up on a sturdy, flat, clean surface. I use my table saw with a piece of plywood on top. If you were to glue up a table on a wavy concrete floor, it would never be true. Label everything so there is no question about what goes where and lay out the parts so all are within easy reach. Put your glue and spreaders in a place you can reach and where they won’t be knocked over. Have a dead blow hammer nearby in case anything needs friendly persuasion. Use carpenter’s tape around joints so glue will squeeze out on the tape instead of the wood. Have some damp rags nearby just in case you need to remove excess glue.

Seat for three-legged stool prepared for glue-up
Taping joints helps if you’ve used too much glue, as I did here
2. Rehearse!
It may sound silly to think of rehearsing the assembly of a piece of furniture, but I do it every time the glue-up is the least bit complicated. I even pretend to spread glue on all the surfaces, getting a feel for how much time everything will take. Rehearsing is the best way to know what to anticipate. Being surprised by a broken part or a clamp that’s too short is not pleasant when you’ve got wet glue everywhere and it is starting to set.
3. Divide and conquer
Some projects, like my three-legged stool, have to be glued up all at once. Because of the angles involved, you have to coax the legs into the seat at the same time you are coaxing the stretcher tenons into the leg mortises.
Thankfully, other projects allow you to glue up in phases. For a table with drawers, you might glue up the drawer supports or runners, let them dry and then install them while assembling the legs and sides. Case pieces rarely have to be glued up all at once. You can’t always divide up the gluing, but it’s helpful when you can.
4. Apply pressure
During your rehearsal you can determine which kind of clamps you’ll need to use and how many. Be sure not to use too much clamping pressure. When the wood comes together and a bit of glue squeezes out, that’s enough. Using any more pressure can warp your project so that it dries out of square. Use cauls on panels and wide cases to protect the wood and help distribute clamping pressure evenly. The rubber pads of F-style clamps can leave an oily residue that soaks into the wood and becomes difficult to sand out. I either cover the wood with wax paper or use a clamping block. Make sure your clamps are unscrewed all the way so you don’t have to worry about doing that in the middle of a glue-up.
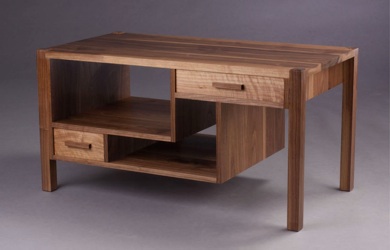
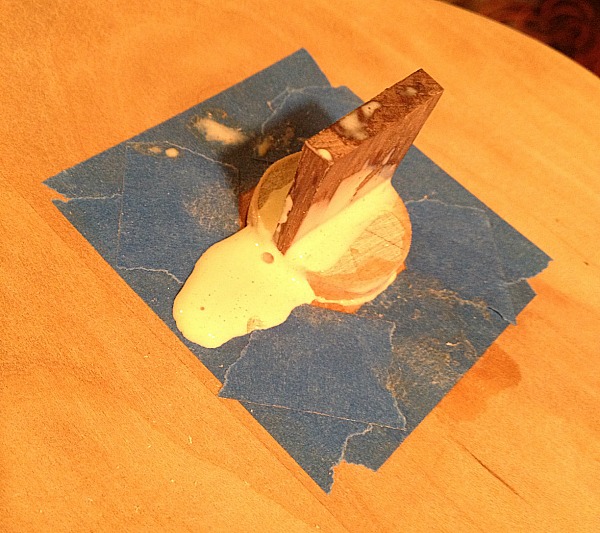
Photo by Jim Dugan via Libby Schrum Design
5. Roll with it
Even professionals stress out about glue-ups. As a case in point, consider the work of Libby Schrum, a furniture maker from Maine. Libby is as accomplished as they come, winning awards and exhibiting work in galleries, museums and shows around the country. When I mentioned writing this post, she replied, “Ahhh, glue-ups! Talk about problem solving…” She described a project, the table pictured above, that was a challenging glue-up because of the angles of the interior parts. Right in the middle of it, she had to trim some tenons so a couple parts could slide into place. “There’s always that nervous feeling before,” she told me, “but then when it all comes together the right way, you feel like you’ve conquered the beast!”
For complicated glue-ups, Libby recommends using an epoxy with a long “open” (set-up) time, taping cauls in place so you don’t have to worry about holding them and pre-finishing parts that would be difficult to finish once everything is together.
Do the best you can to prepare for all contingencies, but stay calm if everything doesn’t go as planned. Often things happen that you can’t anticipate. Ultimately, you have to roll with it. Sometimes you just can’t beat a good game of Twister.
Share tips, start a discussion or ask one of our experts or other students a question.
No Responses to “Achieve Worry-Free Furniture Glue-Ups Every Time With These Helpful Tips”