
Follow this easy five-step process to become a better painter!
1. Thumbnails
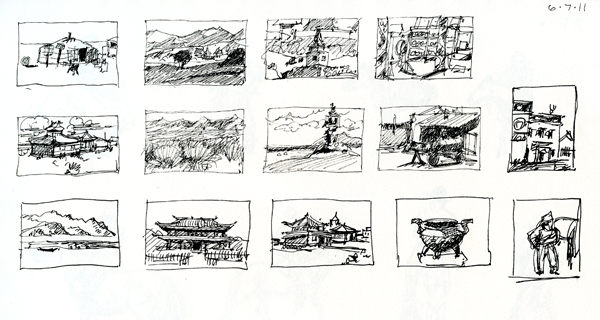
The purpose of thumbnails is to let you try out many composition ideas quickly to see which one best expresses the idea you have in mind. They should be small, no more than an inch or two in size and only have the largest shapes. You are defining the positive and negative spaces in just one or two values. You are solving the problem of the overall composition.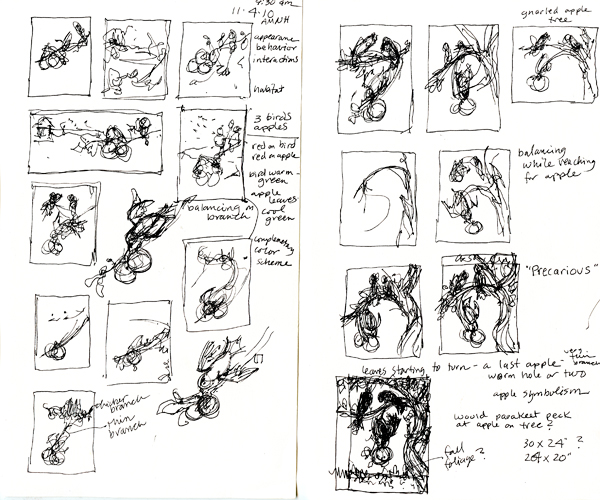
The image above depicts concept thumbnails, most only about 1″ tall, that I sketched while waiting to be admitted to the “Rare and Extinct Bird Room” at the American Museum of Natural History in New York.
2. Design/composition
Once you’ve selected the thumbnail, then it’s time to complete the composition or design. You’re still working with shapes, not detail. There are many formal compositional structures that have been around for centuries. You can choose the one that best fits your thumbnail idea or experiment to come up with a design you like and then see how it might fit one of the traditional compositions. By doing so, you solve the problem of where all the elements of the painting will go and how they will relate to each other.

I had a lovely photo of this stream, and thought a fox would be a nice addition. You can see how I altered the proportions in progress.
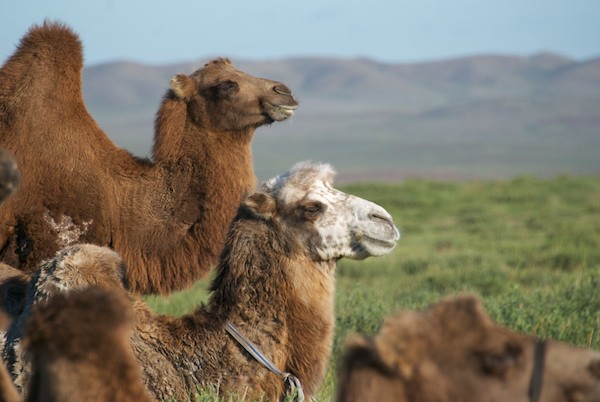
Reference photo of a Bactrian camel in Mongolia
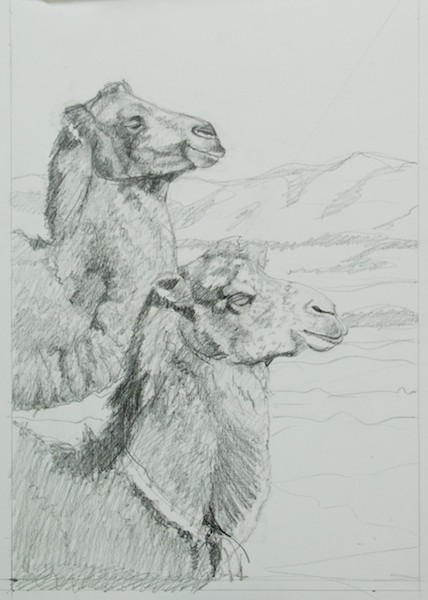
For the above sketch, the photo immediately suggested to me a cropped, vertical design since the painting would be about the heads of the two camels and the positive and negative shapes their position created. I moved the background mountain down so that the top camel’s head would be against the sky. I also changed the shape of the mountains to put a large peak on the right side to keep the viewer’s eye from leaving the picture frame.
3. Drawing
The next step is to do a finished drawing, solving all the problems related to that. This is critical because if you don’t and just dive into your painting, then instead of letting loose or focusing on particular details you may end up struggling to correct the drawing. This can lead to overworking the painting.
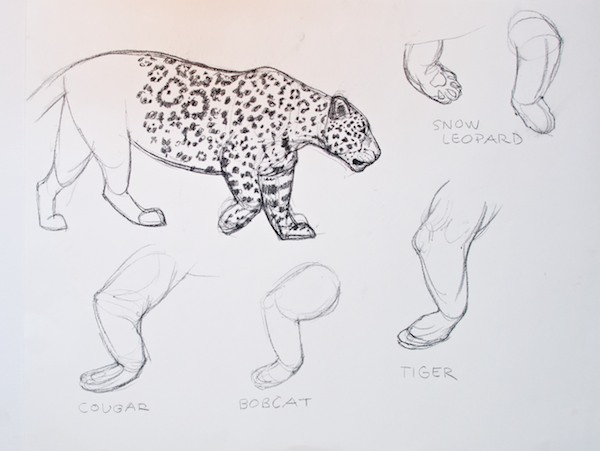
My reference photo of the jaguar didn’t show the lifted paw very well, so I went online and through my other big cat reference to find examples to work from. I also needed to understand the spot pattern, which is different from a leopard’s. The back end of the cat was covered up by vegetation, so I didn’t worry about finishing it.
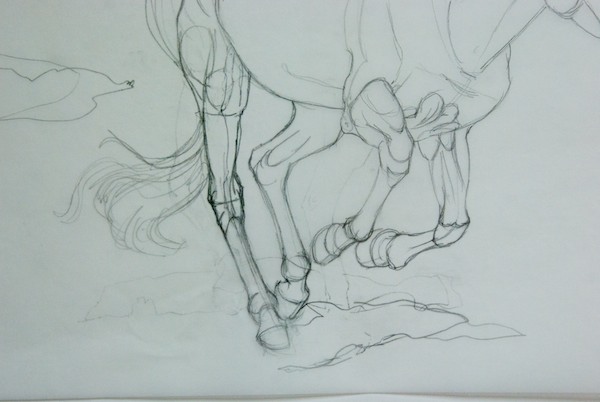
The left hind leg of this horse looked very awkward in the photo. I consulted with an equine artist colleague who gave me some tips. Then, also working from an animal anatomy book and Muybridge’s images of horses in motion, I did a precise study of all the legs.
Sometimes I do a very finished drawing to ensure that I understand all aspects of the subject and to make sure everything really does work as I thought it would.
4. Value
Value is light and dark separate from color or hue. Good paintings always have good values. The eye goes to the point of highest contrast in a painting and that usually controls what the viewer sees first. Value is possibly the most important means of doing that. You are solving the problem of the light and dark pattern of your painting.
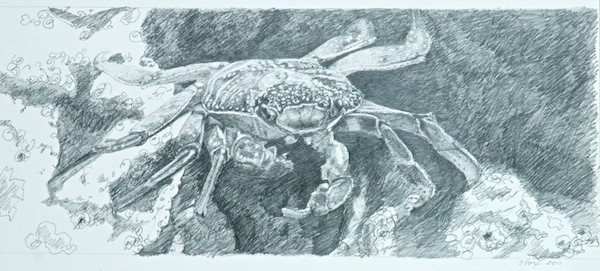
This became a big painting, 24×46″. The actual crab was maybe 8″ wide, including the legs. My idea was to use scale to present an animal that many people would never notice. So, I made sure that the body of the crab was against the dark background.
5. Color
Glorious color! It’s a big part of why we love to paint. But, getting into a struggle with color can kill a painting. That’s why doing a color study can be really helpful. Using your value study as a guide, you can translate it into color and repaint as many times as it takes to get it right. Then, when you start your painting, you won’t be trying to figure out what color to mix. Instead, you can focus on cutting loose with your brushwork and making it wonderful.
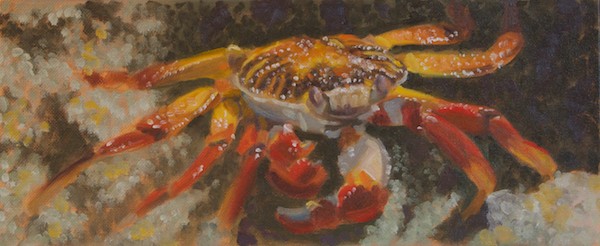
Color study for the crab painting, about 6″ x 14″
These steps are useful tools. You can use all, some or one of them for a given painting, depending on the problems that you feel you need to solve before you start. I learned this process when I was earning a degree in Illustration at the Academy of Art university, but it’s been around for a long, long time.
READY. SET. PAINT!
Share tips, start a discussion or ask one of our experts or other students a question.
No Responses to “Improve Your Paintings In 5 Easy Steps”