
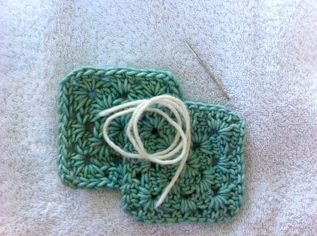
Here are two methods to join granny squares.
For each method, you will need a length of yarn in the same weight. For this post, I used a yarn in contrasting color, but you will probably want to use matching yarn. I generally measure my length of yarn to be three times the length of the finished piece.1. Sewn method
Materials:- Yarn for seaming
- Darning needle
 Match up your granny squares with the right sides facing each other. You will begin at the right end and sew through each of the back loops of both the squares using a whip stitch.
I like this method because it’s super quick and easy, and leaves a nice defined space between each square. It also makes a very flexible and stretchy seam.
This is great for garments that incorporate granny squares on smaller projects, like scarves and baby blankets, because it gives a nice finish without making the piece stiff.
Match up your granny squares with the right sides facing each other. You will begin at the right end and sew through each of the back loops of both the squares using a whip stitch.
I like this method because it’s super quick and easy, and leaves a nice defined space between each square. It also makes a very flexible and stretchy seam.
This is great for garments that incorporate granny squares on smaller projects, like scarves and baby blankets, because it gives a nice finish without making the piece stiff.


2. Crocheted slip stitch method
Materials:- Yarn for seaming
- Crochet hook the same size or a bit larger than that used for project
 Step 1: Match up your granny squares with right sides facing each other.
 Step 2: Make a slip knot at one end of the yarn and place the loop on your hook.
 Step 3: Beginning at the right end of the squares, hook through the back loop of both squares and pull up a loop.
 Step 4: Pull this loop through the loop on hook to make a slip stitch. Continue making the slip stitch across the squares.
 This method creates a really secure and stable seam, which will be especially beneficial for large pieces, such as queen-sized afghans. But be warned, if you crochet too tightly, there won’t be much give to this seam. So be sure to do it loosely or use a hook that is a half to a full millimeter larger than what you used for the granny squares.
Once you are done seaming your grannies together, you will very likely have quite a few ends to weave in. I like to cover these up with a border around the entire piece. This saves me a ton of time on finishing and keeps all the ends covered.
If you will not be doing a border, weave them back into the seam you just completed. This will hide them and help keep your seam secure.
Remember that in order to get your grannies to lay flat and neat, it is important to work in the back loops as you join. If you work through both loops, your piece will not lay well and will look a bit rigid.
To learn more easy crocheted joins, sign up for Joining Crochet Motives with Edie Eckman.
This method creates a really secure and stable seam, which will be especially beneficial for large pieces, such as queen-sized afghans. But be warned, if you crochet too tightly, there won’t be much give to this seam. So be sure to do it loosely or use a hook that is a half to a full millimeter larger than what you used for the granny squares.
Once you are done seaming your grannies together, you will very likely have quite a few ends to weave in. I like to cover these up with a border around the entire piece. This saves me a ton of time on finishing and keeps all the ends covered.
If you will not be doing a border, weave them back into the seam you just completed. This will hide them and help keep your seam secure.
Remember that in order to get your grannies to lay flat and neat, it is important to work in the back loops as you join. If you work through both loops, your piece will not lay well and will look a bit rigid.
To learn more easy crocheted joins, sign up for Joining Crochet Motives with Edie Eckman.
Share tips, start a discussion or ask one of our experts or other students a question.
No Responses to “How to Join Granny Squares”