
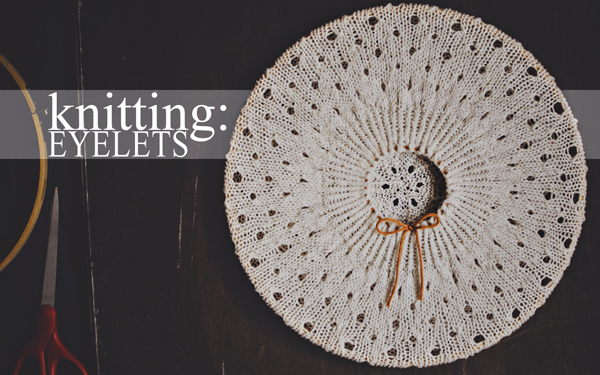
Eyelets are a great way to add elegance to a knitting pattern or design. There is something about them that is charming, interesting, and just plain pretty. The following are some tips for knitting eyelets and how to add them to your favorite patterns or create designs around them.
What is an eyelet?
An eyelet is a small hole in knit fabric. This is accomplished with a yarn over (YO) and a decrease. You need both in order to keep your stitch count consistent.
Creating an eyelet pattern
The easiest way to create an eyelet pattern is to chart it out on graph paper. If you have never used graph paper to plan a knit design, this is a great way to start! The chart will make it easy for you to visualize your new pattern. Graph paper specifically for knitting has spaces that are more rectangular than square, but if regular square graph paper is what you have, it will work.
When working flat patterns from charts, you work Row 1 from right to left, then Row 2 from left to right. If you are working the same pattern in the round, you work ALL rounds from right to left. All charts are worked from the bottom to the top.
Note: Symbols for particular patterns may vary. If you plan to share your pattern, provide a key with the definitions of symbols used. See the Craft Yarn Council’s list of knit chart symbols for more information.
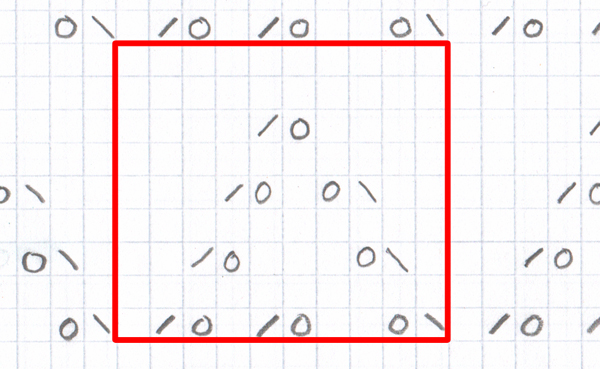
Generally, these are the symbols we would use for a basic eyelet pattern:
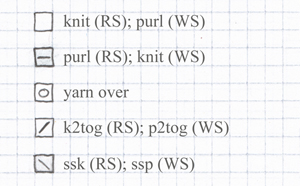
There are two types of decreases you can use, depending on which way you want it to lean. The K2tog leans to the right and the SSK leans to the left. Each has its wrong-side equivalent, noted in the key.
For more ways to use knitting charts, see our post Why Should We use Knitting Graph Paper?
Let’s design a pattern!
I want to make a hat, so I will be working in the round. Because of this, I can put my YOs easily on odd AND even rounds. For simplicity’s sake, when working flat, it’s best to keep them on the right side (usually the odd numbered row).
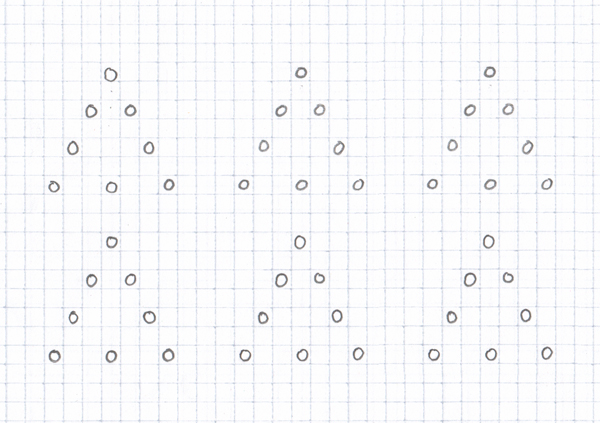
I happen to think triangles are lovely, so I plotted out my yarn overs in a triangle shape:
Next, I added decreases to balance out the YO increases:
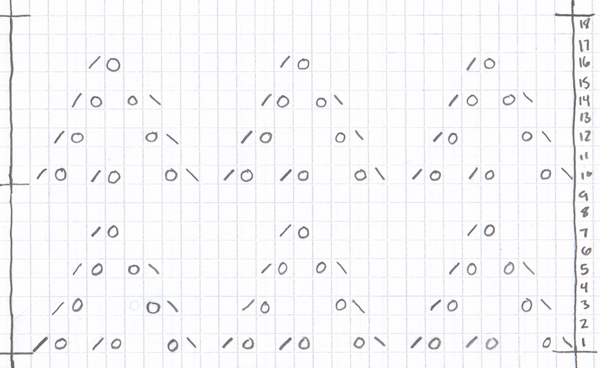
It is easiest to place the decreases right next to the eyelet stitches so you don’t forget about them. I generally put K2tog after a YO and SSK before, but that is a personal preference. You can do the opposite, or even stick to just one decrease for the whole pattern.
Now that you have your eyelet pattern charted out, you can determine what your stitch pattern will be by selecting the pattern repeat over the smallest number of stitches and rounds.
For example, mine was a 10 stitch repeat over 9 rounds:
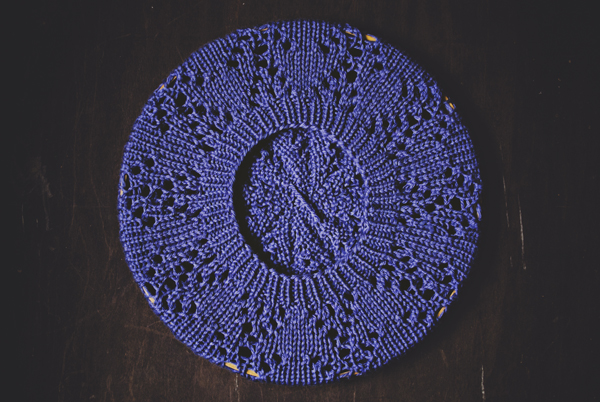
I have to work my project over a multiple of 10 stitches. I can plug it into a favorite or draft up my own. I chose a beret pattern knit with worsted weight wool. I started with 80 stitches, ribbed for an inch, then increased to 100.
I worked my eyelet design 4 times, then started a crown decrease, which I also charted out:
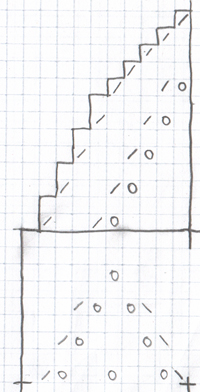
I added some eyelets to the crown for fun, but combined with the slanting decreases of the K2tog, they created an almost floral-like crown:
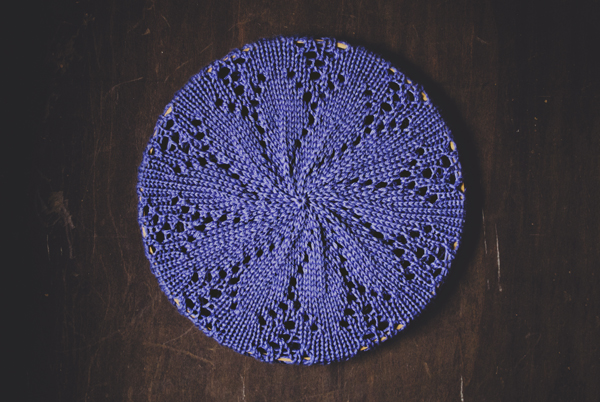
Feel free to knit the same beret using the charts and details above. Yarn used was Stitch Nation Bamboo Ewe (1 skein). Needle sizes were 5mm (US 8 ) 16″ circular for the rib and 5.5mm (US 9) 16″ circular and DPNs for the rest.
Things to keep in mind:
- Working with a natural fiber will allow you to stretch and block your item. Stretching out the fabric makes the pattern pop, so keep that in mind when deciding what yarn to use. I like to block my berets and slouchy hats over an embroidery hoop or dinner plate (10-12″).
- Eyelets will change your gauge slightly. Make a swatch of your new stitch pattern and block it, if you plan on blocking the final item. Compare it to your original pattern’s gauge. You may need to adjust the number of stitches you cast on to either fix the gauge OR to fit the multiple of stitches in your stitch pattern. I like slouchy hats with eyelets because after the ribbing, your gauge does not matter so much. The same goes with scarves and shawls. On the other hand, gauge is paramount when knitting up garments.
I hope these tips help you on the path to creating beautiful lace patterns! Eyelets are the foundation of lace knitting, in my opinion. Once you master them, you can move on to more adventurous projects.
If you’re ready to make that next step, Craftsy is here to help you out. You’ll learn to knit any lace pattern in the brand new class Lace Knitting: Basics and Beyond with Eunny Jang. Once you’ve gotten down the basics, check out Mastering Lace Shawls with Laura Nelkin and Lace Shawl Design with Miriam Felton.
Don’t let all the handwork you’ve been doing leave your hands in excruciating pain! Come back to the Craftsy blog tomorrow to learn some helpful hand stretches for knitters and crocheters.
Share tips, start a discussion or ask one of our experts or other students a question.
No Responses to “How to Knit Eyelets: Designing & Creating”