
Stockinette stitch is a tried-and-true stitch, but sometimes we get an itch to change it up just a bit and add some texture.
The knot stitch is similar to stockinette stitch except that it has small decorative knots peppered throughout. Give the basic knot stitch a try and then start brainstorming ways you can use it to add something special to your knitting project.
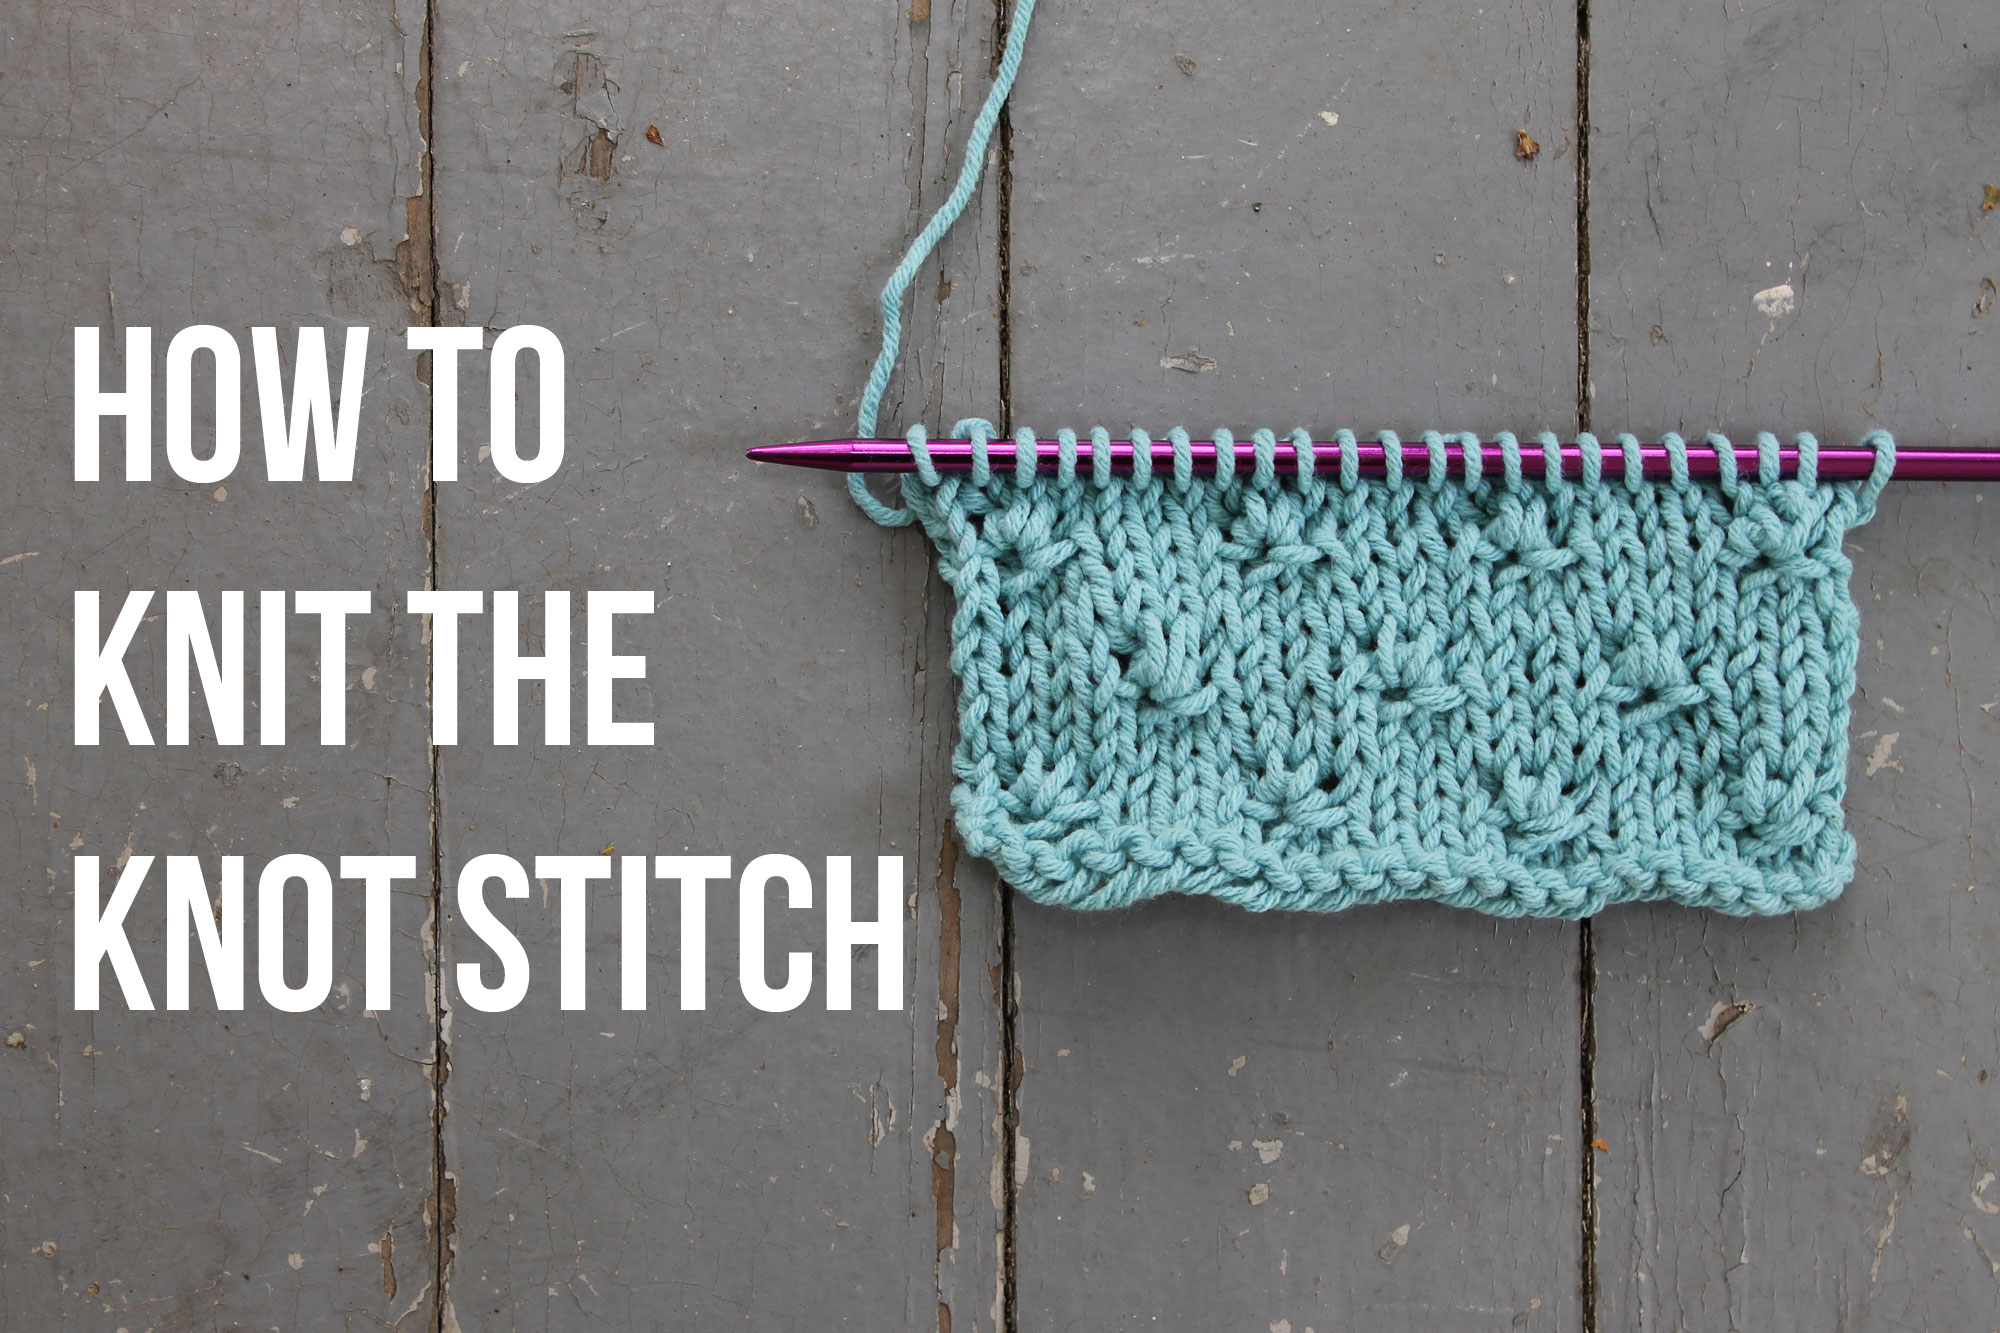
Knot stitch pattern
There are step-by-step photos below to guide you through this stitch, but if you’re ready to go, here’s your ticket to instant knitted knots:
Multiple: 6 + 5
Special Abbreviation
MK (Make Knot): Purl the next three stitches together, but do not drop them from the needle. Knit the same three stitches together, then purl the same three stitches together. Drop the stitches from the left needle.
Pattern
Row 1: Knit across.
Row 2: Purl across.
Row 3: K1, *MK, K3; repeat from * to last 4 stitches, MK, K1.
Row 4: Purl across.
Row 5: Knit across.
Row 6: Purl across.
Row 7: K4, *MK, K3; repeat from * to last stitch, K1.
Row 8: Purl across.
Repeat these eight rows until you reach the desired length.
Knot stitch tutorial
Let’s break down that pattern just a bit.
Step 1:
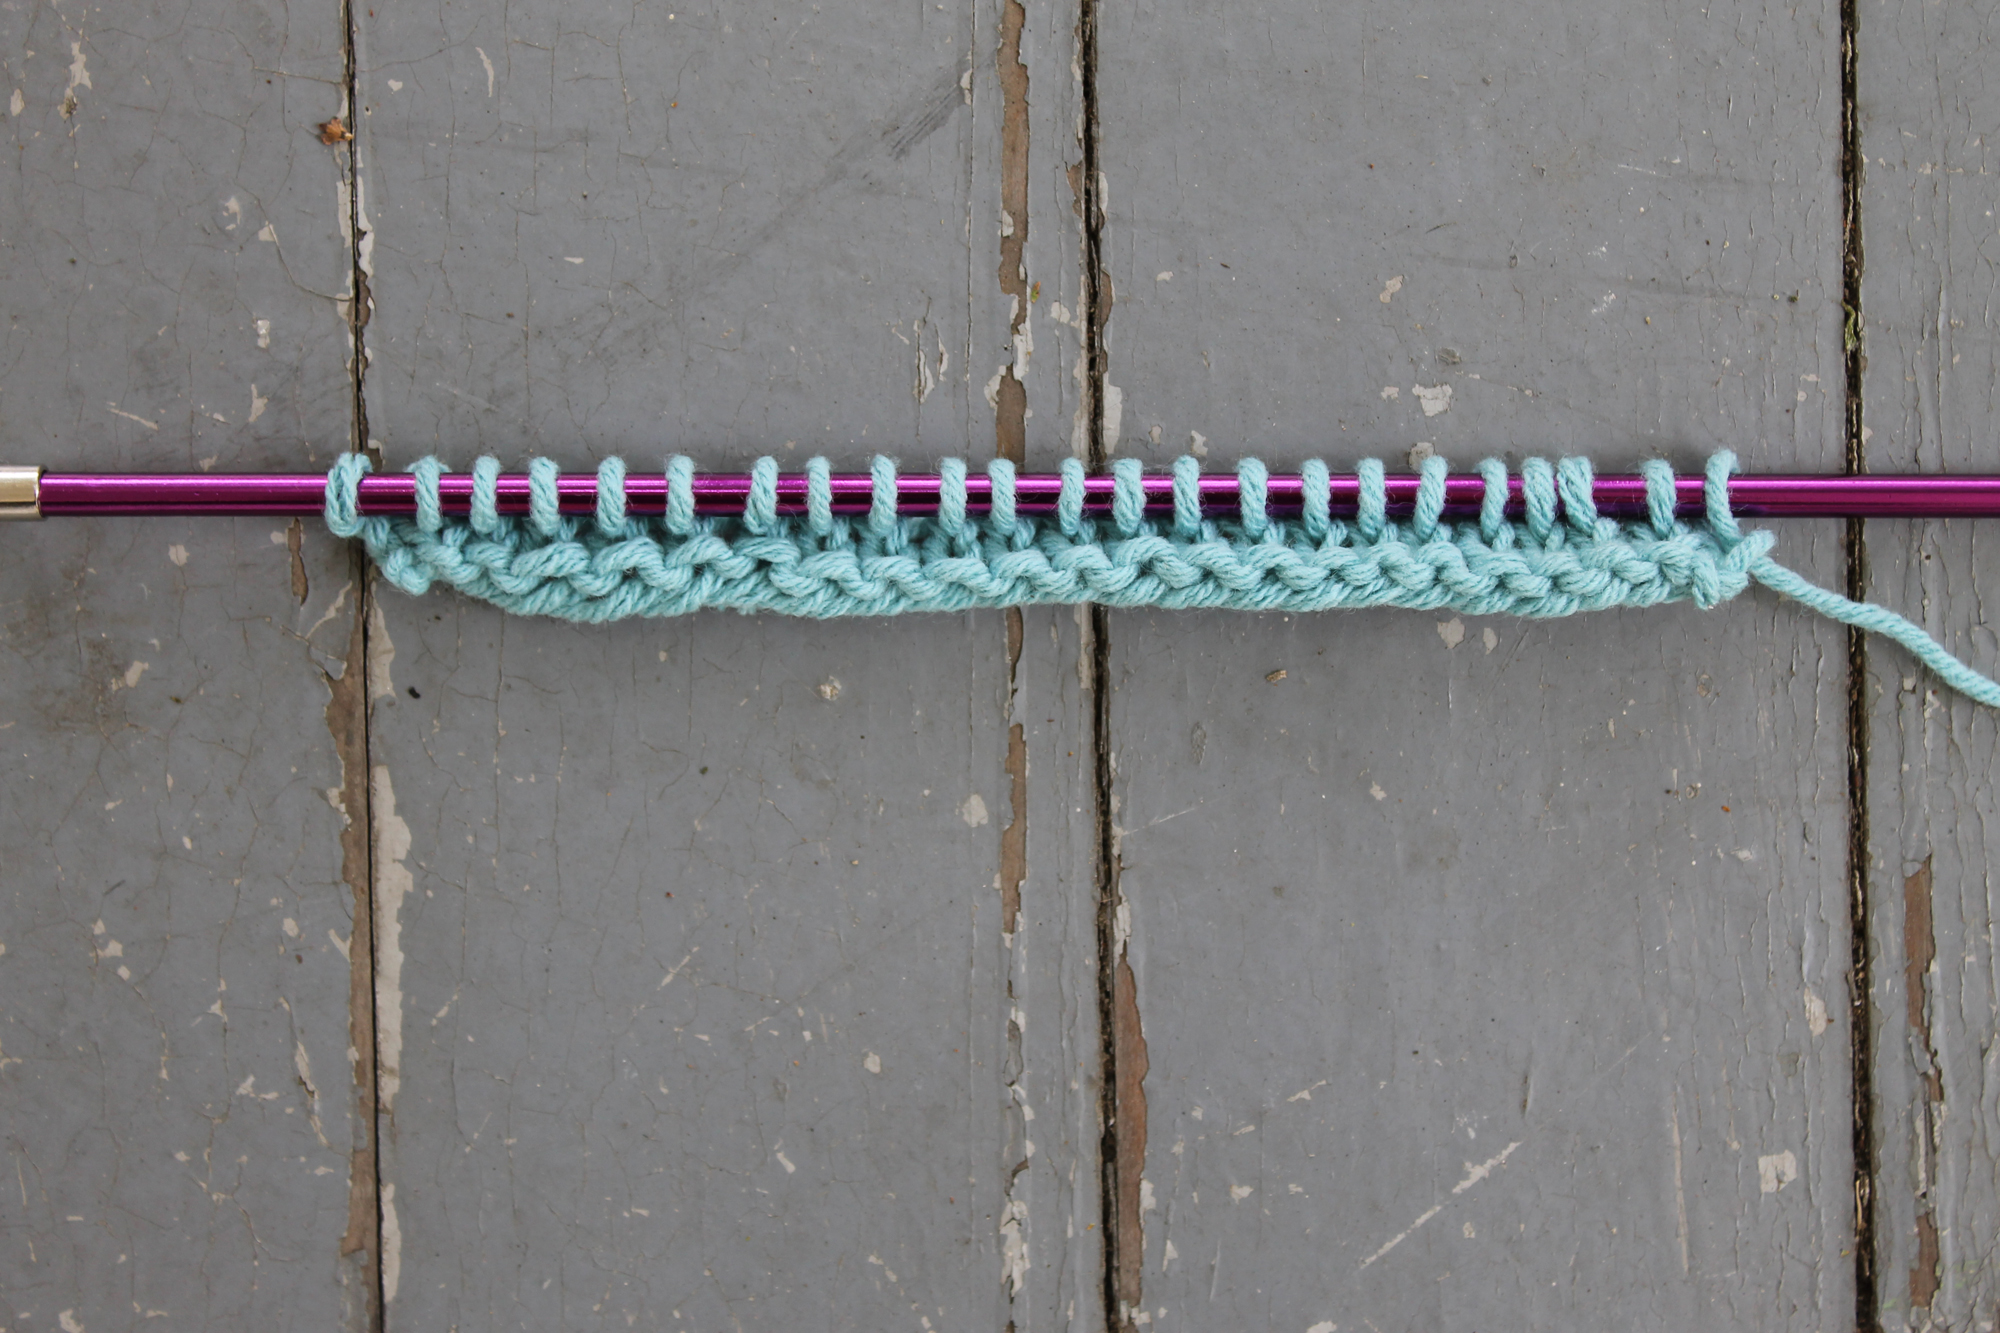
Cast on a multiple of six stitches, plus five extra. I used 23 stitches for this swatch, but you can also use 29, 35, 41, etc., depending on the size you want.
Step 2:
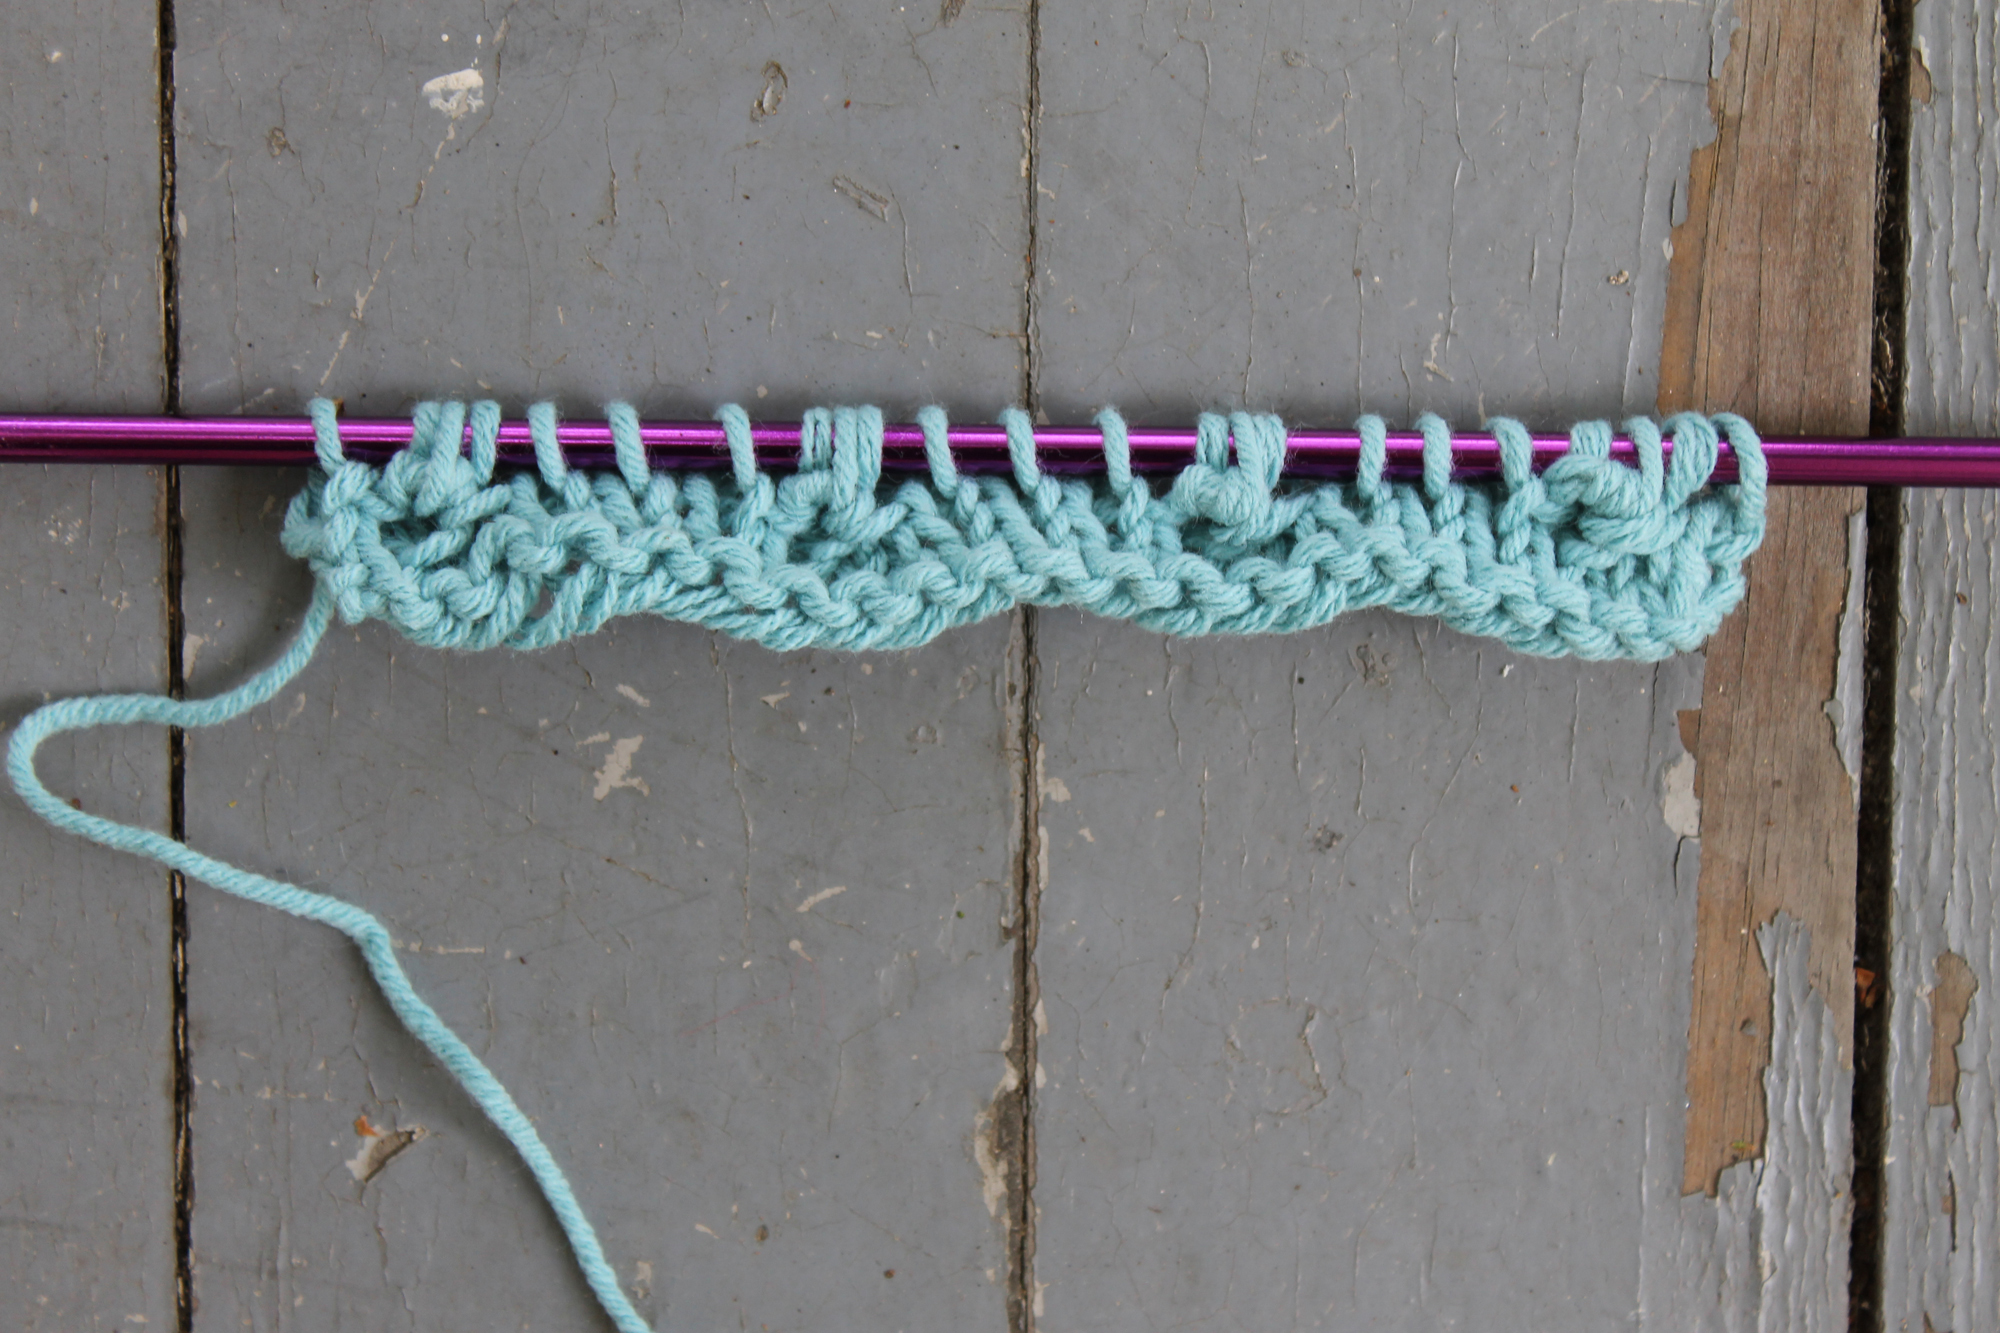
Knit the first row. Purl the second row. Your swatch should look like plain stockinette stitch at this point.
Step 3:
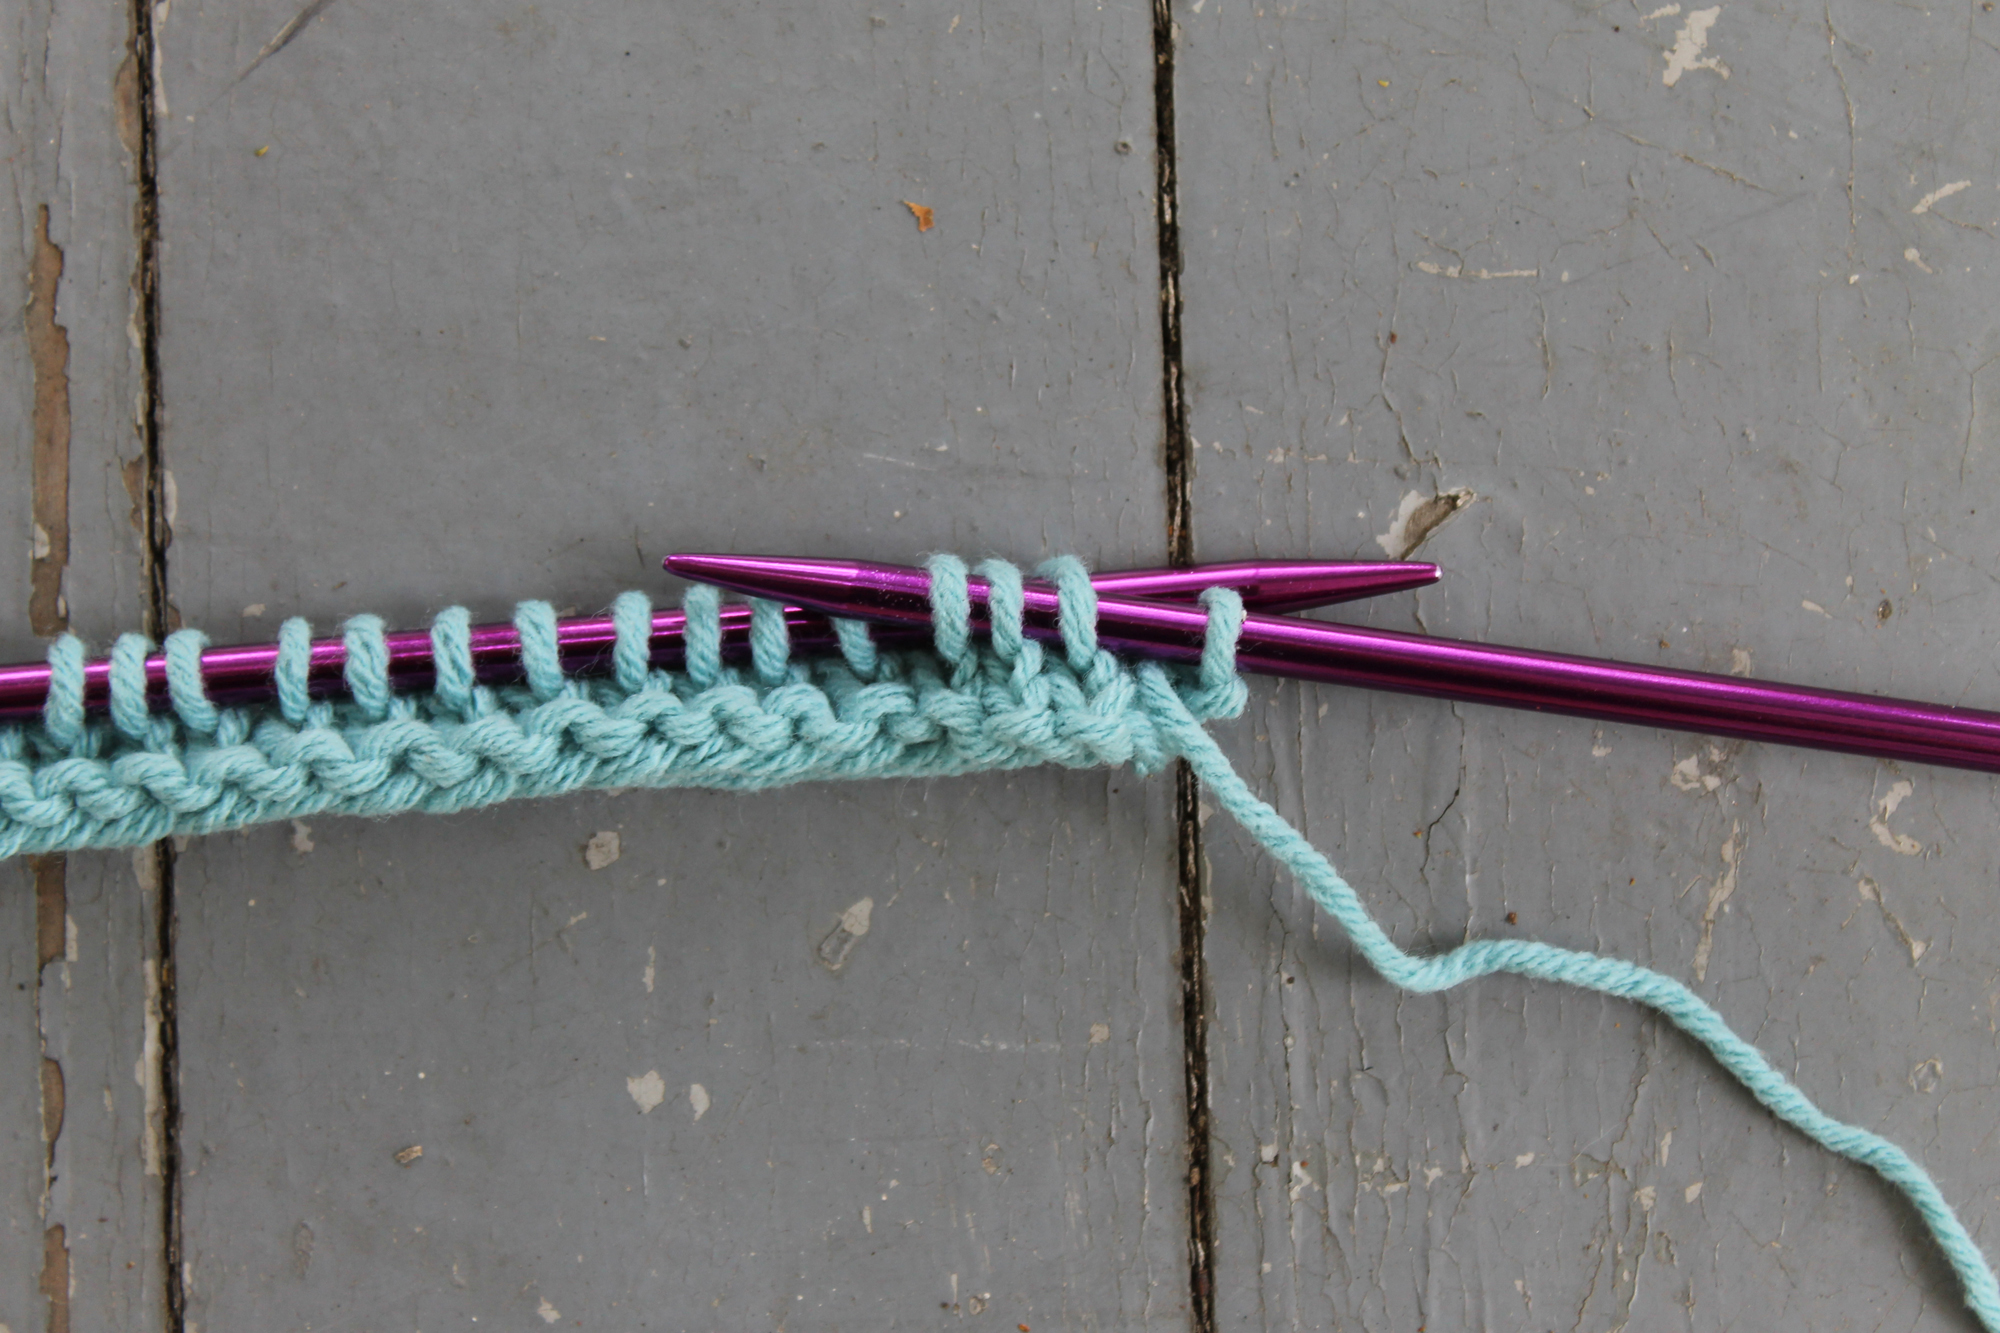
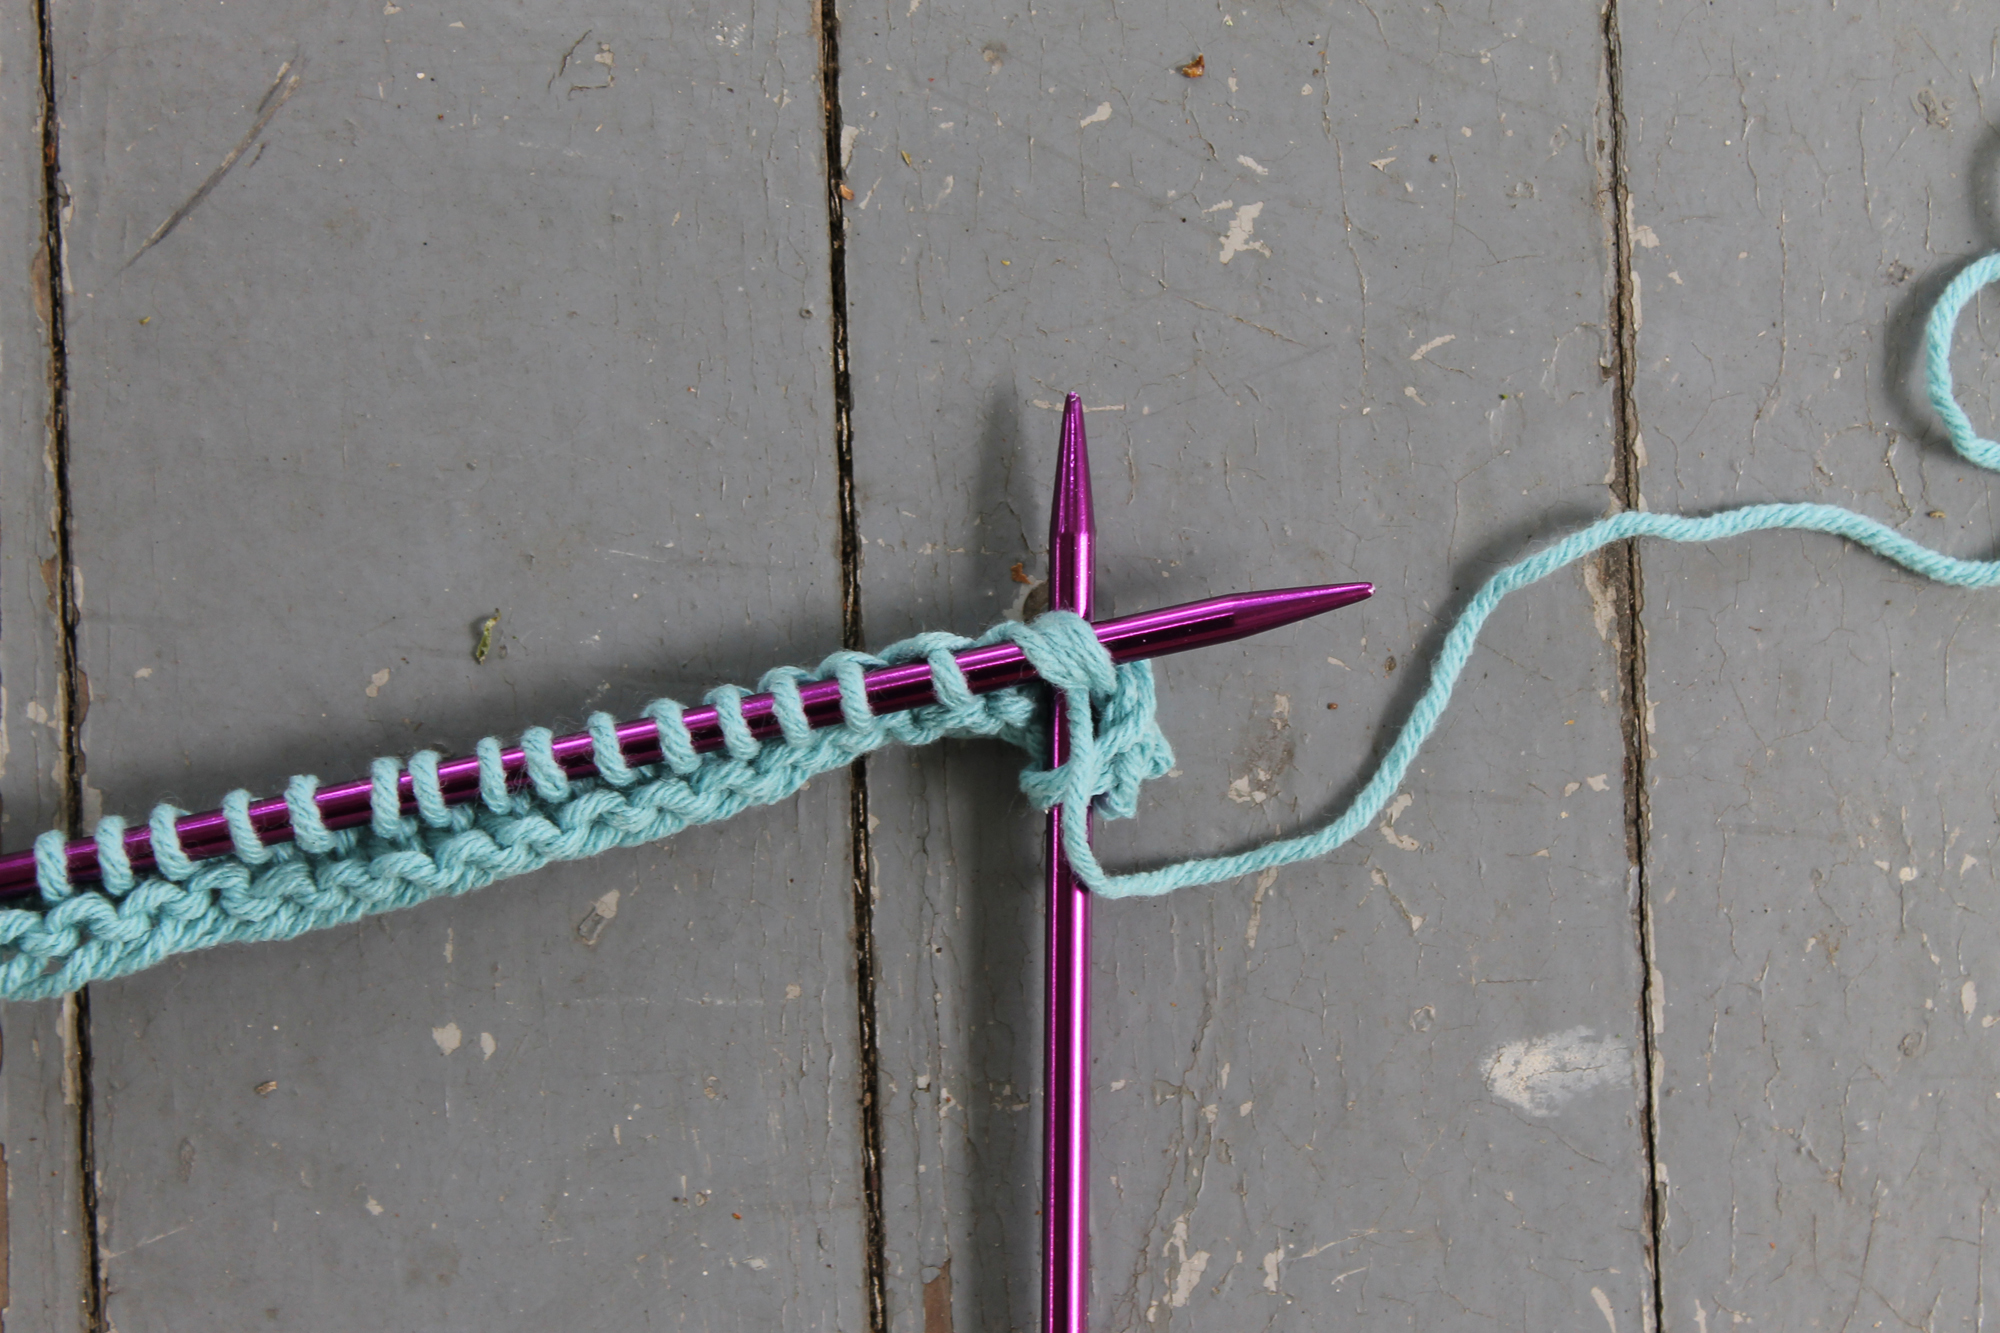
Now for the knotting! Knit the first stitch in the row. Begin the knot by inserting the needle into the next three stitches as if you were going to purl them.
Step 4:
Purl the three stitches together without dropping them from the needle.
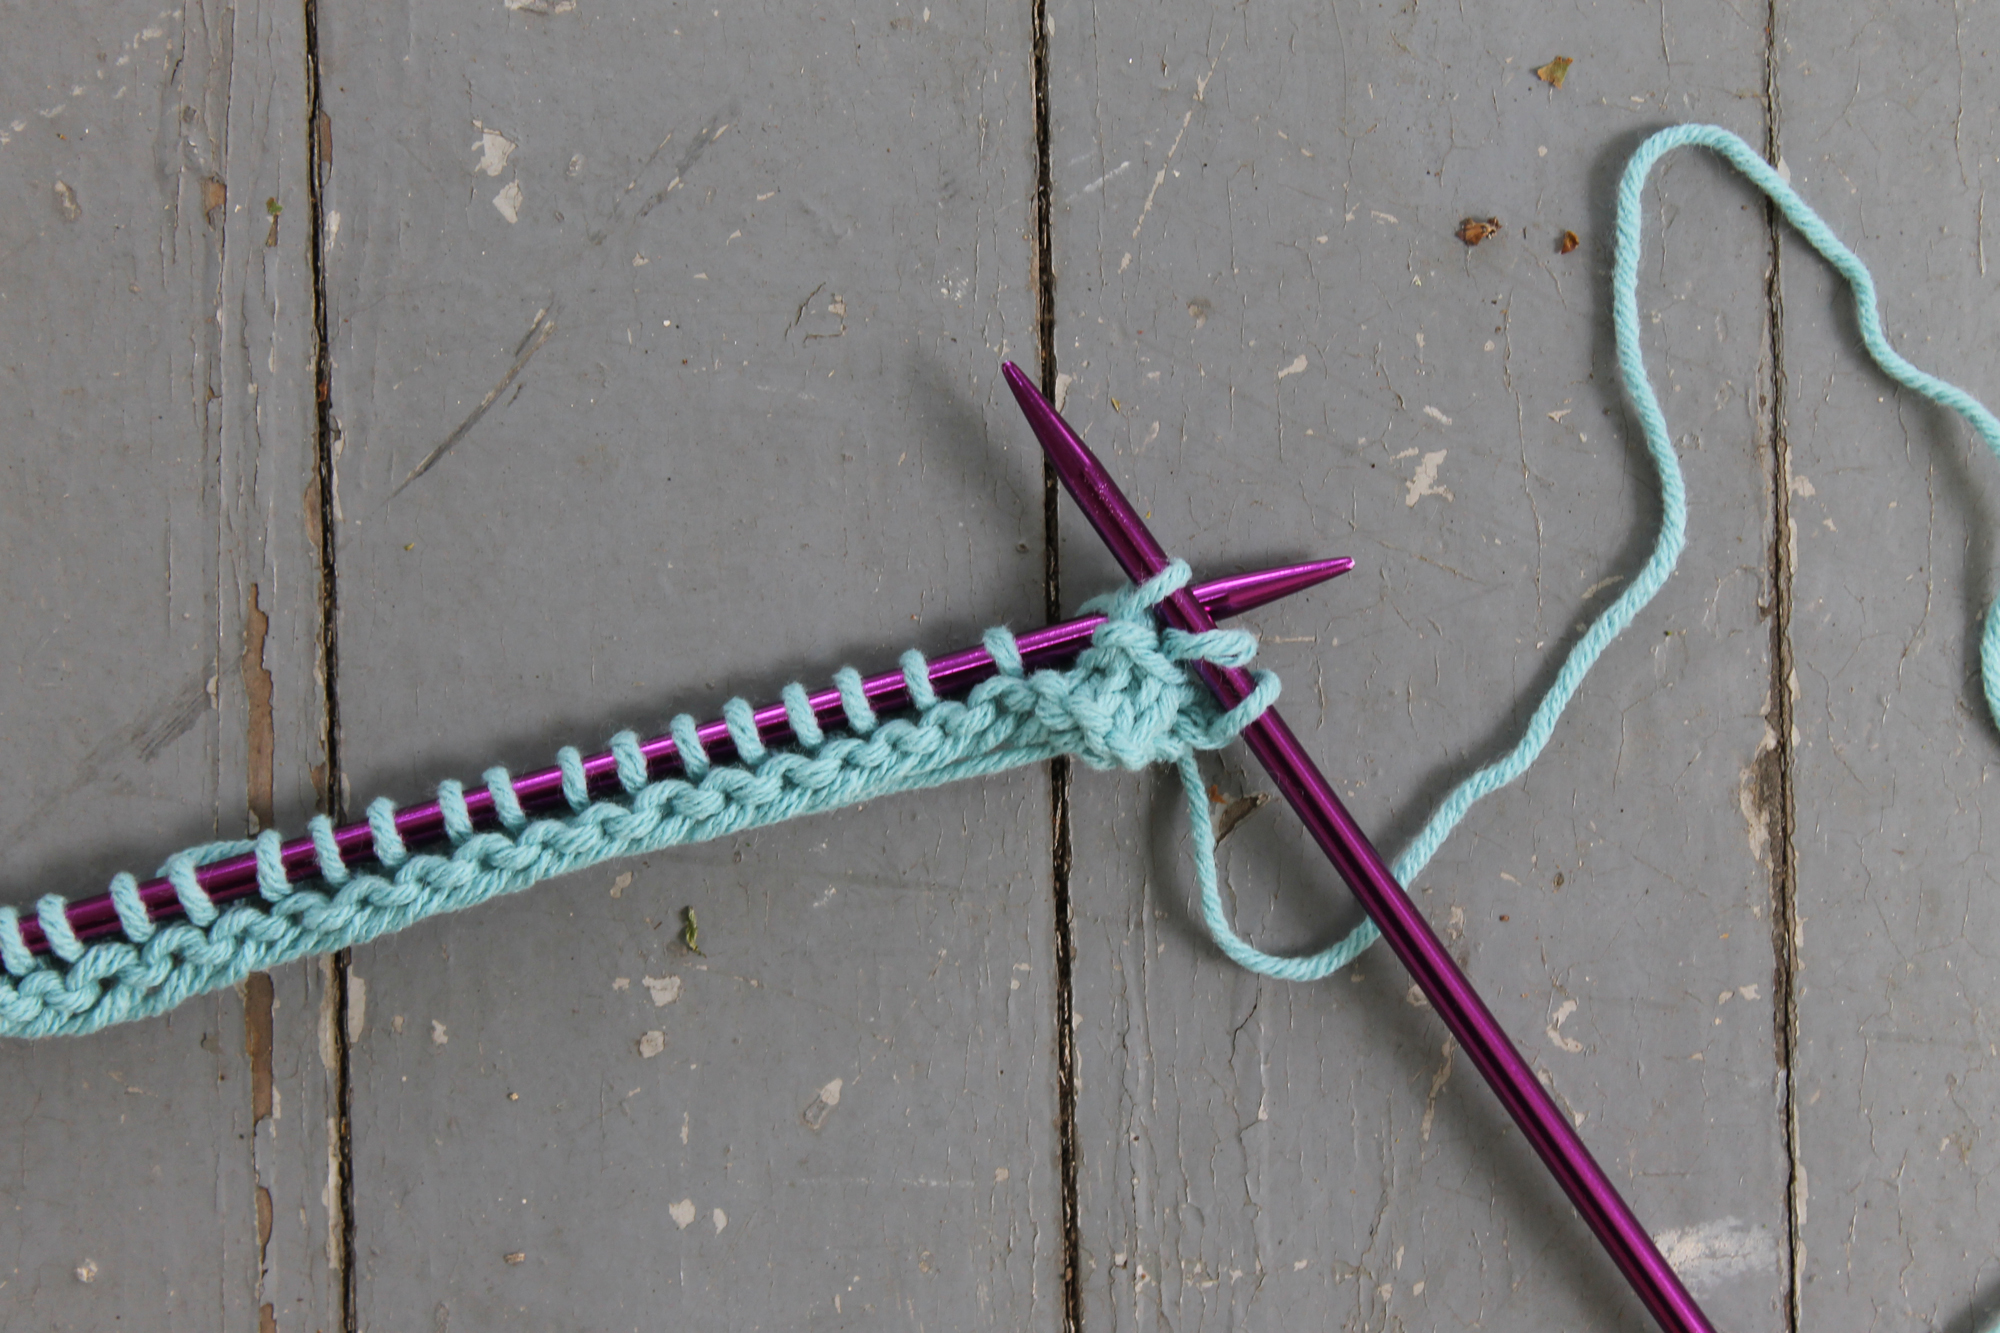
Step 5:
Insert the needle through those same three stitches as if to knit. When you’re wrapping the yarn from front to back, the yarn will lay on top of the three stitches, and that’s perfectly fine! That’s what creates the beautiful texture of the knot.
Step 6:
Knit the three stitches together. Once again, do not drop them from the needle.
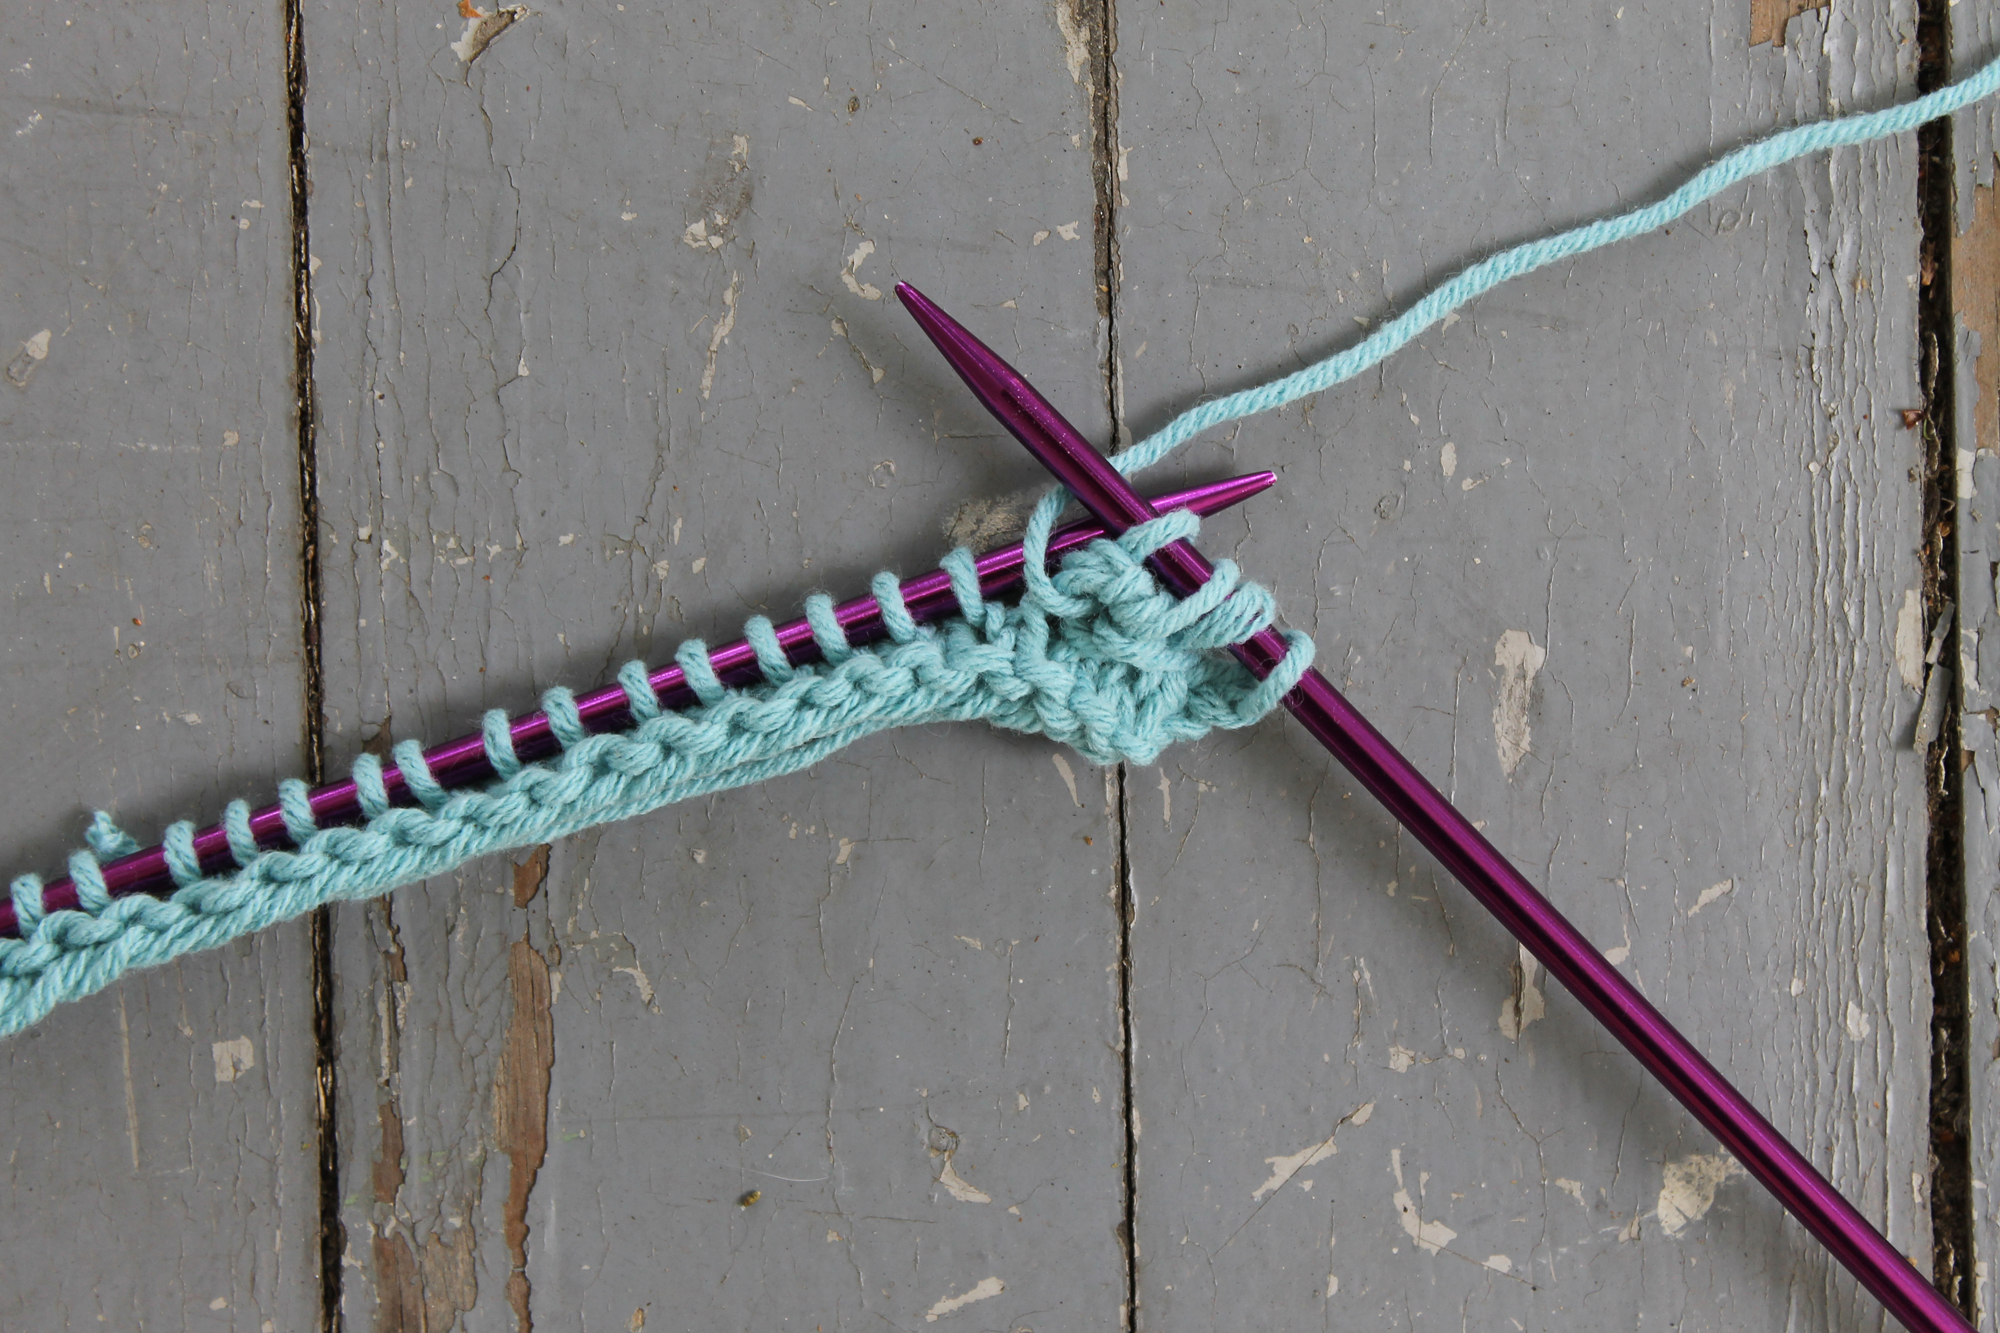
Step 7:
Insert the needle through those same three stitches as if to purl. Purl the three stitches together. Now you can finally drop them from the needle! That’s one knot stitch (MK).
Step 8:
Follow the pattern to complete the row.
Row 3: K1, *MK, K3; repeat from * to last 4 stitches, MK, K1.
Step 9:
Row 4 is an easy purl row. Notice that you will purl each individual stitch. The number of purl stitches should equal the same number of stitches that you cast on at the beginning of the swatch.
Step 10:
Knit row 5. Finish off those easy rows by purling across row 6.
Step 11:
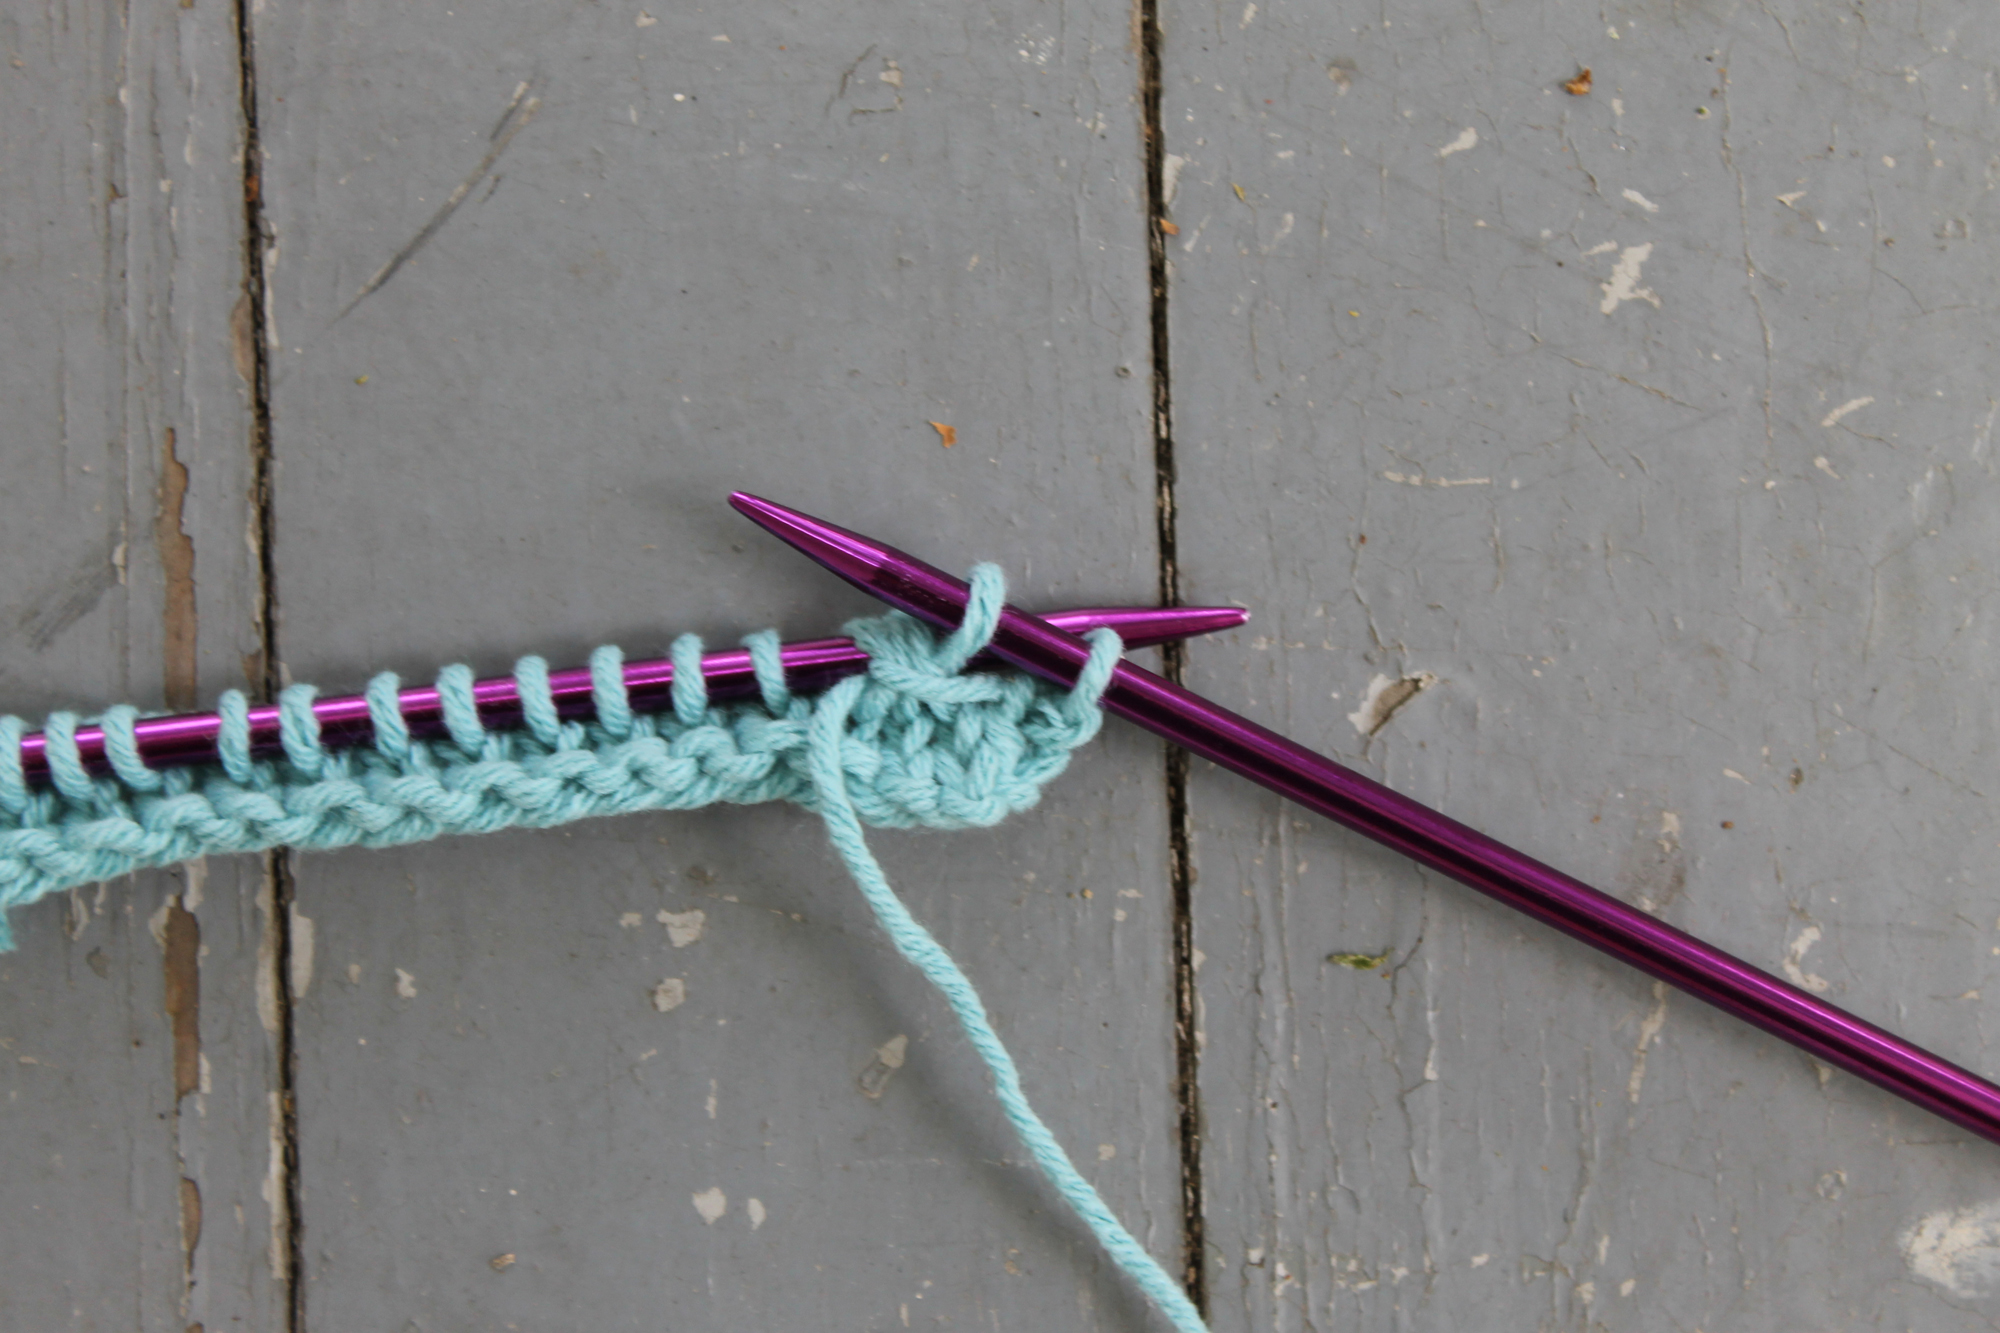
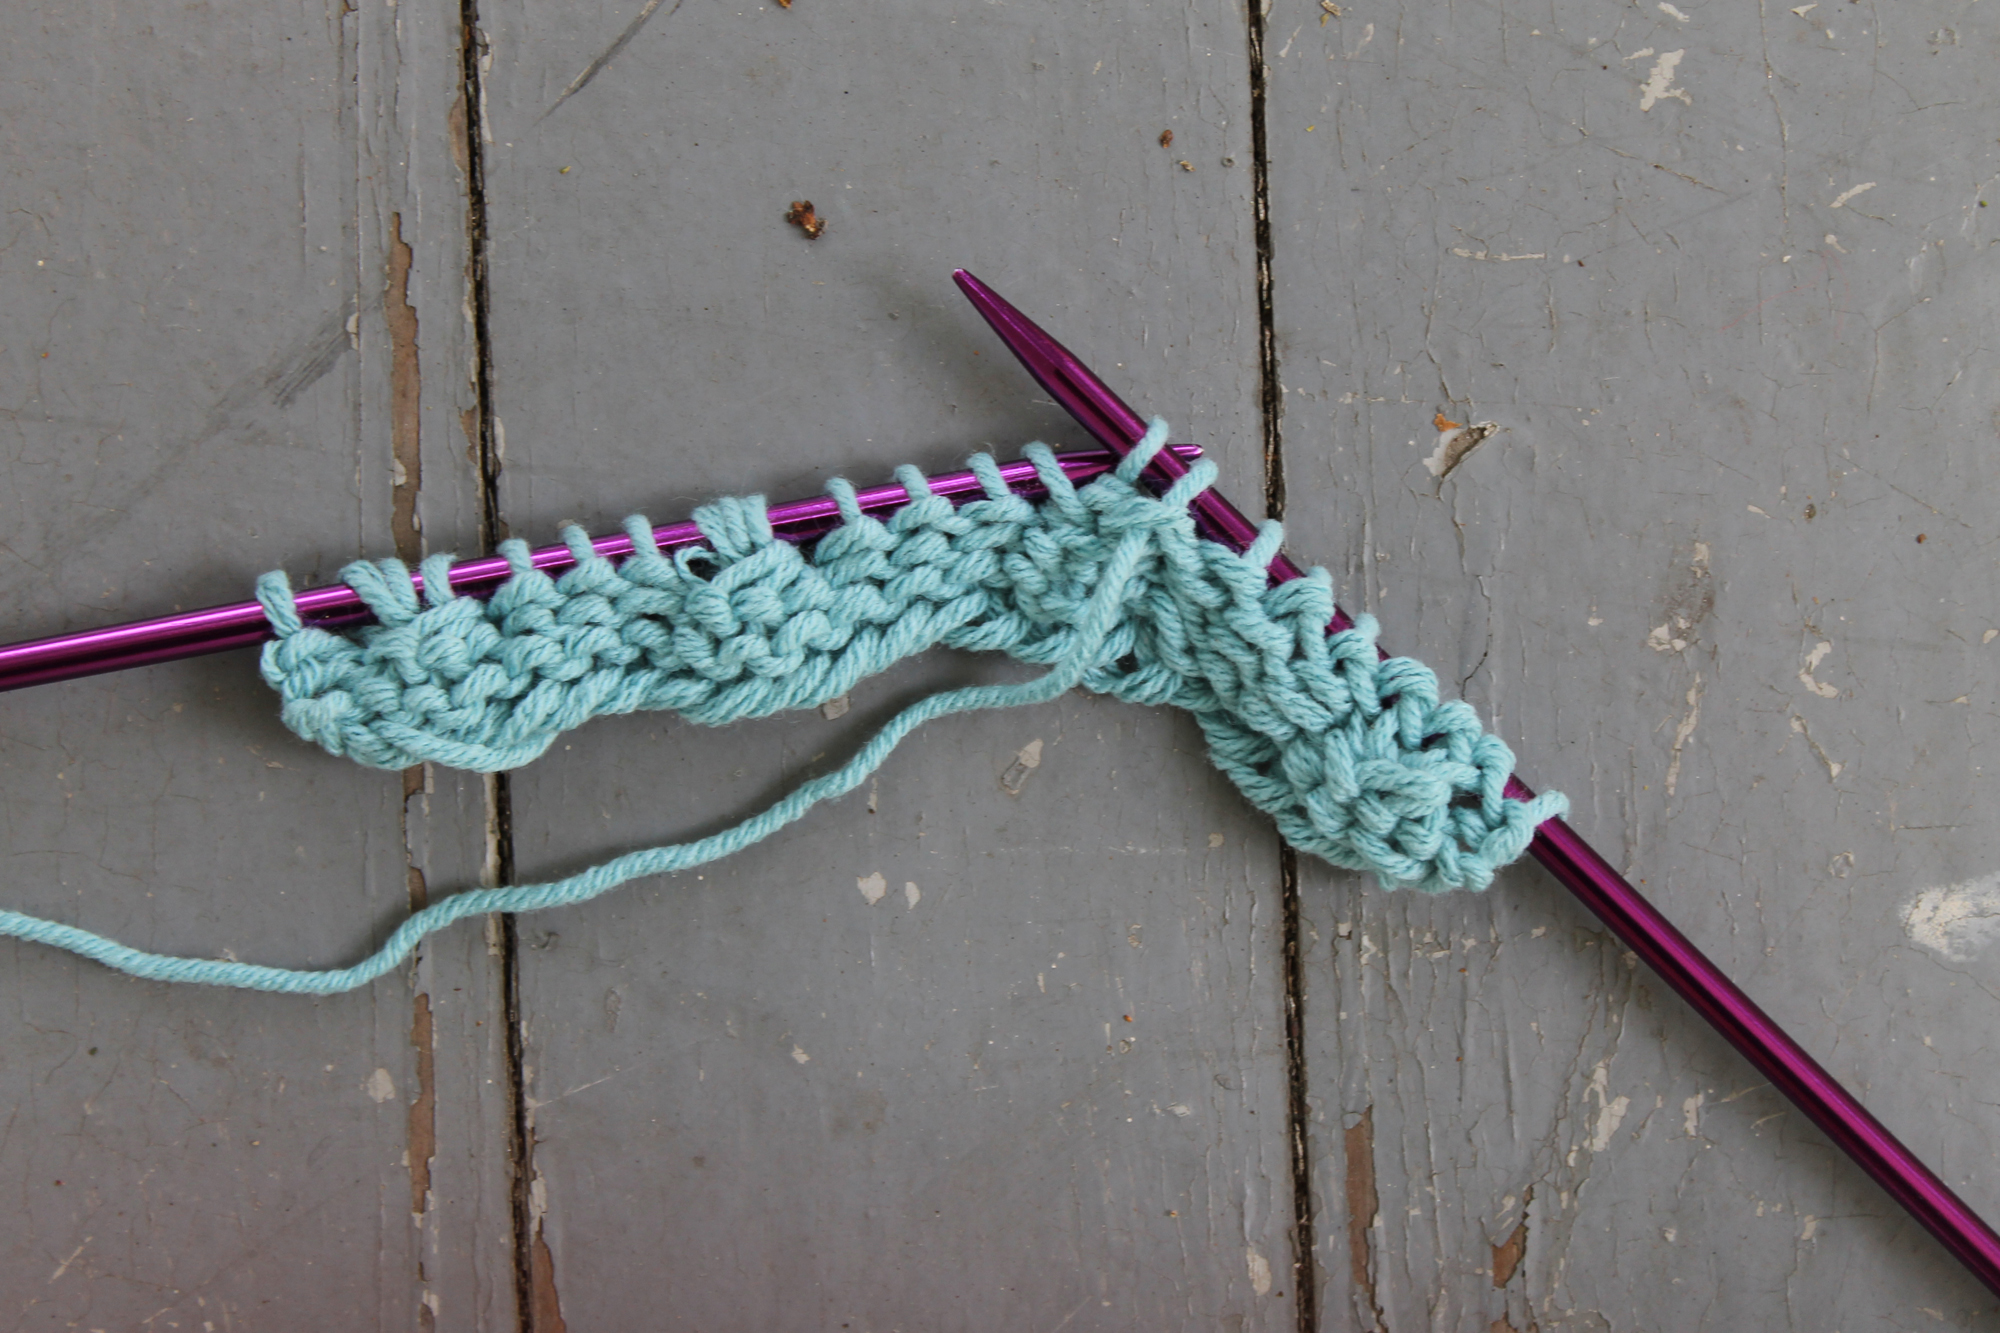
Let’s pick up with the knots once more in Row 7. Knit the first four stitches, then we’ll make our knot just as we did in Steps 3-5. Purl the next three stitches together without dropping them from the needle.
Step 12:
Insert the needle through those same three stitches and knit them together without dropping them from the needle.
Step 13:
Insert the needle through those same three stitches and purl them together. Drop them from the needle.
Step 14:
Continue across the row, following the pattern for Row 7.
Row 7: K4 *MK, K3; repeat from * to last stitch, K1.
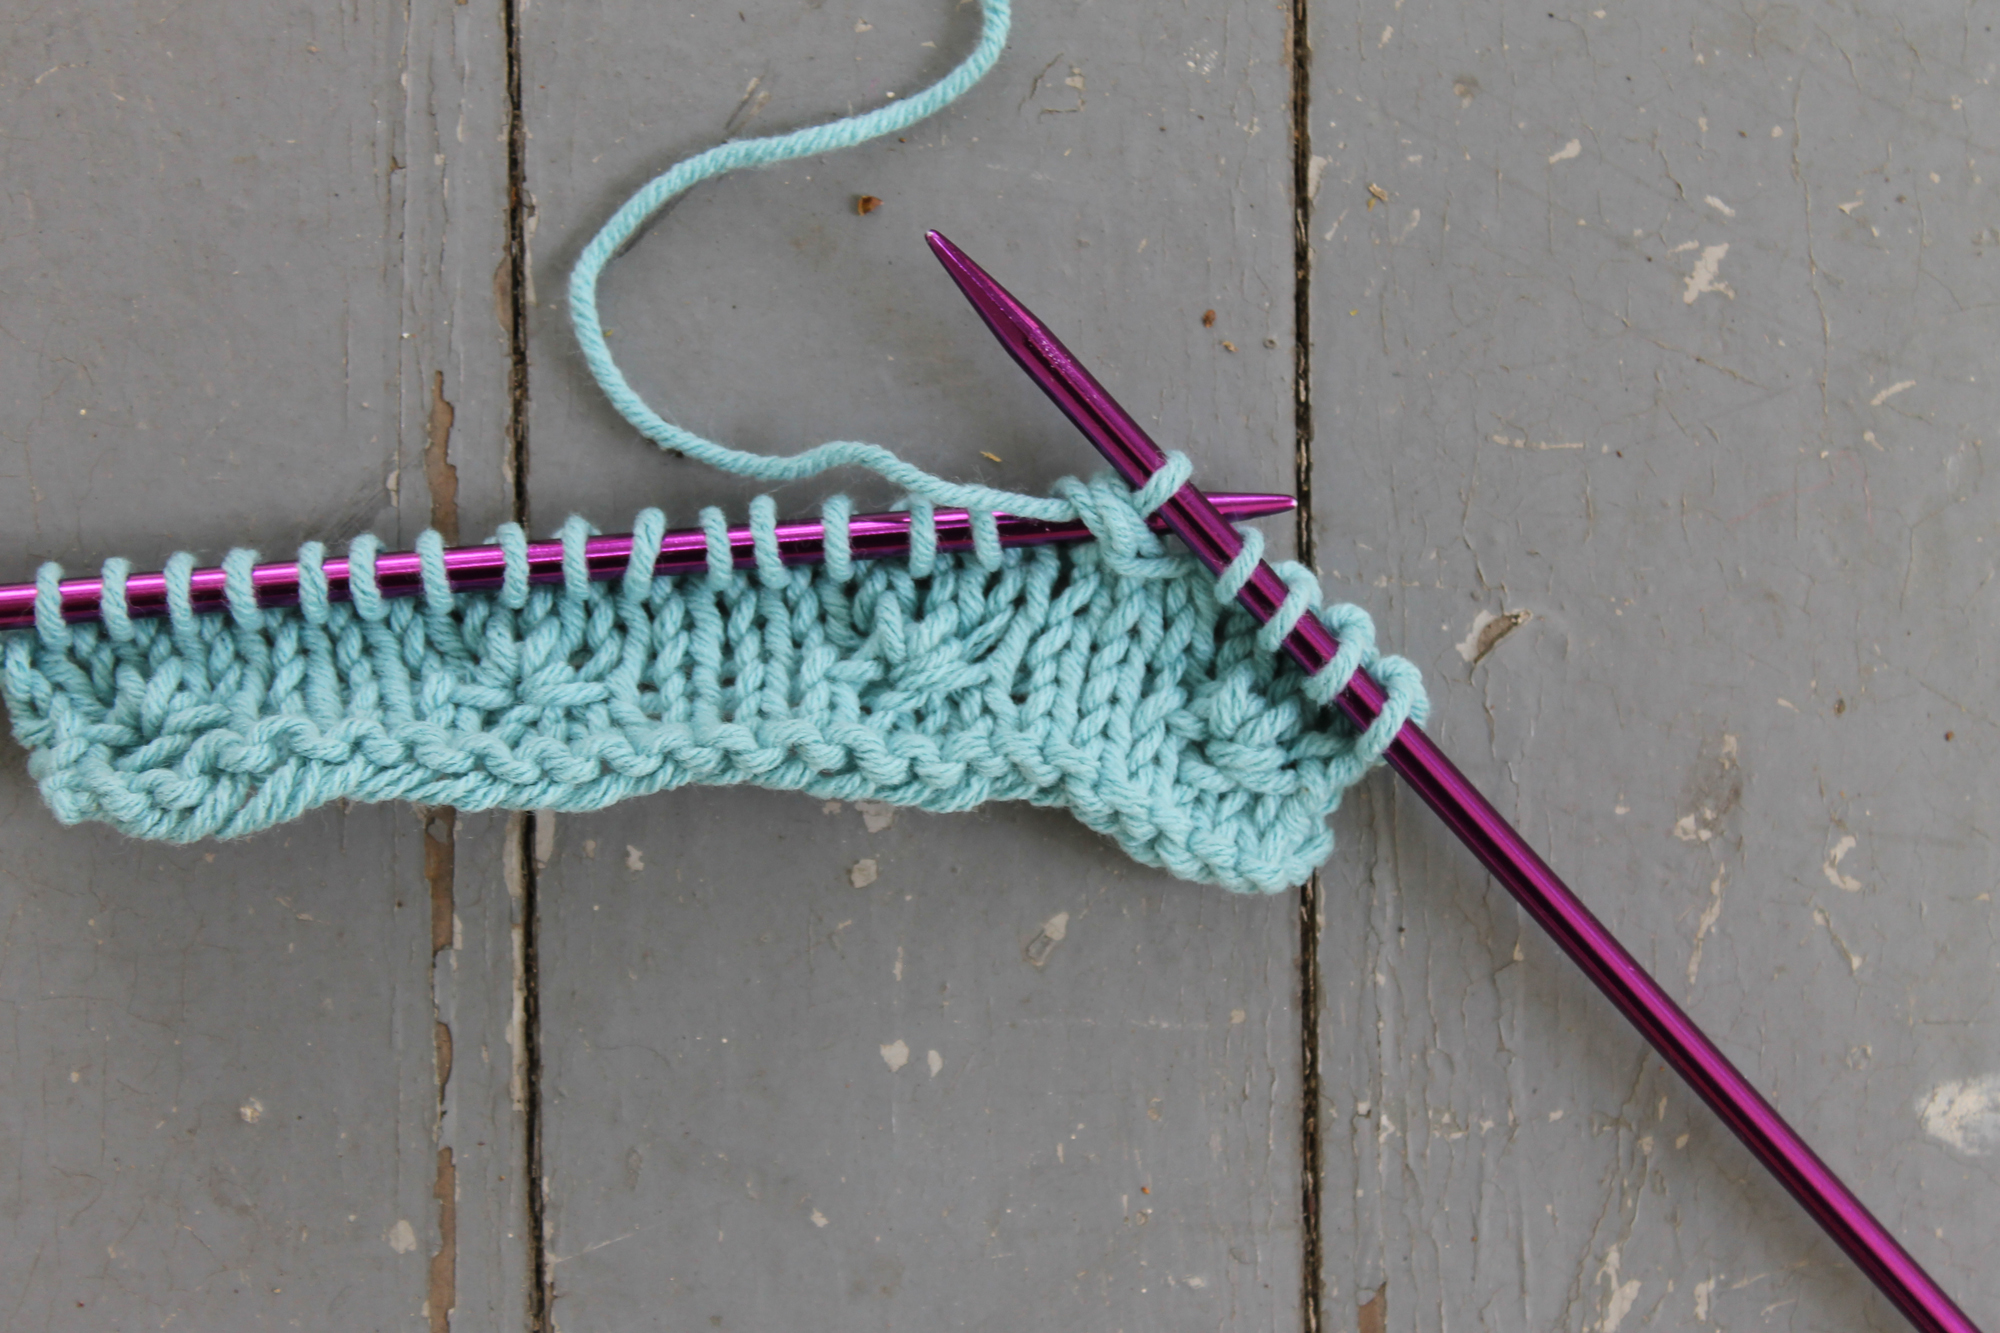
Step 15:
The final row of the pattern, Row 8, is just a simple purl row. Hooray for easy rows!
Step 16:
Repeat rows 1-8 as many times as you’d like.
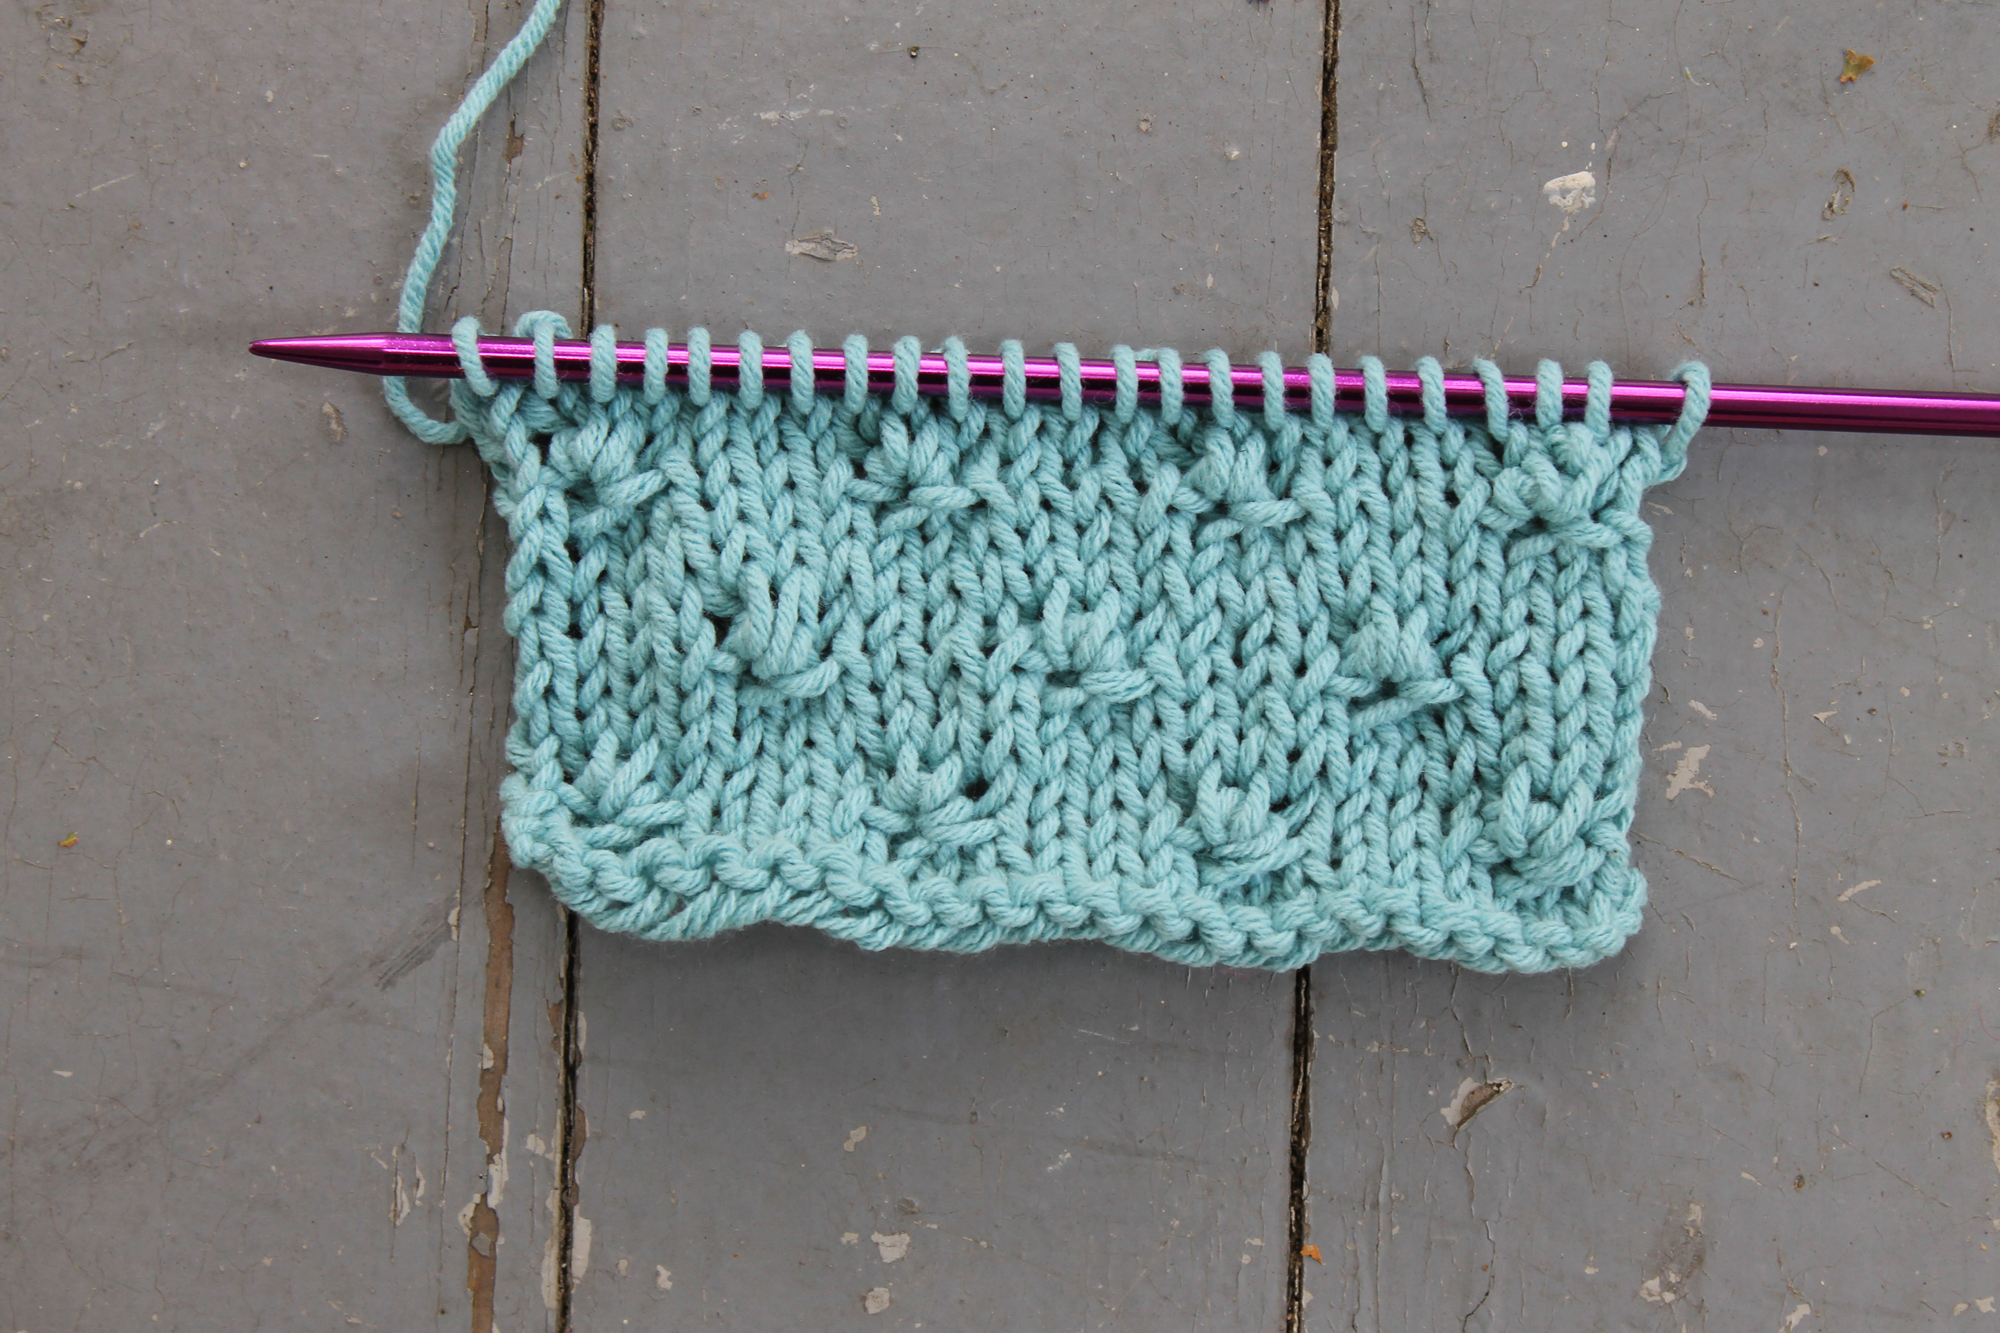
Variations on the knot stitch
The knots of this stitch can be placed as close together or as far apart as you choose. You don’t have to make the entire project from knot stitch either; knot stitch could look cool as a border along the hem of a sweater and sleeves, for example.
The knots could also be lined up vertically instead of staggered like the ones in the swatch. Experiment with a couple of variations and see which is right for your project!
Share tips, start a discussion or ask one of our experts or other students a question.
No Responses to “Tired of the Simple Stockinette Stitch? Update It With the Knot Stitch!”