

A cowl is a timeless look that’s almost always flattering, no matter your body type. You can add one almost anywhere — not just at the bodice front, the most obvious spot, but also the bodice back, the sleeves or even the sides of skirts or pants. Cowls can be subtle with a gentle fall, or dramatic with a plunging silhouette. It’s one of those versatile design elements, so sewists really can’t help but love it.
Bonus: it’s easy to add a cowl to any project, even to a pattern that lacks one. If you want to modify the next top on your to-sew list, here’s your how-to.
Cowl Neckline
Level: Intermediate
What You Need
Pro Tip: You have a lot of choice in terms of fabrics. If you decide to use woven fabric, cut out the pattern piece with the cowl on the true bias so it drapes properly. Adding a lining can also help the cowl folds hang correctly. Soft knit fabrics make beautiful cowls too, and can be cut on the straight of grain.
Instructions
1. Decide Where You Want Your Cowl
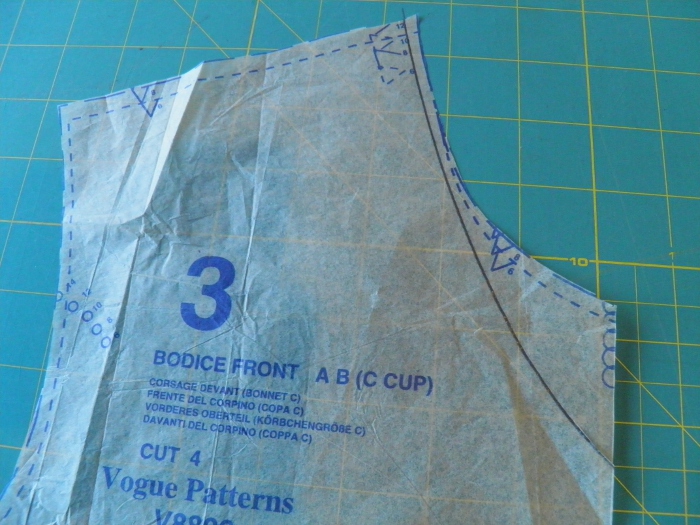
Draw a new curve to indicate the new neckline, about 3-5″ below your collarbone. Measure down the center front on your pattern and mark this spot, then draw the new neckline curve connecting the shoulder point to the cowl drape point.
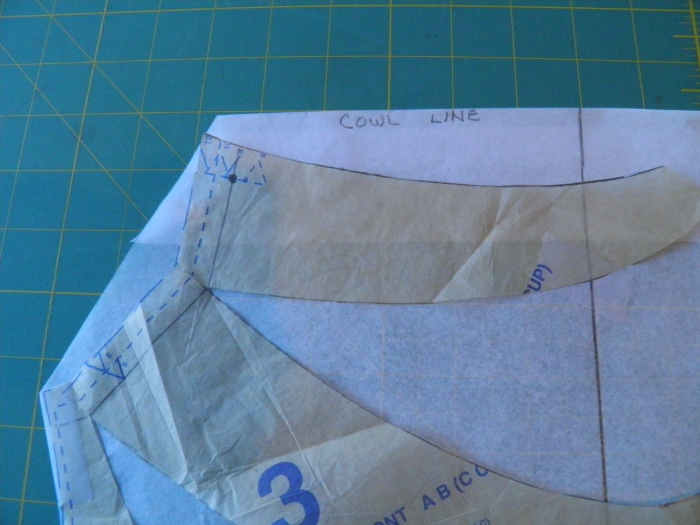
2. Draw the Slash Lines
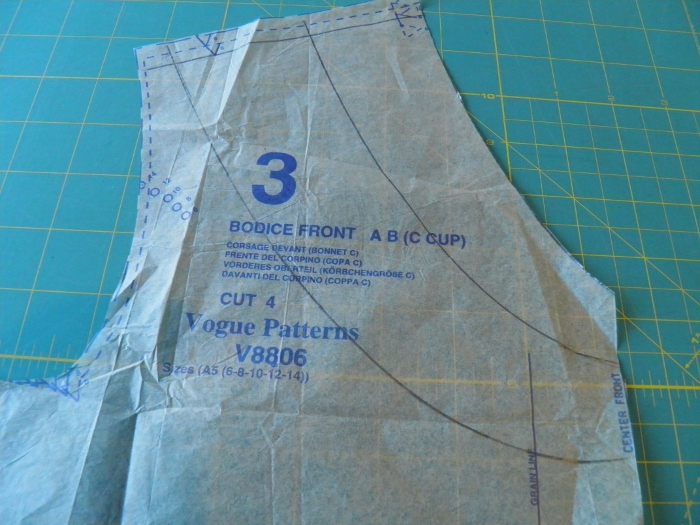
Draw two slash lines on the front of your pattern piece from the shoulder seam to center front.
3. Cut the Slash Lines
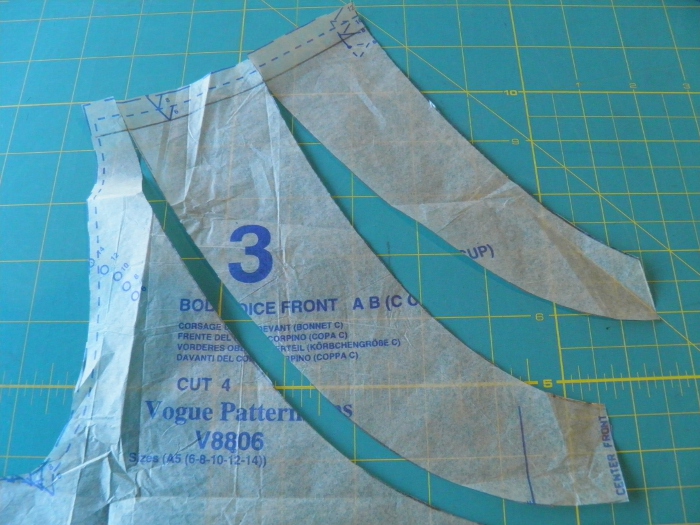
Cut along the slash lines from the center front up to, but not through, the stitching line. Create a “hinge” by also snipping from the cutting line nearly to the stitching line.
4. Tape Down Your Pattern Piece
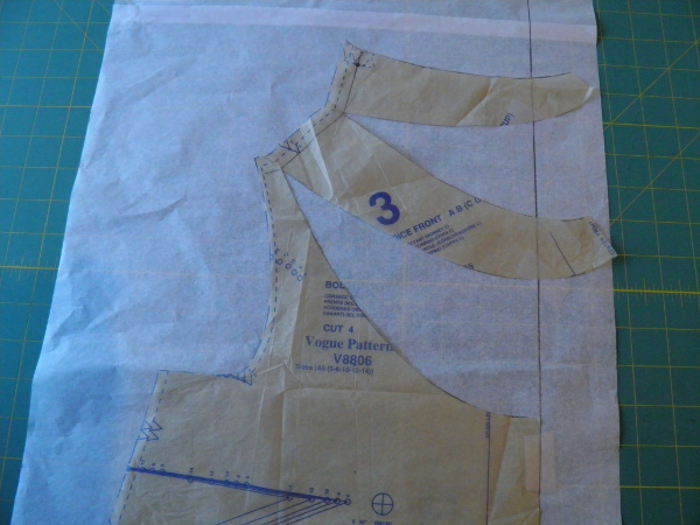
Place a fresh piece of tissue paper under your pattern piece and draw a vertical line for the center front. Tape your bodice front down to the new tissue, aligning the lower center fronts.
Spread the pattern equally along the cutting lines, adding 8-10″ of total length to the pattern piece. Tape the spread pattern pieces to the tissue underneath.
5. Draw the Lines
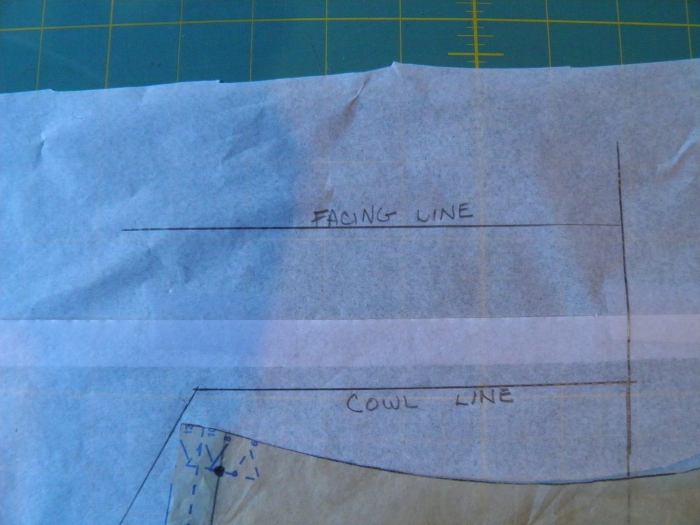
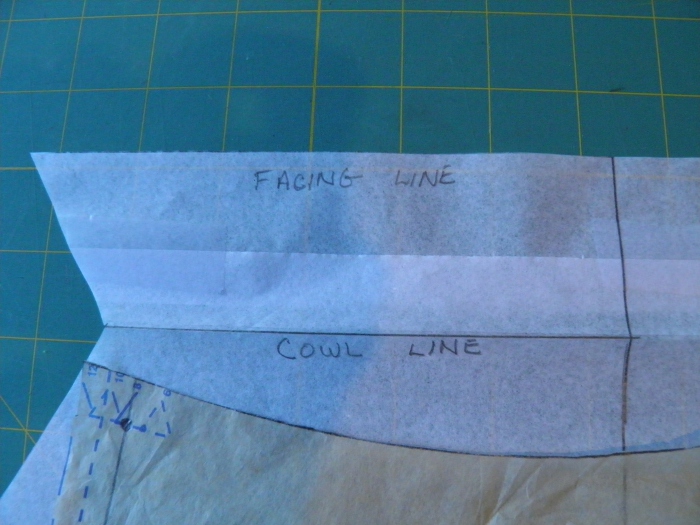
Draw a straight line from the shoulder point at the neck edge to center front, perpendicular to the center front line. This is the cowl line.
6. Cut on the Facing Line, Fold on the Cowl Line
Cut on the facing line, then fold the pattern on the cowl line. True the armhole and the shoulder edge of the pattern. You may also need to true the side seam, the center front and possibly even the hem edge of your top.
7. Sew
You can proceed with making your cowl top according to your original pattern, with these additions:
1. Bind or finish the back neck edge as you prefer before attaching the front and back.
2. Pin the back shoulder to the front shoulder, then the front facing around the back neckline and stitch. This will catch the facing in the shoulder seam.
3. You may need to add a weight to keep the folds of a cowl hanging correctly. In that case, you can just sew a small pocket to the cowl facing and add a small weight.
Why am I unable to see my classes I bought few years ago. Please help .cnaanders@hotmail.com
I have a problem with a reading disorder and can not quite understand how to do the cowl neckline! I need help.
How far up from the Cowl line should one mark the Facing Line??
How do i know , if the neckline will be deep or not ? Also i didn't understand point number 2 , it's says slash lines from the shoulder and center front . But i see some particular measurement has been taken
Just what I need now
Nice once
The basic instructions help but I don't fully understand the #5-6 instructions for the shoulder seam.
Your Comment here...not very clear