
Earlier on the Craftsy blog, we shared a series of posts on how to make a through dovetail joint. In addition to the through dovetail, there are variations of this joint, all with their particular strengths. Today we’re going to learn how to make a half-blind dovetail joint.
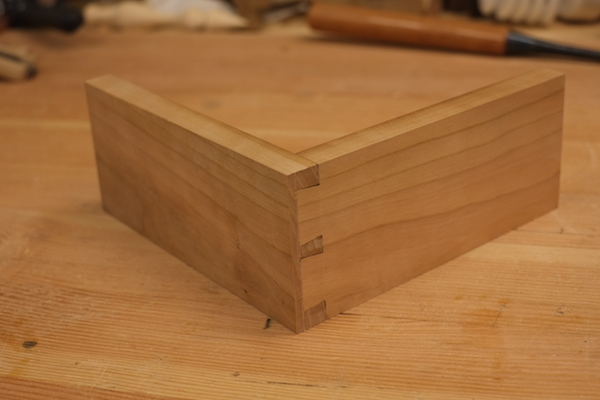
Unlike through dovetail joints, where you can see the end grain on both boards when you’re done, a half-blind dovetail joint shows the end grain only on the pin board. If you try to look at the end of the tail board, it is covered by the pin board. This is useful if making a drawer, for example, since the drawer front, which would be the pin board, will be more attractive by hiding the ends of the tails when the drawer is closed. Also, this configuration can easily hide a groove on the inside of the joint, which is useful when making a box. (This will be covered in an upcoming blog post.)
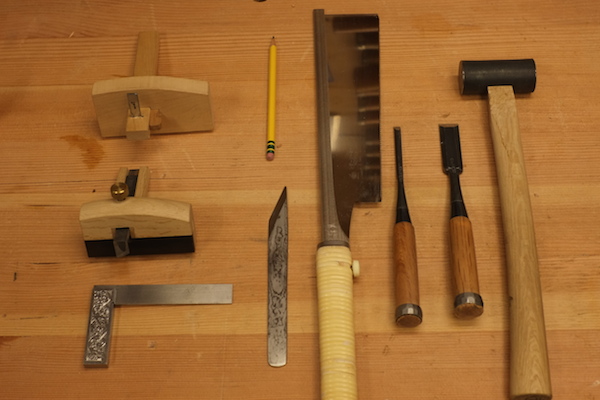
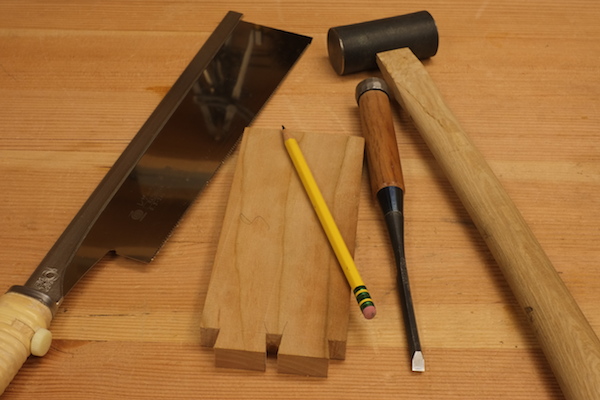
Tools you will need for making a half-blind dovetail joint:
- A marking gauge, preferably two
- A square
- A pencil, and maybe a marking knife
- A saw for cutting the dovetails
- Chisels
- Hammer
Directions
Step 1:
To make a half-blind dovetail, first start with two boards that are milled flat and square. Mark the depth of the tails on the end of the pin board with a marking gauge. Having the tails cover about 3/4 of the thickness of the board is a good starting point.
Use the same marking gauge to mark the baseline of the tail board.
Step 2:
Set another marking gauge to the thickness of the tail board, and mark a second baseline along the inside of the pin board. Double check to make sure your orientation is correct. I use an upside-down V pointing toward the joint to mark the inside of the board, and I filled in the marking gauge lines with pencil to make them more apparent. If you can see your marking gauge lines, you don’t have to do that.

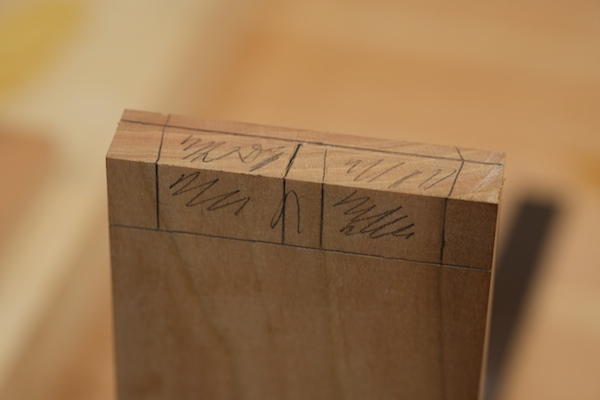
Step 3:
Mark the tails, just as you would on a through dovetail, make your cuts, and chop out the waste. See our post on chopping the waste in dovetailing for a more detailed look at this step.
Step 4:
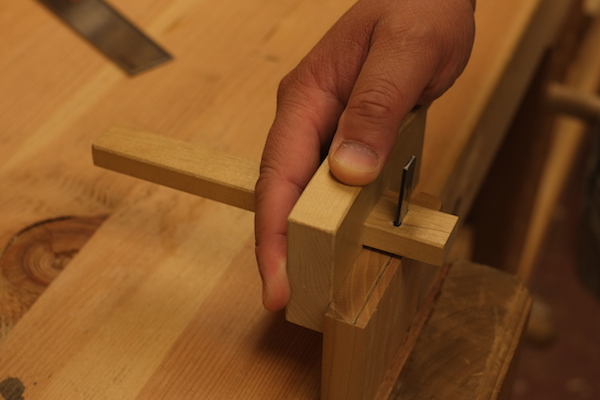
Use the tail board to mark the location of the pins on the pin board. Remember that the tail board will not extend all the way across the pin board, and will line up with the first line you marked on the end of the pin board. You can use a pencil or a knife to mark this. Make sure the boards do not move during this step.
Step 5:
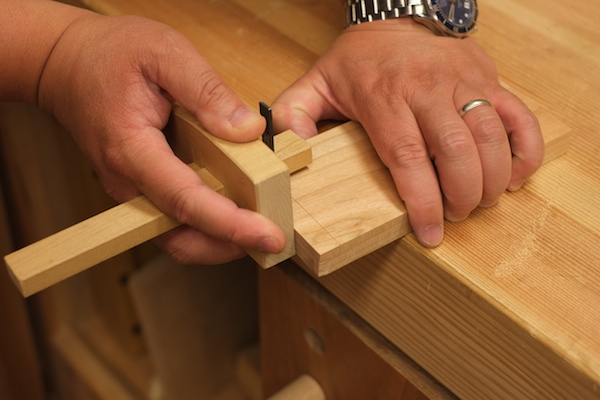
Use a square to extend the lines from the pins down to the baseline. It’s a good idea to shade in the area that will be chopped out.
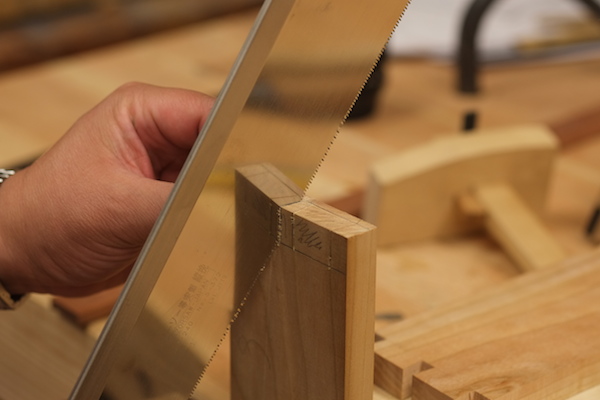
Step 6:
And use your saw to saw along the lines as far as possible. You want to cut as close to your marked line as possible without getting rid of it, so when you’re done, you can still see the pencil line or the edge of the knife line, depending on how you marked it.
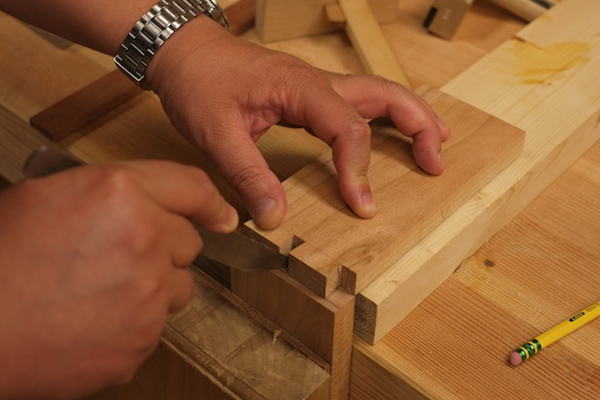
Step 7:
Use your chisel to chop close to the baseline of the socket, about 1/16” away.
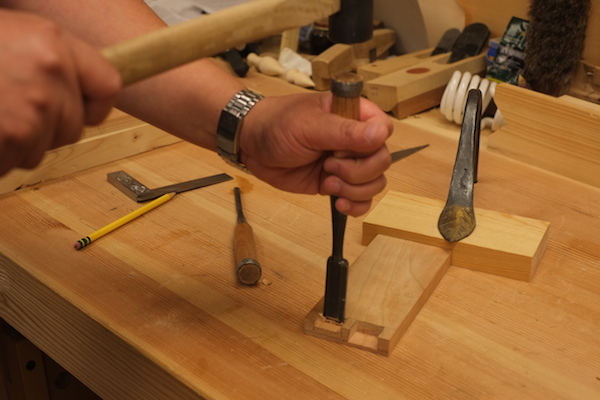
Step 8:
And then chop along the end grain to remove the waste. Again, you want to stop about 1/16” from the marked line.
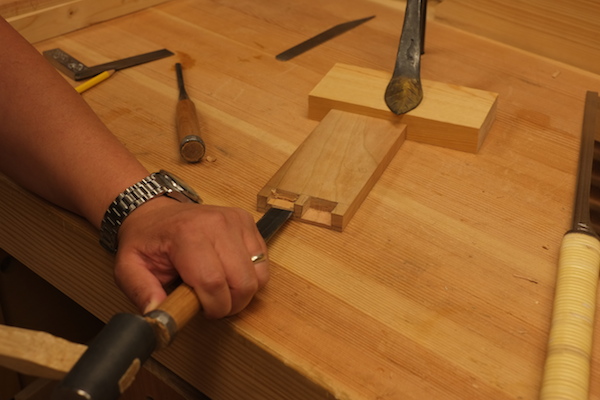
Step 9:
Continue going back and forth until you have most of the waste removed from the socket. At this point you can go back and put the chisel right on the baselines. Because there’s only 1/16” of wood that needs to be removed, this step will be easy. You can use a narrow chisel to get into the corners. As long as you get the wood out of the corner, don’t worry about being completely precise in the back part of the corners. This will be covered up by the tail board, and no one will see how imprecise this part of the joint is.
The side faces of the pins will also probably be a little rough in the area where the saw could not reach. Pare those surfaces smooth, using the sawn part of that face as a guide.
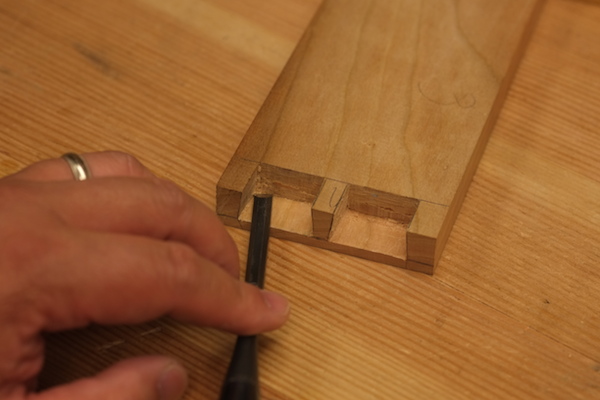
Step 10:
Now, it’s a matter of fitting the tail board to the pin board. To ease the insertion of the tail board into the pin board, you can pare down the corners of the tails on the side that gets inserted first.
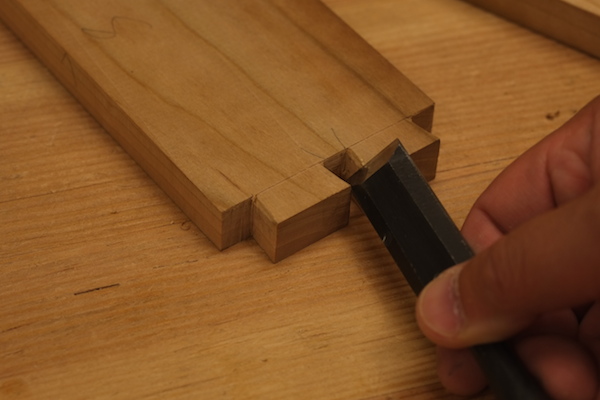
If you have to do any additional fitting, make adjustments to the pin board, not the tail board. Eventually, the boards will fit together like this.

Step 11:
Take the boards apart, and apply glue to the side faces of the pins and tails, where long grain will touch long grain. There’s no harm in applying extra glue where the end grain of the boards touch, but it won’t add very much to the strength of the joint.
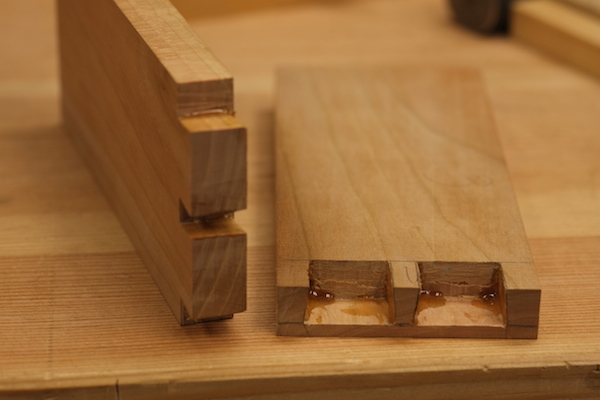
Step 12:
Put the boards together, and plane the surfaces smooth, and you’ll have a half-blind dovetail joint as seen at the top of this post, a joint as attractive as it is strong.
This is just the beginning! Learn three approaches to the fundamental dovetail joint in the Craftsy class Three Essential Dovetails, taught by expert woodworker Kyle Kwiatkowski. You’ll achieve a variety of functional and beautiful dovetails that are sure to impress!
Share tips, start a discussion or ask one of our experts or other students a question.
No Responses to “How To Make Half-Blind Dovetail Joint in 12 Steps”