
Nothing stops a sewers rhythm like stopping to find a misplaced pin or pincushion. This cute little machine-side pincushion is the solution to your problems.
Learn how to keep your pins close with this easy pincushion tutorial!
The joy of a clean sewing station
The start of the New Year is a great time to assess your sewing space and to look for ways to make it more efficient and productive. Having a sewing machine station that is well situated within your space helps to make that happen.
As you evaluate your space are your tools, like scissors, presser feet and seam ripper within hands reach as you sew? Is there a place to put pins as you remove them when sewing, or do they simply fall willy nilly? Having all the frequently used sewing machine paraphernalia at your station makes for fast, easy and efficient sewing.
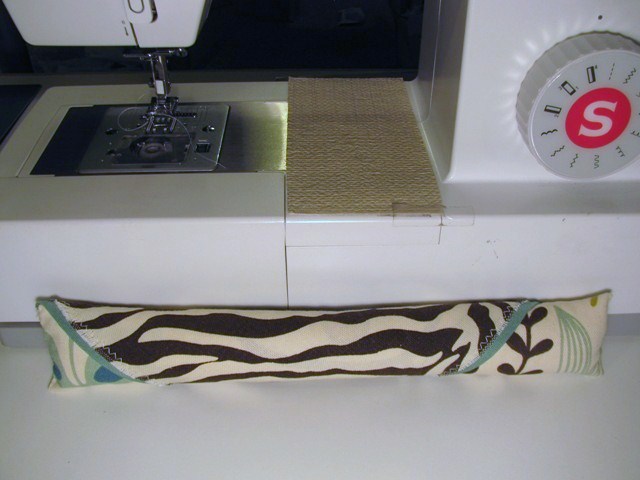
For me, having a place to put my pins so they stay put as I sew is a must. I want to be able to extract pins and place them somewhere as close to the presser foot as possible. To maintain my rhythm of sewing, I have found that having a long, slender pincushion at the base of my machine allows me to easily move pins away from the presser foot and have them ready to retrieve when I need to pin the next seam.
Make it your own!
The pincushion can be any size you want or works best with your own machine, so it can be smaller or larger than the one in this tutorial. As for design, well, let your creativity bloom. Piece together complementary fabrics, like I did, to create an interesting design or go with just one piece of fabric. It can be as simple or intricate as you want it to be.
Any type of fabric will do, but you want something that can bear the wear of pinning. This is a good project for a fat quarter or for all those small scraps you have stored away. The concept here is to present a way to place a pincushion as close to your sewing as possible.
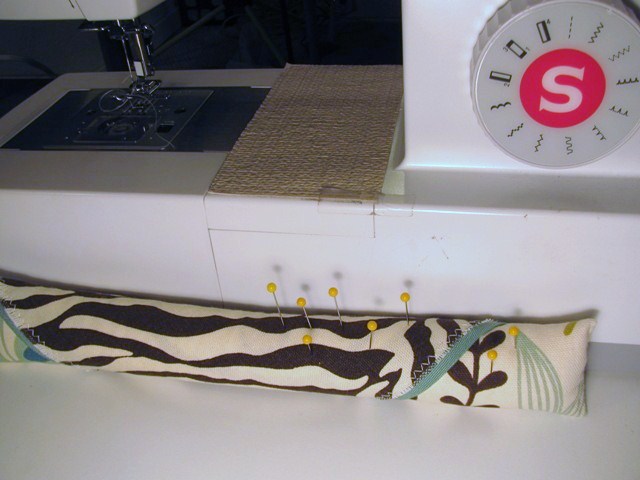
Mine measures 12″ in length and is approximately 1 ¼” in diameter. I pieced together some home dec material to make the cover. For the filler I used plain cotton batting that I rolled up tightly to form the pincushion’s cylindrical form and creates a nice solid medium for the pins.
To make the pincushion you will need a small piece (or pieces) of fabric for the pincushion cover, a piece of cotton batting, some thread and Velcro. The Velcro will be used to attach the pincushion to the sewing machine and allows the pincushion to be removed easily from the sewing machine when necessary.
Directions:
Here are the steps to making this easy and quick sewing machine pincushion measuring 12 inches long by 1 ¼ inch in diameter.
Step 1:
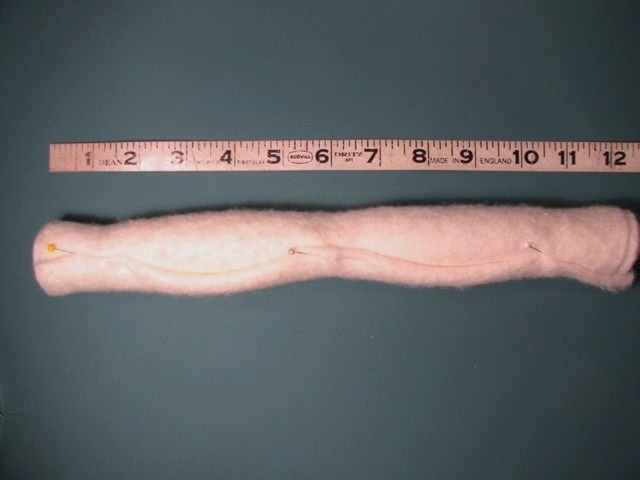
Cut out a piece of cotton quilting batting that is 24” long (or your desired finished length) by 12” wide. Fold it in half so it is 12” by 12”. Now starting at one end begin to roll it tightly and pin in place to hold the shape.
Step 2:
Using a needle and thread, hand sew the batting roll closed with a slip stitch.
Step 3:
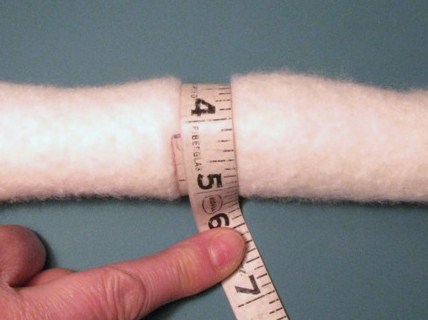
Wrap a measuring tape around the roll to confirm the finished diameter and add 2”. This will be the width measurement for the fabric cover.
Step 4:
The fabric cover will require a piece of fabric that is 12″ long plus 1-2″ more for the seam allowances at each end, or 14″ in my case. For the width take the circumference measurement (4″ in my example) and add another 2″ to equal 6 inches. For my pincushion the fabric cover dimensions are 14″ by 6″. I used a little extra for the seam allowances, so they can be smaller if you prefer.
Step 5:
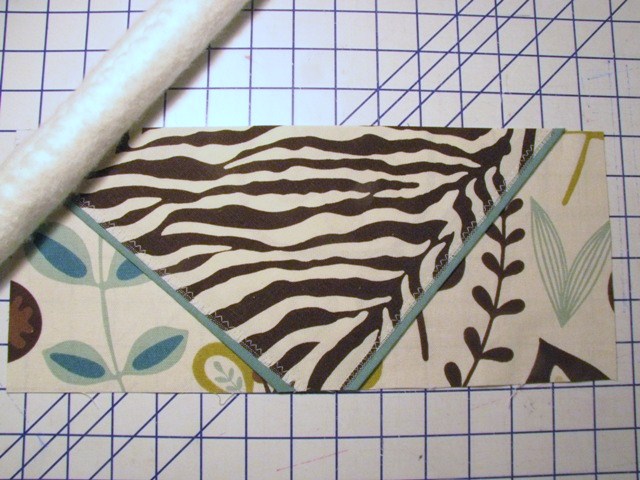
Press a 1″ fold to the wrong side, at each short end of the cover. Press a 1″ fold to the wrong side at only one of the long edges. I chose to baste stitch this fold in place, but it is not really necessary if your fabric will take a pressed edge.
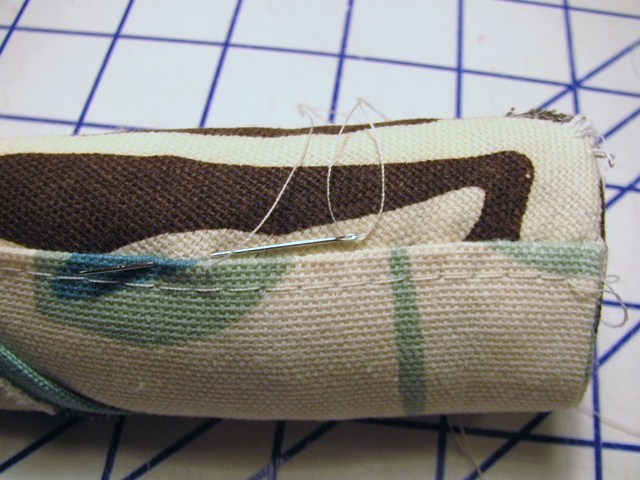
Step 6:
Lay the fabric cover on a table surface wrong side up. Place the batting roll along the long end without the 1″ fold. The ends of the batting roll should match the length of the cover with the short ends folded in. Pin the long end of the cover fabric to the batting roll and then hand stitch the cover to the batting.
Step 7:
Next, tightly roll the batting roll over the fabric cover and pin to secure in place. Once again, hand stitch the length of the fold to the roll using a slip or fell stitch.
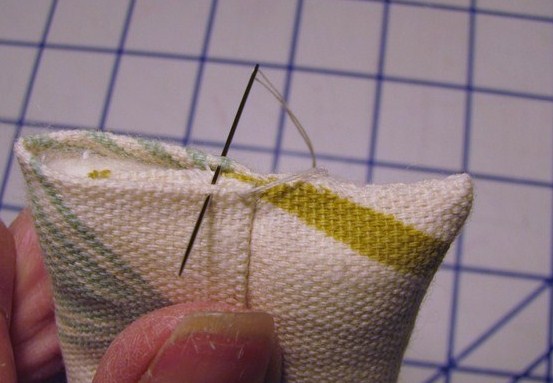
Step 8:
Push the batting roll gently into the cover at the ends. Pin each end shut and then slip stitch them closed.
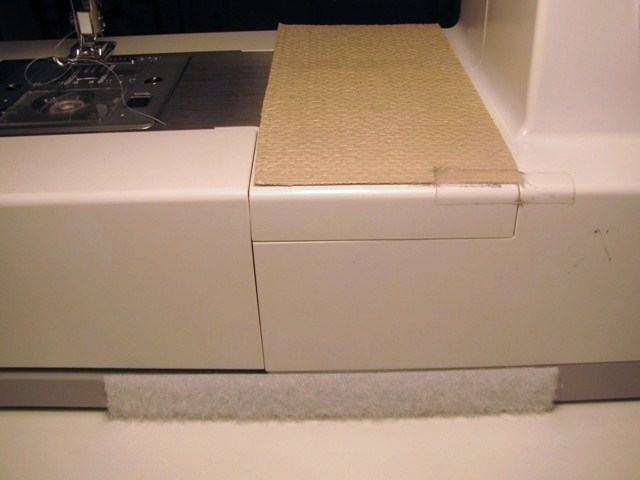
Step 9:
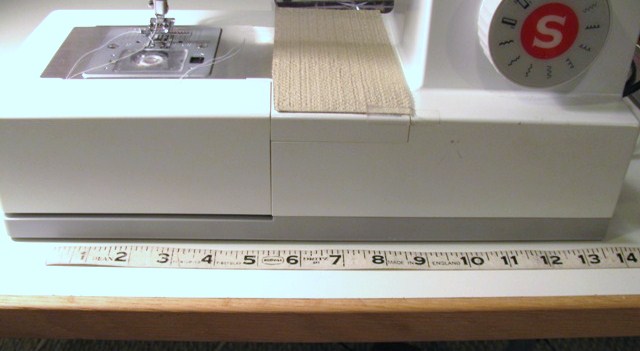
Lastly, apply a piece of stick-on Velcro to the base of your sewing machine — your choice on length. I chose it to be 5″. Important — use the softer half of the Velcro to prevent any fabric from sticking or snagging when the pincushion is not in use. Then apply the corresponding Velcro to the pincushion.
Need a project to put the pincushion to use? Check out Craftsy sewing kits!
These expertly curated kits were designed for busy sewers like you! Get a fabulous pattern along with perfectly coordinated and cut fabric shipped straight to your door with just the click of a button, making getting started on your next sewing project a breeze.
Share tips, start a discussion or ask one of our experts or other students a question.
No Responses to “How to Make a Pincushion for Your Sewing Machine”