Do you ever feel completely lost for ideas of what to do with your paper scraps? In this step-by-step tutorial, we’ll show you how to use small bits scrapbook paper to make festive and fun pinwheels. These pinwheels make great party decor and also provide a wonderful take-home favor for guests. Just choose patterned paper that matches the occasion for instant festivity.
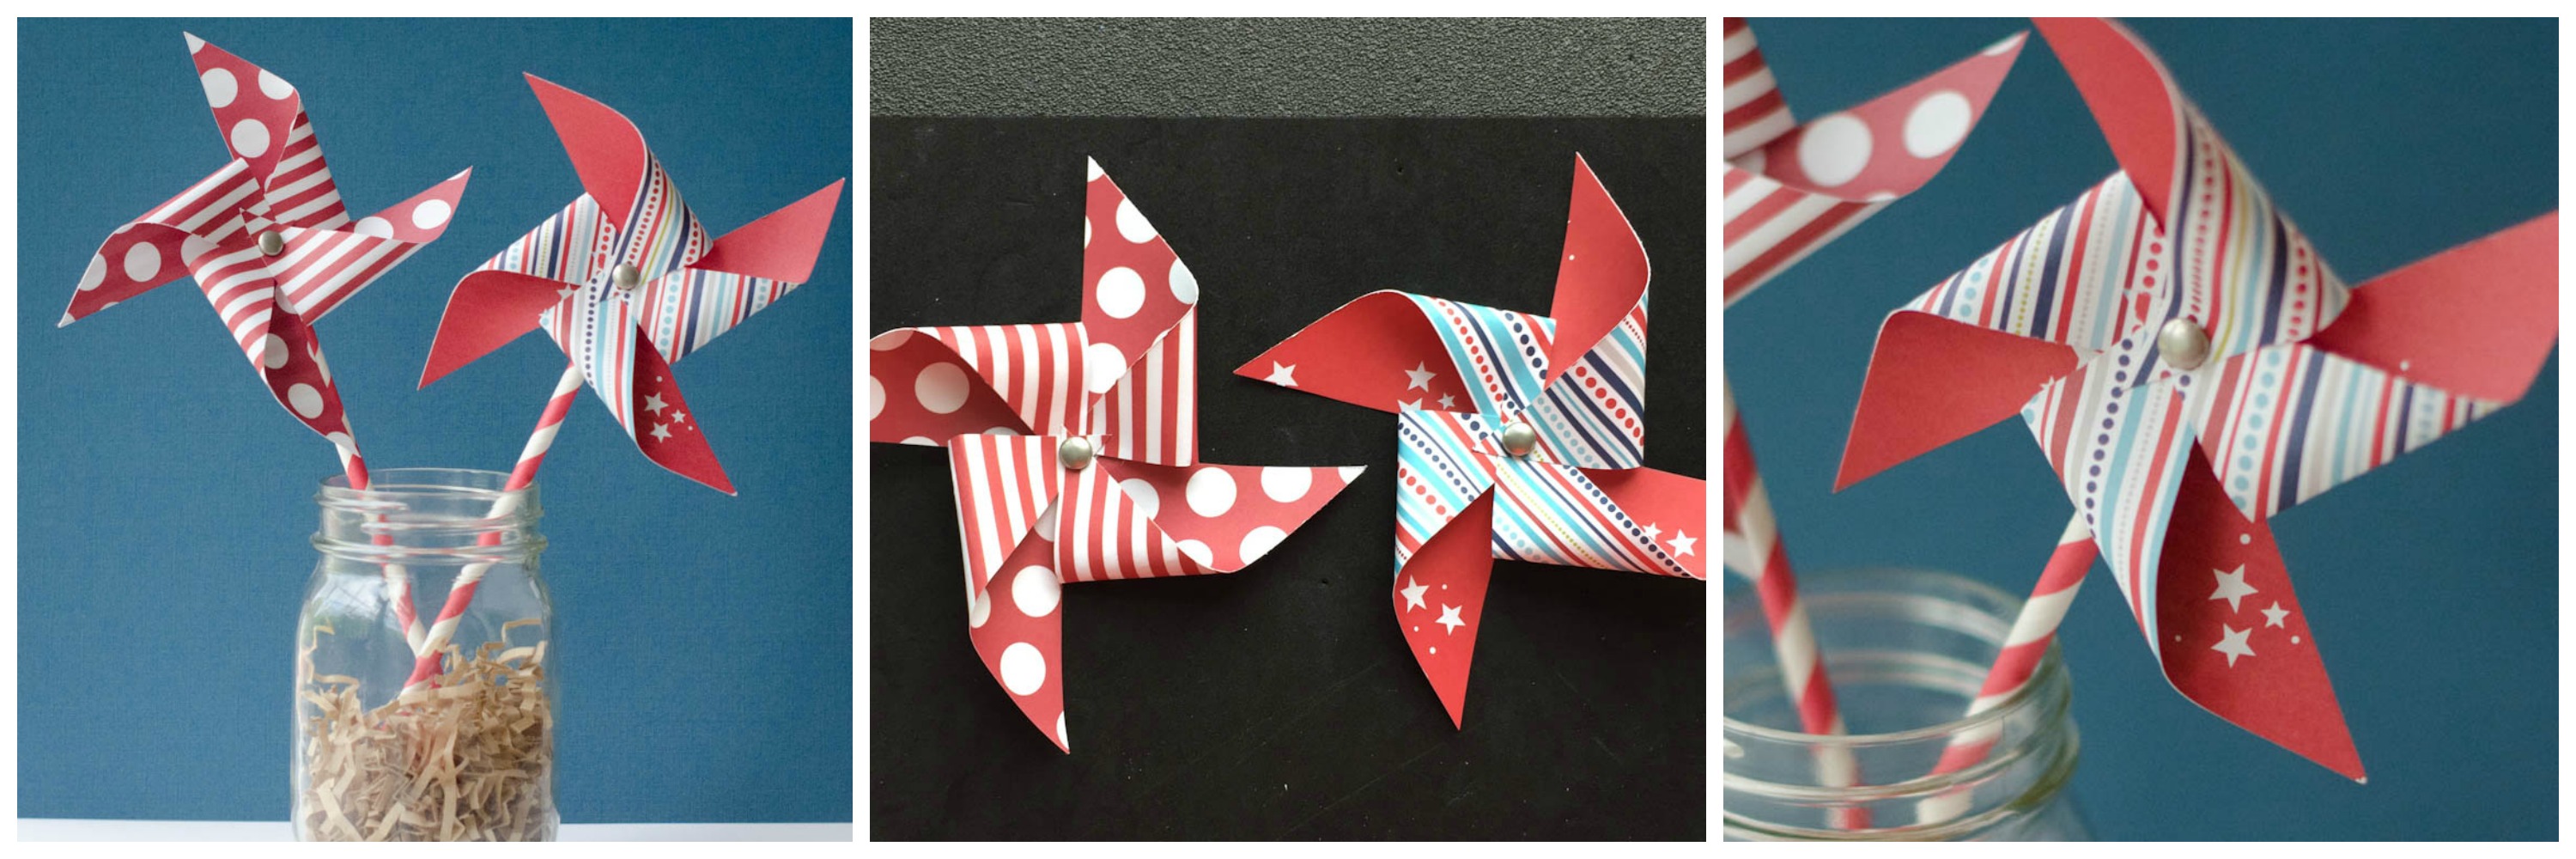
How to make a pinwheel
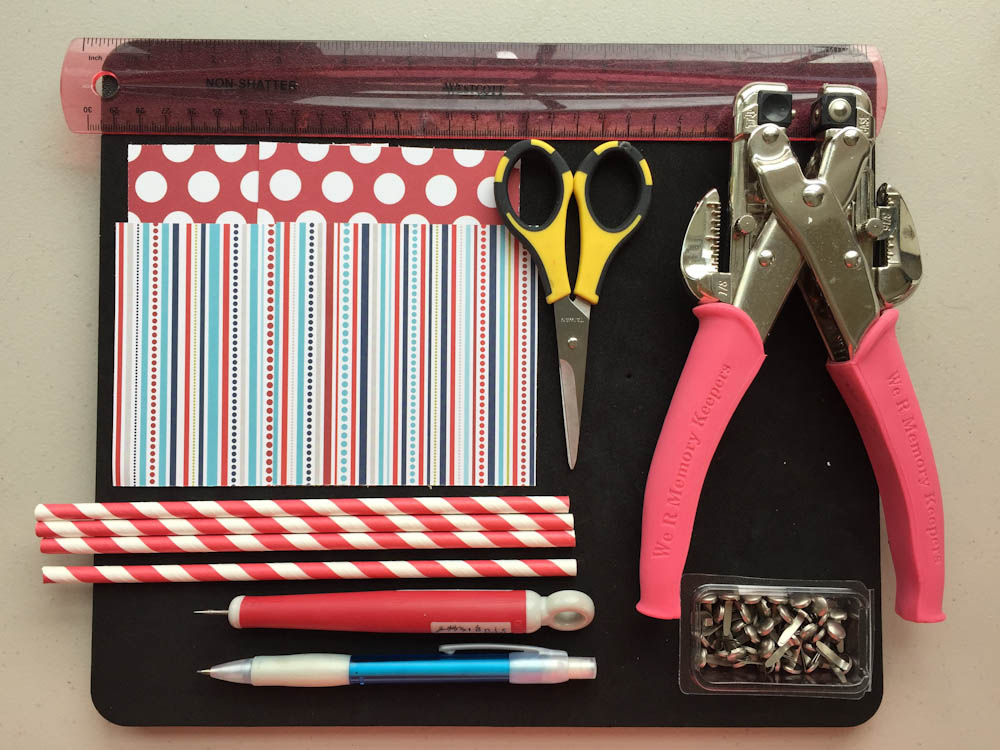
Supplies you’ll need:
- Double-sided scrapbook paper trimmed to 4” x 4”
- Ruler
- Pencil
- Hole Punch
- Paper piercing tool + piercing mat
- Brads
- Decorative straws
Step 1:
Begin with a piece of double-sided scrapbook paper that is trimmed to 4” x 4” square. It is best to used double-sided paper, as both sides of the paper will show in the completed project.
Step 2:
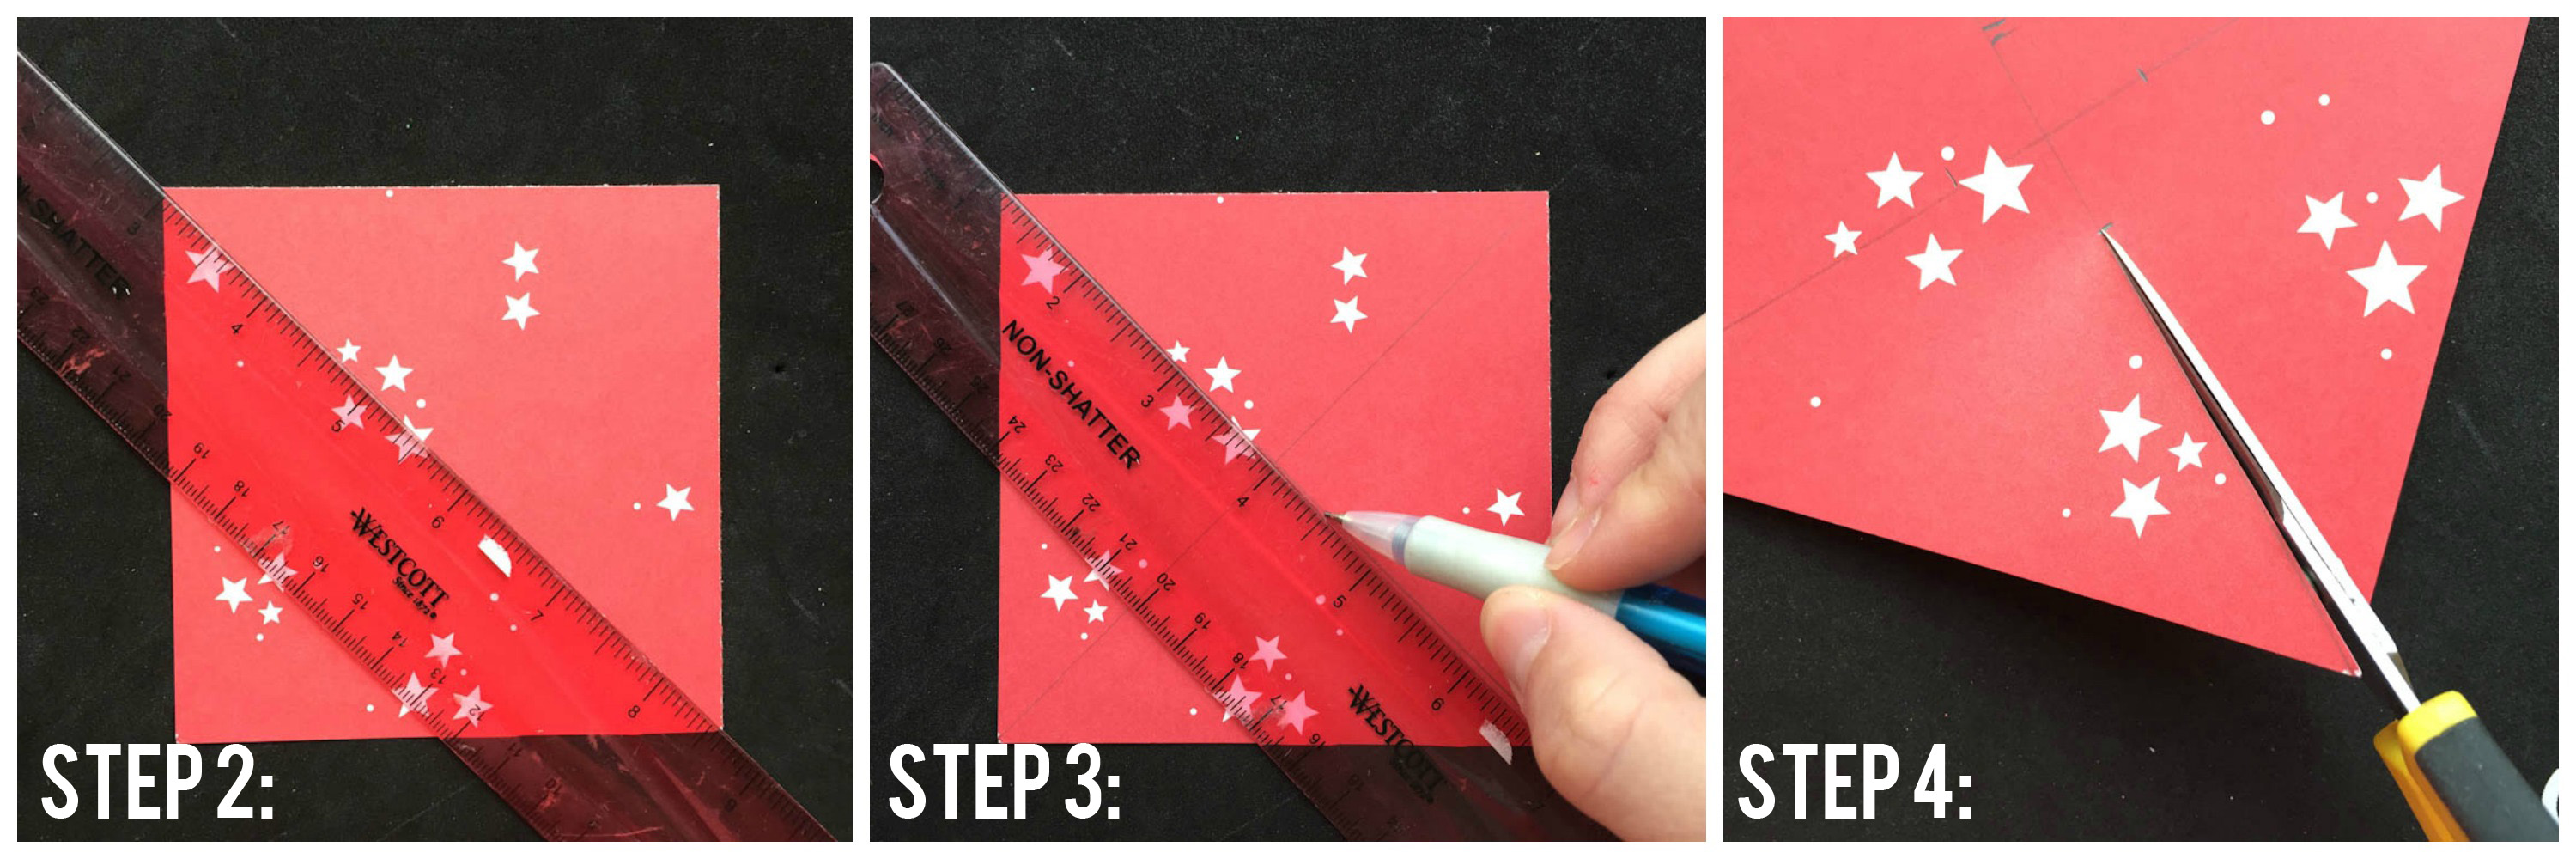
Use a ruler and pencil to draw diagonal lines from opposite corners, making an “X” on your paper.
Step 3:
Measure ½” out from the center on each line and make a small mark with your pencil.
Step 4:
Use your scissors to trim along each diagonal line up to the small ½” line that you marked in Step 3.
Step 5:
Take your paper piercing tool and poke a hole in the very center of the X. Be sure to wiggle the piercing tool around a bit to make this hole large enough to accommodate your brad.
Step 6:
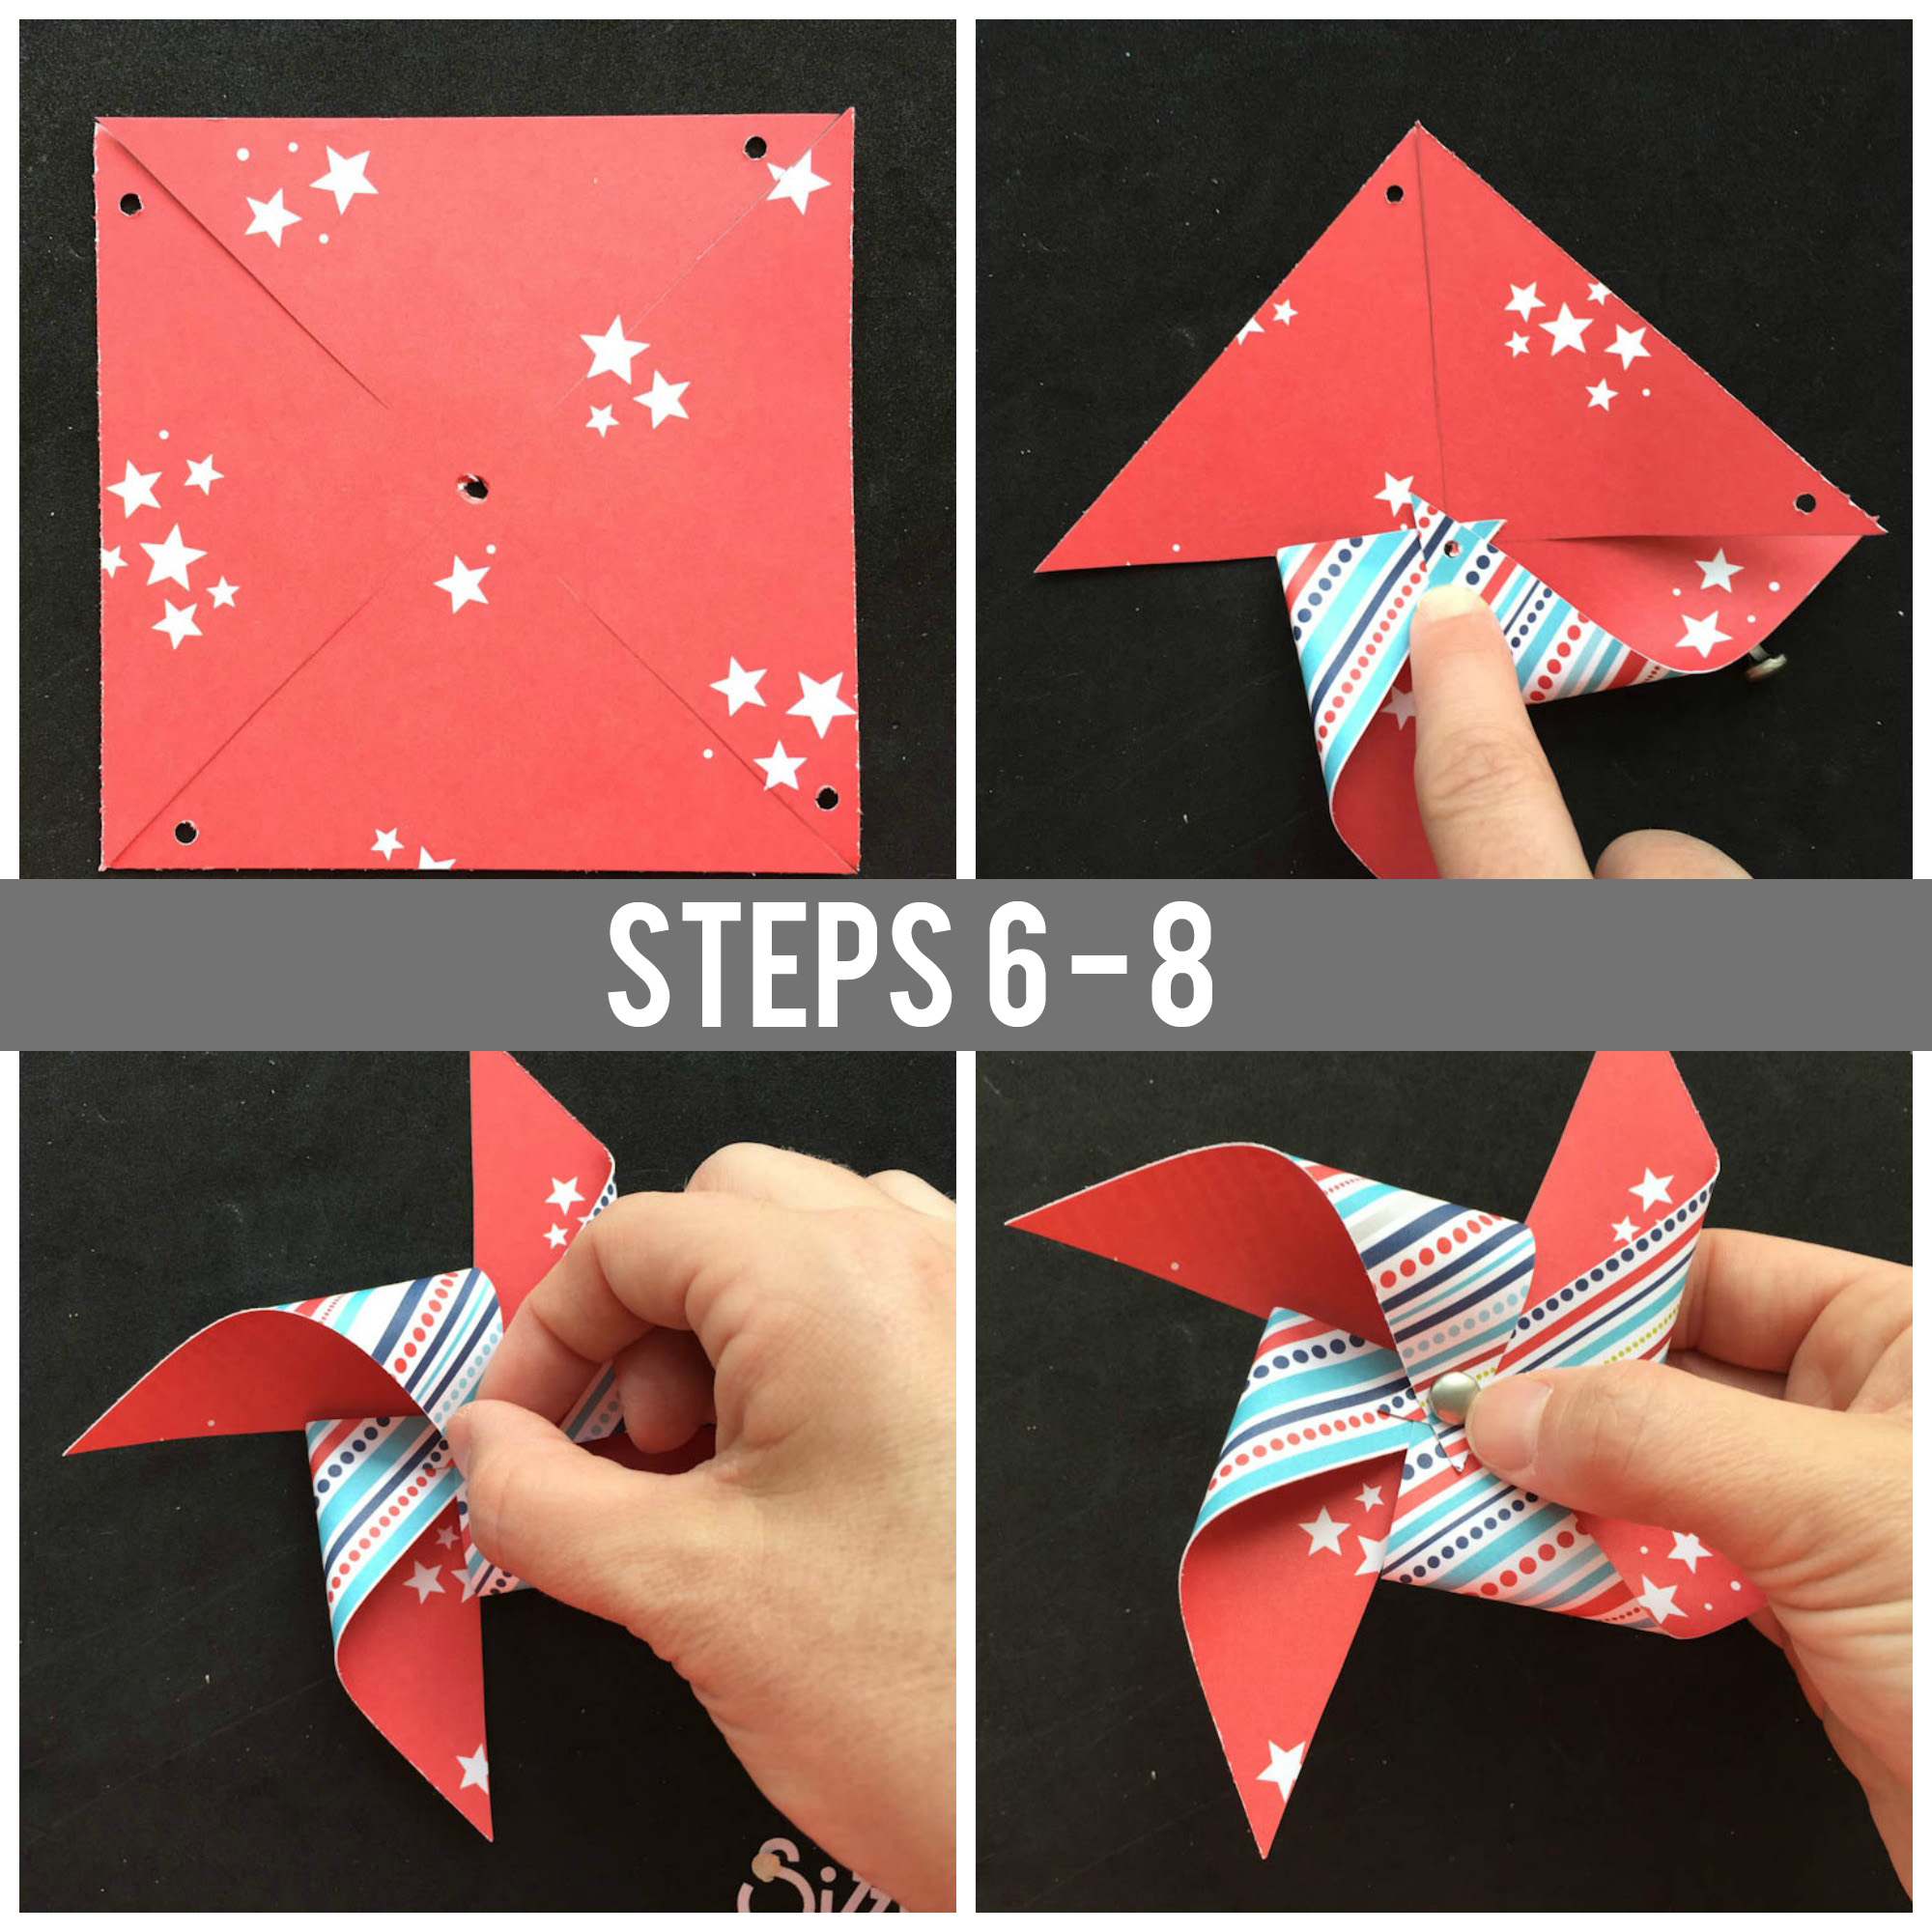
Use your small hole punch or piercing tool to punch holes in the bottom left of each section of triangle. You will have a total of four holes, as shown in the photo.
Step 7:
With the paper lying flat on your work surface, carefully bring each hole-punched corner up to the center of the X. Hold each piece together in the center as you go — you might find it helpful to push your finger down on the mat to keep them all in place. Once all corners are folded in and holes are lined up, insert your brad into the center hole.
Step 8:
Carefully pick your pinwheel from your work surface and spread the back tabs of the brad open. This will help to keep your pinwheel in place until you secure your straw.
Step 9:
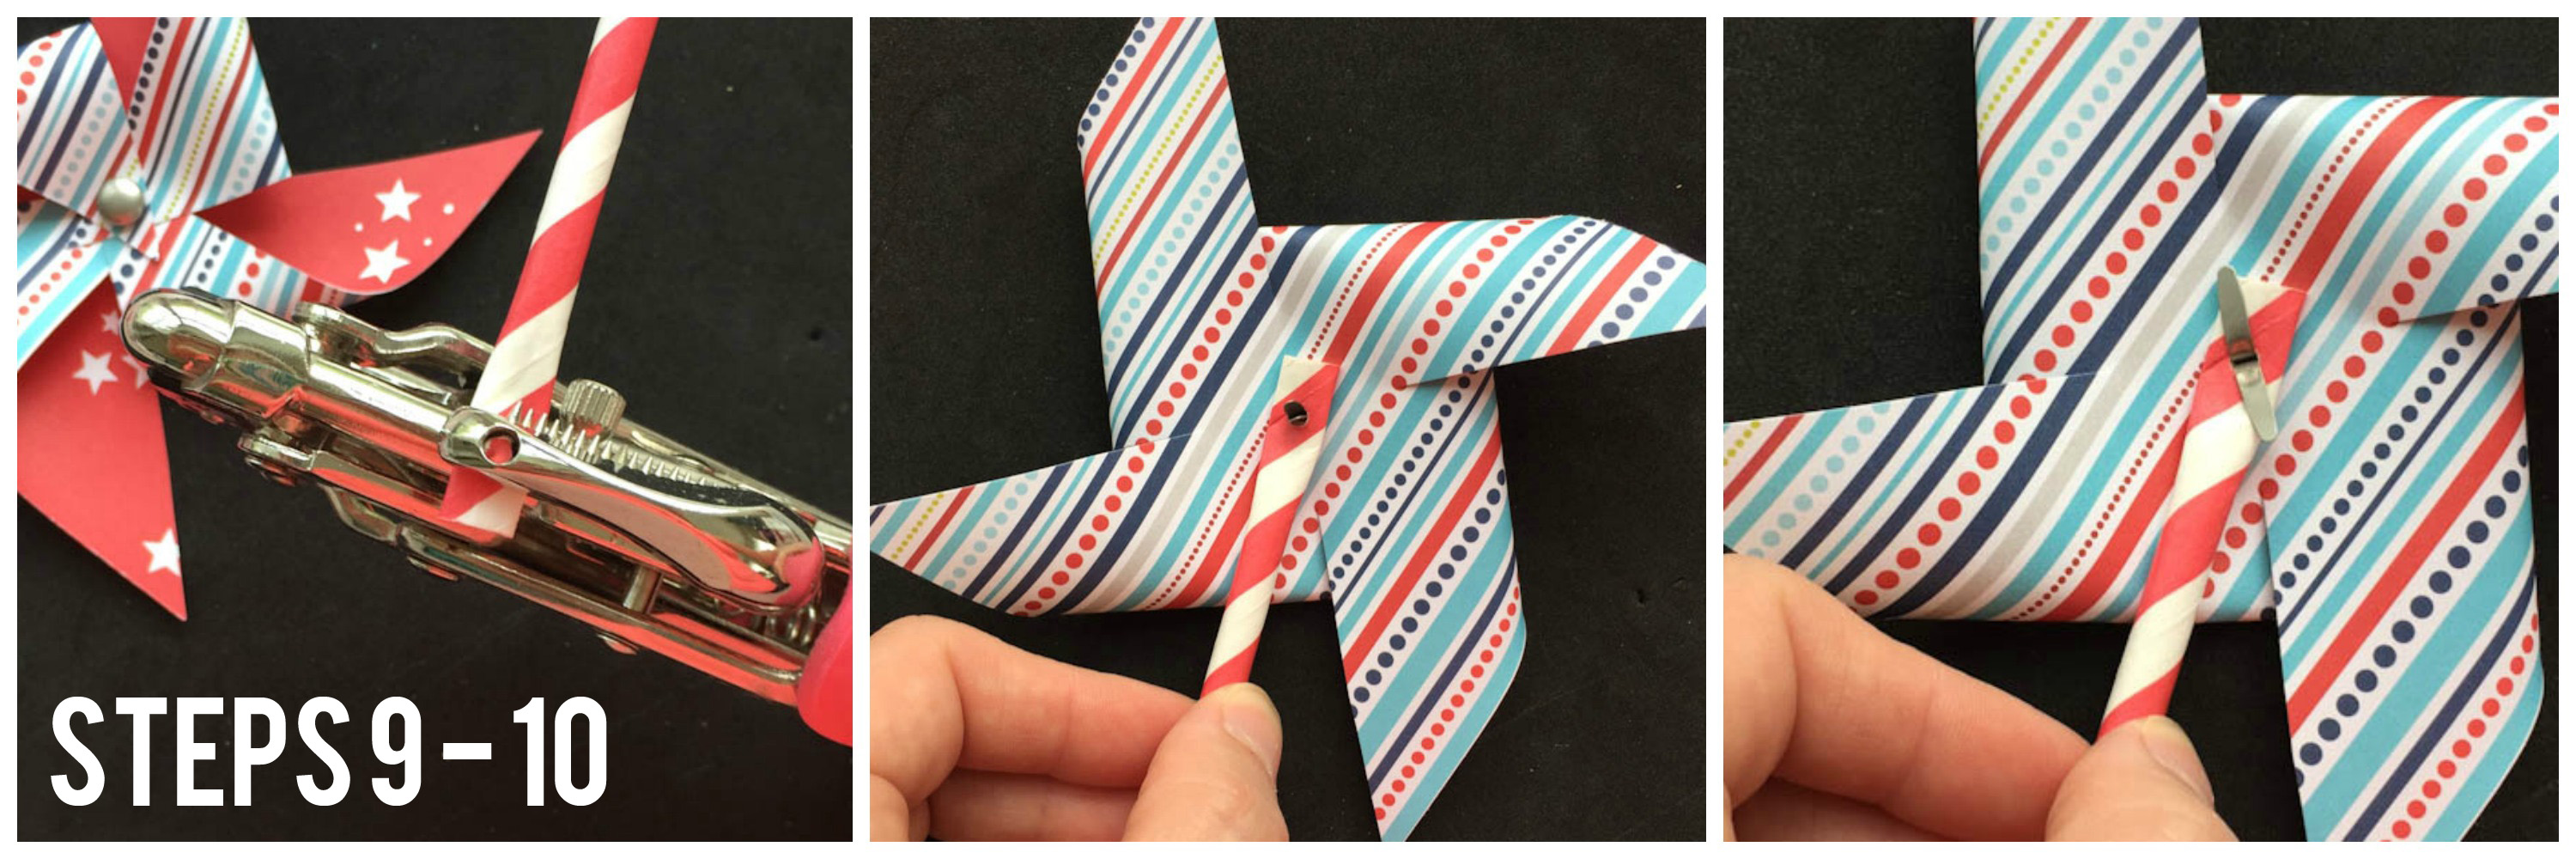
Use your fingers to gently flatten the top of your decorative straw. Punch a hole in the top of the straw (roughly 1/2″ from the top) with your hole punch or paper piercing tool.
Step 10:
Grab your completed pinwheel and carefully unfold the tabs of the brad. Be sure to hold the pinwheel together so that it does not come flying apart! Slide the brad through the hole on the straw and press the tabs of the brad open on the back to secure everything in place.
These pinwheels look great displayed in a decorative jar or vase!
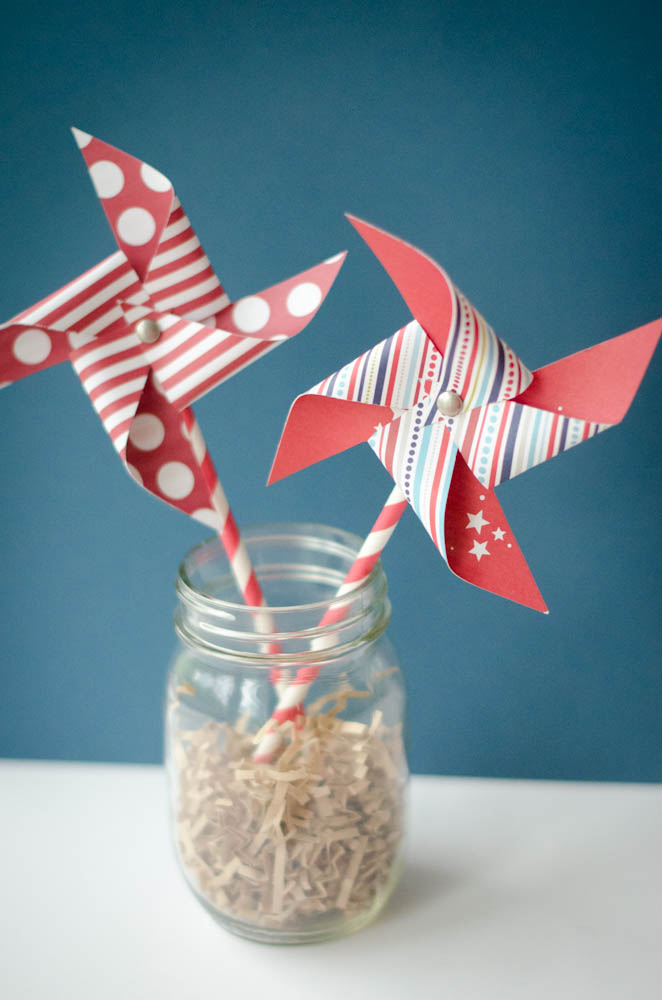
Tip: If you’d prefer your pinwheel to spin, try using a thumb tack in place of a brad, and a pencil with rubber eraser instead of a straw. Poke the thumb tack into the rubber eraser on your pencil and your pinwheel should spin like a charm!

Share tips, start a discussion or ask one of our experts or other students a question.
No Responses to “How to Make a Pinwheel With Your Leftover Paper Scraps”