
It would be fun sometime to investigate whether sewers or sailors have to learn more knots. There are so many uses for knots, both functional and decorative. If you’re a sewing, quilting or needlepoint enthusiast, you’ve likely learned your share: the tailor’s knot, the slipknot, the figure-eight knot, the French knot, the English knot, and more. But one of the basic and most versatile knots is the quilter’s knot — and it’s also one that’s underused.
Keep reading to find out how to make a own quilter’s knot, and when to use it!
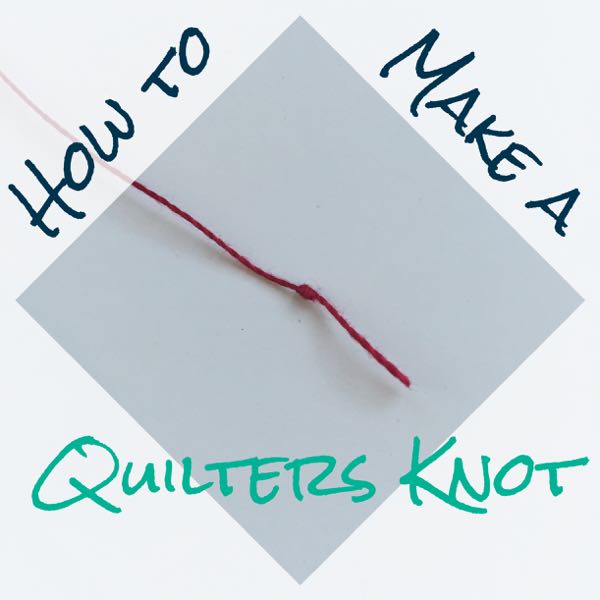
What is a quilter’s knot, anyway?
I should first put forth the disclaimer that there are about twice as many names for knots as there are knots themselves. Some people claim that the quilter’s knot and the tailor’s knot are the same, whereas other camps (of which I’m one) make a distinction between the two.
The way I’ve learned it, a tailor’s knot is one of those simple “wrap around the finger” knots, often made two-at-a-time as a double knot for stability, and it’s designed not to slip through any of the layers of fabric.
A quilter’s knot, on the other hand, is a tiny knot that can be pulled through one layer of fabric so that the end is “hidden” from both sides. These knots can often be used interchangeably, but sometimes picking the right one makes a difference.
How to make a quilter’s knot
The good news is that a quilter’s knot is fairly straightforward and easy to make. My directions are for right-handed sewers; lefties, just reverse directions!
Note: I used a thicker thread (12 wt) just for clarity. You’ll may want to choose a thread in a lighter weight.
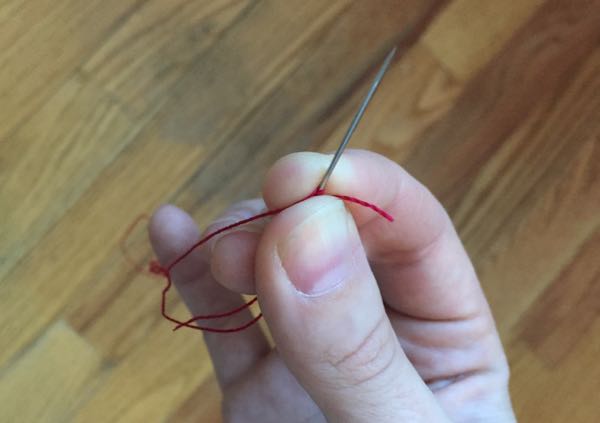
1. Begin with a threaded needle (single-ply), and hold it in your right hand. Pick up the end of the thread in your left hand.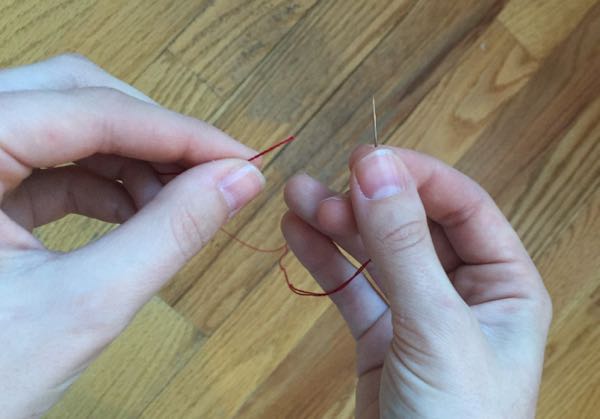
Photos via Right Sides Together
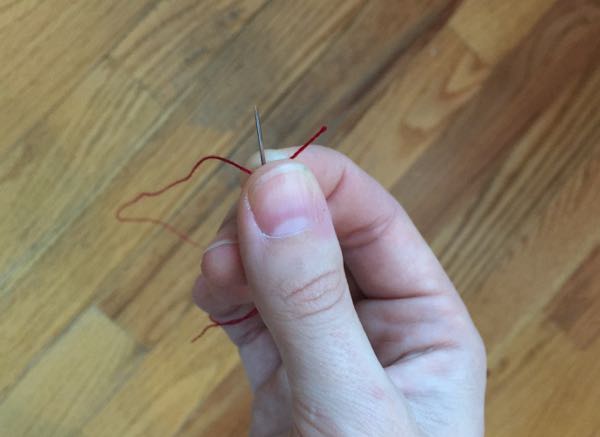
3. Using your left hand, wrap the thread close to the thread end around the needle. How many times you choose to do this is up to you. For standard quilting, most people will wrap it about three times. For quilting with embroidery floss or heavier thread, twice is plenty.
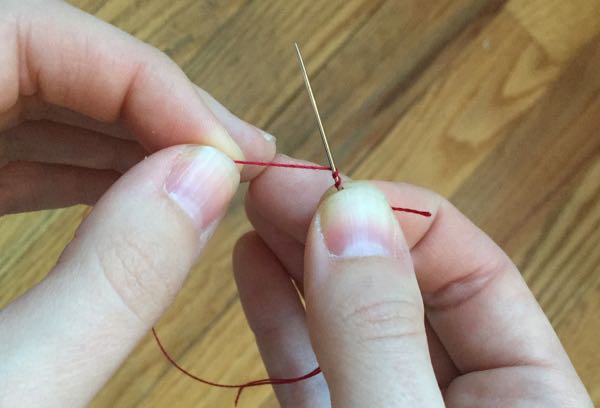
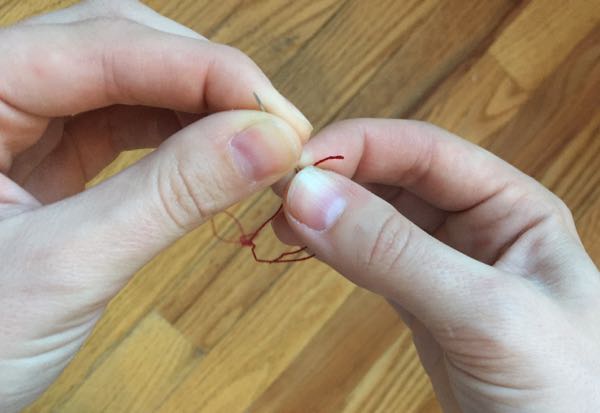
4. Once your needle is wrapped around several times, move your right forefinger and thumb up the needle just a smidge so they pinch the coil of thread. (They’ll also still be holding the needle and the thread end.)
5. Here’s the fun part: with your left hand, grab the needle and pull it and the thread through the coil. Keep holding onto the coil of thread with your right forefinger and thumb as you do this.
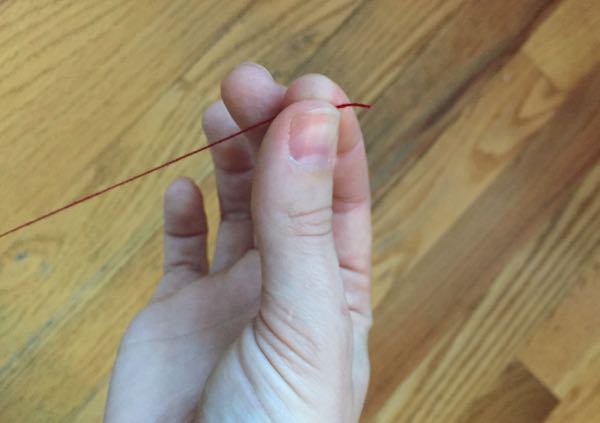
6. As the coil reaches the end of the thread, give it a good pull. Ta-da! There’s your quilter’s knot.
When to use the quilter’s knot
A quilter’s knot is ideally used as a beginning knot for hand sewing. The term “quilters knot” can be a bit misleading; it doesn’t have to be used for quilting or pulled through your first layer of fabric, but it’s a good place to start if that’s what you want to do with it. While it’s technically possible to tie off a line of stitching using a quilter’s knot, it can be harder to do because the “thread end” isn’t free. Using a single tailor’s knot as close as possible to the fabric is often a better choice, and it can often be pulled through as well.
Good presentation of doing this knot. You’re right that it goes by many names; waste knot (since you later snip it off when the threat is sufficiently anchored by threads going on top of it.