
One of the challenges of sewing a dress shirt is getting the collar just right.

Photo via Sew Maris
Shirtmakers have lots of little tricks for sewing a beautiful shirt, and one that I like to use is converting a two-piece collar into a combined one-piece upper+under collar. This results in a smoother front collar edge, and that can translate into nicer looking and more even collar points. Since most commercial shirt patterns include just a single collar pattern piece that’s used for both the upper and under collar, you will need to draft a one-piece upper+under collar pattern piece.
Let’s start by identify the parts of the collar we’ll be working with:
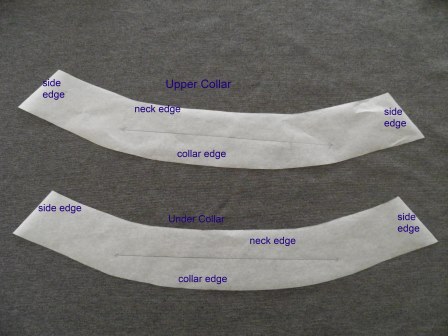
How to draft a one-piece upper+under shirt collar:
Step 1:
Draw a fresh copy of the upper collar, including notches and grainline.
Step 2:
Draw a fresh copy of the under collar, or if there is not a separate pattern piece for this, draw a second collar piece to be used for the under collar. Ignore notches and grainline.
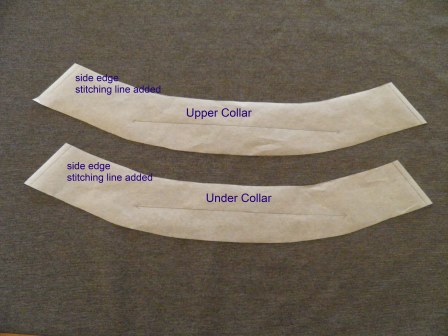
Step 3:
Draw the stitching line on both ends of the upper collar and also on the under collar.
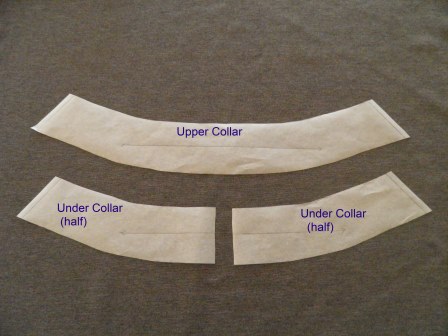
Step 4:
Fold the under collar in half, and cut the under collar on this center fold line.
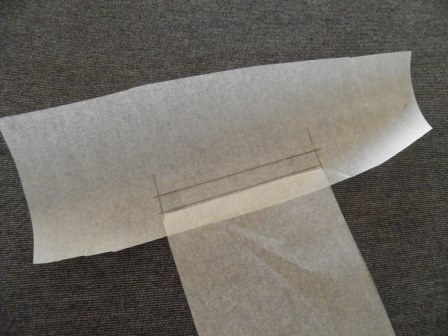
Step 5:
Add tissue under both of the under collar center back cut edges, and draw a new seam allowance.

Step 6:
Place the upper collar face-up in front of you, and place the side seam stitching line of the under collar on top of the side seam stitching line of the upper collar.
Step 7:
Tape down the under collar and cut off the corner triangles.
How to use a one-piece upper+under shirt collar:
Step 1:
Interface the upper collar to the side edge fold line.
Step 2:
Right sides together, sew the center back seam allowance, and press the seam open.
Step 3:
Right sides together, stitch the collar edge seam.
Step 4:
Trim, turn and press the collar.
Step 5:
Apply to the collar stand per the pattern directions.
Give this technique a try in your next shirt, and let us know how you like it. I love the fact the under collar is on the bias, which causes it to roll nicely under the upper collar. My husband also likes button-down collars, and it is vastly easier to make a small buttonhole at the front of this collar style than a two-piece collar!
Learn lots more secrets to a crisp, tailored shirt with Pam Howard’s help in The Classic Tailored Shirt Craftsy class. And Christine Haynes also has some great ideas in her post Tips for Sewing a Perfect Collar.
Share tips, start a discussion or ask one of our experts or other students a question.
No Responses to “How to Make a One-Piece Shirt Collar”