
You may be expecting this post to be about how to avoid your wrapped loops being messy. Nope — just the opposite! In this mini tutorial, I’m going to show you how to add a little rusticity to your jewelry by allowing your loops to relax a little and let it all hang out.
When you first learned how to create wrapped loops, probably the first few (hundred, most likely!) weren’t as neat as you would’ve liked. They were probably pretty messy, if you are anything like me! The difference between those messy wrapped loops and the ones I’m going to share with you today, is that you are now in control of the wire. You are going to be making a style choice here, and also in the process making your jewelry a little bit sturdier.
Personally, I like my “rustic-wrapped loops” to be a little sprawling, messy and imperfect. That says “handmade” to me. But the beauty of this technique is that even if you prefer the very even, neat coiled wrapped loops that we all aim for initially, you can opt for that look here too, and still reap the benefits of their inherently sturdier nature — simply make the second lot of coiling just as neat as the first.
Here’s how to make a wrapped loop with a pair of earrings:
Materials:
- 20g/0.8mm wire
- A selection of beads
- Brass earwires
Tools:
- Round-nosed pliers
- Flush cutters
- Chain-nosed pliers
Directions:
Step 1.
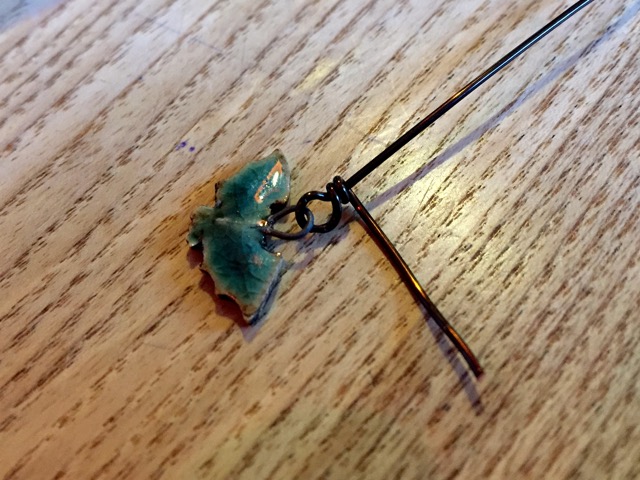
Begin by making a wrapped loop as usual. The only difference is that you will need to leave yourself longer tails than usual on both sides. I would say a general rule of thumb is to add on a third to the length of wire you’d usually use but of course it depends on your style of wrapping as well as the beads you are working with — you may need a little more or less.
Step 2.
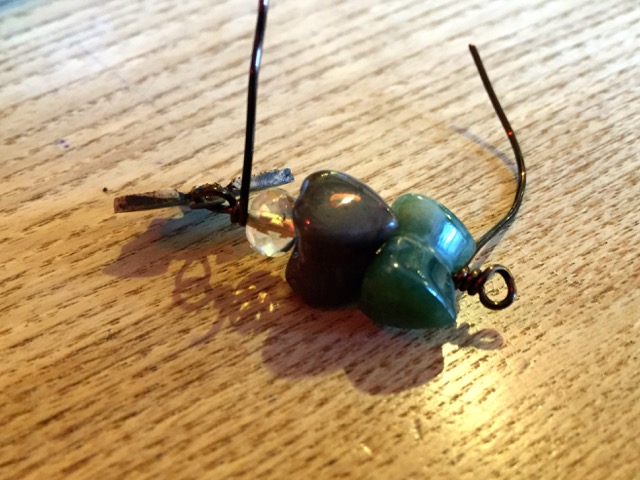
Slide beads on and turn a second wrapped loop to close. The bead(s) will now be trapped and secure between these two wrapped loops.
Step 3.
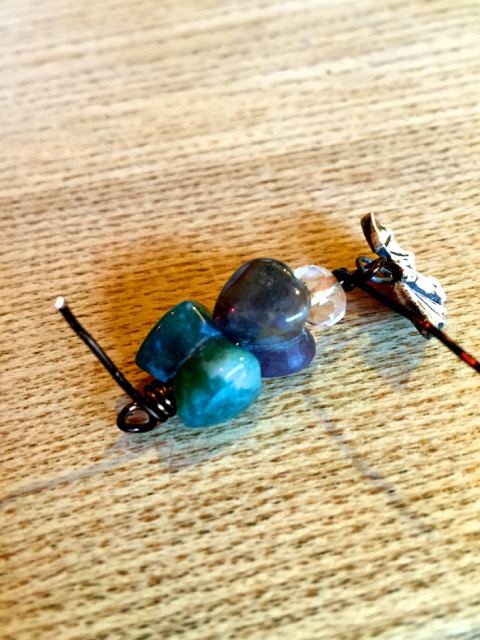
With the tail from the second step, wrap down from the bead to the loop, over the coils you initially made. Here’s where you decide on the messiness factor! You’ve already created a sturdy base/connection so the wrapping over the top has a little more flexibility visually.
Step 4.
Repeat the third step. with your initial wrapped loop from step one. Trim your tails and tuck them in, and voila! You’re done.
I use this technique almost every time I turn a wrapped loop. Aesthetically, it suits my style. But as I said, you can make these double could neater than mine if that suits yours.
There are many benefits to this double-wrapping style:
- It makes the coils much sturdier.
- If you’re working with delicate beads such as freshwater pearls, it takes the wire tails away from the bead and back to the loop for when you are tucking them in with your pliers, and protects the beads from being accidentally scratched.
- It is an ideal technique if you are working with beads with fine holes, such as gemstones, as the wire you are working with will be on the fine side, too.
- This technique will make your connections stronger as you’re effectively doubling the gauge of the wire at these points.
- Visually, sometimes you can get an unwanted gap between beads due to the way they have to be wrapped. Double-wrapping these links adds a little heft to these sections.
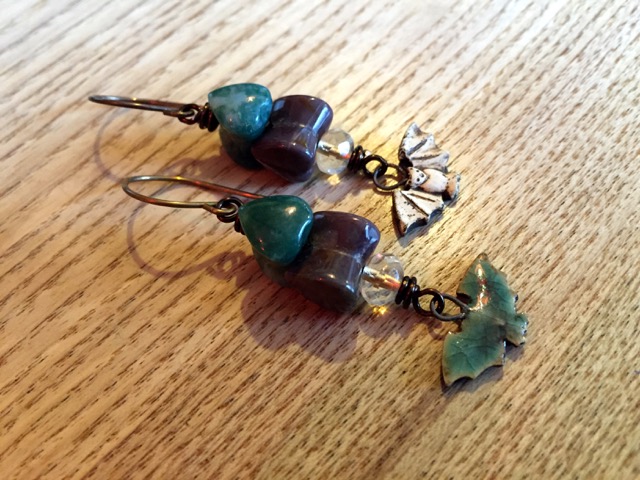
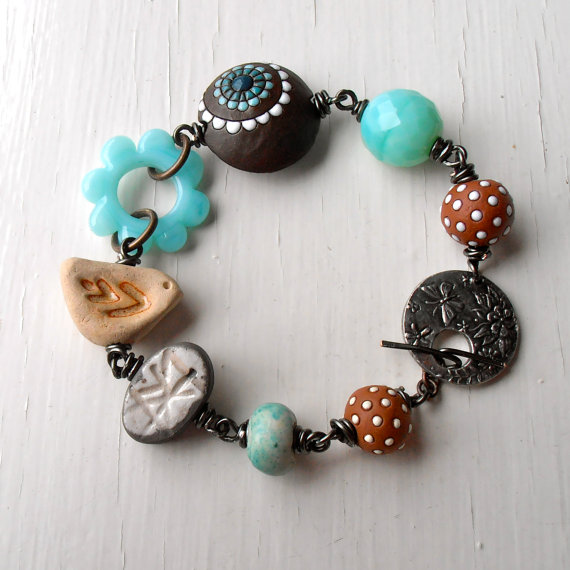
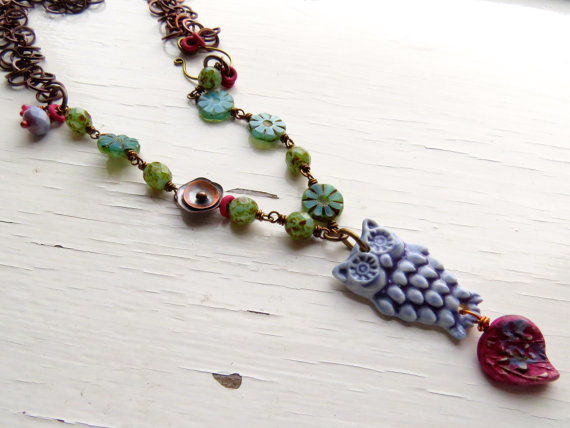
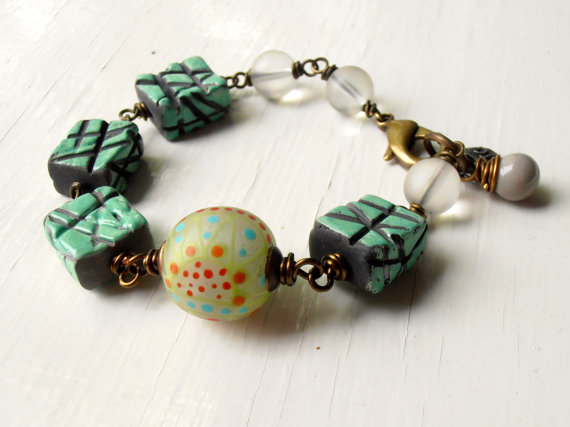
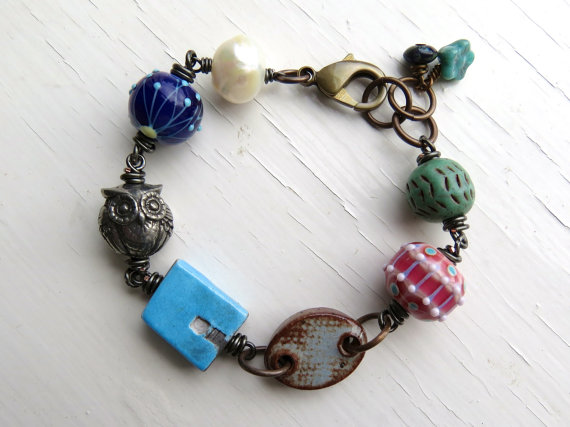
Check out my examples below of jewelry featuring rustic-wrapped loops:

Share tips, start a discussion or ask one of our experts or other students a question.
No Responses to “Add a Rustic Look to Your Jewelry With Messy Wrapped Loops”