

If you’re a quilter or sewist, you’ve probably come across bias tape before. And while it’s commonly used for quilt binding, there are a ton of ways you can incorporate bias tape into any project. The best part, though, may be just how easy it is to make yourself.
DIY Bias Tape
Level: Easy
What You Need
Pro Tip: This tutorial is for single fold bias tape. To make double fold, you need to iron the fabric in half one more time.
Instructions
1. Prep Your Fabric
Generously spray your fabric with starch and press until dry. This will stiffen your fabric and make it easier to pull through the bias tape maker.
2. Cut

Fold your fabric on the 45-degree diagonal and trim off the folded edge, using a ruler as a guide. Use your ruler to measure the width of your bias tape from the cut edge and cut from one end of the fabric to the other.
You’ll now have lots of fabrics strips of varying lengths.
Good to Know: This method is ideal for cutting bias tape from fabric that’s less than two yards. To see how to cut bias tape from larger pieces of fabric, check out our class, Modern Quilts With Bias Tape Appliqué.
3. Join the Strips
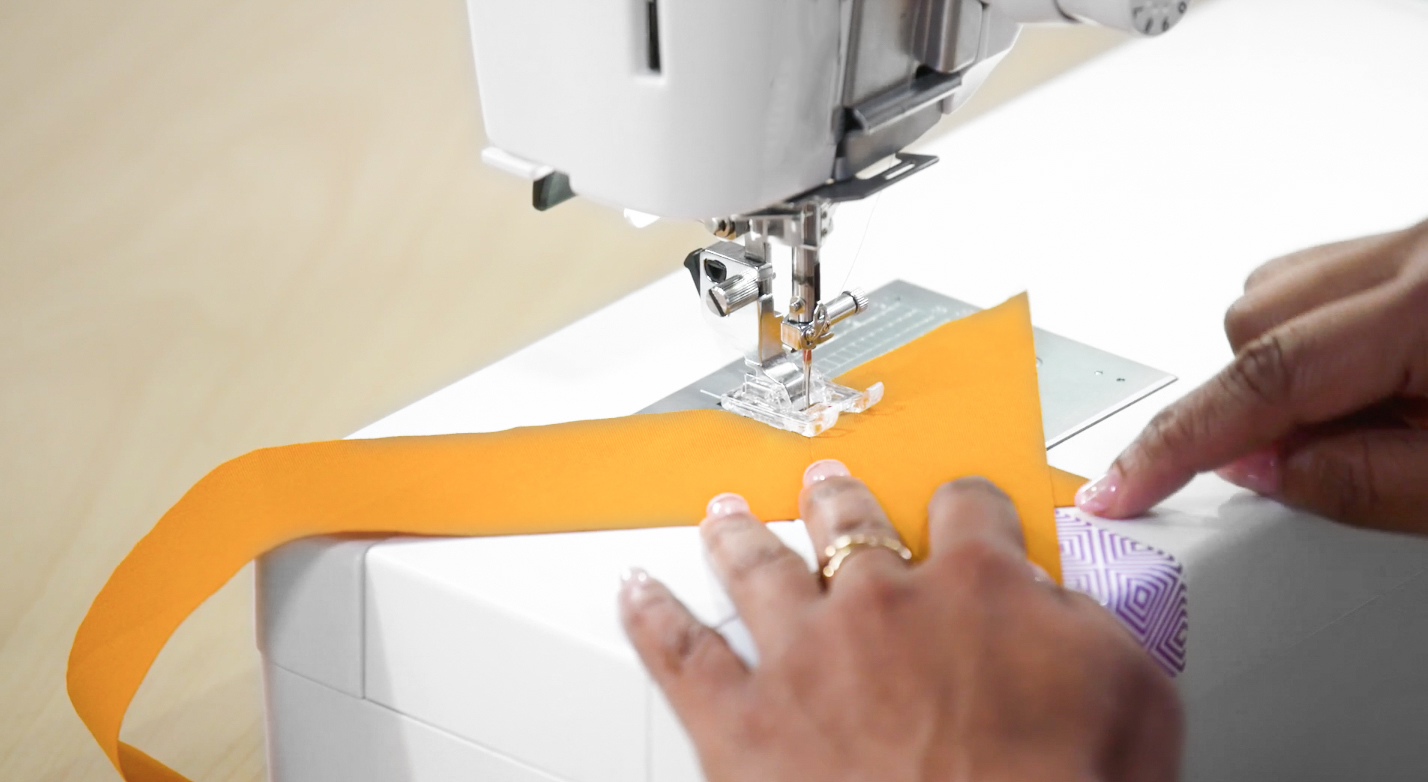
Criss-cross two strips, right sides together, at a 90-degree angle. The tail should come off the left side of your machine. Stitch the two strips together on the overlap, from the top left to the bottom right.
Pro Tip: To make your stitching easier, place a piece of masking tape or washi tape on your machine to use as a guide. Tape it down the bed of your machine, with the right edge aligned with the center needle position. The overlapped strips will create a little V at the bottom — keep this aligned with the tape for straight stitches.
Repeat this step until all your strips are joined.
4. Trim
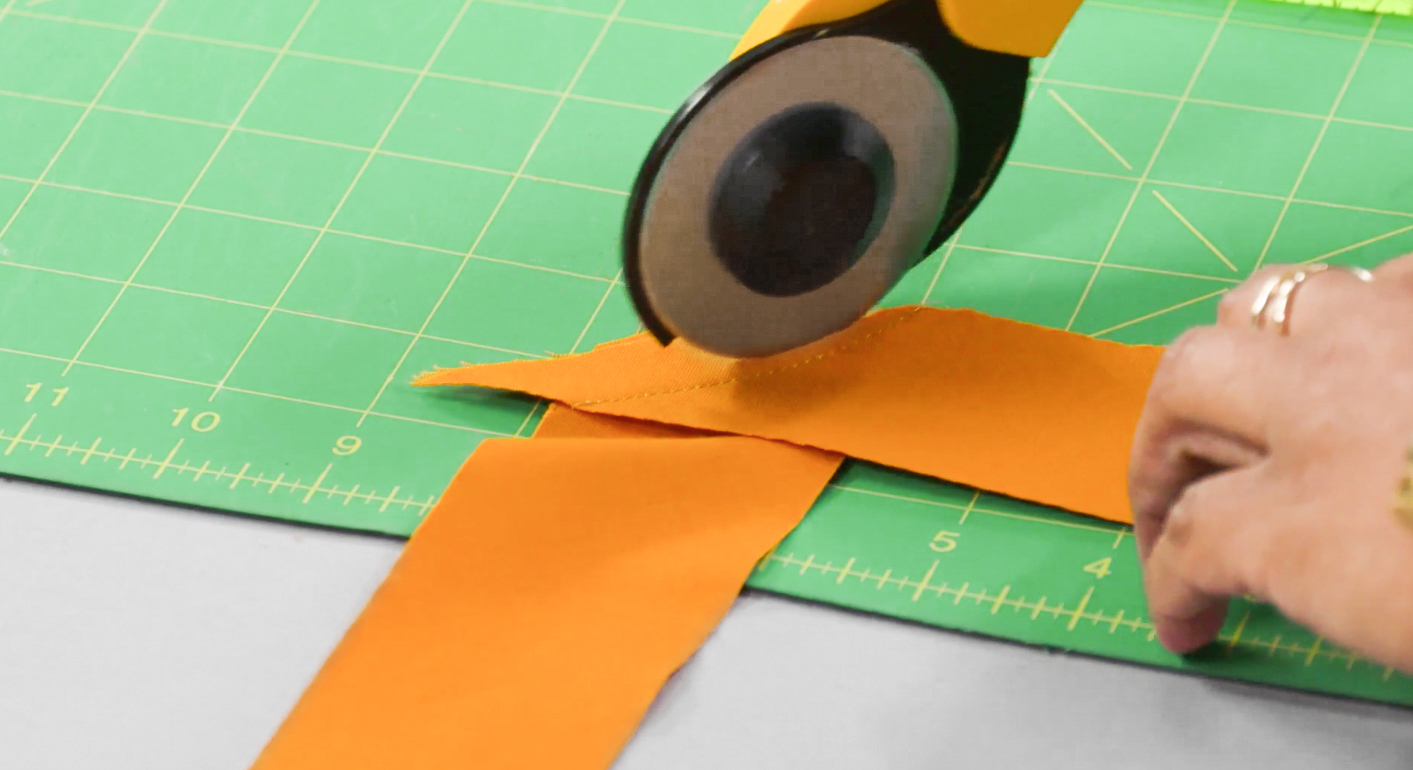
Cut off the excess fabric, ¼” from your seams.
5. Fold and Press
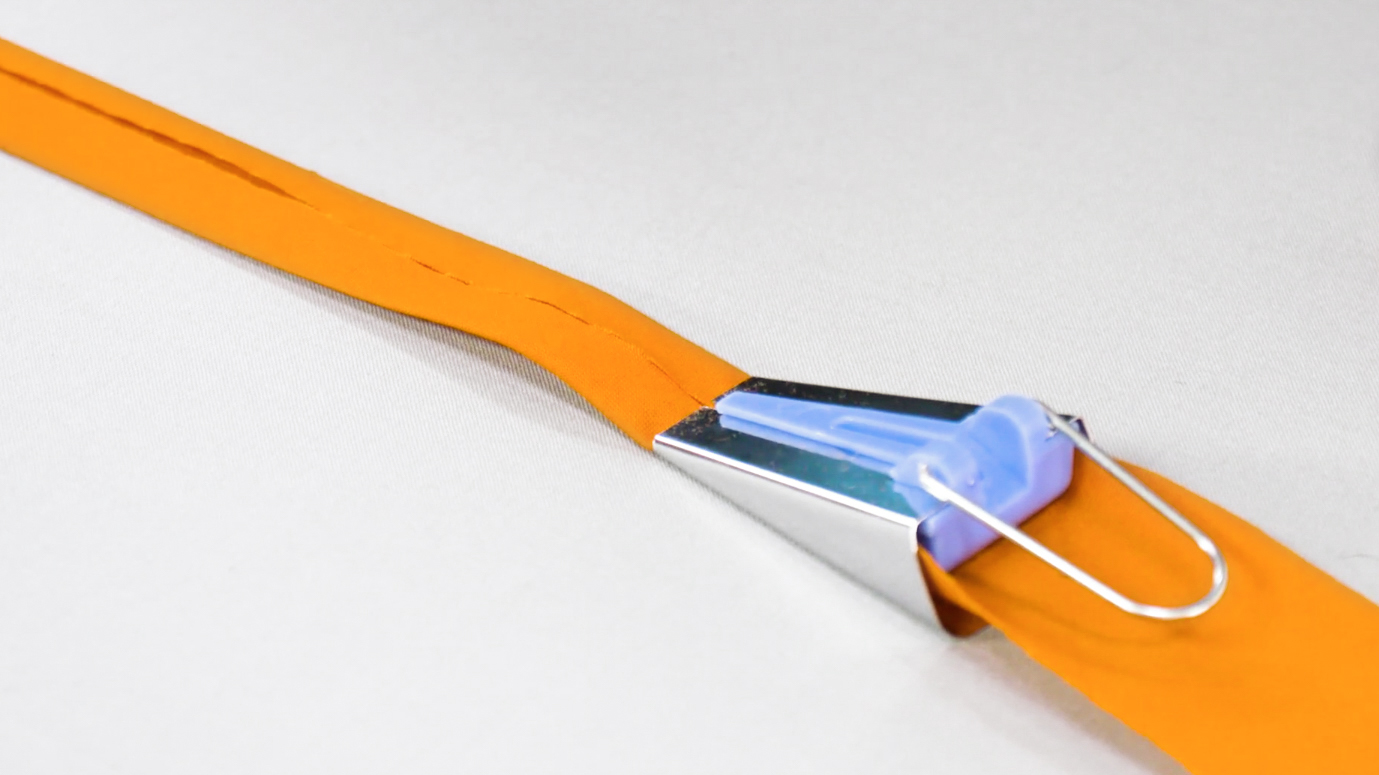
Insert your fabric into the slot of your bias tape maker and feed it through for a few inches. The fabric will come out the narrow end and be folded on both sides.
Pro Tip: If your fabric gets stuck in your bias maker, insert a toothpick or pin in the top slot of the tool and gently pull the fabric through.
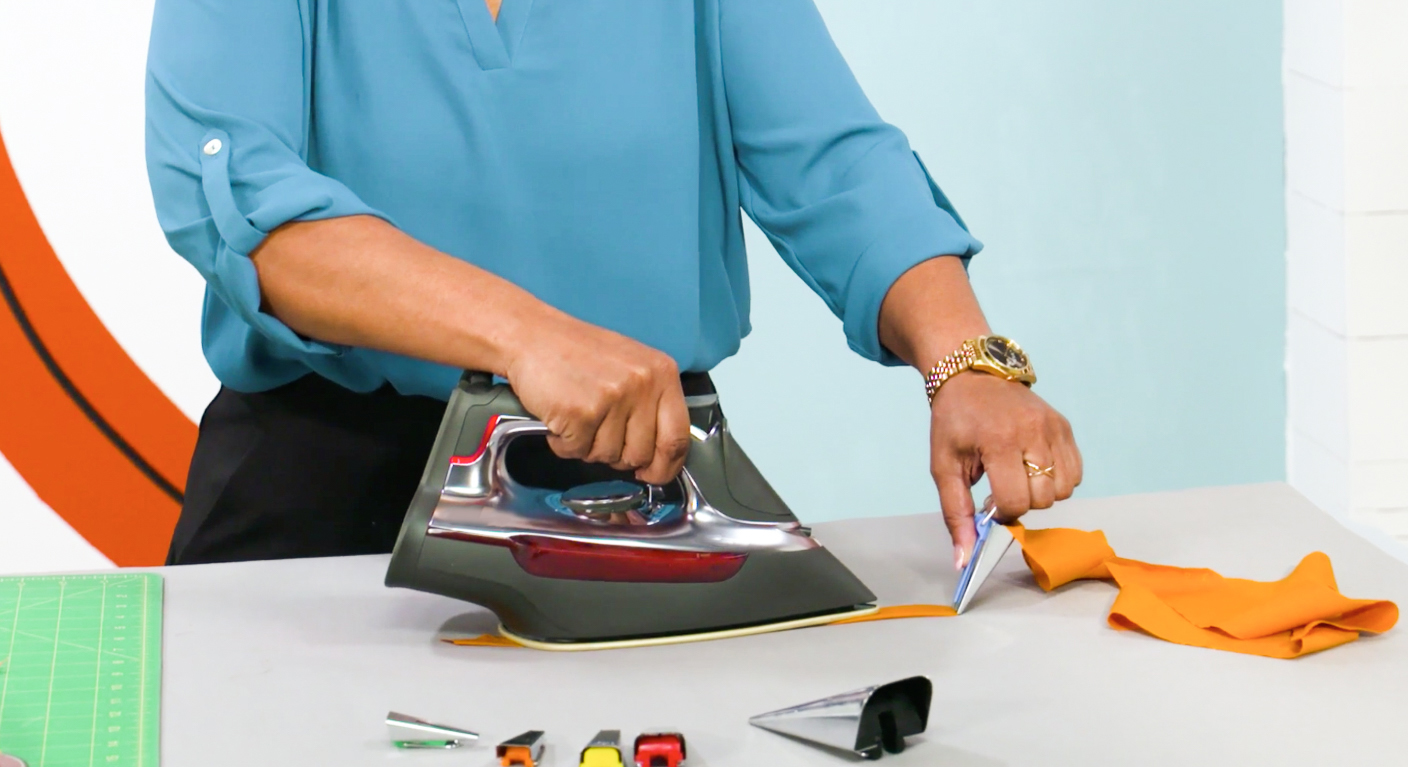
As the fabric is folded, press it into place with an iron. Keep moving the fabric through the bias tape maker bit by bit, pressing the folded end as you work. Both edges of the fold should meet in the center, but there will be some irregularity — it just happens.
Now you have DIY bias tape to use in your next project!
Thanks this was helpful!