
This week’s installment of Sweet Sunday is brought to you by seasoned pastry chef and Craftsy instructor
The Cronut craze is sweeping the country and charming the media, making their way into the hearts of food fanatics everywhere. Invented by Dominique Ansel, who, every day, has hundreds of eager customers lining up outside his New York bakery before dawn in hopes of getting their hands on the trendy treat that’s a cross between a croissant and a doughnut. Cronut-crazed celebrities have even been taken to task for trying to cut in the line as well.
Up until a few months ago no one would have thought to deep-fry lovingly laminated dough. But they are delicious — really, really delicious.
In this tutorial, we’ll show you how to make you own Cronuts.
Use the dough from my Craftsy class Classic Croissants at Home and make a few fillings (recipes follow), and you will be on your way to creating your own custom Cronut without having to get up early or dodge any paparazzi.
Note: Cronuts can be made from fresh dough or scraps. If you are making the dough just for Cronuts, I recommend making a half batch, as a full batch of the recipe could result in hundreds of Cronuts, depending on the size of your cutter.
Photos via Kat Shaffer
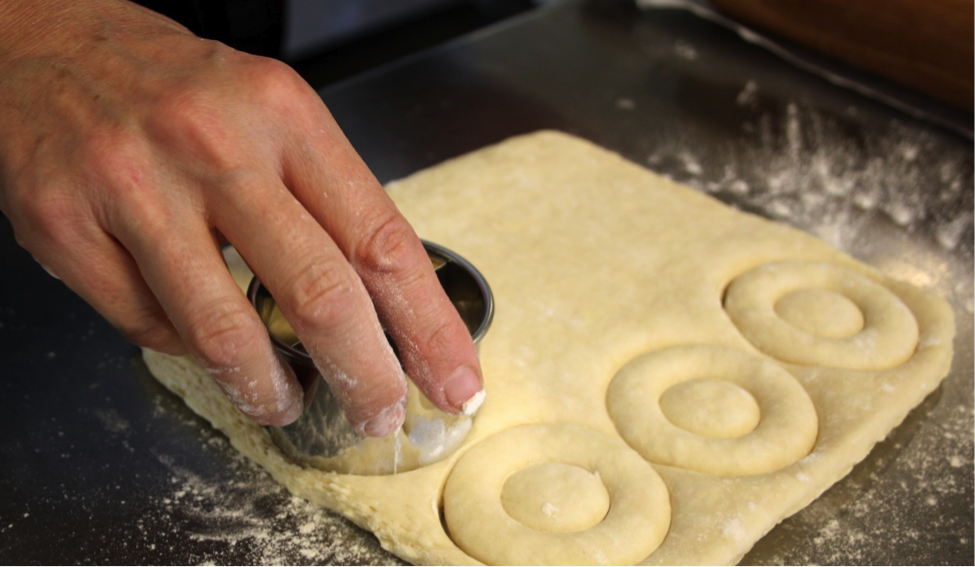
Step 1:
Roll the dough ¼” thick. I am using a small doughnut cutter, but you could use a large one. A set of large and small round cutters will also work.
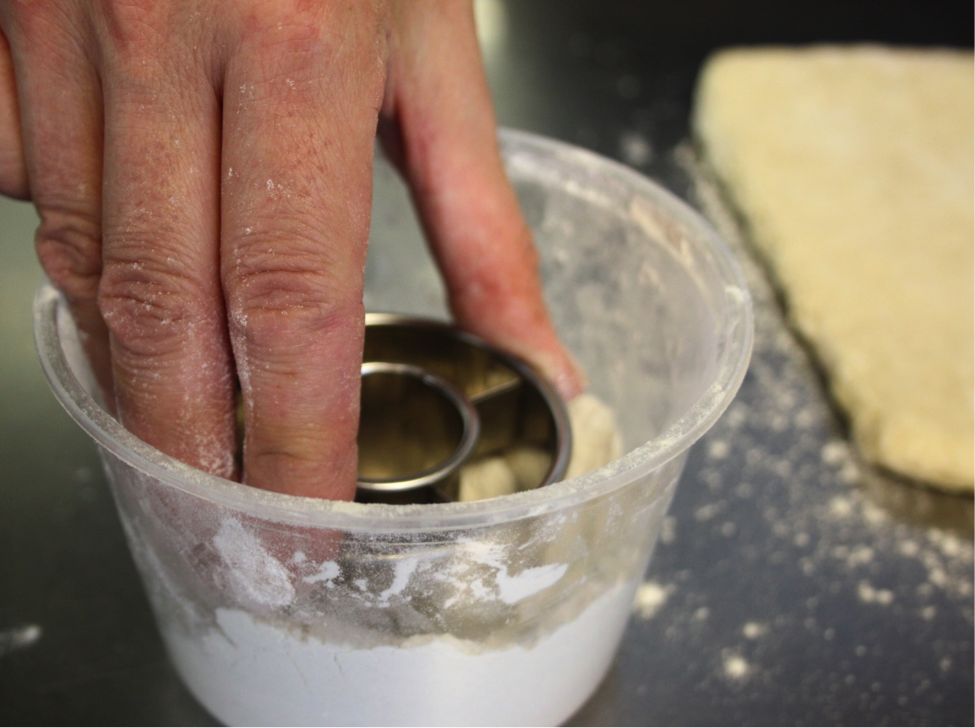
Make sure you flour the cutter each time you cut.
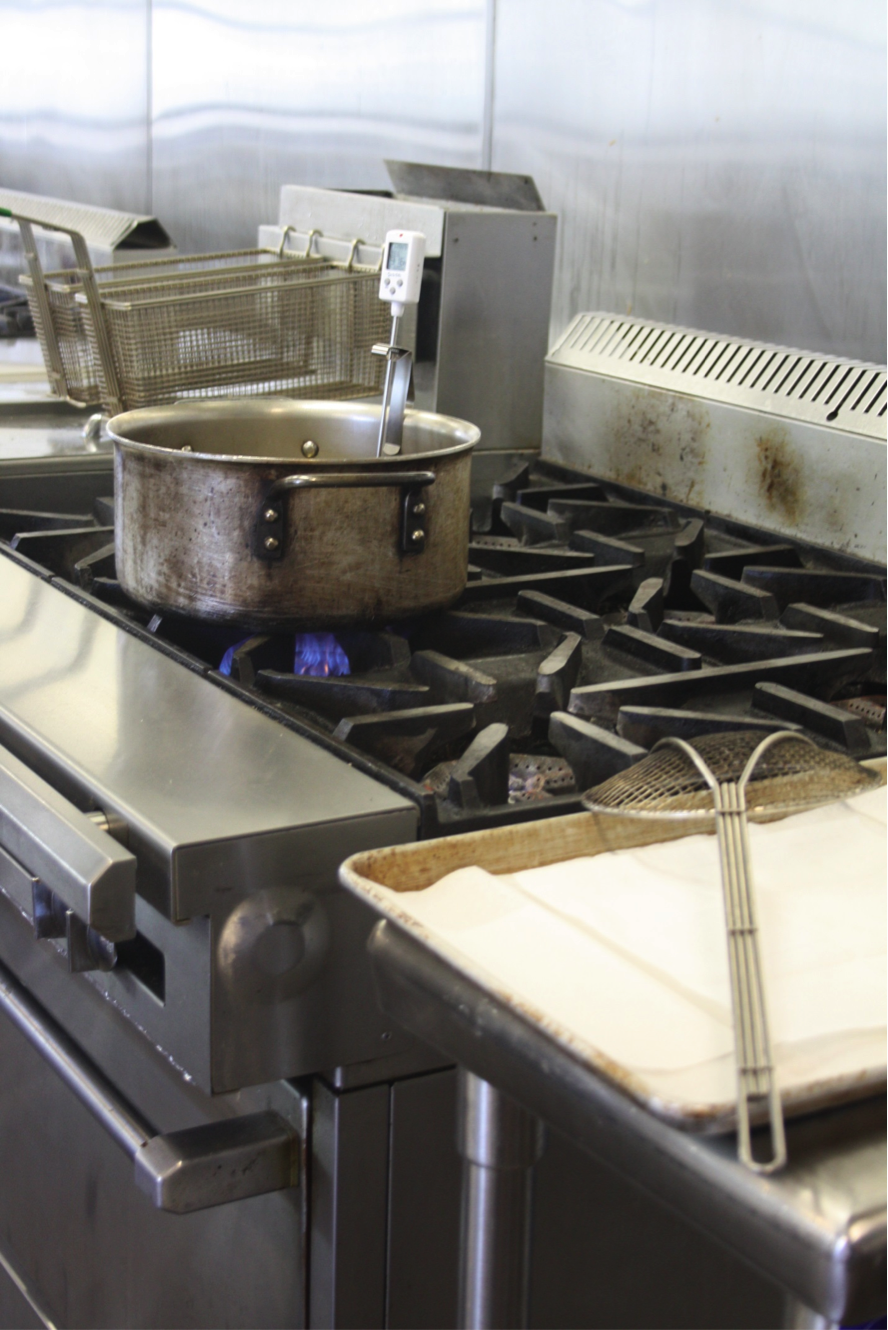
Step 2:
Set up a tall-sided pot with a candy or deep-fry thermometer. Put 5″ of vegetable oil in the pot and turn the heat to medium. Let the oil heat up to 325 degrees F.
Line a baking tray with paper towels to absorb excess grease. You can also use a rack.
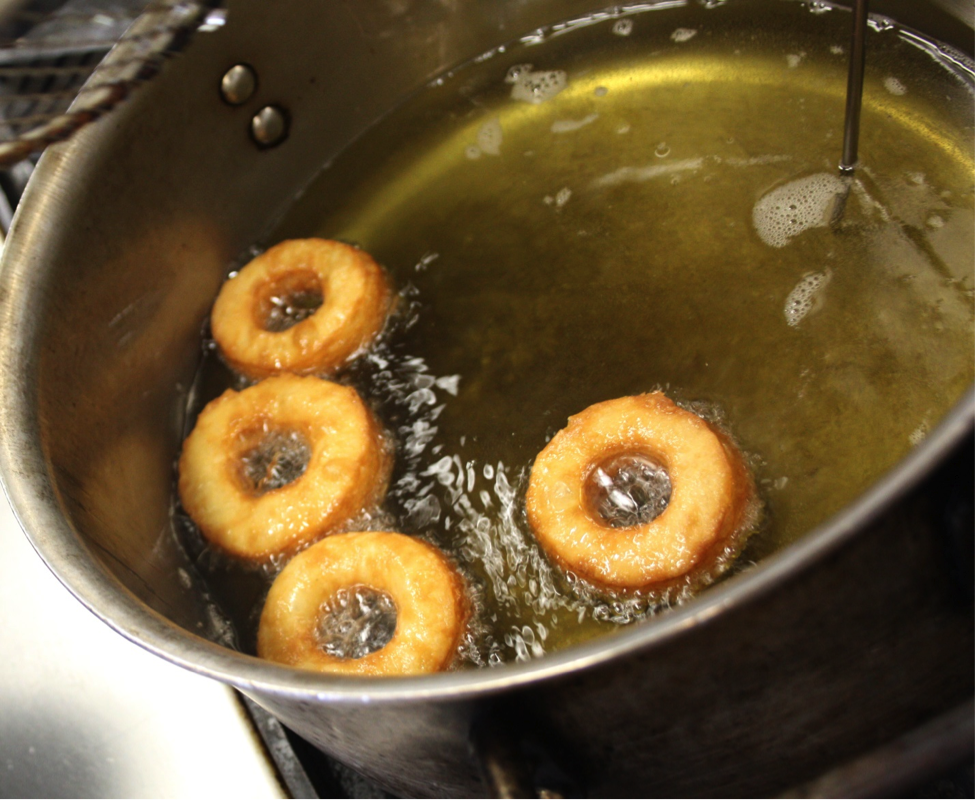
Step 3:
Drop the Cronuts carefully into the hot oil. They should bubble immediately and within 2-3 minutes take on color. Using a spider or slotted spoon, turn them over a few times so that their color is even.
This is the color you are looking for. Larger Cronuts will take a few minutes longer. You want to make sure they are cooked all the way through.
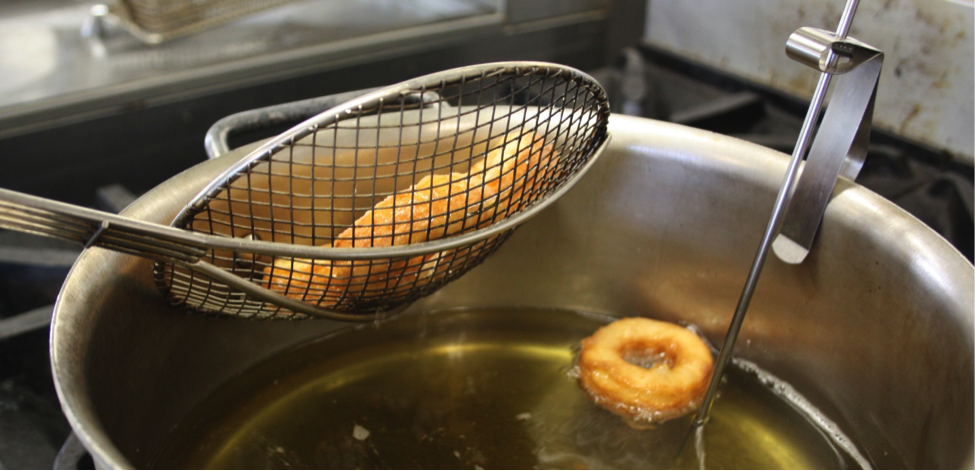
Step 4:
When removing the Cronuts from the hot oil, tilt the spider or slotted spoon against the side of the pot to drain off excess oil. Place them on the paper-towel-lined baking tray to drain, and let them cool for a few minutes.
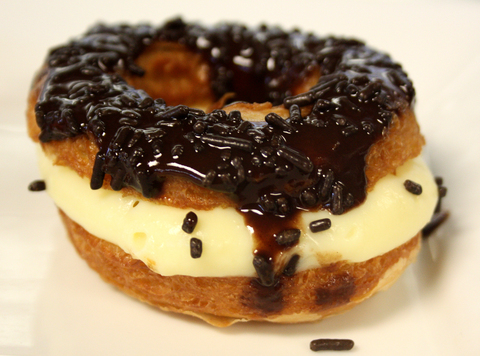
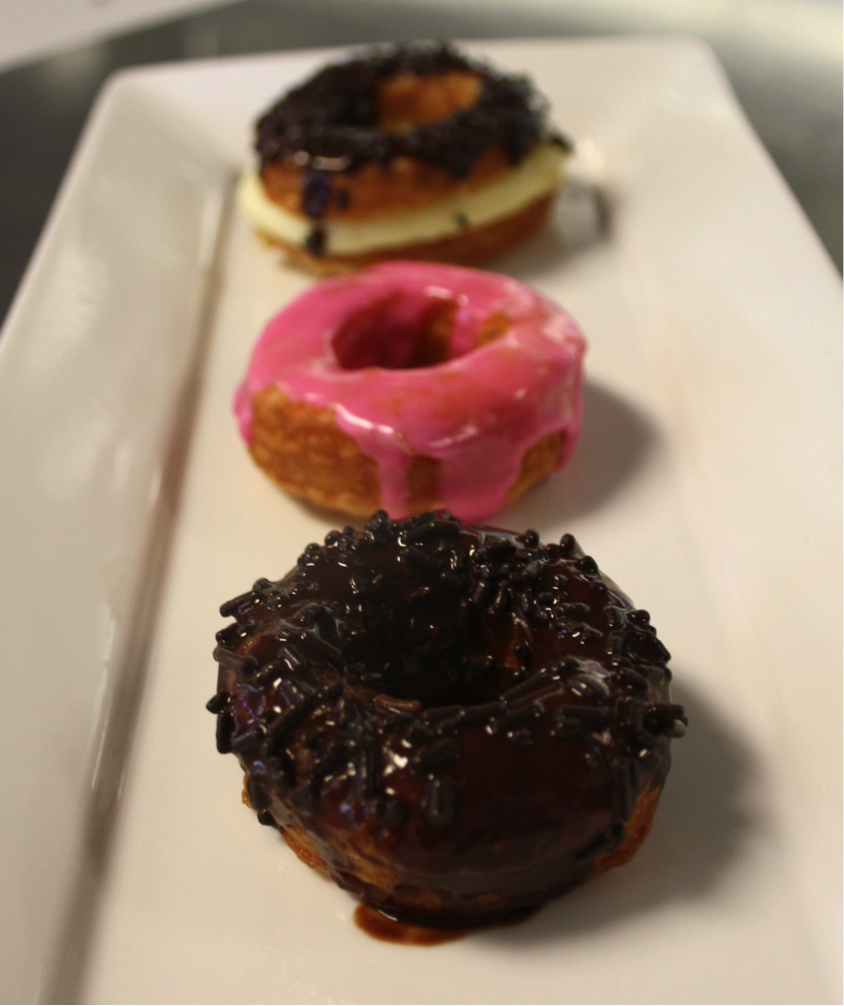
You can enjoy them on their own or spruce them up with extras:
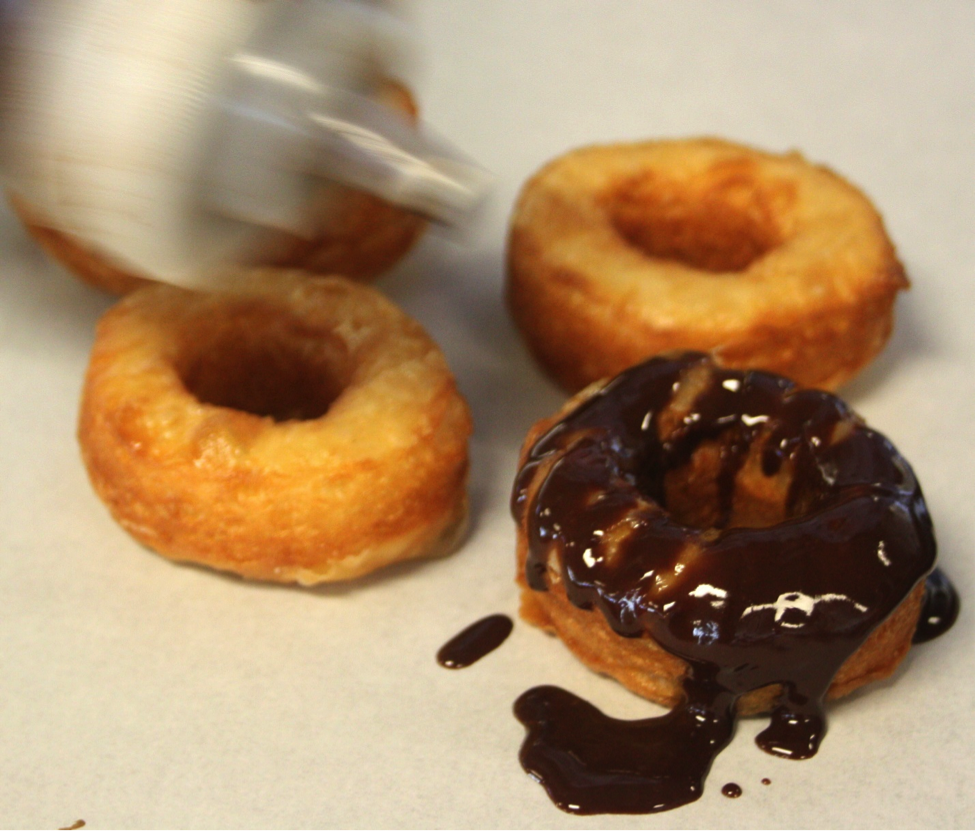
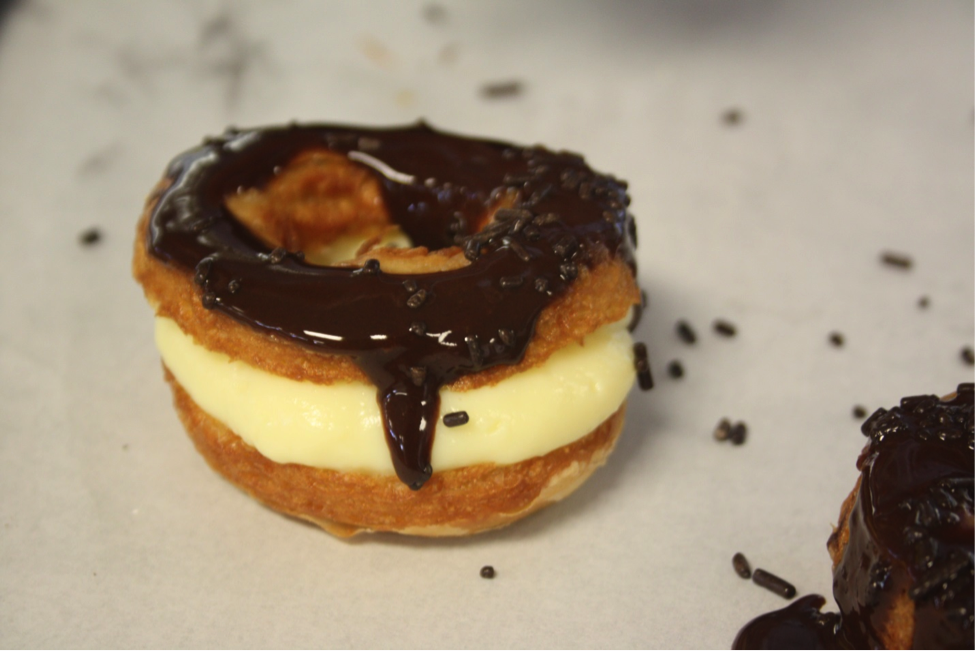
Icing with ganache
To make ganache, heat 1 cup of heavy cream to a rolling boil and then pour it over 1 cup of chocolate chips. Let stand for 30 seconds, then stir until smooth with a spatula.
A squeeze bottle works great for applying icing.
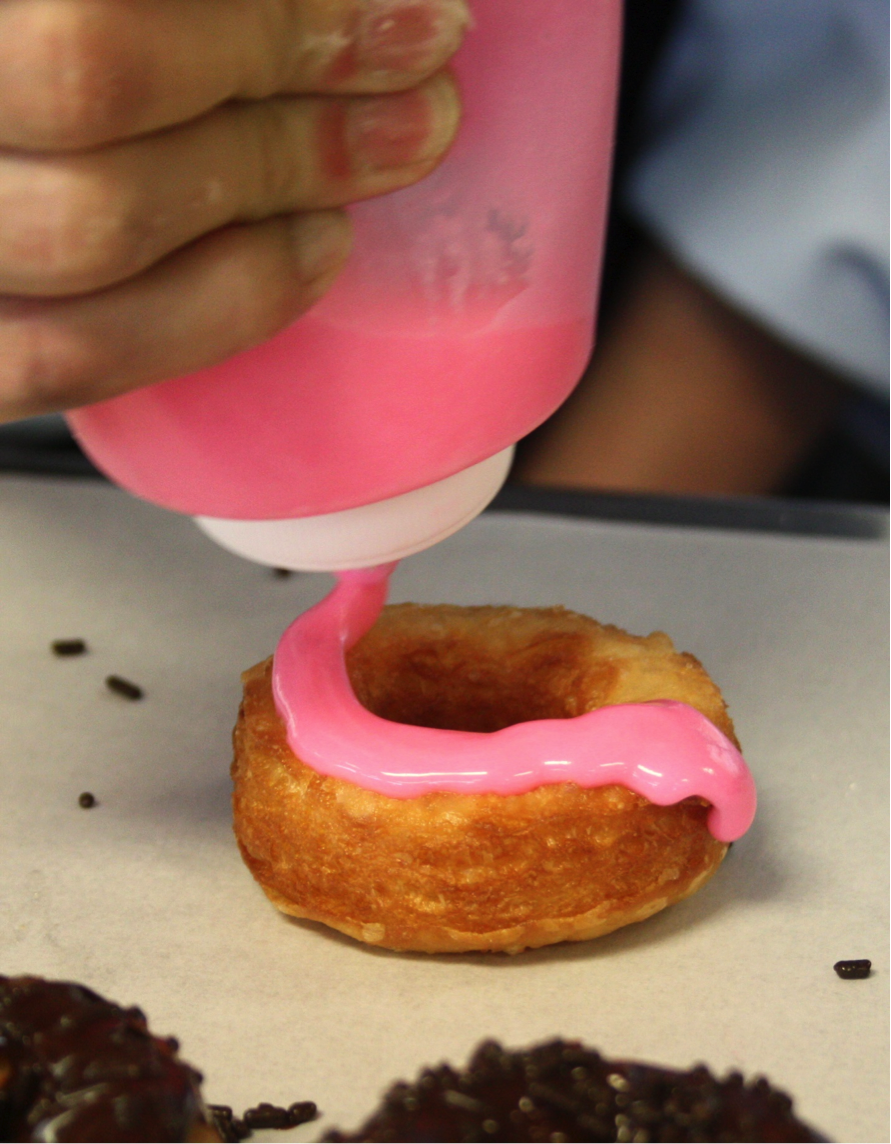
Pink icing
Whisk together 8 ounces sifted powdered sugar, 2 tablespoons milk, and enough food coloring to achieve the shade you desire. Continue whisking until smooth.
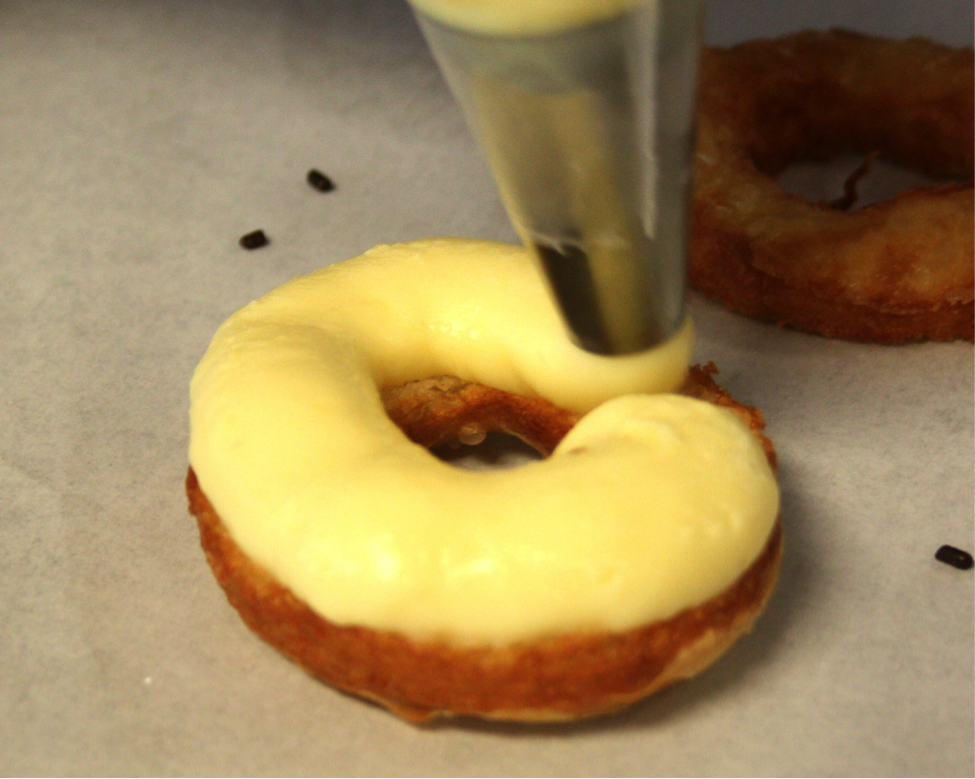
Filled Cronuts
Cut cronuts in half and fill with pastry cream.
Pastry Cream 101 – No Straining Necessary – Perfect almost every time
- 16 fluid ounces milk (set aside 3 ounces)
- 1/2 vanilla bean – scraped ** or 2 teaspoon vanilla extract
- 2 ounces sugar
- 3 tablespoons cornstarch
- 2 ounces sugar
- 4 egg yolks
- 1 ounce butter
Step 1:
Scrape the vanilla bean and blend with the first sugar.** If you are using vanilla extract, hold off on adding it until Step 8.
Step 2:
Place milk (13 ounces) in saucepan and pour in most of the “vanilla sugar.”
Step 3:
Bring the mixture to a low and boil.
Step 4:
Combine the cornstarch and remaining sugar together.
Step 5:
Whisk in the egg yolks and remaining 3 ounces of milk into the cornstarch and sugar mixture.
Step 6:
Temper (pour) in half the hot milk and then quickly pour the egg/milk mixture back into the pot.
Step 7:
Using the whisk as spoon, stir gently over medium heat and then as the mixture thickens, and whisk until smooth.
Step 8:
Add the butter and vanilla extract if you are using it.
Step 9:
The mixture should be smooth, but if you do see any sign of lumps, strain them.
Step 10:
Keeping the surface covered, cool over an ice bath.
Step 11:
Keep refrigerated. It will keep for up to three days.
Wait, almost finished.
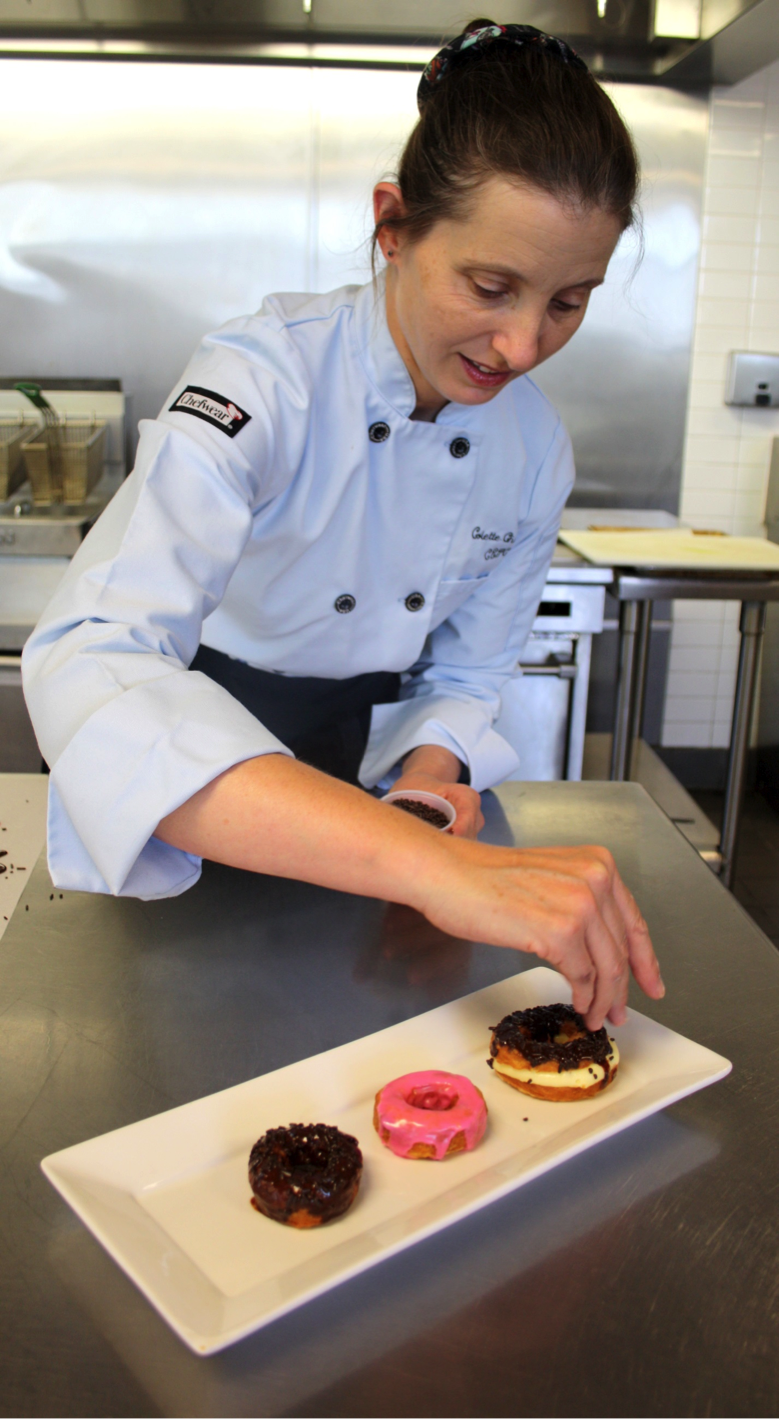
Add your finishing touches.
Voilà! Happy Baking!
All about croissants? Perfect the art of making homemade croissants (ooo la la!) with Colette in her virtual classroom in the cooking class Classic Croissants at Home.
You may also enjoy our posts on how to make homemade doughnuts and 20 creative doughnut flavors.
About Colette Christian
 Colette is a graduate of the the Art Institute of Chicago and the New England Culinary Institute. She has extensive training in baking and pastry and is a CEPC, certified executive pastry chef. Today, Colette lives in LA and teaches at several area schools: Art Institute Hollywood, AI Santa Monica and Great News in San Diego. She also taught at Le Cordon Bleu in Pasadena for many years. Although she thoroughly enjoys working in professional kitchens, what really makes her heart sing is teaching cooking and baking to others.
Do I have to egg wash and proof cronuts or just cut them out with doughnut cutter and put them in oil?
How many cronuts will this recipe make using 3" cookie cutter without cutting it in half because I want to make a large quantity? Thank you
When is the Cronut class available?