
 Photos via CakeSpy
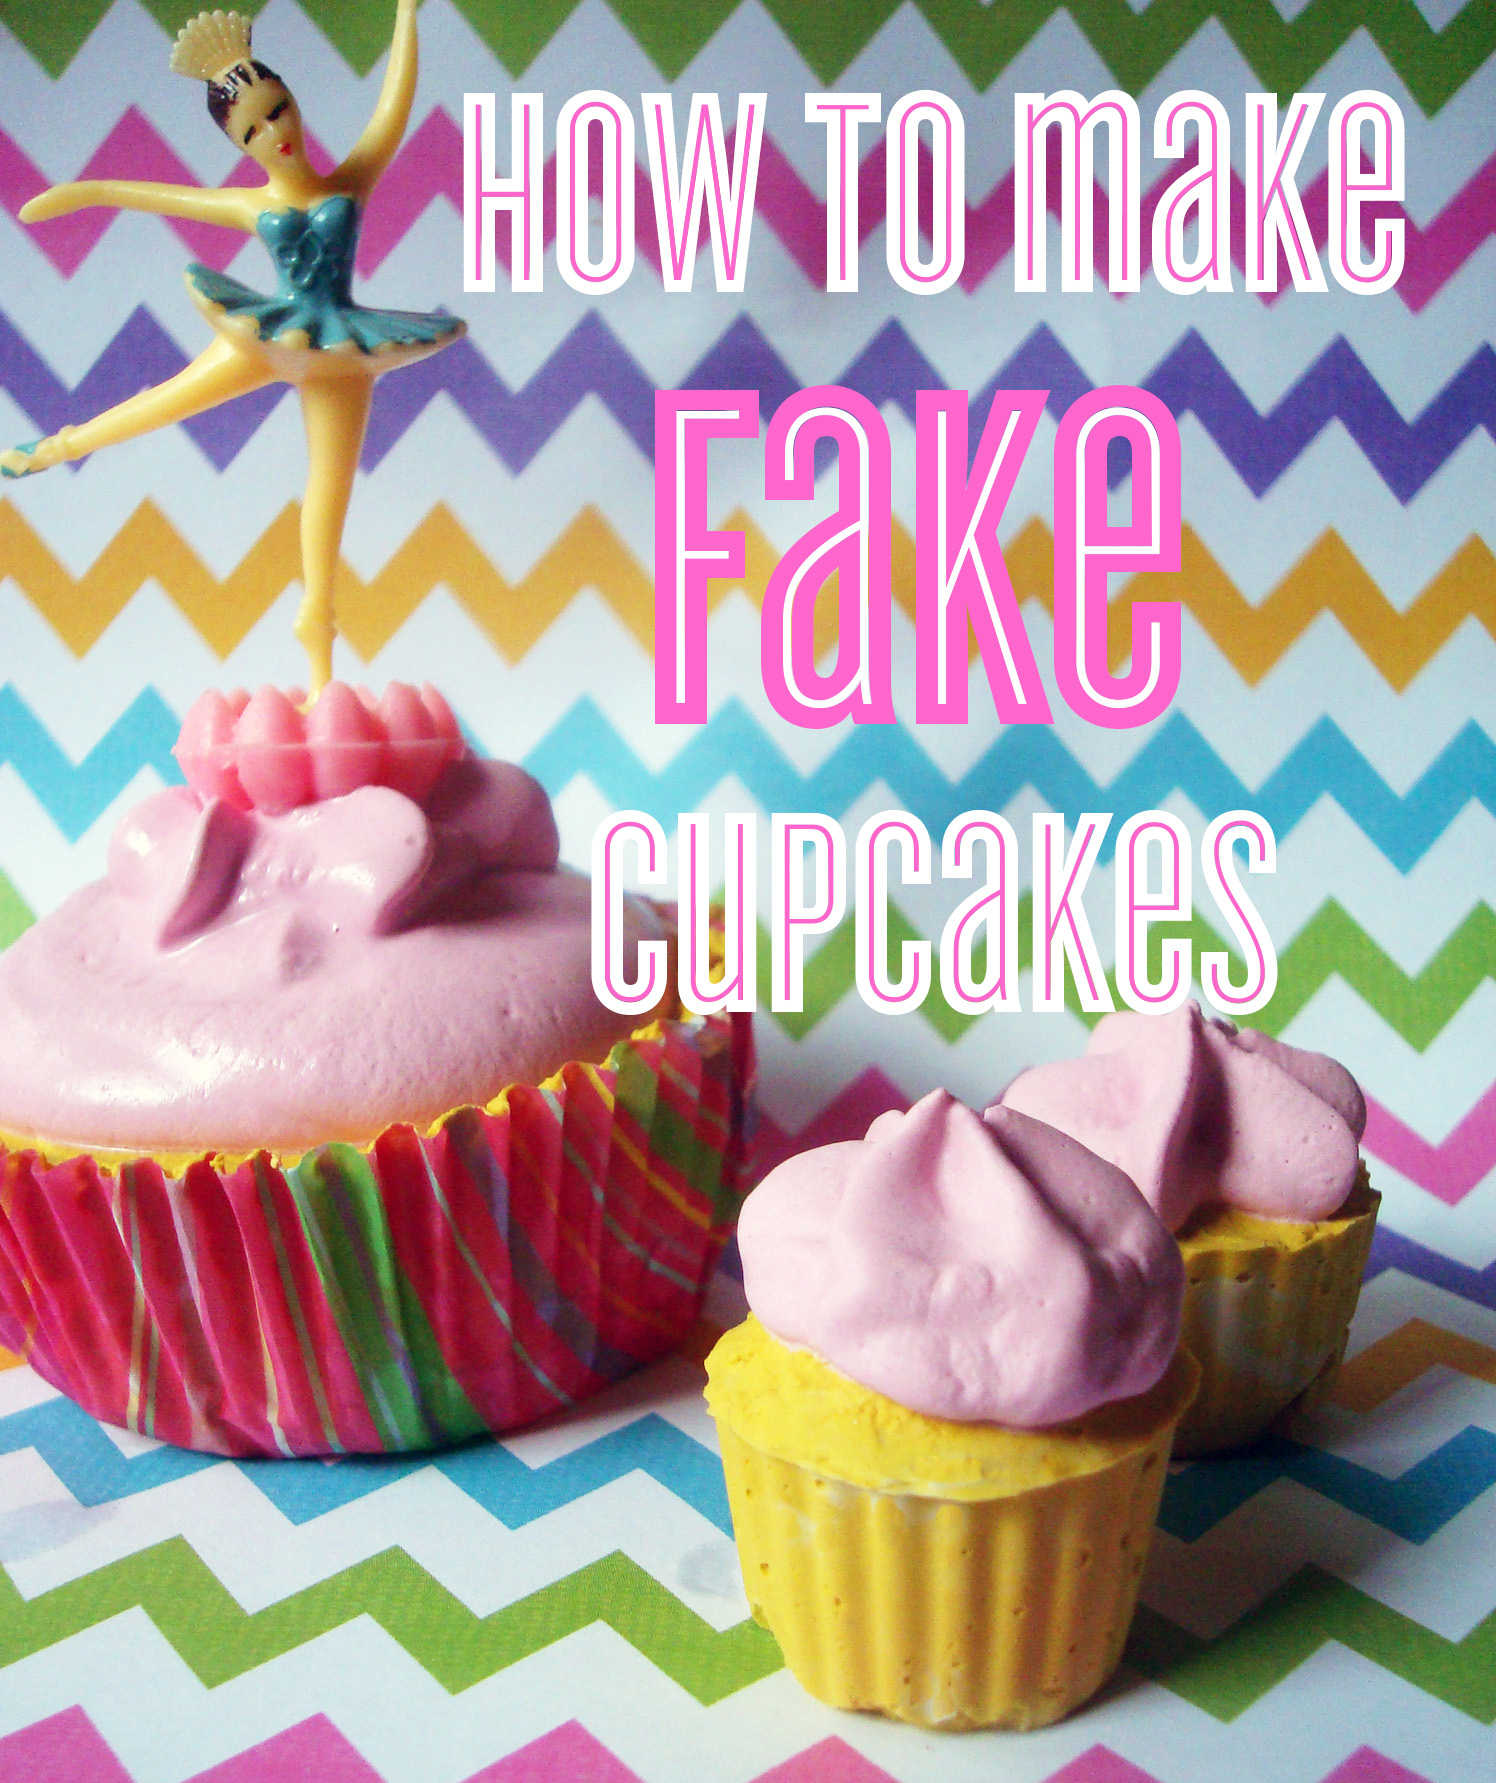
When it comes to a sweet snack, most people prefer their cupcakes edible: moist cake, rich buttercream, and all. However, there are a number of good reasons why you might want to learn how to make and decorate fake food cupcakes, too.
The shelf life of actual cupcakes is quite short, and they are susceptible to the elements. So when making cupcakes for a window or trade show display, or for a photo shoot, you might want to embrace the faux cupcakes so that you can get the look without the liability.
This tutorial will guide you through how to make fake cupcakes using plaster of paris (yes, the same stuff you used for papier-mâché in grade school). This inexpensive medium is easy to form into beautiful cupcakes that are super sweet, just not to eat!
How to make fake food cupcakes
Recipe notes
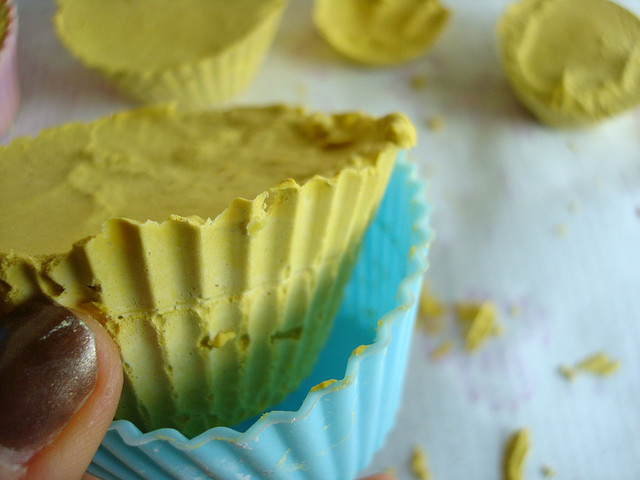
Use silicone cupcake liners for best results. Paper liners will sag and become soggy, whereas the silicone ones will retain their shape and peel off easily once the plaster has set. You can place the finished cupcakes in paper liners once the plaster cupcakes are dry, if desired.
Be sure to wash all utensils and materials used to mix your plaster directly after using. Once it sets, the plaster is extremely annoying to clean off of plates and plastic mixing bowls.
For the “cakes”
- Plaster of paris
- Water
- Acrylic paint
- Silicone cupcake liners
For the “icing”
- Plaster of paris
- Water
- Acrylic paint
- Piping bag and tip (optional)
To decorate
- Glitter
- Fake fruit
- Beads
- Clay
Step 1:
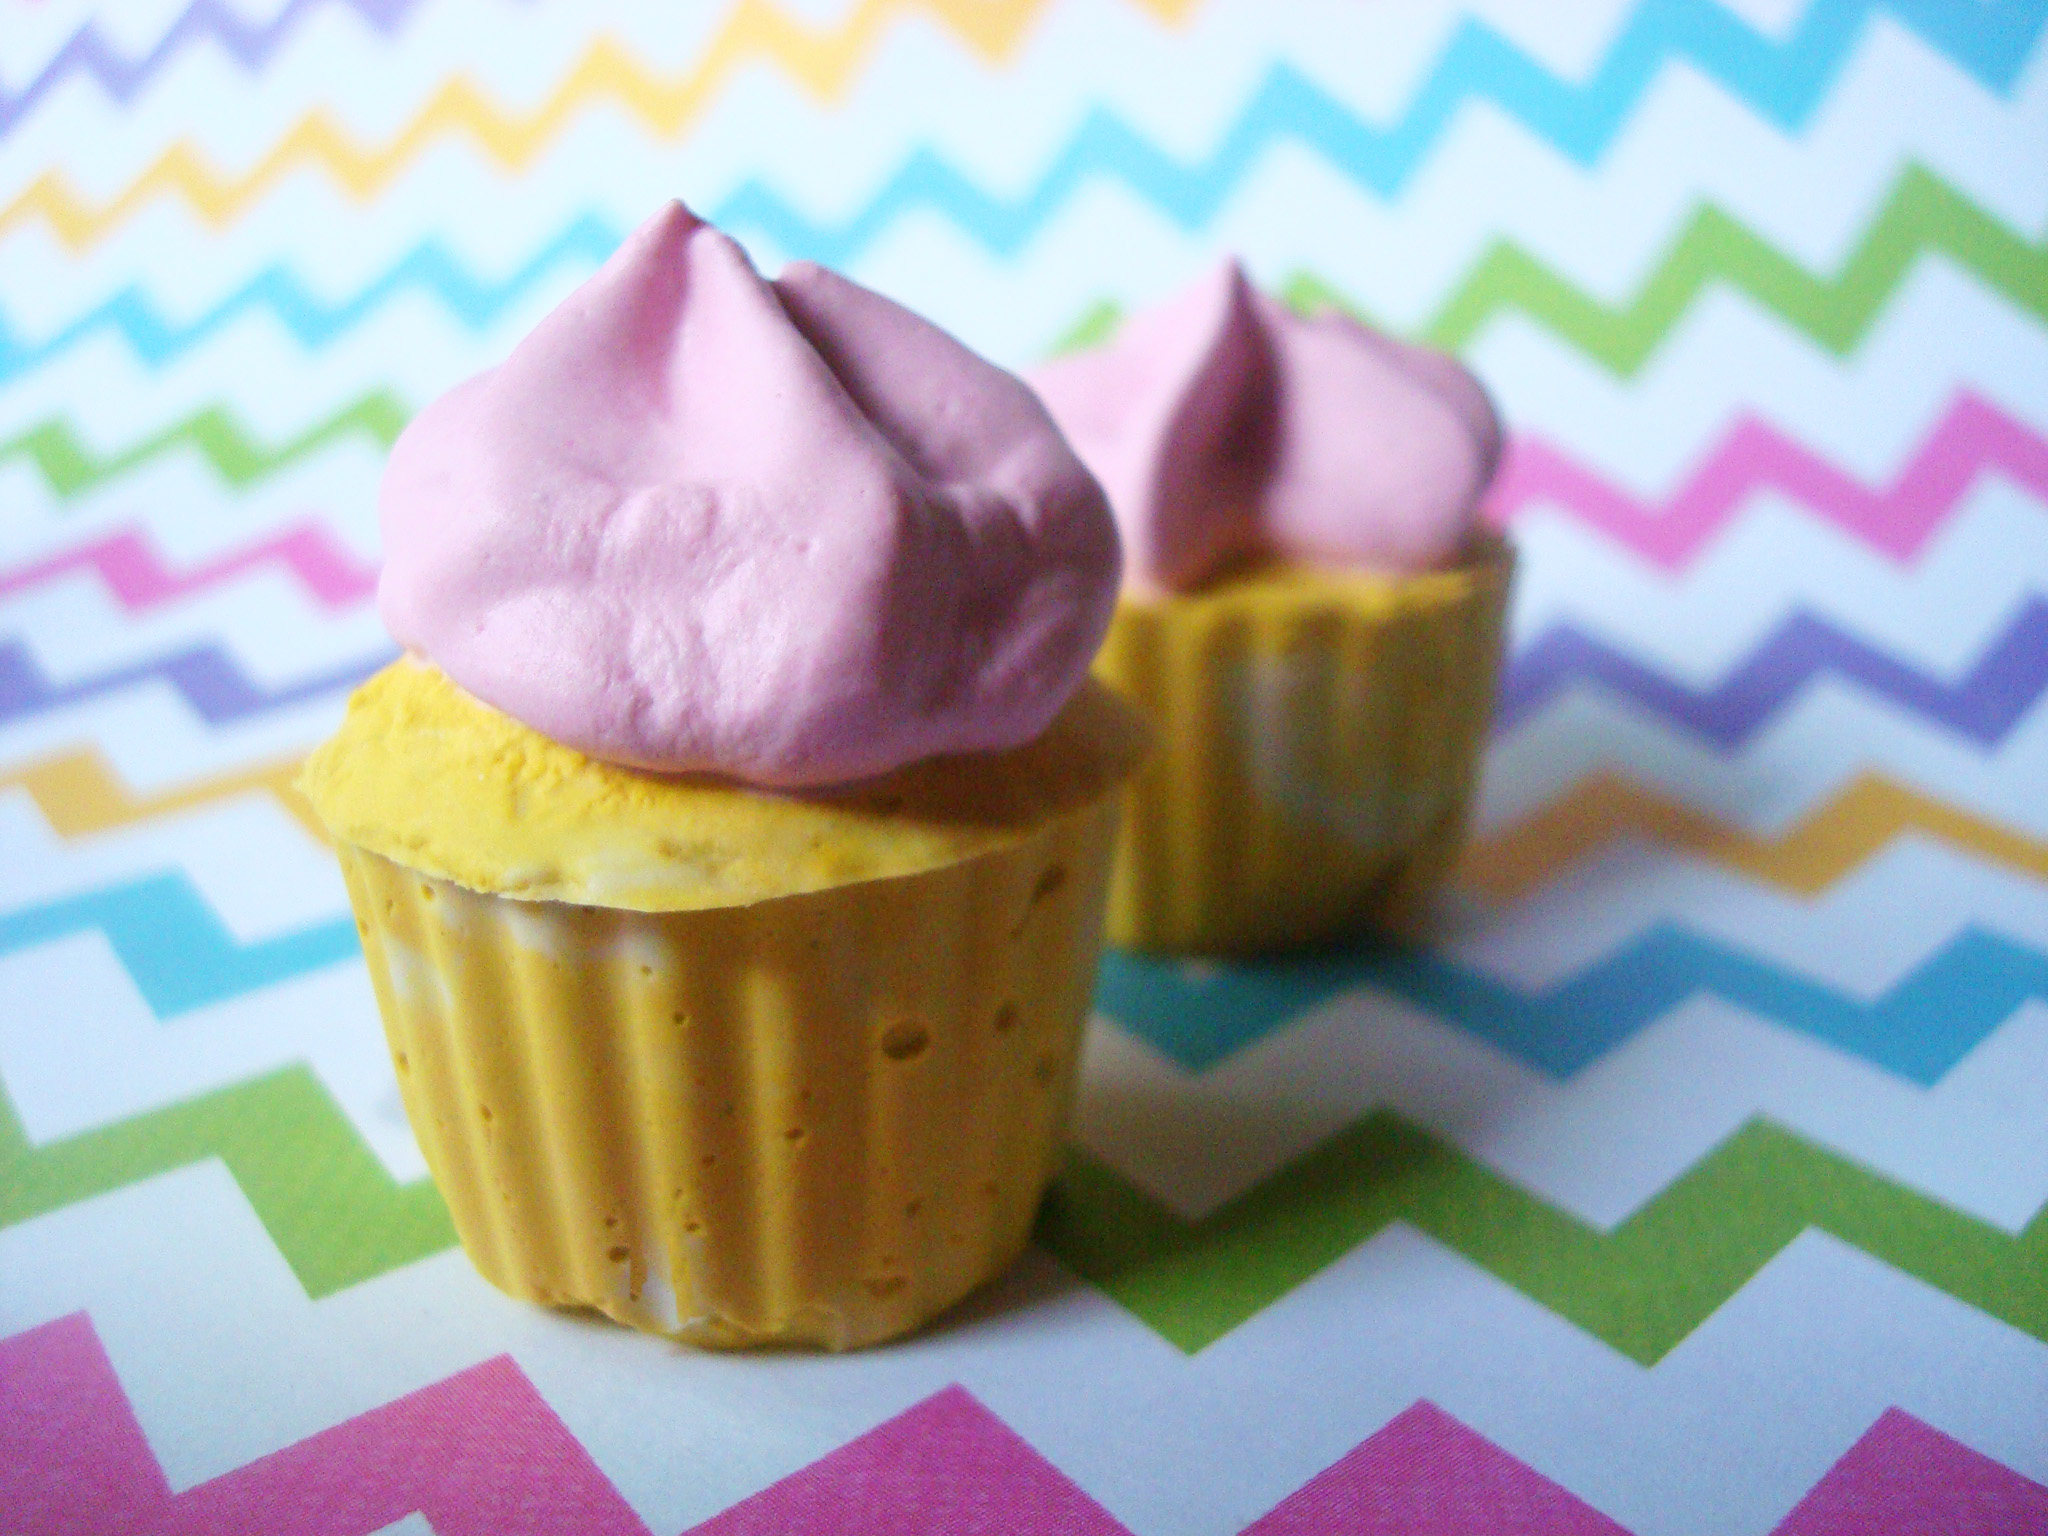
Make the cakes. In a plastic container, mix plaster and water (usually 1 part each, but adjust to an easily spoon-able but thick consistency). You can mix up whatever quantity you’d like. If you make about 3-4 cups at a time, this will make 8 or so 4-ounce cupcakes.
Add a small bit of water-soluble paint (such as acrylic or gouache) in the color that you want the bottom part to be, and mix until the color is to the point you like it. Pour into the cups ’til they level off at the top, with a slight dome if you prefer. Let these bottoms set for at least an hour before proceeding.
Remove from the cups. If there is slight breakage or bubbles along the side, don’t worry–you can reduce the “damage” by going gently over these bits with sandpaper.
Step 2:
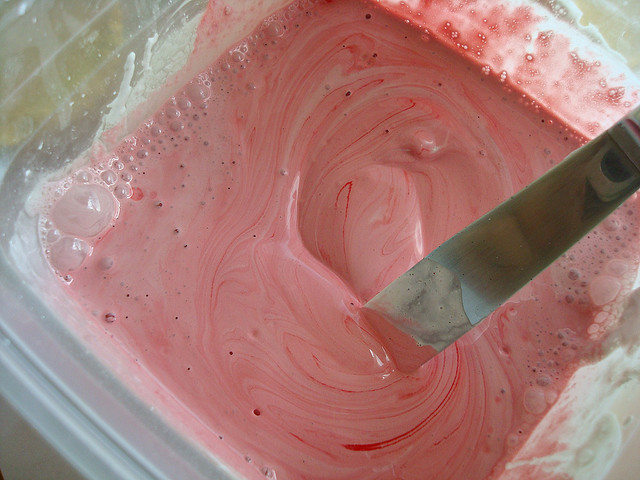
For the frosting, use the same steps to create a plaster mix, but with whatever color you’d like for the frosting mixed in. Make around the same amount you made for the “cake” part, or a little less.
For this batch, adjust the consistency so that it is a little thicker if you’d like to pipe the “icing” into designs on top of the cake, so that it will hold its shape.
Step 3:
If you’d like to pipe the “icing,” load up a pastry bag fitted with a tip with a fairly large opening. Pipe on top of your cupcakes as you would with buttercream. If the plaster icing is not holding its shape, either wait a few minutes until it has become more firm (this will happen naturally) or mix a little more plaster into your icing mixture.
You can also simply spoon the “icing” on top. Using a spoon, gently put a spoonful on top of each cupcake, adding another spoonful to get a gentle “tiered” effect on the frosting, which will kind of melt into a pleasing cupcake frosting-y shape.
Step 4:
If you are using beads or glitter to resemble sprinkles, or adding elements that will need to be adhered, now is a good time to add them, while the “icing” is still a bit wet; items will stick better.

If you will be including elements, such as a bead or clay element as a topper that you want to add later, you can make a small indent so that you’ll have an easy place to affix it when it is dry.
Step 5:
Let them set overnight or until they’re very firm and completely dry.
Decoration ideas
 Macaron cupcake topper via Sheryl Bito
Looking for inspiration for cupcake decorations? Some easy decorations are to use seed beads for “sprinkles” or larger wooden beads or marbles to resemble candies or cherries on top. However, if you’re more ambitious, you might consider adding more elaborate cupcake toppers.
Using the methods taught in Craftsy course Tiny Cupcake Toppers, recreate these sweet toppers in clay and you’ve got amazing toppers for your fake cakes!
Share tips, start a discussion or ask one of our experts or other students a question.
No Responses to “Sweet, But Not to Eat: How to Make Fake Food Cupcakes”