
The first time I had good pastrami was nearly 5 years ago at a place called Kenny & Zuke’s in Portland, Oregon. I may be exaggerating when I say it was life changing, but I may not be.
It was tender, juicy, had a good bit of fat laced throughout, perfectly salted, spicy but not too much. It was the perfect match for Russian dressing, rye bread and sauerkraut.
I fell so hard for this pastrami that I took a class from the former owner of the restaurant, Nick Zukin, who, along with Michael Zusman, wrote the book Artisan Jewish Deli. It took me another year to finally make the pastrami at home.
Below I let you in on what I learned along the way with this step-by-step tutorial on how to make pastrami at home.
In the class, I saw how easy the process is and yet for the longest time I was simply intimidated by the time the entire process takes — Five days. But don’t make the same mistake I did and wait a year to try this recipe! It’s an incredibly simple process. The hardest part is the wait, and yet somehow I feel that it makes the enjoyment of the final dish that much better.
How to make pastrami
Adapted from Artisan Jewish Deli
Ingredients:
- 3 quarts (12 cups) cold water, for the brine
- 2 cups Diamond Crystal (or other large-crystal) kosher salt
- 1/4 cup pink curing salt
- 1 cup granulated sugar
- 1/2 cup firmly packed dark brown sugar
- 1/4 cup honey
- 2 tablespoons pickling spice (I used a spicy mix)
- 1 tablespoon whole coriander seeds
- 1 tablespoon whole yellow mustard seeds
- 4 cloves garlic, sliced
- 3 quarts (12 cups) ice-cold water, for the brine
- One 3- to 4-pound beef brisket
- 4 cups cold water
Spice rub
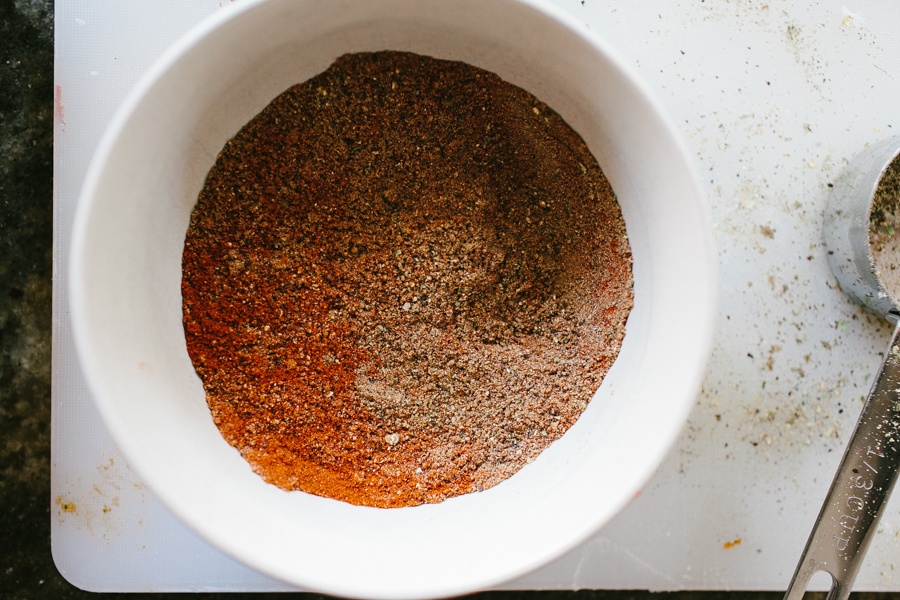
- 1/4 cup ground coriander
- 2 tablespoons freshly ground black pepper
- 2 tablespoons smoked paprika
The brine
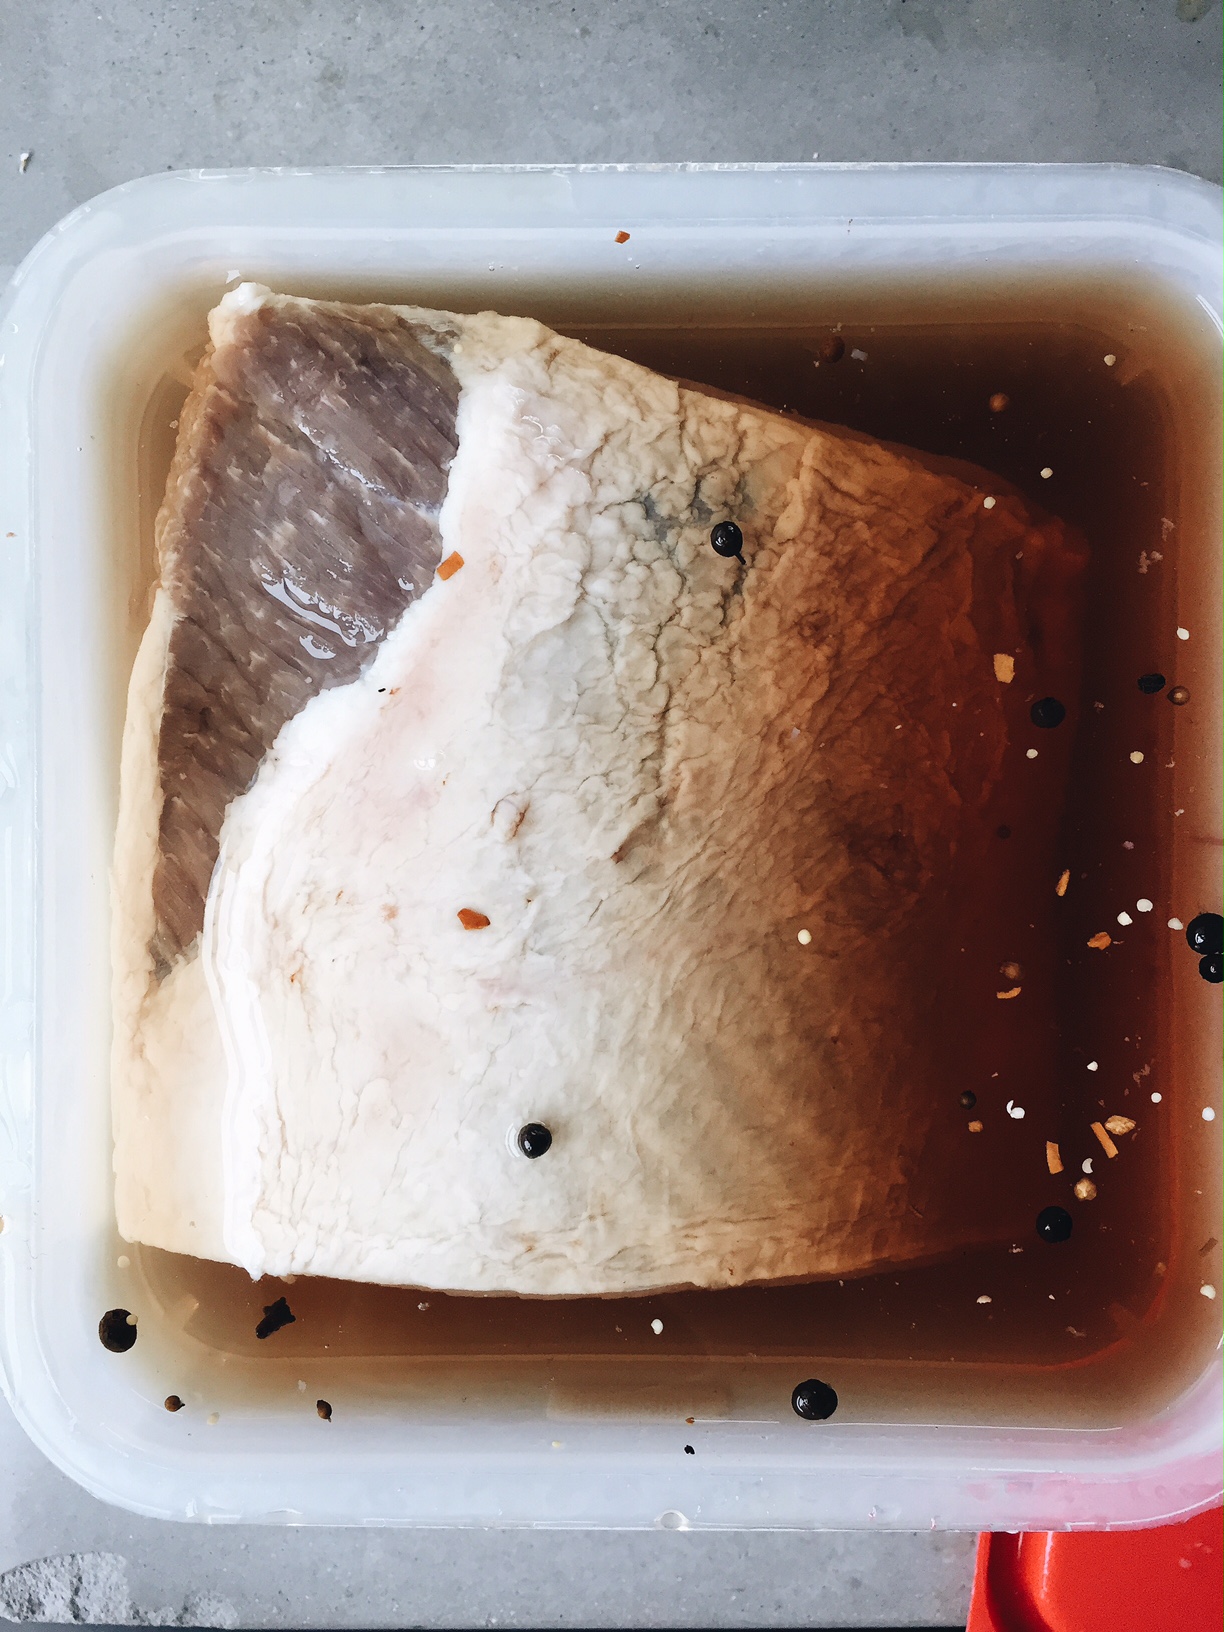
- Fill a large stockpot with 12 cups (3 quarts) cold water.
- Add the kosher and pink curing salts, sugars, honey, pickling spice, coriander, mustard seeds, and garlic.
- Bring the brine to a boil over high heat, stirring occasionally to fully dissolve the salt and sugar in the water. Remove the pot from the heat once the brine boils.
- Add the 3 quarts ice-cold water to a 2-gallon (or larger) food-safe container that will fit in your refrigerator. Pour the brine into the container with ice, stir, and place the container, uncovered, in the refrigerator until completely cool, about 2 to 3 hours.
- Trim the excess fat from the brisket until the fat layer remaining on the brisket is about 1/4 inch thick.
- Submerge the brisket in the cooled brine. If it doesn’t fit you can cut the brisket into two pieces.
- Refrigerate the brisket for 5 days, stirring the brine and flipping the brisket once a day. Make sure that if any of the brisket sides are touching one another that you regularly turn them away from each other to expose all the brisket to the brine.
Make the spice rub
Mix together the coriander, pepper, and paprika in a small bowl.
Roast the pastrami
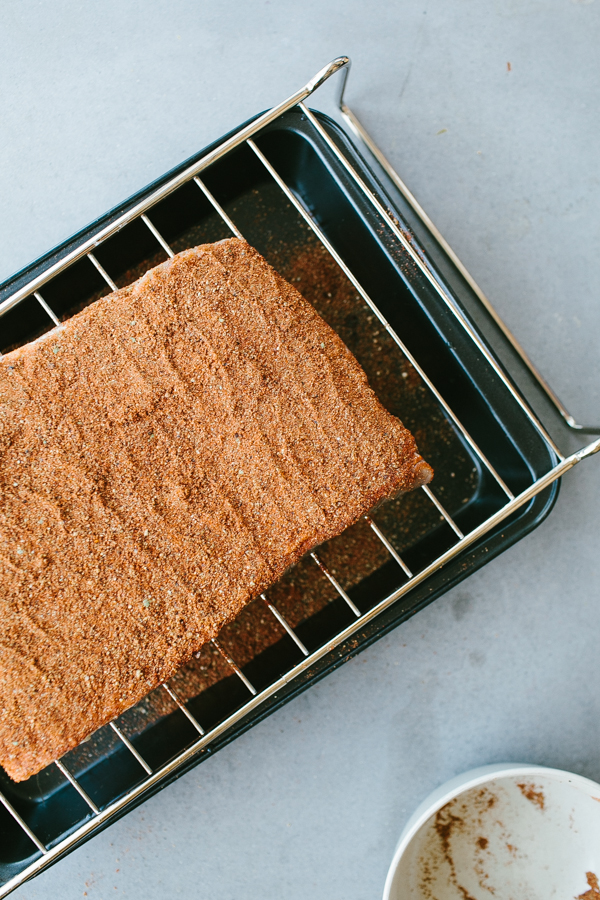
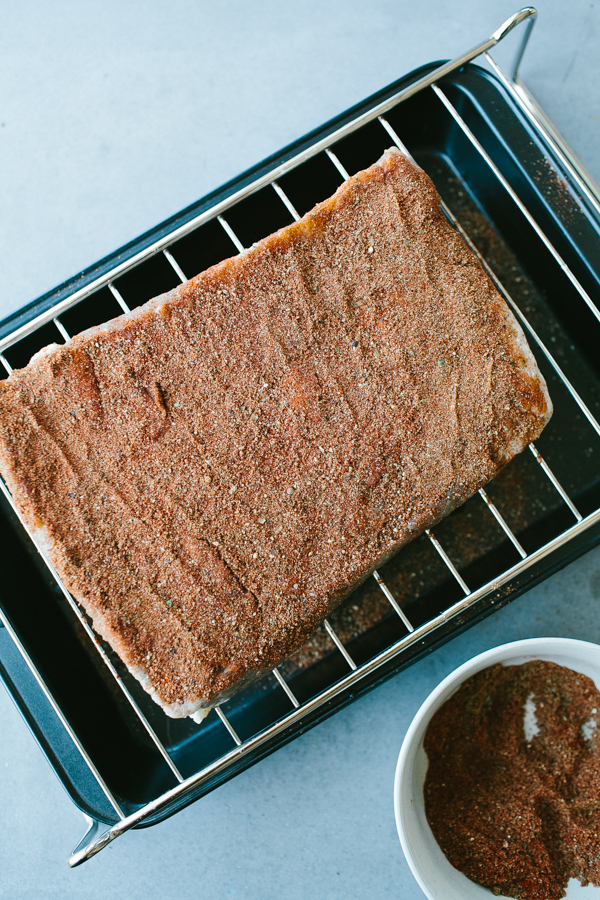
- Remove the brisket from the brine and pat it dry. Rub 1/4 cup spice rub evenly on the non-fatty side of the brisket, then flip the brisket and rub the remaining spice mixture onto the fatty side.
- Let the brisket come to room temperature for about two hours.
- Preheat the oven to 300°F (149°C). Pour 4 cups cold water into the bottom of a 12×15″ roasting pan. Set a wire rack inside the pan.
- Place the brisket on the wire rack, fatty side up. Tightly cover the brisket and roasting pan with a double layer of aluminum foil. Bake until the brisket reaches an internal temperature of 200°F (93°C). This will take about one hour per pound or three to four hours total.
Serve
- Let the meat rest for at least 30 minutes before slicing.
- Without trimming the fat, carve the pastrami against the grain into 1/4″ slices.
- Keep the meat tightly wrapped in aluminum foil or plastic wrap in the fridge for up to one week or frozen for up to six months.
- Be sure to serve with plenty of Russian dressing!
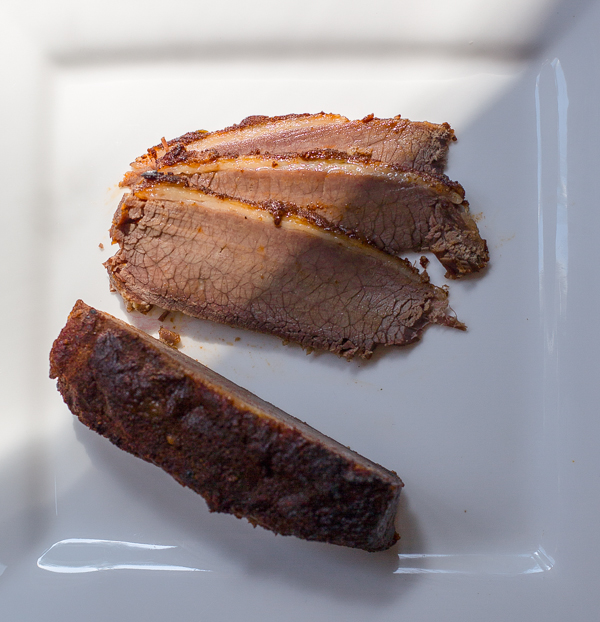
Note: I apologize for the sad looking image of the final product. I was so excited to finally get to eat the pastrami I failed to remember to snap a photo. Instead I asked my brother to quickly shoot one as he was sent home with the leftovers and this is what he shot just before his dog came and ate it while he stepped away to grab more photo equipment.
Share tips, start a discussion or ask one of our experts or other students a question.
No Responses to “Skip the Deli Line! Learn How to Make Pastrami at Home”