
It’s possible to make your own plywood by adding veneer to commercial plywood, but why go to the trouble when you can buy readymade plywood in any number of species? There are several reasons to make your own!
Read on to learn why and how to make plywood.
Photos via wooden-box-maker.com
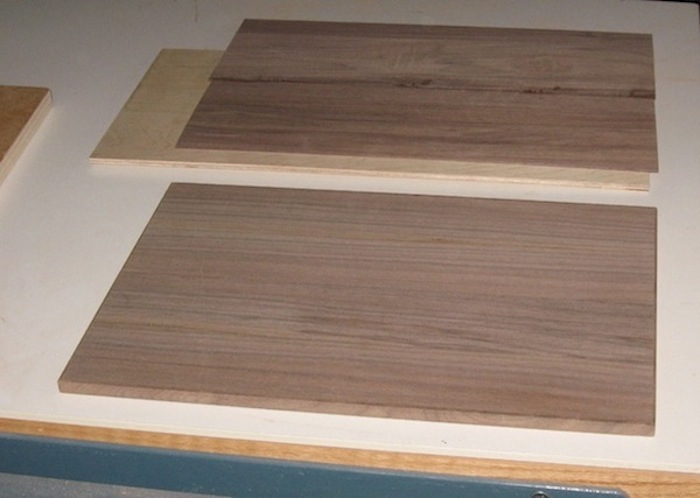
I usually make my own ply when I find a beautiful piece of wood that is too small to use on its own, but can be resawn into usable sheets, like the figured walnut below.
Other reasons to make your own plywood:
- You can make the veneers thicker than what is found on commercial plywood. (It is way too easy to sand through veneers on commercial plywood.)
- You can make what you need, avoiding the need to buy a full sheet when you only need a little bit.
- You can build up your ply in layers and bend it as you go to form curves.
- Sometimes, you may need the stability of plywood, but can’t find the species you want.
Making the plywood
I usually start with 1/8” or 1/4” commercial plywood as the core for my own veneers. I glue my veneer (often a full 1/16” thick) onto each side. If the whole board is going to be seen I will also add wood to all the edges. If you want to make it hard to tell your board from solid wood, make sure the grain is going in the right direction. It will be cross grain on the ends and edge grain on the sides.
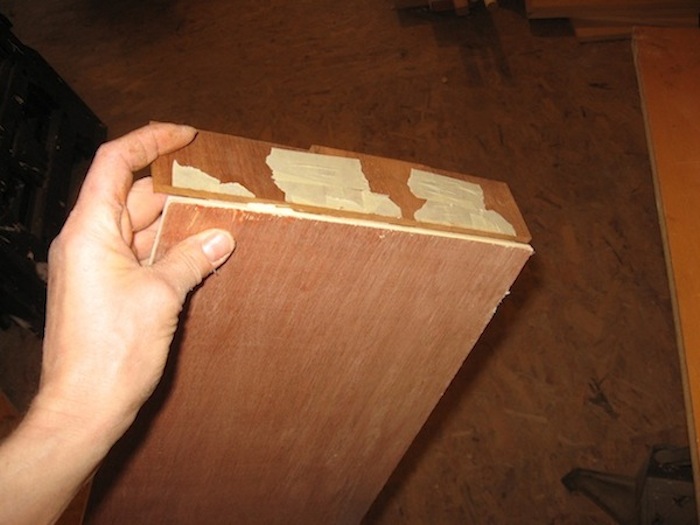
Note the grain direction for the end grain of the board. Excess will be trimmed later.
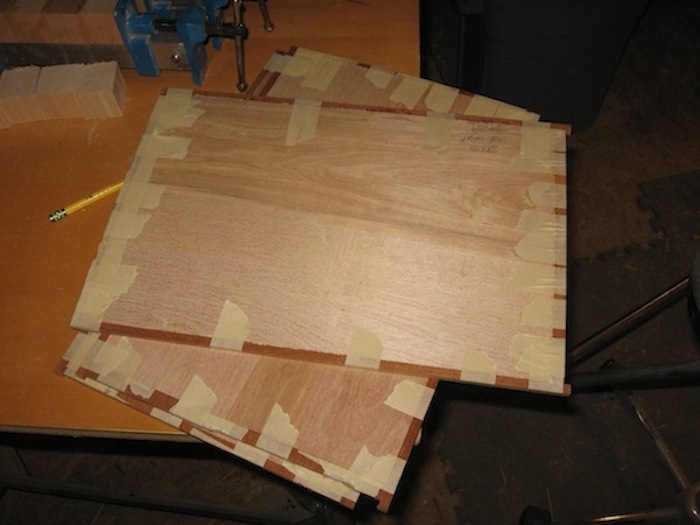
I glue on all the banding around the edges first. Masking tape pulled tight makes a great clamp for edge banding.
Then, when the banding is dry, I cover the whole thing with the veneer.
Tips to keep in mind when making your own plywood or veneering:
Whatever you do to the top, you need to do to the bottom. In other words, temping as it may be, don’t veneer only one surface. If you do, the difference in wood movement will cause the entire sheet of ply to twist and warp.
For the same reason, you can’t add 1/16” veneer to one side and 1/32” to the other. In fact, it’s good to use the same species, although I confess I often use a similar wood rather than the same one if I’m trying to save wood.
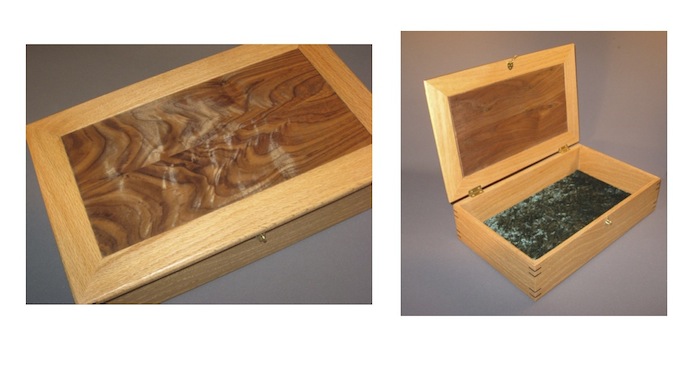
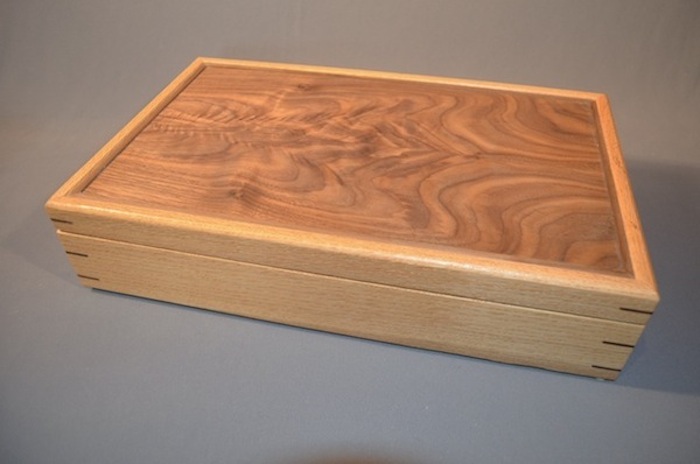
Note the different grain pattern inside and out in the photos above. I used figured walnut for the outside and more common straight grain for the inside. That way, I got two boxes worth of figured wood.
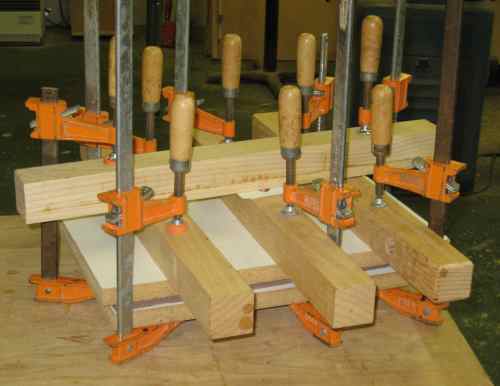
To attach the veneer, I clamp the wood between two flat counter top boards that I keep on hand for that purpose. The melamine stays flat and the laminate makes for easy glue removal if there is any squeeze-out. I use clamps and cauls to keep the pressure even and put a thin shim (the thickness of a playing card or less) under the top middle caul to make sure the center of the wood gets clamping pressure as well as the outside.
One last thing I have learned the hard way is to make the veneer sheets oversized. No matter how careful I am, there is always some movement when I tighten the clamps. You really don’t want the veneer to slide off the substrate. While it is possible to repair the damage, it’s not an enjoyable chore.
There you have it! Veneering your own plywood can be fun and gives a whole new layer of flexibility to your woodworking. I encourage you to give it a try.
Share tips, start a discussion or ask one of our experts or other students a question.
No Responses to “Expand Your Options By Learning How to Make Plywood”