
It’s that time of year: warm enough to bring out your short-sleeved sewing patterns, but not quite warm enough to wear them yet. Rather than wait to start sewing, try lengthening the sleeves! I’ll guide you through the steps for how to make sleeves longer, just in time for spring.
It is surprisingly simple to draft a long or three-quarter length sleeve — you will be wearing your new garment before you know it! The nine easy steps below cover two situations: patterns with sleeves cut on the fold, or patterns where the sleeves are cut flat.
How to make sleeves longer on a short-sleeve sewing pattern in 9 steps
You will need:
- Sample garment to measure new sleeve length. It should be in the same fabric as your short-sleeve pattern. For example, use a woven garment for a woven pattern, and a knit garment for a knit pattern
- Short-sleeve pattern piece
- Paper large enough to trace the new sleeve
- Pen/marker
- Ruler or straight edge
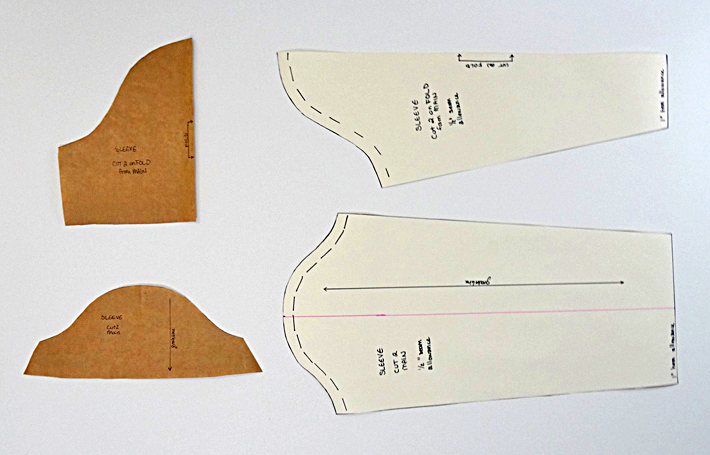
Lengthen a sleeve pattern with sleeves cut on the fold
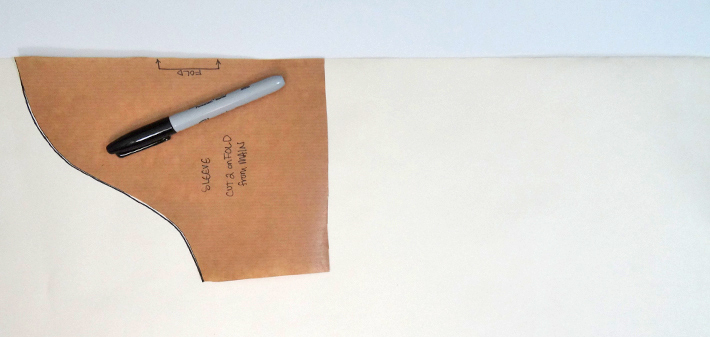
Step 1:
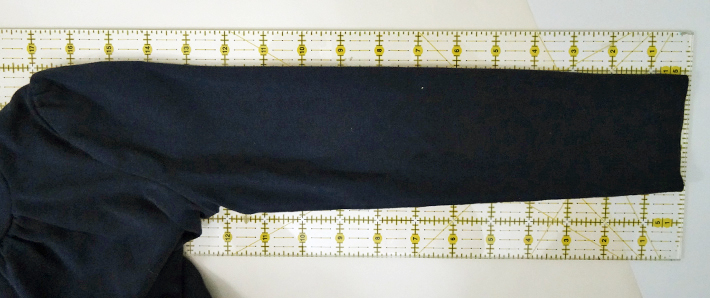
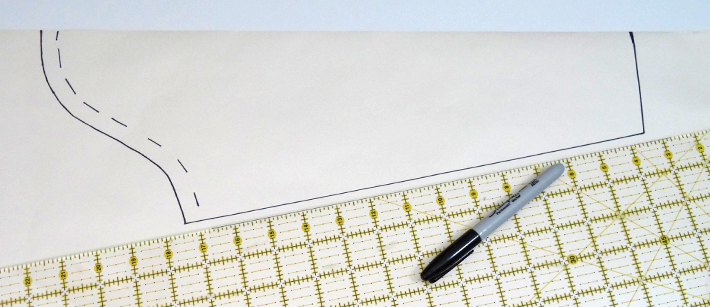
Lay the sleeve on the tracing paper with the fold along one straight edge. Leave enough room on the paper to create the entire sleeve length. Trace the top curved edge of the sleeve pattern onto the paper, stopping at the corner.
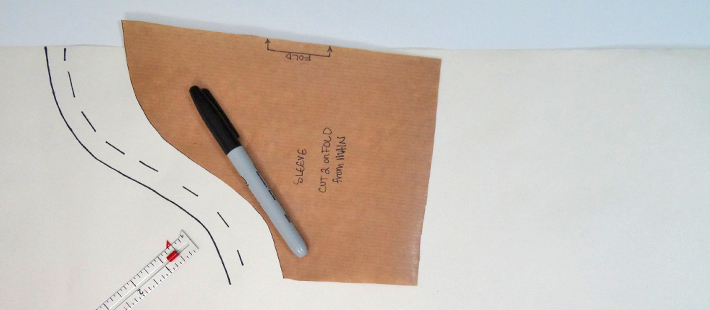
Step 2:
Check the seam allowance in your pattern directions and mark it on the top shoulder of your pattern piece. Remove pattern piece.
Step 3:
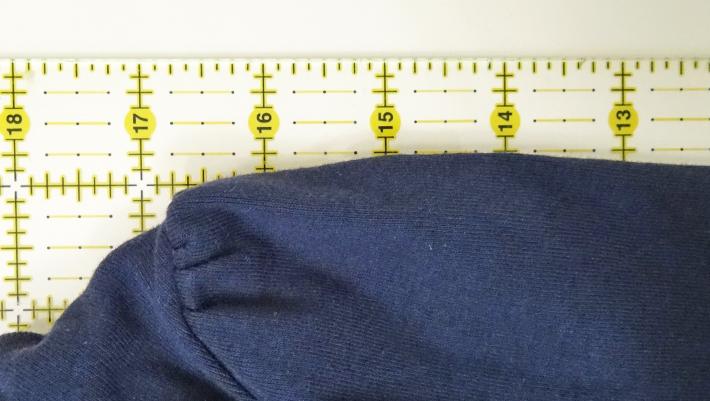
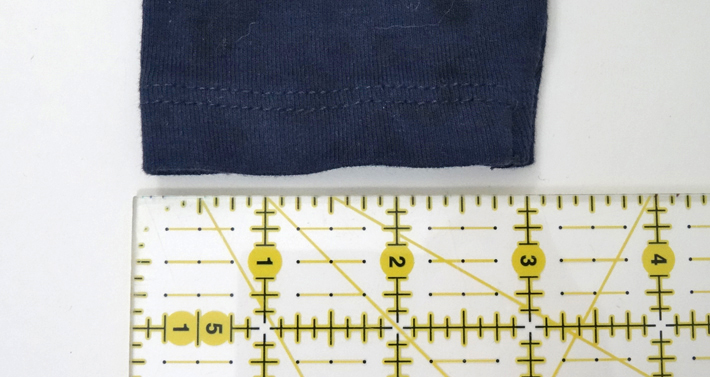
Fold your sample sleeve exactly in half along the underarm seam. Measure from the shoulder seam to the sleeve opening — this will be the new sleeve length. Note the measurement and add your desired hemming allowance to the sleeve length. (Example: Adding 1” will allow for a double-folded ½” hem.)
Step 4:
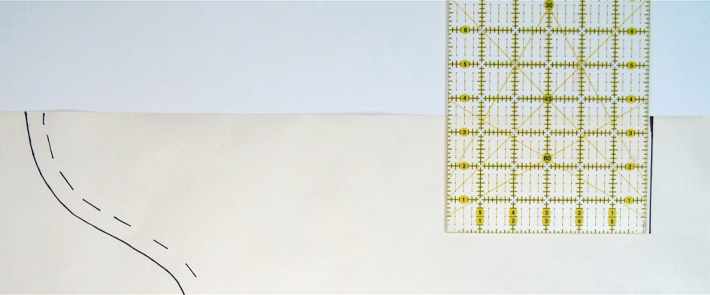
Measure and mark the sleeve length, including hem allowance. Use the ruler to measure down from the shoulder seam allowance marking on your tracing paper.
Step 5:
Measure the sleeve opening on the sample sleeve, while folded. Note the measurement and add the seam allowance.
Step 6:
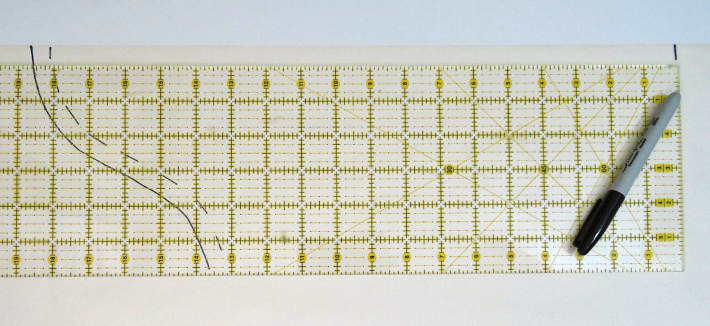
Draw the bottom of the sleeve using the sleeve opening measurement (including seam allowance). Draw a straight line 90 degrees up from the edge of the paper at the sleeve length mark.
 Step 7:
Draw a straight line from the sleeve opening to the end of your traced pattern line to finish the lengthened sleeve.
Step 8:
Trace any notches or notations from the original pattern piece that are applicable to the new sleeve.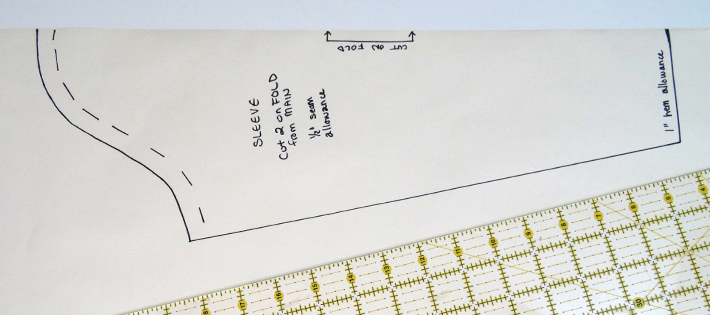 Step 9:
Mark your pattern with the “Cut on Fold” notation along the straight edge. Also mark the original pattern/size/date and any other information you might need.
Lengthen a sleeve pattern with sleeves cut flat
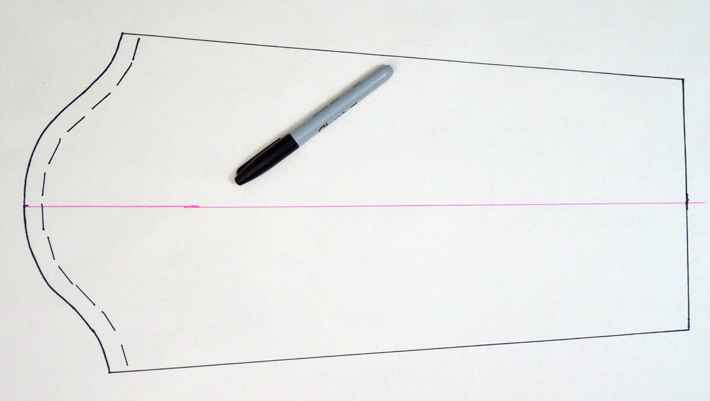
Step 1:
Trace the top curved edge of the sleeve pattern onto the paper from corner to corner.
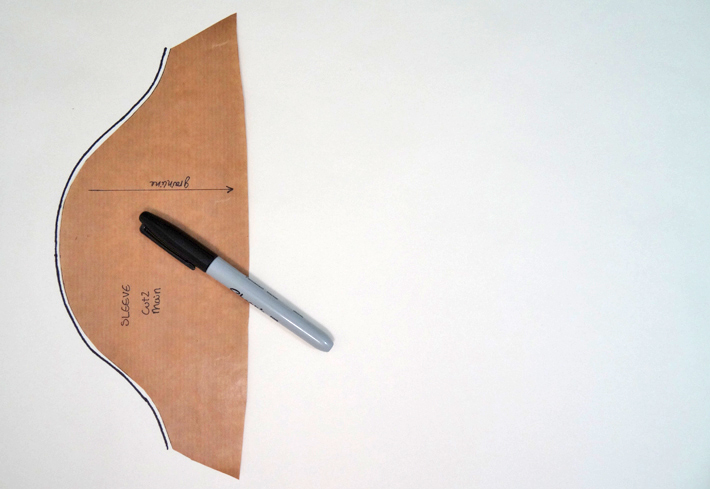
Step 2:
Check the seam allowance in your pattern directions and mark it on the curved edge of your pattern piece. Remove pattern piece.

Step 3:
Fold your sample sleeve exactly in half along the underarm seam. Measure from the shoulder seam to the sleeve opening — this will be the new sleeve length. Note the measurement and add your desired hemming allowance to the sleeve length. (Example: Adding 1” will allow for a double-folded ½” hem.)
<
Step 4:
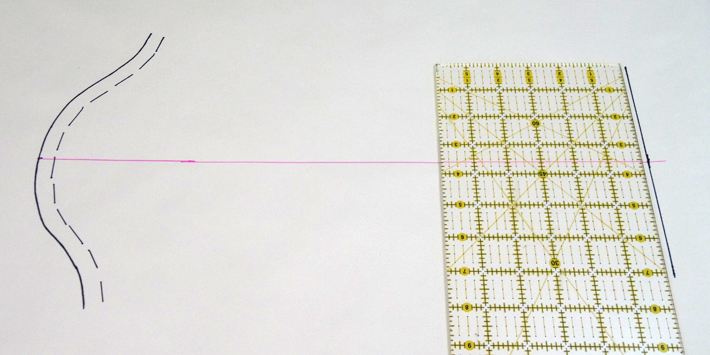
Mark a guideline along the center of the sleeve. Make sure the marking is longer than the final sleeve length.
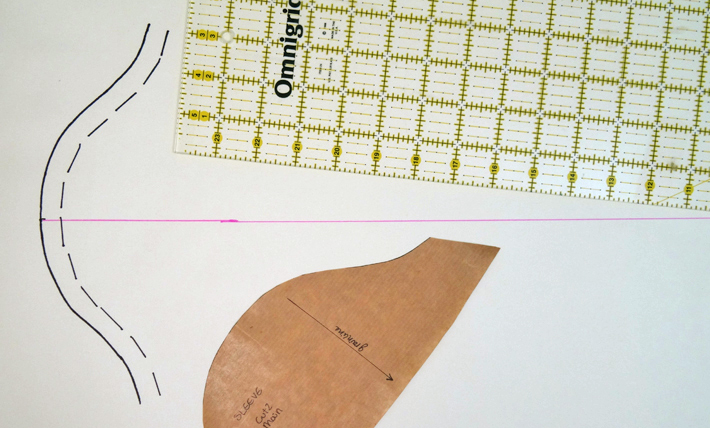
Step 5:
Measure and mark the sleeve length, including hem allowance. Use the ruler to measure down from the shoulder seam allowance marking along the center guide line.

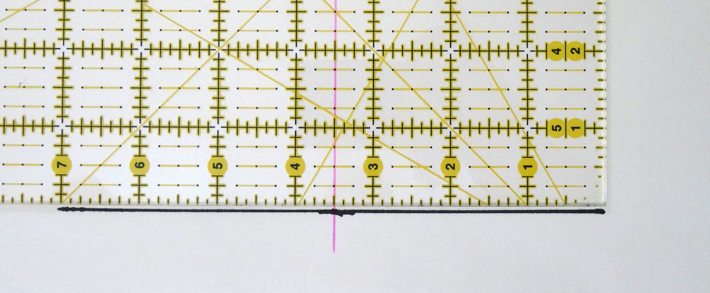
Step 6:
Measure the sleeve opening on the sample sleeve, while folded. Note the measurement and add the seam allowance.
Step 7:
Draw the bottom sleeve opening (including seam allowance) as a straight line 90 degrees to the guideline. Mark this measurement on both sides of the guideline at the sleeve length mark.
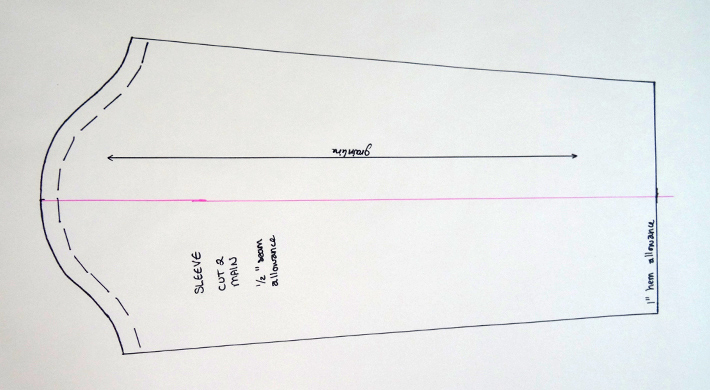
Step 8:
Draw a straight line from the top of the bottom sleeve opening marking to the end of the traced curved edge of the sleeve pattern on each side.
Step 9:
Trace any notches or notations from the original pattern piece that are applicable to the new sleeve. Mark the original pattern/size/date and any other information you might need.
Be sure to purchase additional fabric to allow for the added sleeve length. Sew your sleeve as instructed in your pattern with your new lengthened pattern piece. Hem as desired according to your new hem allowance.
How do you now how wide to draw the horizontal line by the wrist of the pattern?