
Having made the seat, back and legs, the only things left to make for our Tage Frid three-legged stool are the stretchers. I like these stretchers because they come from the long tradition of chairmaking. They may seem delicate, but they are strong and flexible at the same time, perfect for a chair that gives a little when you sit on it. Check out the process for making the wood stretchers that will hold our stool together.
Step 1: Make a round tenon
Start with the first stretcher, using the piece you milled earlier to 1 ¼” by ¾”. With the wood still rectangular, make a ½” diameter tenon on one end using the method I described in the post on making tenons for the legs. It’s important to note that there are no shoulders on the stretchers for this stool. The stretchers are thick in the middle and gradually taper down to the ½” diameter of the tenon. I was skeptical of this at first, fearing that the joints for the stretchers wouldn’t have enough mechanical strength without shoulders. However, since the stretchers taper, there is a bit of material to register against the inside surfaces of the legs. With the wedged tenon installed, the joint will be more than adequate.
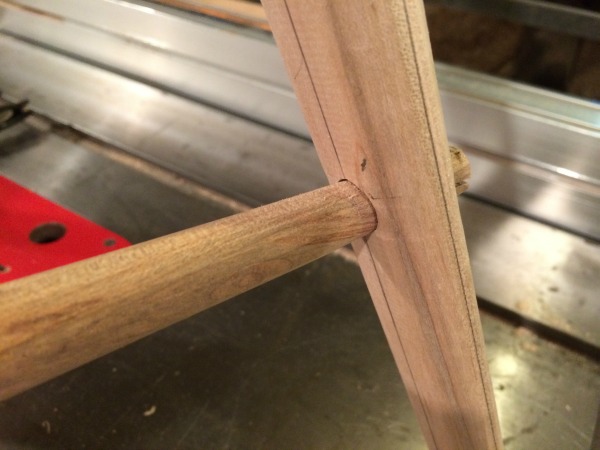
Start by fitting a stretcher into one of the front legs.
Step 2: Determine the length
Determining the length of the stretchers is a bit tricky. Focusing on the front stretcher first, insert the round tenon into the hole in one of the legs. With the stretcher lined up with the center of the opposite leg, mark where the stretcher will contact the inside of the leg. You can also cut the stretcher to length, making sure it is proud on the other side of the leg. (Proud means that the tenon protrudes. Shy is when it is a bit short. Flush is, well, flush.)
Once you have glued everything up, you will cut the tenons flush. Cut the remaining round tenon for the front stretcher. Using a bandsaw or dovetail saw, cut a slot for a wedge as you did for the leg tenons, making sure the wedge will be perpendicular to the grain of the leg. With the slots cut, it becomes easier to insert the tenons into the holes in the legs, giving you some wiggle room during assembly.
Step 3: Prepare the front stretcher for the cross stretcher
With the stretcher temporarily installed, mark the exact center. This is where the cross stretcher will join the front stretcher with a wedged tenon. Drill a ½” hole in the center to house the tenon for the cross stretcher.

Note the orientation of the slot for the wedge. It is perpendicular to the grain of the stretcher to prevent splitting.
Step 4: Make the cross stretcher
The cross stretcher joins the back leg to the center of the front stretcher. Use the above technique for cutting a round tenon on one end. After fitting it to the front stretcher, line up the other end with the hole in the back leg so you can mark the length (a bit proud so you can cut it flush after glue-up) and the place where the stretcher will contact the back leg.
Step 5: Shape the stretchers
With the tenons cut, it’s time to taper and round the stretchers. Actually, they are also oval in cross section, like the legs. The stretchers are thick in the middle and taper down at the ends. Mark out a slight taper starting from the center of the stretcher to the ends and use a bandsaw to cut the tapers. A spokeshave or block plane will make quick work of rounding the stretchers into an approximately oval shape. Finish up with sandpaper or leave the knife marks if you like a hewn look.
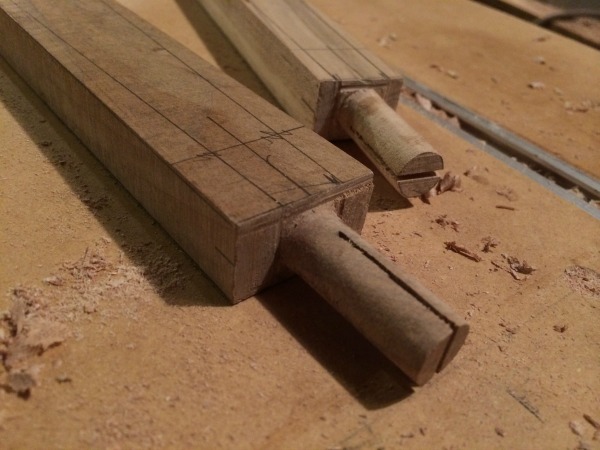
Wood stretchers with tenons cut, ready to be tapered on bandsaw.
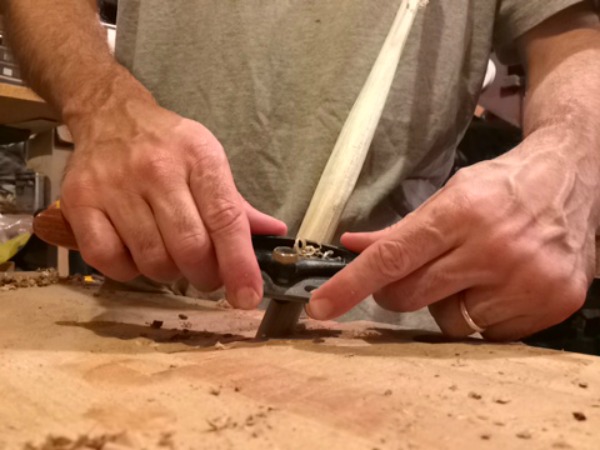
A spokeshave is a perfect tool for rounding and shaping the wood stretchers.
Step 6: Make wedges for the tenons
You will need seven wedges for the tenons of this stool – three 1” wedges for the legs and four ½” wedges for the stretchers. Make the wedges exactly the width of the holes they will be fitting into. If you are making multiple stools, it would make sense to make a jig to cut the wedges on the bandsaw.
To make the wedges for one stool, I simply planed a contrasting wood (cherry) to 1”, marked out several wedges and cut them on the bandsaw. I did the same with the ½” wedges. Make a few extra so you can pick out the best ones to use.
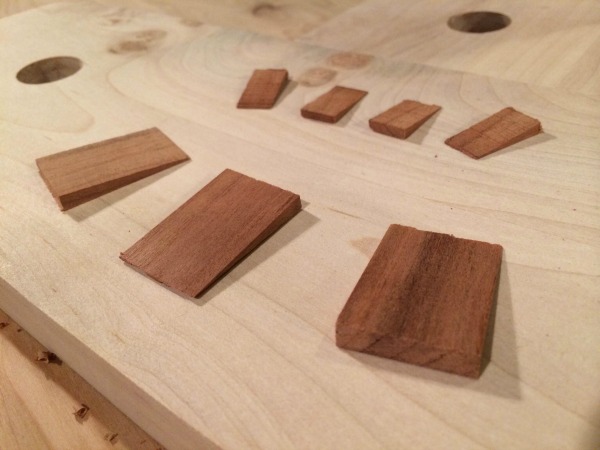
Wedges made of cherry, a beautiful contrast to the maple legs and stretchers.
With the wedges made, we have all the parts of our three-legged stool. In the next installment of this series, I’ll describe how to prepare the stool for assembly and walk through the glue- up. After that, I’ll describe how to give the stool a durable finish that enhances the wood.
Share tips, start a discussion or ask one of our experts or other students a question.
No Responses to “How to Make Wood Stretchers for a Stool”