
Careful, thoughtful stock preparation is essential to successful execution of dovetail joinery, so it pays to attend to the critical steps for making a dovetail joint, which we’ll discuss here.
How to mark out a dovetail joint
Prepare well
The inside surfaces of the pieces are the reference surfaces because they, not the outsides, will contact their mating pieces. So, they should be flat, free of any winding (twist), and cleaned up enough that any final touch up just before assembly will not substantially change their trueness. The outside surfaces will be cleaned up after assembly.
Here I’m working with 5/8″ thick curly red oak, a lovely but somewhat cantankerous beast, about 6″ wide. If you are just starting out, I suggest a tamer species such as straight-grained poplar or perhaps soft maple. Very soft or “stringy” species such as cedar are actually more difficult to work because the fibers tend to crush when fitting the joint.
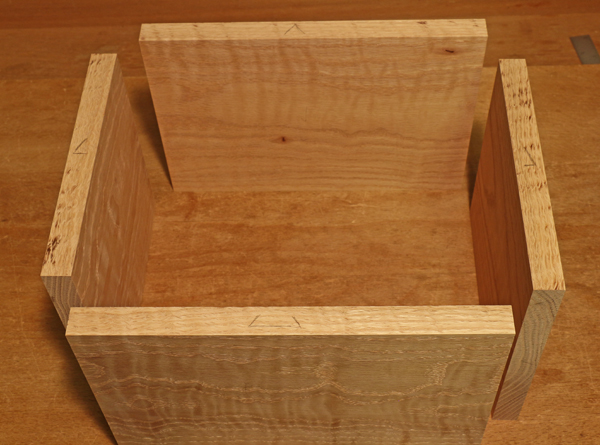
For a case such as a box, the lengths of opposite sides must match precisely. Now is the time to mark the orientation of the pieces with a triangle on the top edges as shown below. I also like to put a big “O” on the outside face of each piece.
Now here is a critical step.
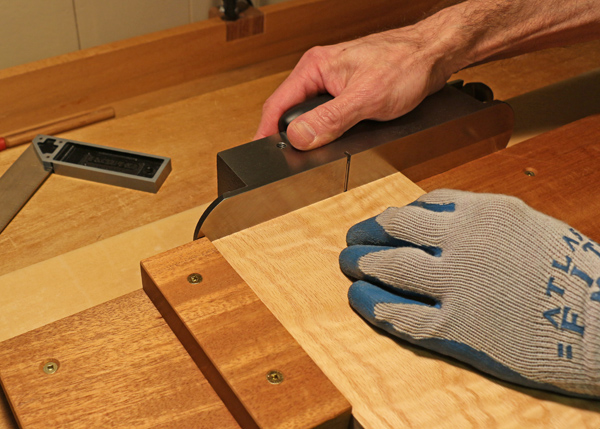
Because the cutting gauge will register against the ends (the end grain) of each piece, they are references for the squareness of the whole assembly. Your project will not be any more true than those ends. It might be possible to get them just right using a well-tuned table saw, by the greatest precision is done by shooting. A detailed discussion of shooting is beyond the scope of this series, but I believe it is an essential gateway technique. Here it has the added advantages of leaving a clean surface on which scribing marks show well, and can be used to make tiny adjustments in the length of a piece.
Layout
Any perusal of historic and current artisan-made furniture will reveal a wide range of dovetail spacing and angles, so remember, there is more than one good way to do this.
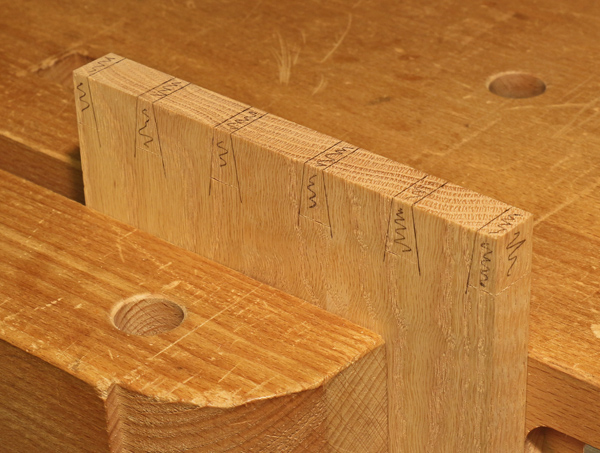
Here are my preferences: For carcase dovetails in hardwoods, a 1:7 dovetail slope (a little more than 8°) and 1/4″ spacing on the end grain between the tails and at the ends looks good and affords good strength. In thinner stock, such as for half-blind drawer dovetails, or for soft woods, 1:6, or even 1:5, is better. Also, as seen in the photo at the top of this post, I usually make the tails narrower on the ends of the width of the board, and wider toward the middle.
OK, tails first or pins first?
Like most woodworkers, I prefer to cut the tails first since the critical step of marking the second part of the joint (in this case marking the pins from the tails) is a much more stable and reliable affair for through dovetails, as we are doing here, and even more so for other variations of the joint such as half-blinds.
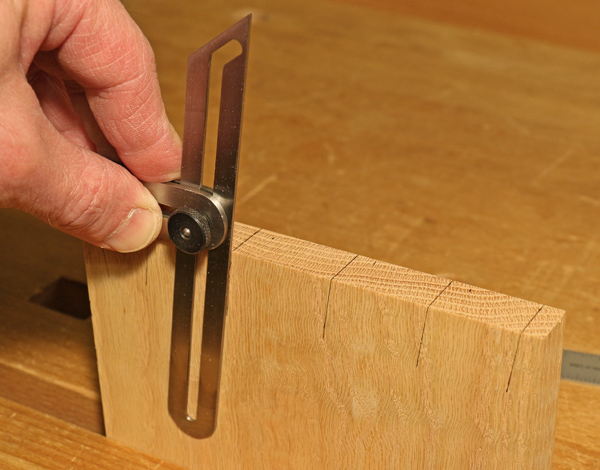
Mark the locations on the end grain, then use the dovetail marker and the 0.5 mm mechanical pencil to make a square line across the end grain and a slope line extended generously down the side grain with a single positioning of the marker.
Layout using a sliding bevel, which must be used along with a square, is a slower, less accurate two-step process.
Knife the baseline
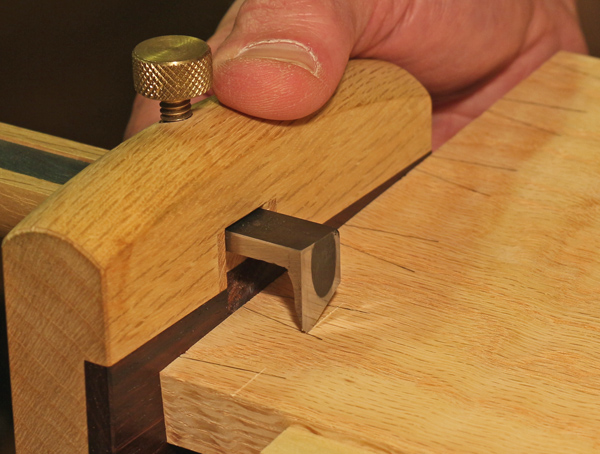
The baseline defines the registration against which the the inner surface of the pin piece — the other part of the joint — will rest. The cutting gauge not only marks the baseline, but is the initial step in actually cutting the wood.
For our job here, we’ll set the cutting gauge to just a bit more — 1/16″ at the most — than the thickness of the mating part. Here you can see I’ve extended the blade just a bit beyond the thickness of the pin piece. This means that the end grain of the tails will extend that much beyond the outer face of the pin piece. Be sure to use the same gauge setting to mark the sets of tails on the right side of the box, and likewise on the left side of the box, otherwise you will destroy the squareness of the box.
The excess length of the tails will be cleaned up after assembly. Creating this excess is not always necessary or desirable but it does give you a little allowance for error when starting your saw cuts. We’ll do similarly for the pin piece.
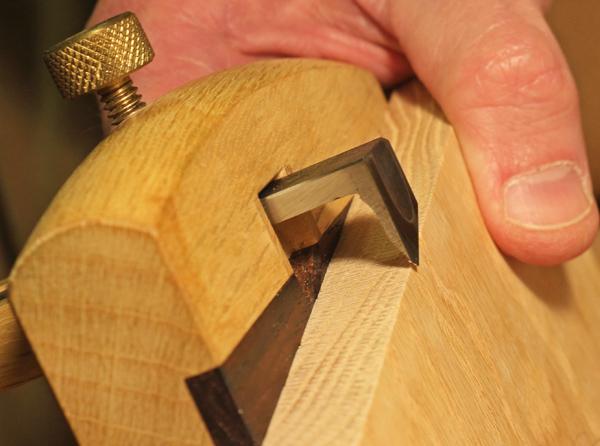
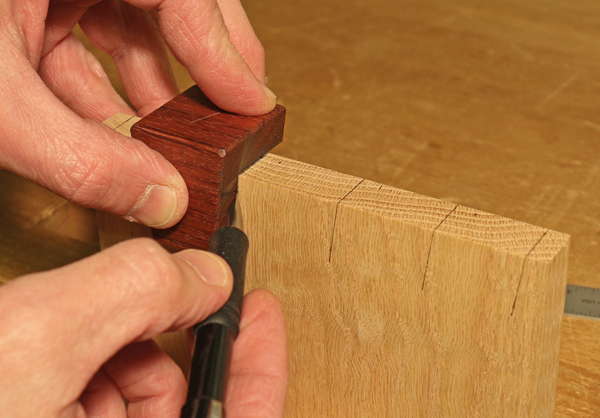
I make a knife line all the way across on the inside face and on the sides, but on the outside face, I knife only where wood will be later chopped away. Again, this is a matter of personal preference, but it does allow me to make a helpfully deep line without worrying about having to plane it away later. The second photo below shows the advantage, for this technique, of a V-point cutting tip that is visible at the end of the stem of the tool. Many woodworkers like to leave a full length gauge line showing in the finished project.
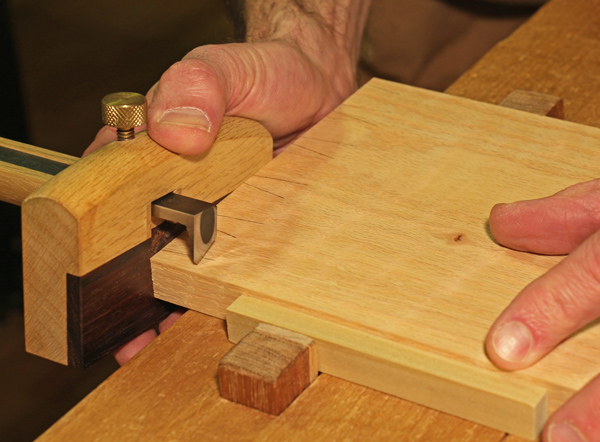
Knife the line in gently
You may need take a second pass in hard woods. Notice also that I’ve clamped the piece because this is a precision task and I don’t want to slip.
One more thing
Please make scribbles on all the sections that will be waste wood. Later, it is awfully easy when you are concentrating on sawing and chiseling, to get confused as to what is wood is keeper and what is waste.
Note: The completed layout for the tail piece is shown in the opening photo.
In the next installment of our dovetail joinery series, we’ll start sawing.
See also our post on essential tools you need for dovetail joinery.
Share tips, start a discussion or ask one of our experts or other students a question.
No Responses to “Dovetail Joinery: Stock Preparation and Marking Out a Dovetail Joint”