
At this point in our dovetail joinery journey, the tails will be used as a template to mark out the pins, which are the sockets into which the tails will fit. This is a critical step that must be done accurately to have any hope of a well-fitting joint.
Tell if the tails are ready
First, one has to know if the tails have been made accurately. Very experienced craftspeople may be able to directly trust their sawing and chiseling, but it pays to know which are the key aspects of accuracy, and, for intermediate woodworkers, to check them.
The photo below shows a shop-made small square (Starrett makes an excellent model) placed against the inside face of the tail board to determine if the sawn surface of the tail is square to the face. This is another one-sided tolerance situation. Perfectly square is best, but there should be no gap toward the outside face; a trace of gap toward the inside face is usually OK.
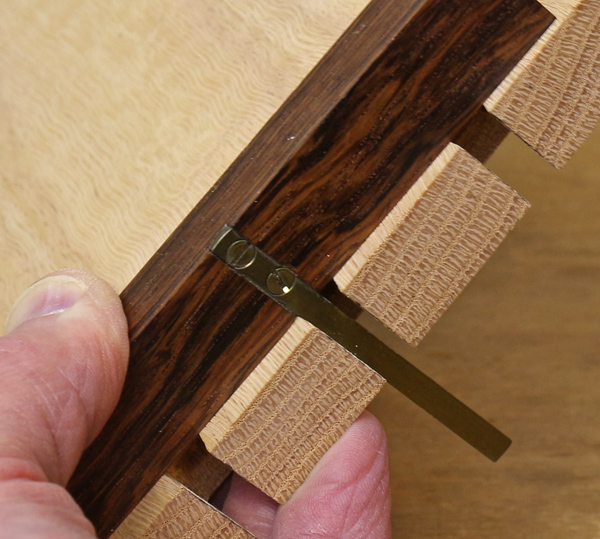
Make corrections by using a chisel to pare the inside of the tails across the grain. Files and rasps are not a good choice for this work because they tend to produce a convex surface that will cause a visible gap in the finished joint.
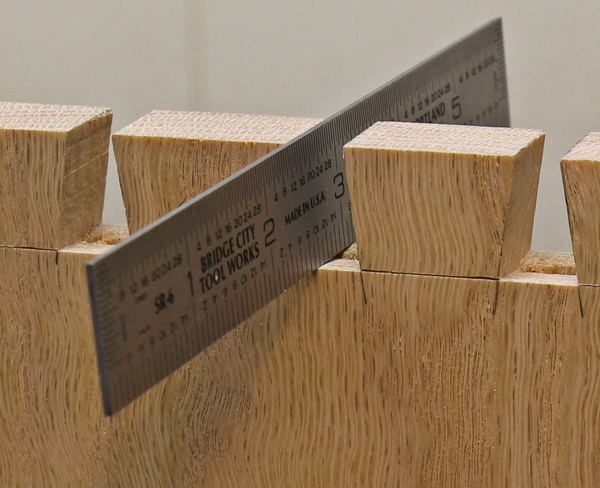
Below, a ruler proves there is no bump on the chiseled area. The appropriate undercutting is visible.
Set up for success
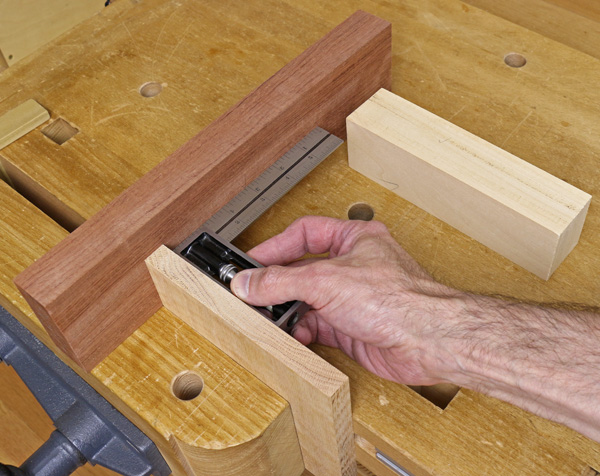
Before proceeding, use the triangle marks that you made earlier to ensure that the tail board and the pin board are properly oriented to each other. Then, secure the pin board in the front vise, inside face toward the workbench, so it is even with the top of a squared support block, as I am doing in the photo below.
The baseline of the tails will be aligned with the inner face of the pin board. Realize too, that the bottom (reference) edges of both the tail and pin boards must be in the same plane. In other words, if you are making a box, you want it to end up sitting flat without twist.
An aid to doing this accurately is to use a squared alignment block against the bottom edges of the work pieces. This is especially helpful for working with narrower boards, such as shallow drawers, but for wide boards it is usually not necessary because the wide baseline serves as sufficient registration. I will illustrate the process here.
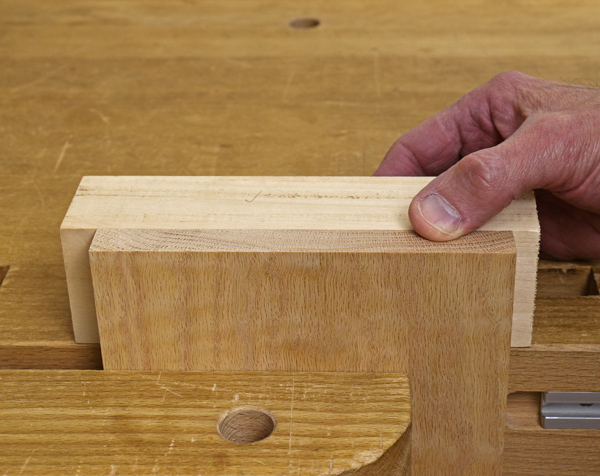
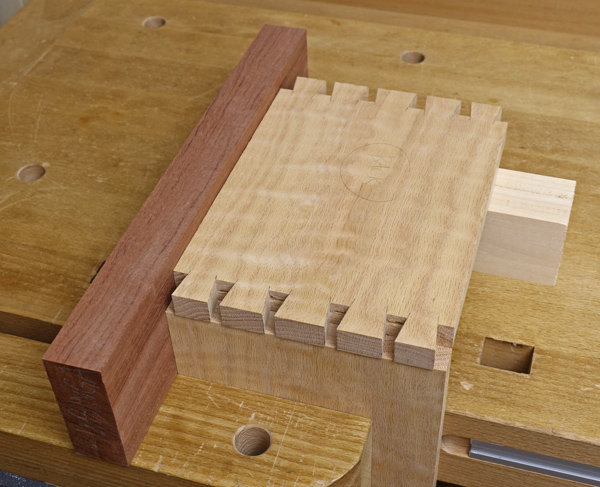
Note in the photo below, how I have placed the alignment block against the bottom edge of the pin board and am squaring it against the inner face of the pin board. (The block’s face is also square to the bench surface.) The support block is also in place where it will be under the tail board.
Now carefully place the tail board so its bottom edge is against the alignment block and then advance the baseline of the tails so it aligns exactly with the inner face of the pin board. The alignment block is really a double check.
You’ve parked it, now mark it
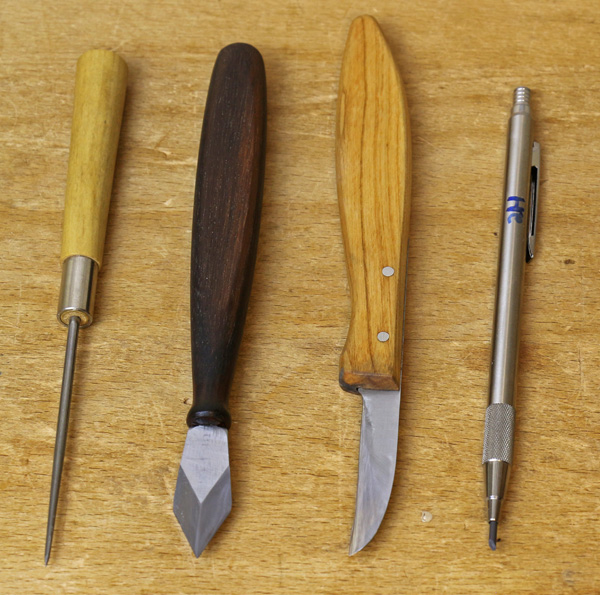
I prefer a simple point scriber to make the marks. It makes a fine line that is still easy to see.
Other options for marking tools are shown below. Many woodworkers prefer a V-point knife. The V-point allows it to be used on both sides of the tails with the flat side flat against the tails. A chip carving knife, or even a penknife, ground to a single bevel, also works well. I often use it on fine pored woods like cherry. Even a drafting pencil, sharpened on sandpaper to a chisel point, can be used, but remember that the thickness of the line is in the keeper wood, so saw to the side of it in the waste wood.
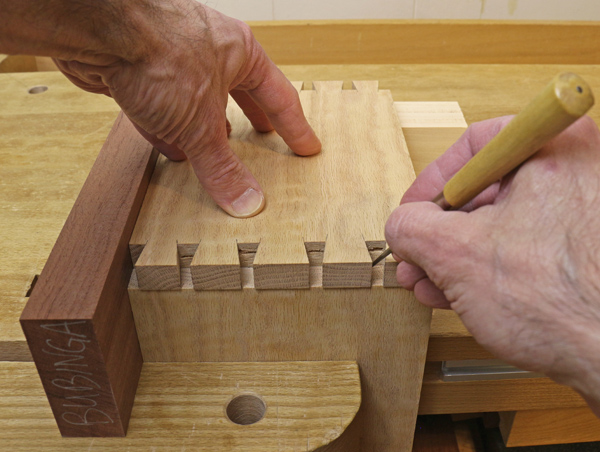
Hold the tail board firmly in place as you mark. Angle the scriber so it is tight against the side of the tail with the point penetrating the end grain of the pin board exactly where the tail meets it. This is easily done by feel. Make sure all the marking is done before removing the tail board.
I am scribing the pins in the opening photo at the top of this post.
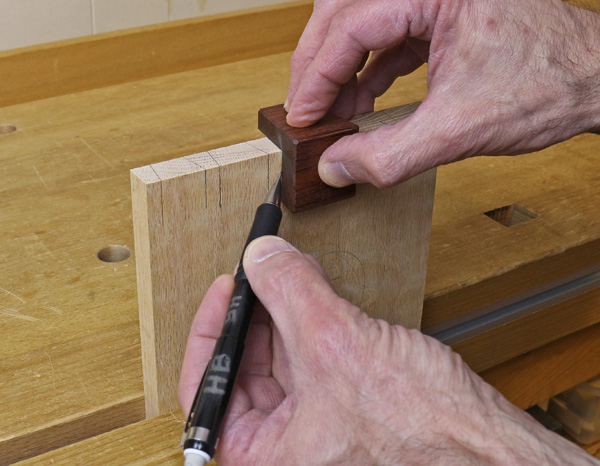
Using a pencil, square the end grain scribe lines down onto the side grain. A square can be used, but I find it easier to use the square end of the dedicated dovetail marker.
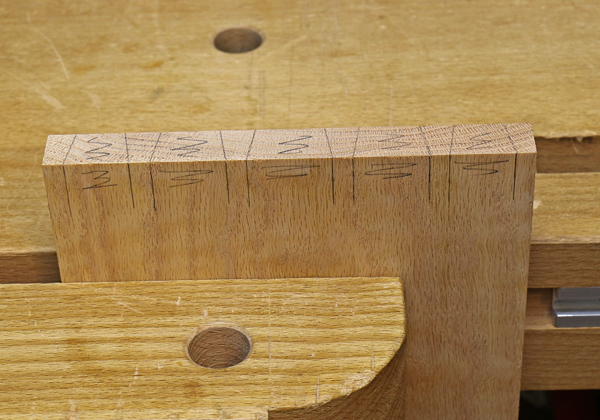
On some coarse grain woods, it may be necessary to enhance the visibility of the scribed lines on the end grain by running a moderately sharp pencil in them. I did that here on this red oak because the scribed lines were a bit difficult to see. This leaves graphite on both sides of the tiny “valley” of the scribed mark, a clue for you to split the line with the saw.
Oh, and don’t forget to scribble the waste, like you did with the tails.
Next week, we’ll knife the baseline on the pin board, then pick up the saw again.
Share tips, start a discussion or ask one of our experts or other students a question.
No Responses to “Dovetailing: How to Mark the Pins From the Tails”