
Do you love adding texture and color to your quilt top? Then try using oil paint in stick form! These oil paint crayons, called “paintstiks,” produce amazing, artful quilts with so much vibrancy! These simple sticks are so versatile too: You can stencil with the crayons, use them for shading or just create an object on your quilt.
Follow this tutorial for a technique that will enhance your quilt!
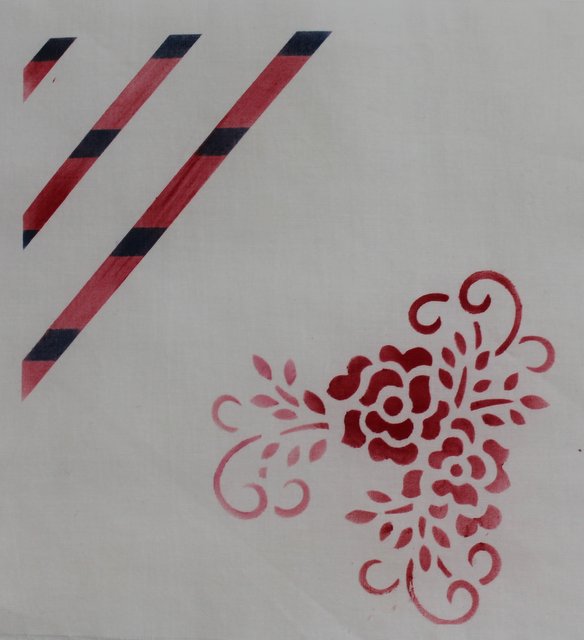
Photo via Craftsy member Marysu4
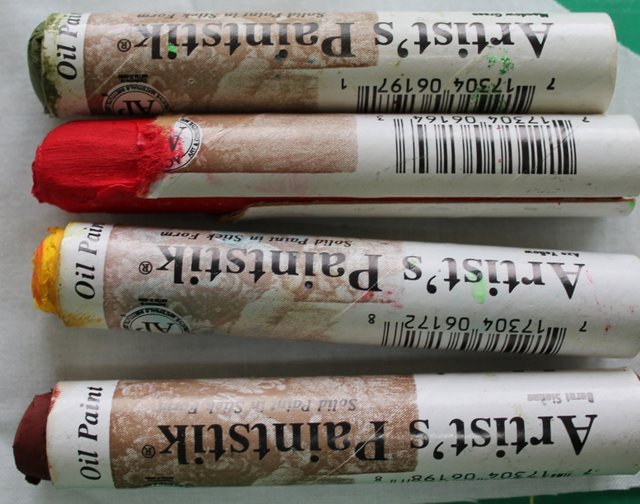
Choosing your paint
The most common kind of oil paint on the market are the Shiva Paintstiks. They come in a large and small size suitable for all types of projects on cloth. They are a non-toxic, permanent oil paint in the shape of a crayon.
A really wonderful attribute of this product is that its is self sealing, meaning it won’t dry out. The sticks develop a “skin” after each use that is simply removed each time before you play with them again.
Supply list
The items you will need for this tutorial are: fabric, tape, paintstiks, papertowels, brushes with thick bristles, iron, and any cleaning product with the word “degreaser” in it to clean your brushes.
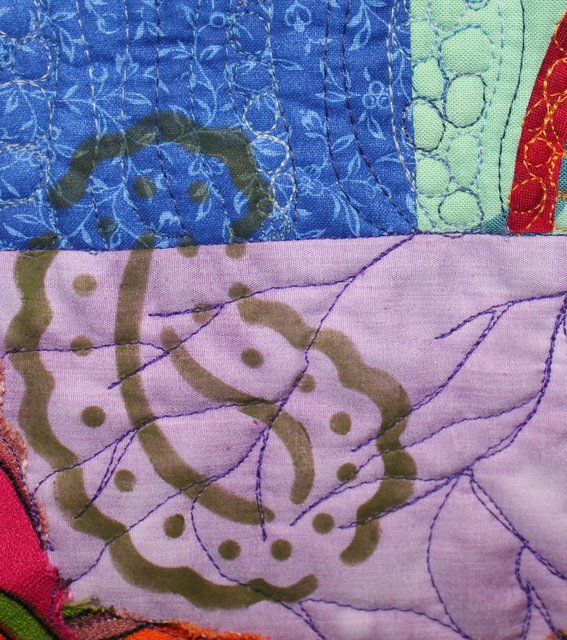
Photo via Jackie’s Art Quilts
Directions
1. The first thing you will do is wash your fabric to remove all the chemicals and sizing out of it. Once this is done tape the fabric down to your work area.

2. Put the end of your paintstik into a couple layers of paper towels and twist until you feel the “skin” come off. Another way to remove the hard dried layer of the paintstick is to use a small knife.
3. Once this is complete you are ready to start. If using a stencil, place your stencil on the fabric. In a circular motion move the paintbrush over the paintstik till you have some on the brush, then using a similar motion, apply that to the fabric either through the stencil or onto the fabric directly.
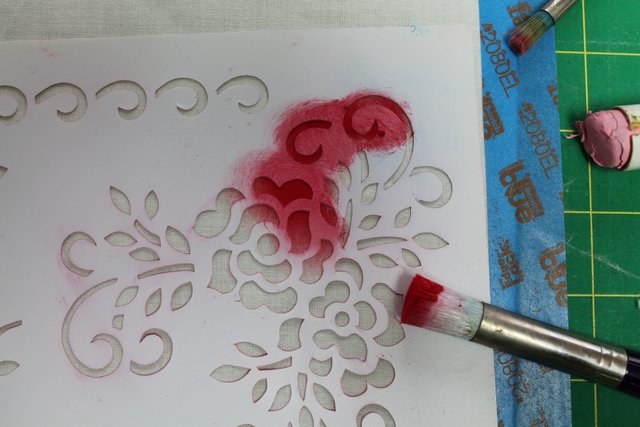
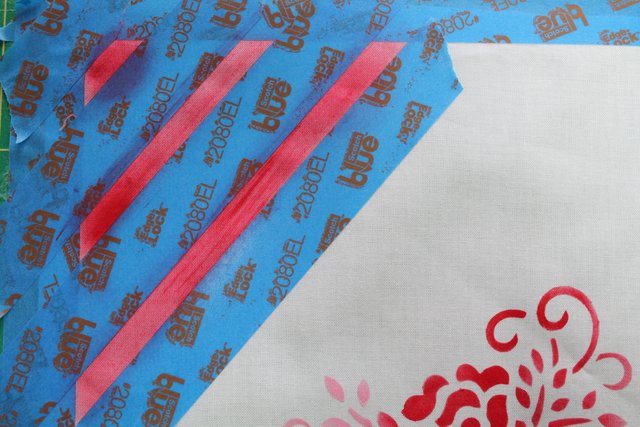
4. You can use a small palette to mix colors prior to putting them onto the fabric, and use your brush to create a blended color. You can also apply directly to the fabric with the paintstik and use the brush to blend out the color. This can be a bit tricky as the paintstik is big and has a fat end. Using tape to divide areas is another way that creates an interesting design, as you brush the color within the taped area.
5. The paintstiks allow you to put different layers on top of each other creating shading, multiple colors and a stunning effect without changing the hand of the fabric.
6. Once you have created your art work on your fabric, it needs to dry or ‘cure’ for a few days, depending on how much paint you put on and how thick. A minimum of 24 hours is needed. After the curing period, the paint needs to be heat set to ensure a permanent hold.
Encase the fabric within either parchment paper or paper towels. Using a hot, dry iron, heat set the area for 15 seconds. Another alternative to heat setting with the iron is to put the fabric in the dryer for 30 minutes on a high-heat setting.
Discover more ways to use paint to bring your quilt top to life with the online Craftsy class Painted Pictorial Quilts. Join Annette Kennedy to learn masterful techniques for adding visual depth to your own quilted images!
Can this be laundered?